How to Draw a Fish Skeleton: Easy 9-Step Guide
Ready to create a cool, slightly spooky fish skeleton? This tutorial is perfect for young artists ages 6+ looking to practice geometric shapes and symmetry. All you need is a pencil, an eraser, and a piece of paper to get started on this fun, structured drawing project.
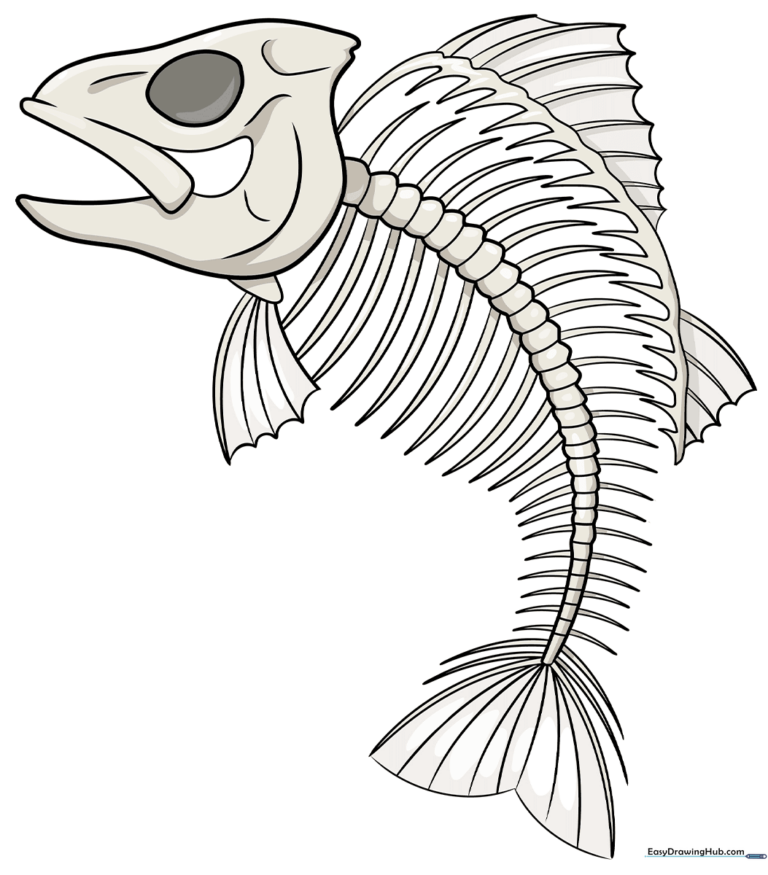
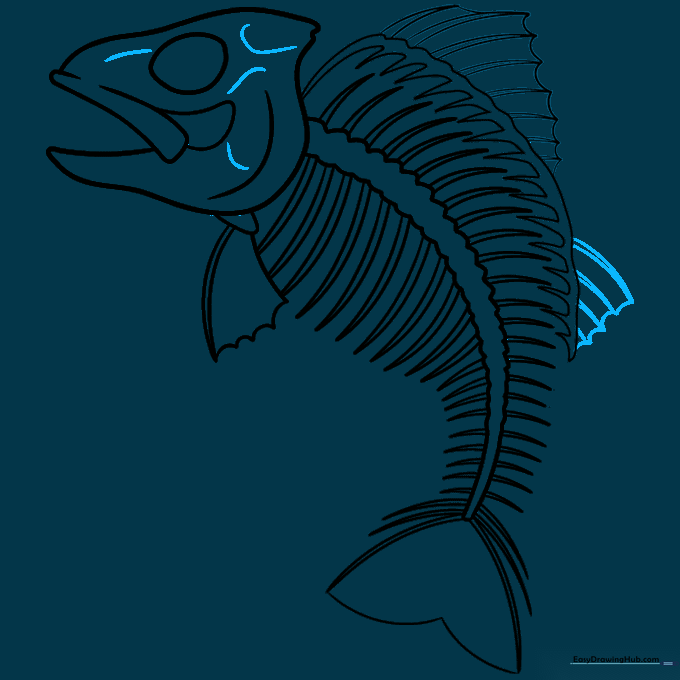
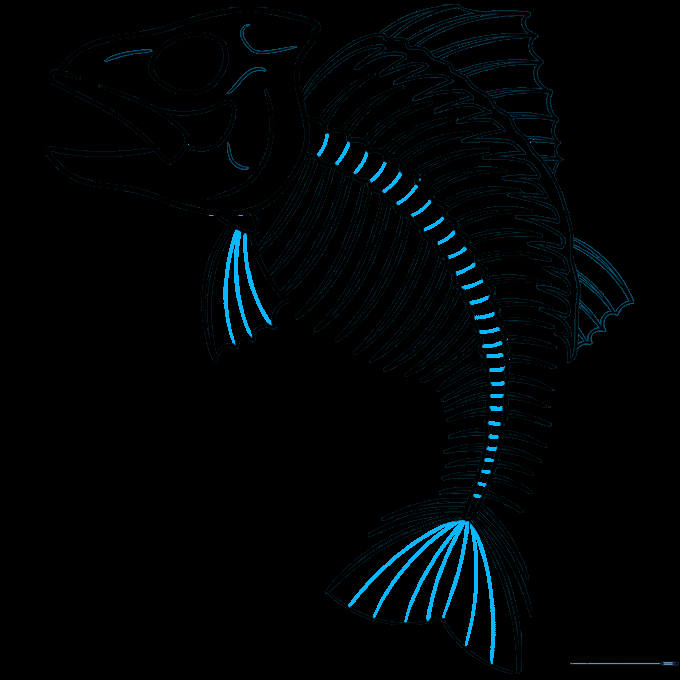
🎯 Final Result
Step-by-Step Instructions
Step 1: Sketching the Skull Base

Draw an uneven egg shape near the top of your page for the head. Add a narrow triangle to the left for the snout and a curved horizontal line above to define the skull. Tip: Keep the lines loose and light so you can refine the jaw shape later.
Step 2: Defining the Jaw and Spine

Sketch a wide banana shape inside the head to represent the jaw. Draw a bumpy line trailing downward from the skull to form the spine. Tip: The 'bumpy' line is the foundation for the ribs, so make sure it curves naturally like a fish swimming.
Step 3: Adding Ribs
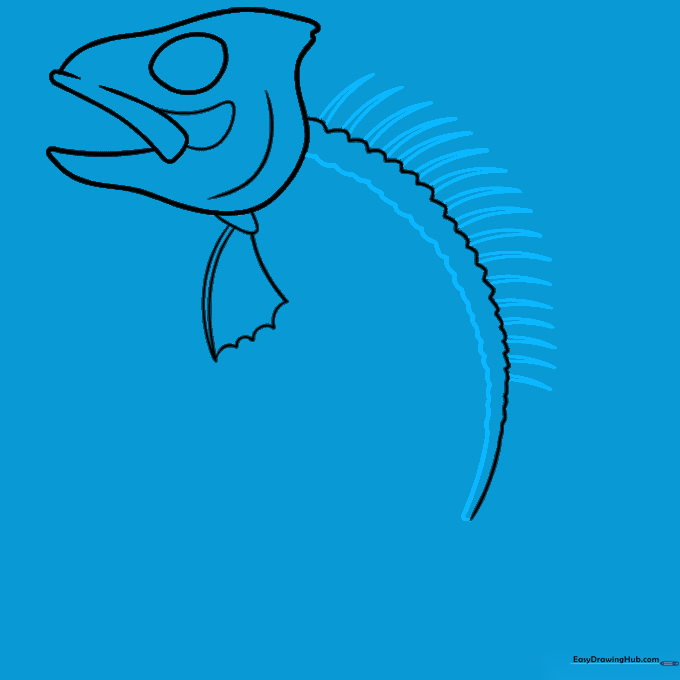
Draw a second bumpy line parallel to the first to create the rib cage. Add small, narrow triangles along the spine. Tip: Keep the triangles uniform in size to make the skeleton look neat and organized.
Step 4: Tapering the Spine

Continue adding narrow triangles along the spine, making them gradually smaller as you move toward the tail. Tip: This tapering effect creates a sense of perspective and realism.
Step 5: Drawing the Tail
Finish the spine with a final set of small triangles. Outline the tail using a pointy, heart-like shape. Tip: Use light, quick strokes to get the tail shape symmetrical.
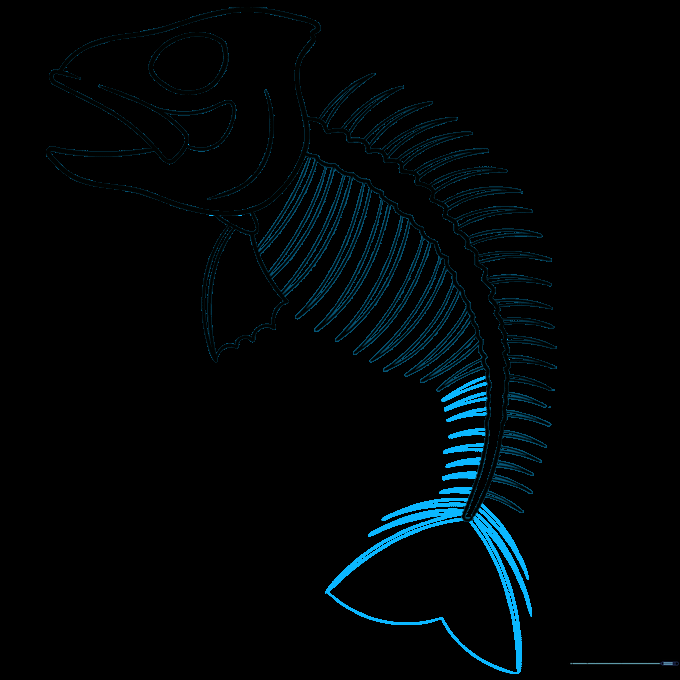
Step 6: Adding Fin Details
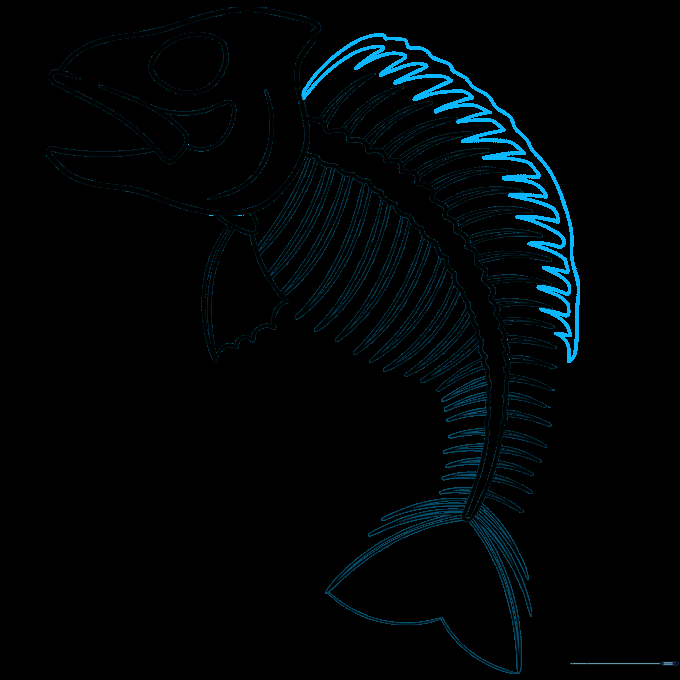
Sketch a curved line over the spikes to connect them. Draw a long triangle extending from the head to form the top fin. Tip: Ensure the fin connects smoothly to the skull for a clean look.
Step 7: Webbing the Fins

Add more triangles of varying sizes to the fins. Draw small curves between the triangles to create a 'webbed' look. Tip: Think of these like spiderwebs to help you get the spacing right.
Step 8: Refining the Skull
Repeat the fin process for the bottom fins. Add three curves and a vertical line inside the skull to suggest bone structure. Tip: Don't press too hard; these details should be subtle.
Step 9: Final Outline
Add small dashes inside the spine for texture. Go over your final lines with a black ink pen, then carefully erase your pencil marks. Tip: Wait for the ink to dry completely before erasing to avoid smudging!
Step 10: Adding Color

Color the bones with off-white and add gray shadows for depth. Keep the fins pale to suggest transparency. Tip: Use a darker gray for the eye socket to make it pop.
More Tutorials


