How to Draw a Fireball: Easy 10-Step Guide for Kids
Ready to bring some heat to your sketchbook? This tutorial is perfect for young artists ages 5 and up who want to master drawing dynamic, flame-like shapes. All you need is a pencil, an eraser, and your favorite markers or crayons to get started.
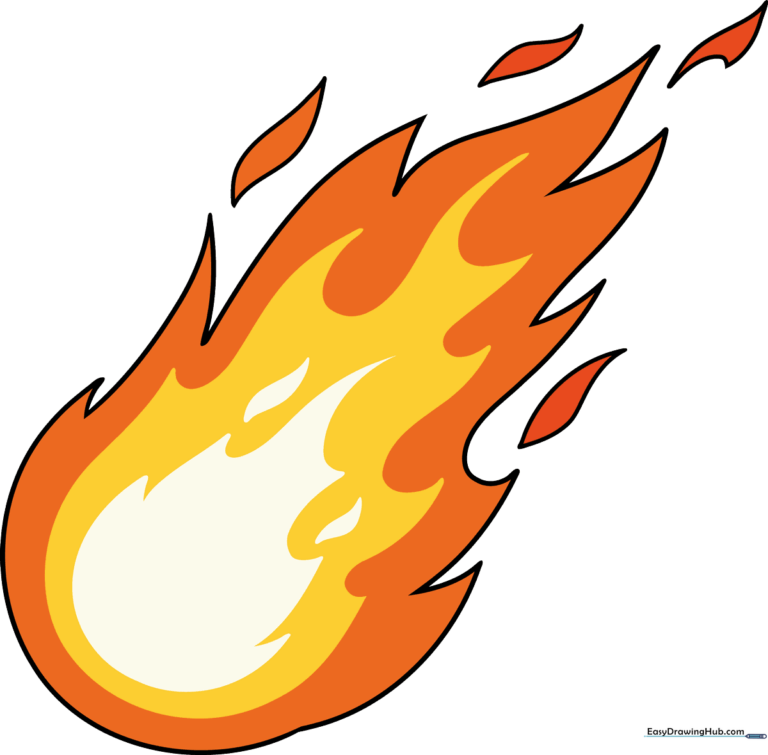
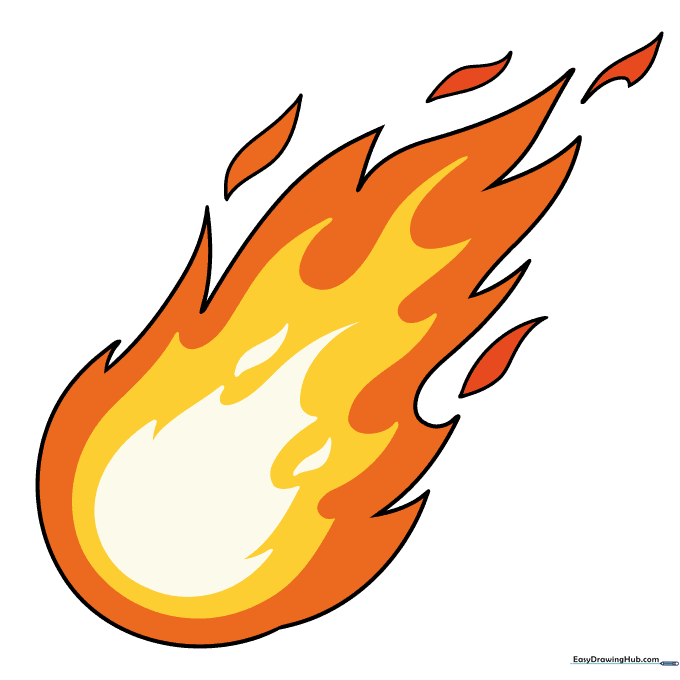
🎯 Final Result
Step-by-Step Instructions
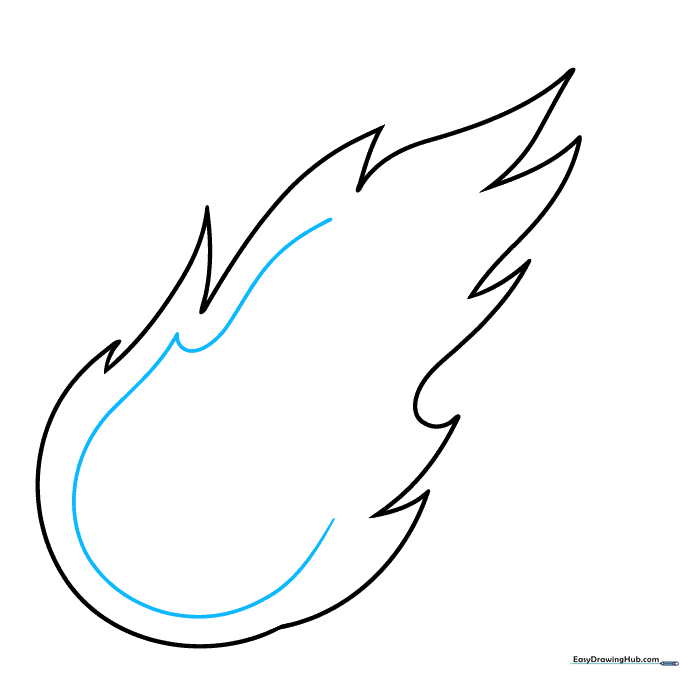
Step 1: Sketching the Leading Edge
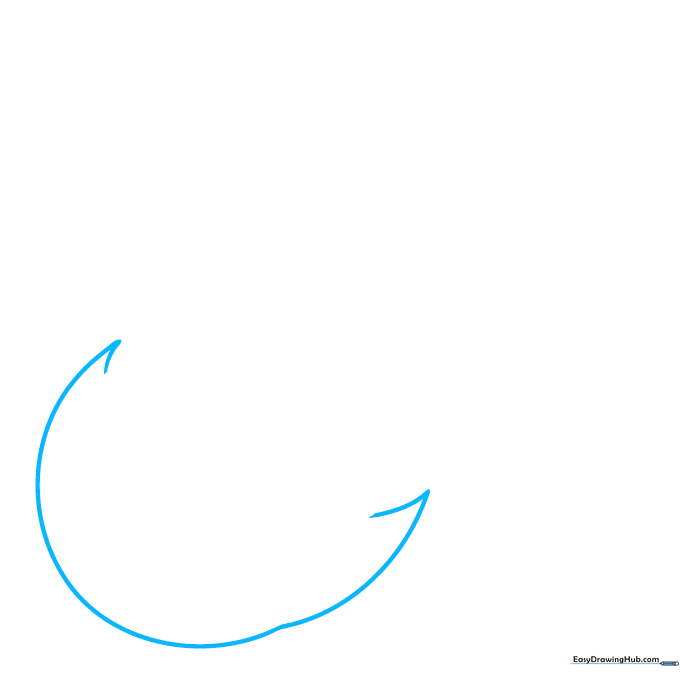
Draw a large “C” shaped curve. At the top and bottom ends, add short lines that meet at sharp points. Teacher's Tip: Keep your pencil pressure light so you can easily adjust the shape later if needed.
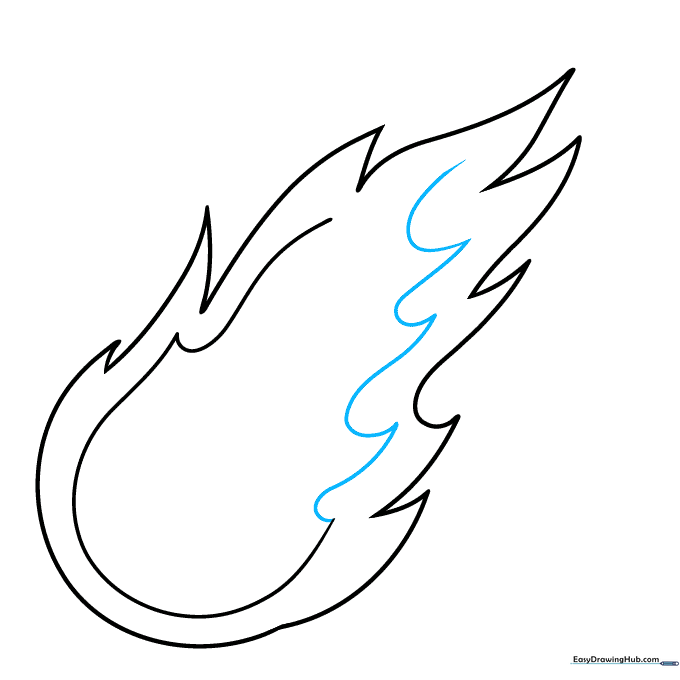
Step 2: Adding Curvature
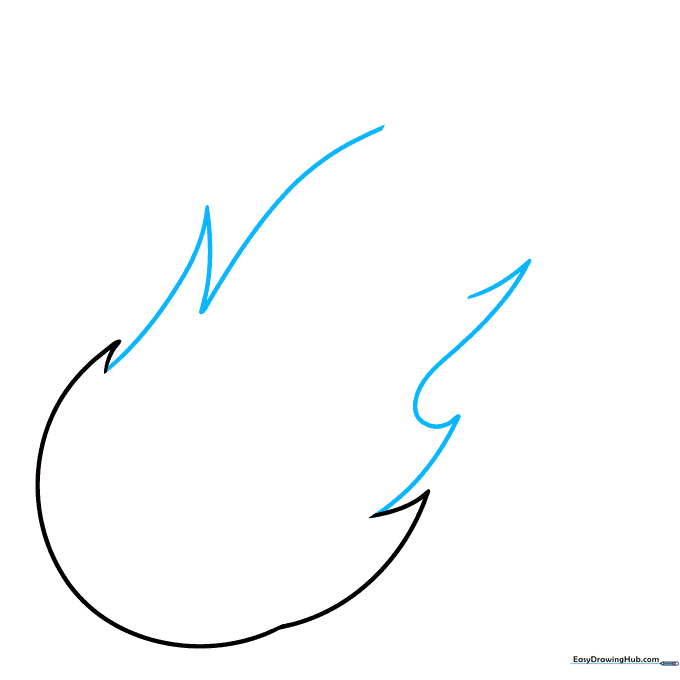
Extend curved lines from the sides and connect them with jagged, pointed tips. Teacher's Tip: Think of these as 'flame tongues'—the more variety in the size of your curves, the more realistic the fire will look.
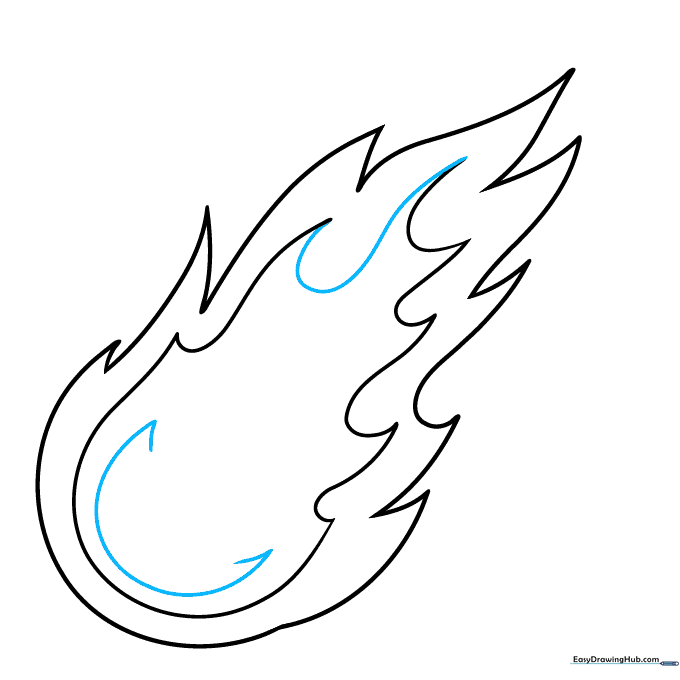
Step 3: Closing the Flame Shape
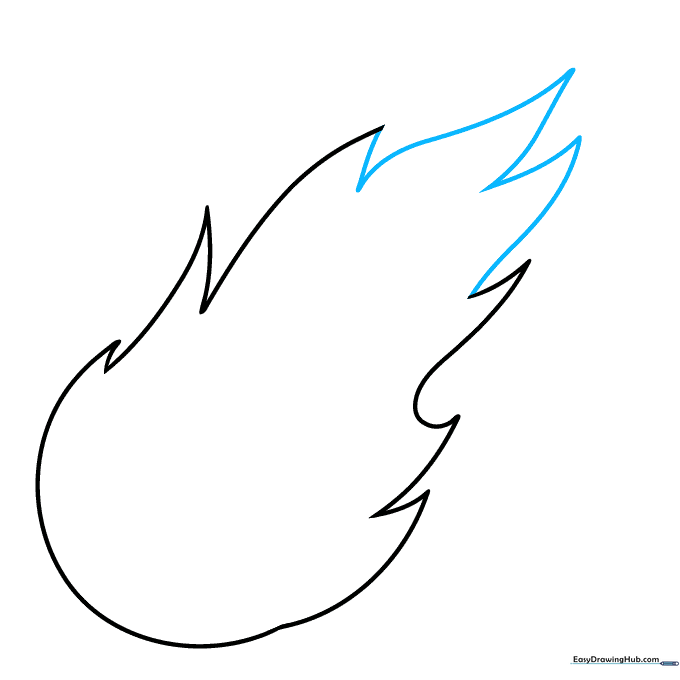
Continue drawing connected curved lines until the shape is fully enclosed. It should look like an elongated, flickering flame. Teacher's Tip: Ensure your lines meet at sharp points to keep the 'hot' look.
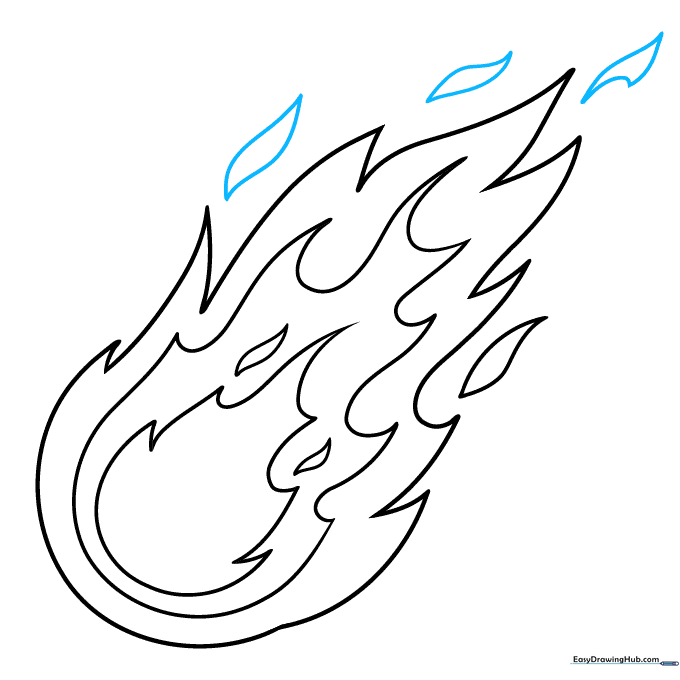
Step 4: Drawing Inner Details
Draw a smaller flame shape inside your main outline using similar jagged, curved lines. Teacher's Tip: Try to keep this inner shape roughly parallel to the outer edge to show depth.
Step 5: Refining the Core
Continue adding more jagged lines to the inner section of the fireball. Teacher's Tip: Don't worry about making it perfect; fire is chaotic, so irregular shapes actually look better!
Step 6: Adding the Third Layer
Complete the second inner shape, then start a third, smaller 'C' shape inside the very center. Teacher's Tip: This layering effect creates the illusion of a glowing, intense core.
Step 7: Completing the Center

Close the innermost flame shape with jagged lines. Teacher's Tip: Keep these lines very tight and close together to represent the hottest part of the fire.
Step 8: Adding Flame Wisps

Draw small, double-pointed 'wisps' of flame inside and around the main shape. Teacher's Tip: These floating wisps make the fireball look like it is moving through the air.
Step 9: Final Touches
Add a few more small wisps to fill in any empty spaces. Teacher's Tip: Vary the size of these wisps to create a sense of scale and realism.
Step 10: Bringing it to Life with Color
Color your drawing! Use yellow for the center, orange for the middle, and red for the outer edges. Teacher's Tip: Use a white gel pen or leave small white spots to create a 'sparkle' effect.
More Tutorials


