How to Draw a Fiddle Leaf Fig: Easy 9-Step Art Guide
Bring a touch of nature to your sketchbook with this beginner-friendly fiddle leaf fig tutorial. Designed for artists ages 6 and up, this activity requires only a pencil, eraser, and paper. You will learn how to build organic, leafy shapes and add realistic vein textures to your plant drawing.
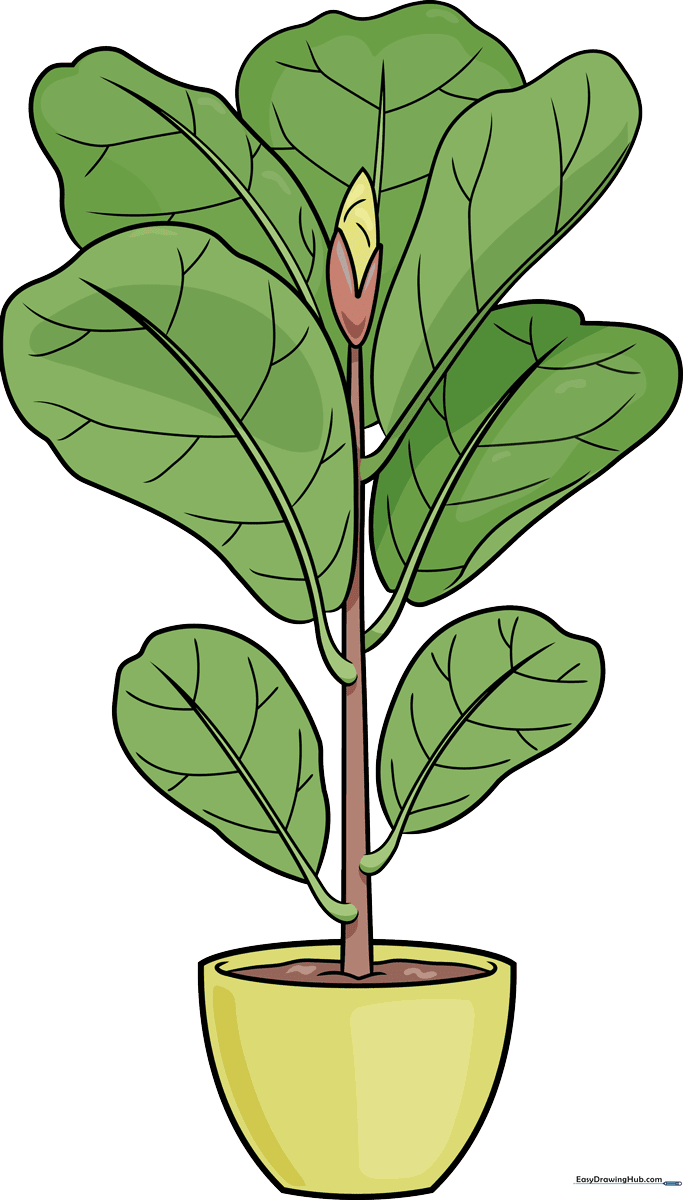
🎯 Final Result
Step-by-Step Instructions
Step 1: Sketching the Pot Base

Start by drawing a rounded trapezoid for the pot. Add a curved 'C' line at the top to represent the soil line. Tip: Keep your lines loose and light; the pot acts as the anchor for your entire plant.
Step 2: Adding the First Leaves
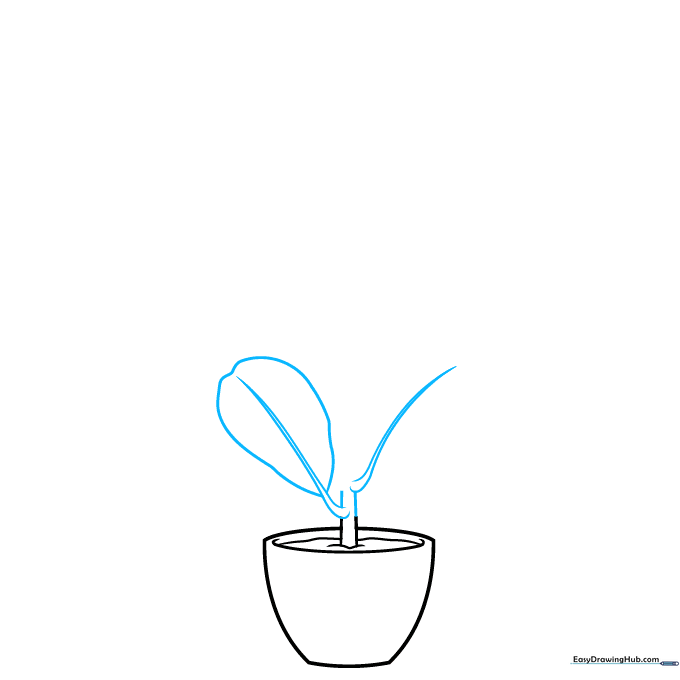
Extend two curved lines upward from the pot to form the main stem. Add two teardrop-shaped leaves branching out. Tip: Fiddle leaf fig leaves are naturally wide, so don't be afraid to make them look a bit 'chunky'.
Step 3: Developing the Trunk
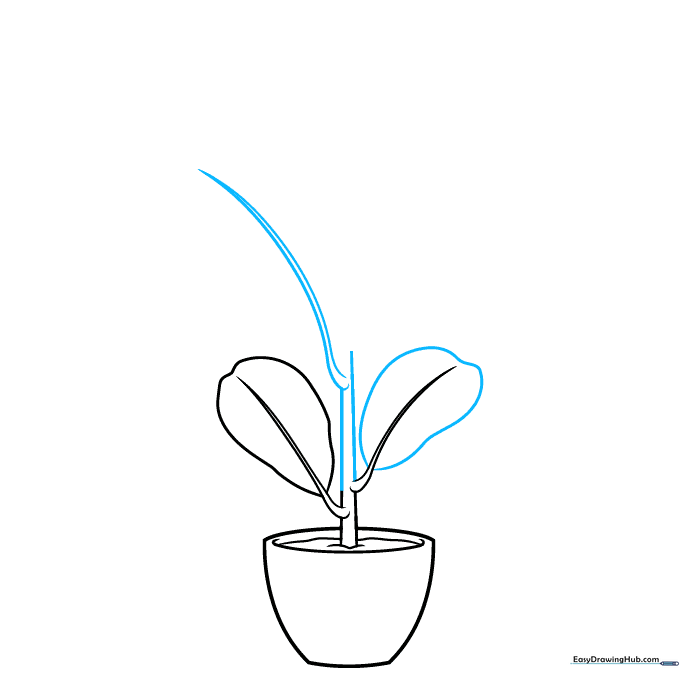
Use a wavy line to define the leaf edges, giving them that signature fiddle-leaf ripple. Extend the central trunk higher and add another small twig near the top. Tip: Nature isn't perfectly straight, so keep your trunk lines slightly curved.
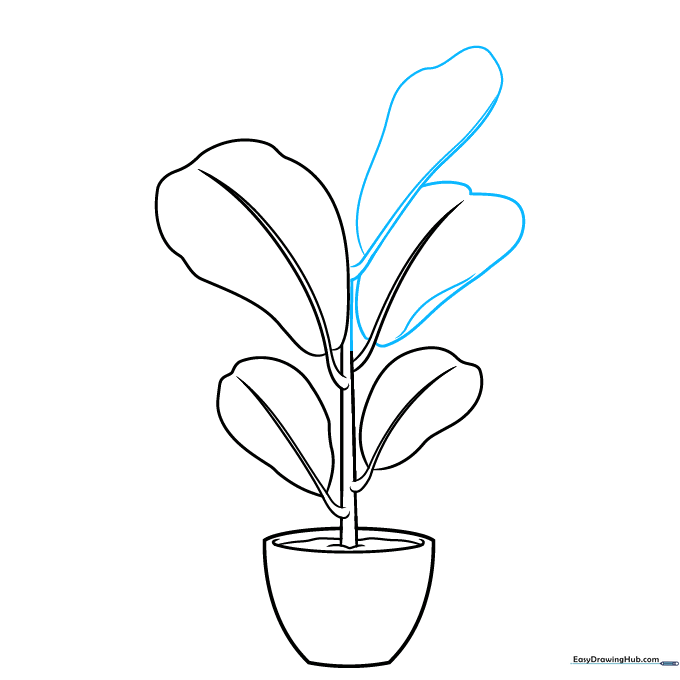
Step 4: Building Leaf Volume
Continue adding more leaves by drawing long, wavy lines that meet at sharp points. Extend the trunk further upward. Tip: Overlapping your leaves slightly creates a sense of depth and realism.
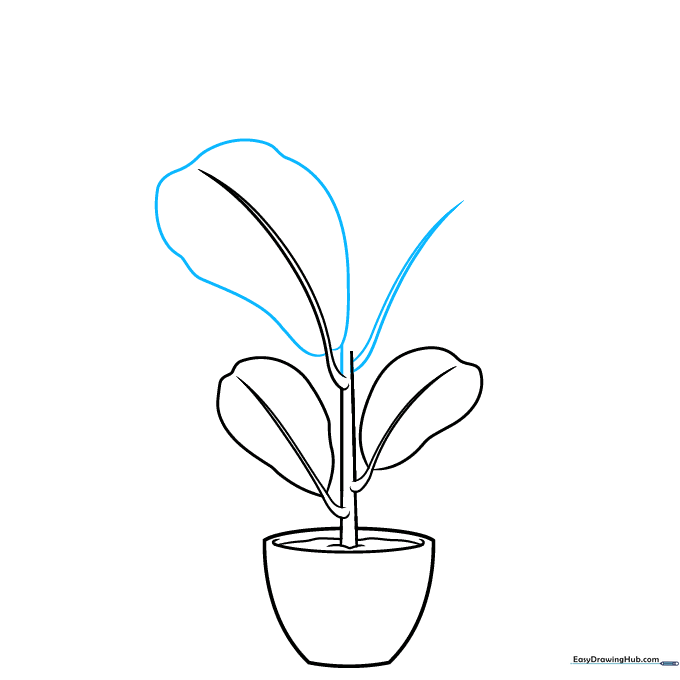
Step 5: Adding Dimension
Continue the trunk and add more twigs. Add a small curved line on one of the leaves to show a fold or curl. Tip: Adding these 'folds' makes the leaves look three-dimensional rather than flat.
Step 6: The New Growth Bud
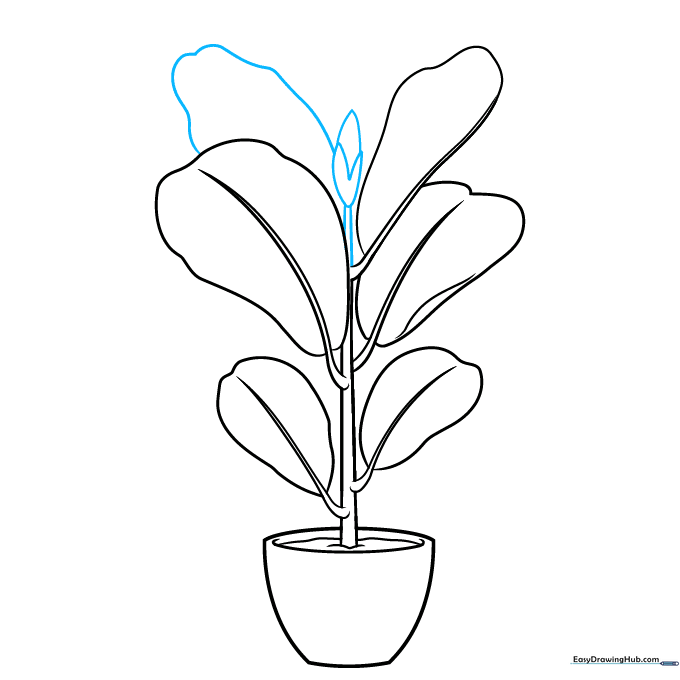
At the very top of the trunk, draw a 'V' shape and an inverted 'V' above it to represent a new leaf bud. Add another leaf in the background using a wavy line. Tip: Background leaves should be slightly smaller to show distance.
Step 7: Drawing the Veins
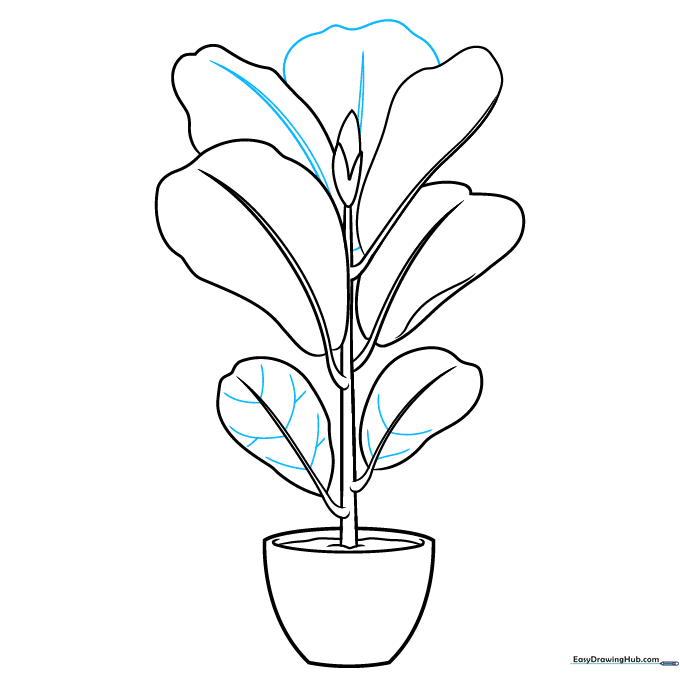
Draw the main central veins in each leaf. Use 'Y' shaped lines branching out to create the smaller, intricate vein patterns. Tip: Use a lighter touch for the smaller veins so they look delicate.
Step 8: Refining Texture
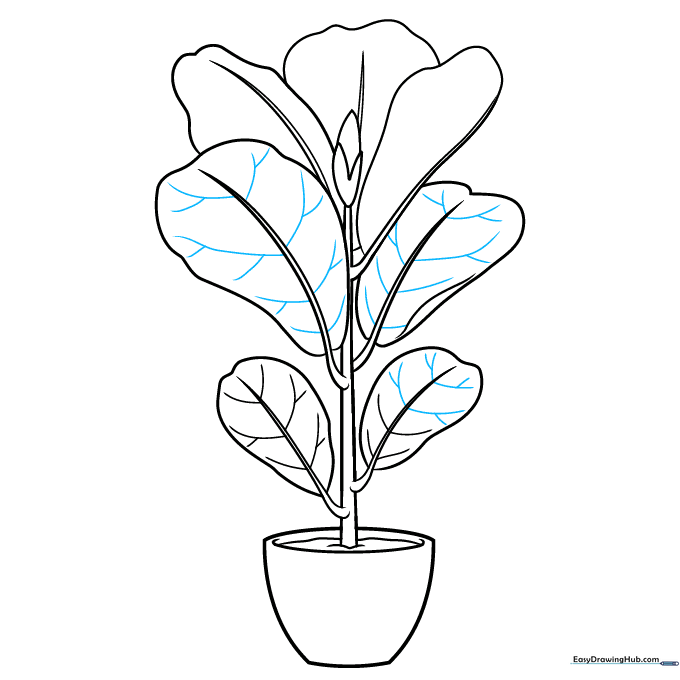
Continue adding vein details to all remaining leaves. Ensure the lines follow the curve of the leaf. Tip: If you make a mistake, gently dab with your eraser—don't rub hard!
Step 9: Final Touches
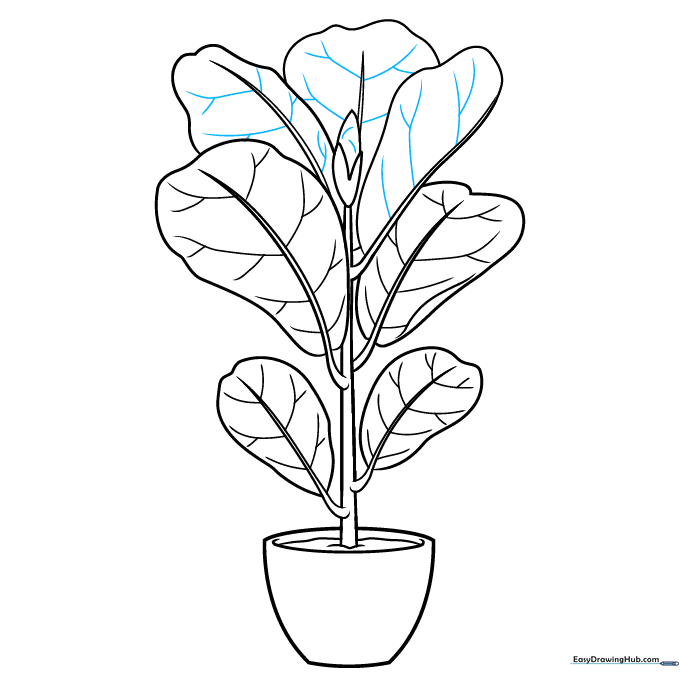
Add short, quick lines to the bud to show texture. Review your drawing and darken the main outlines. Tip: A clean outline makes your drawing look professional and finished.
Step 10: Coloring Your Plant
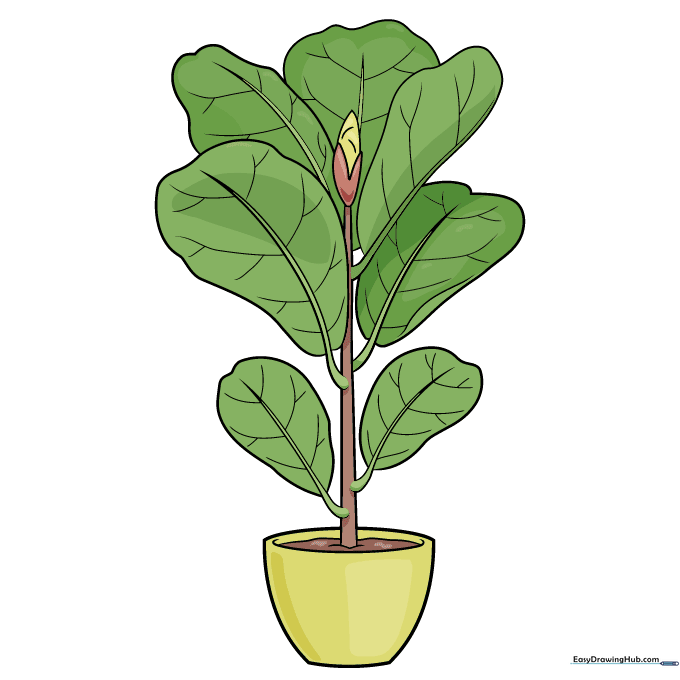
Time to bring your plant to life! Use dark green for the leaves and a lighter brown for the pot. Tip: Use a slightly lighter green for the center of the leaves to highlight the veins.
More Tutorials


