How to Draw a Farm: Easy Step-by-Step Guide for Kids
Bring the countryside to life with this fun, beginner-friendly farm drawing tutorial. Designed for young artists ages 5+, this activity requires only a pencil, paper, and your favorite coloring tools. Follow along to build confidence in landscape composition and geometric shapes.
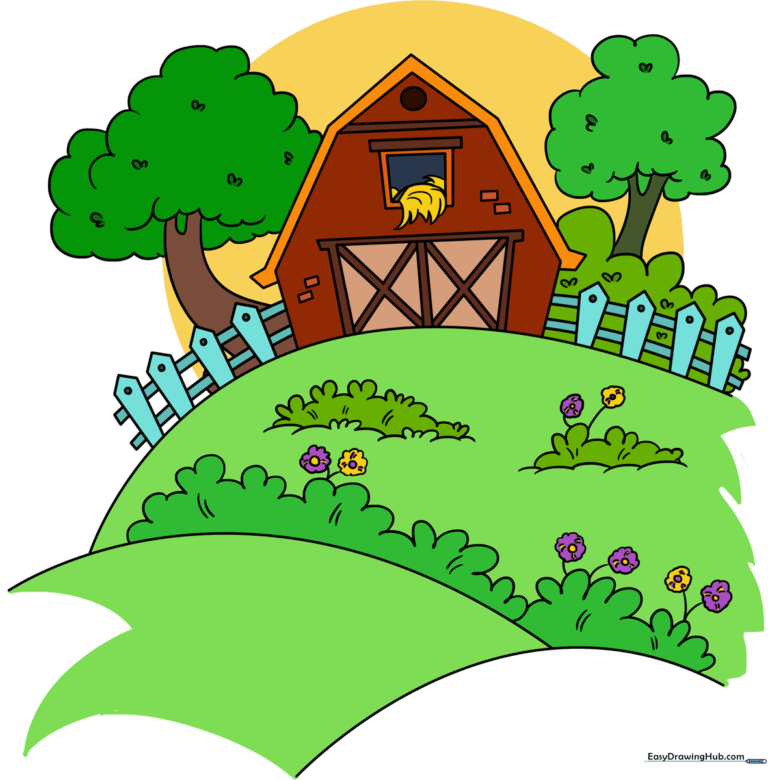
🎯 Final Result
Step-by-Step Instructions
Step 1: Sketching the Rolling Hills

Start by drawing the rolling hills using long, overlapping curved lines. Teacher's Tip: Keep your pencil pressure light here so you can easily erase any overlapping lines later to create a clean horizon.
Step 2: Constructing the Barn

Place your barn on the highest hill. Use straight lines to create a heptagon shape for the front, then add parallel lines to form the roof. Teacher's Tip: Use a ruler if you struggle with straight lines, but don't worry if it's not perfect—a slightly rustic barn adds character!
Step 3: Adding Door Details

Draw an 'X' shape across each barn door using parallel lines. Teacher's Tip: This is a great exercise for practicing symmetry; try to keep the lines on the left door matching the angle of the lines on the right.
Step 4: Designing the Loft Window
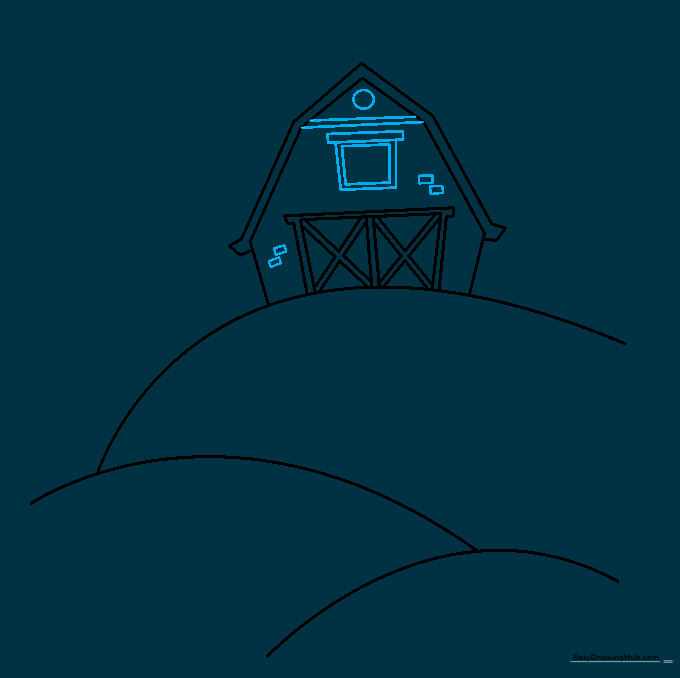
Add a square loft window with a frame and small rectangular bricks on the barn wall. Teacher's Tip: Vary the size of your brick rectangles slightly to make the barn look more realistic and textured.
Step 5: Sketching Cascading Hay

Draw jagged, curved lines spilling out of the loft to represent hay. Teacher's Tip: Use quick, flicking motions with your pencil to make the hay look loose and natural rather than stiff.
Step 6: Drawing the Tree
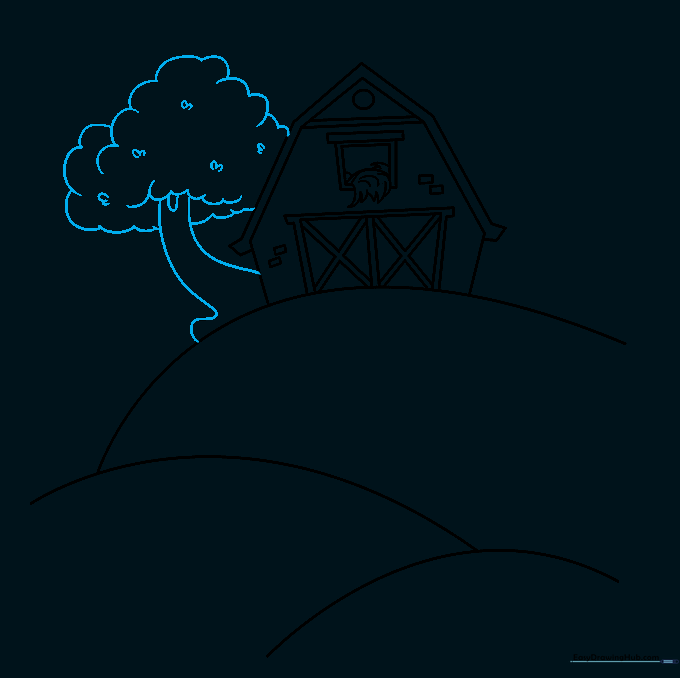
Erase your guide lines, then draw a tree trunk and a cloud-like canopy using 'U' shaped lines. Teacher's Tip: Overlap your 'U' shapes to create a fuller, more voluminous tree top.
Step 7: Building the Picket Fence
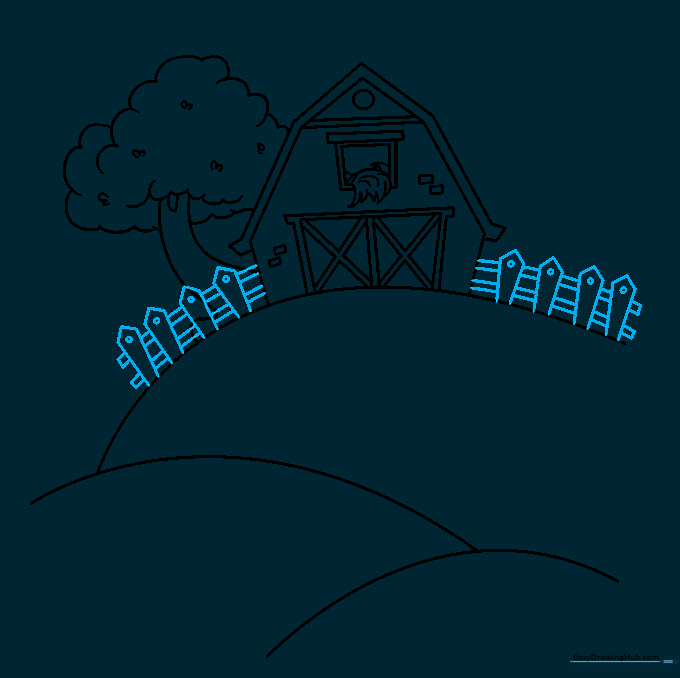
Draw tall, narrow pentagons for fence posts and connect them with horizontal rails. Teacher's Tip: Keep the fence posts evenly spaced to make your farm look tidy and well-kept.
Step 8: Adding Bushes and Foliage
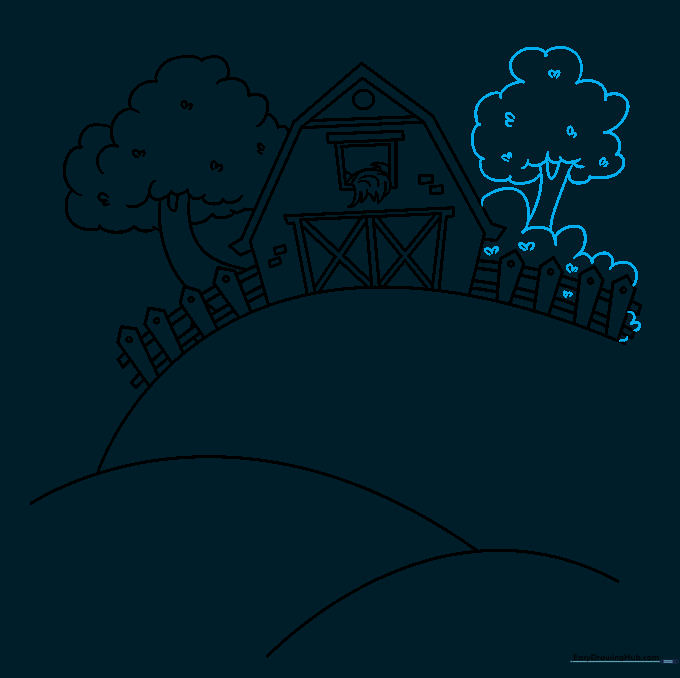
Add bushes behind the fence and another tree to balance your composition. Teacher's Tip: Adding layers of greenery creates depth, making your drawing look more professional.
Step 9: Final Landscape Details
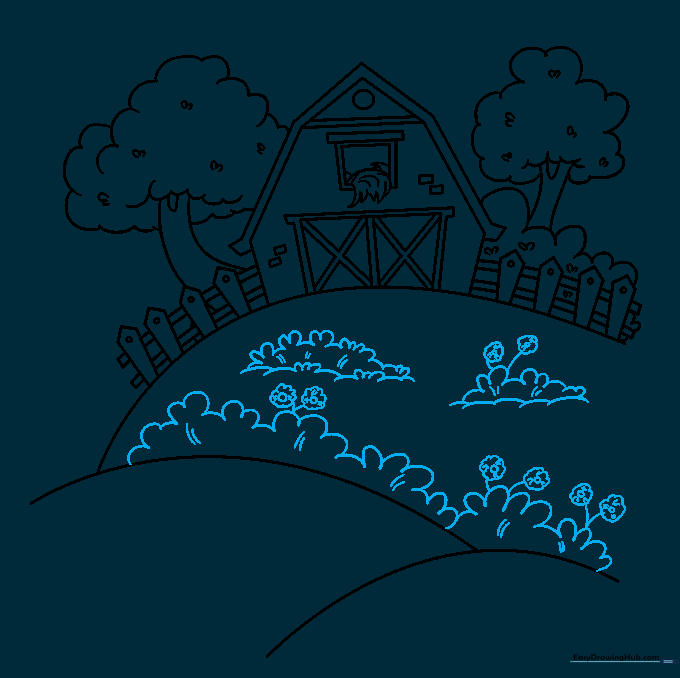
Fill the hillside with small flowers and plants using circles and curved lines. Teacher's Tip: Don't overthink the placement—a few scattered flowers look more natural than a perfectly straight row.
Step 10: Bring Your Farm to Life with Color
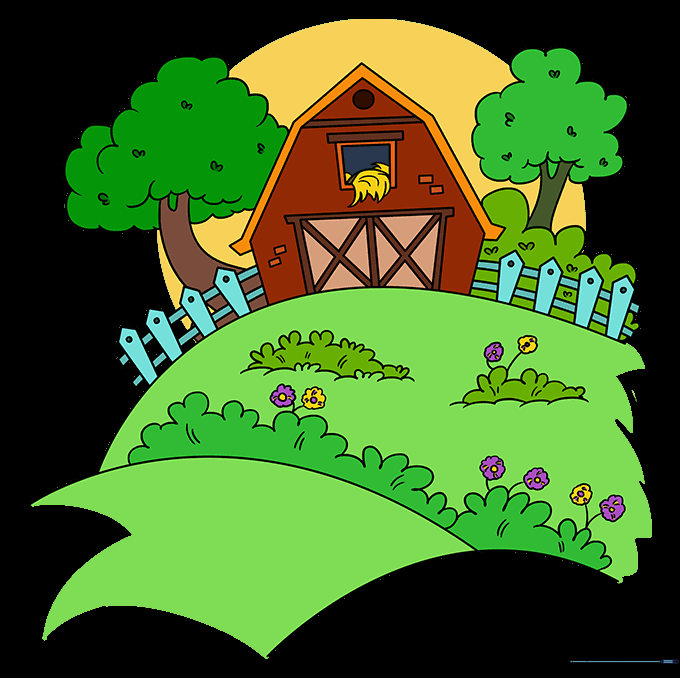
Time to color! Use traditional barn reds, earthy browns, and vibrant greens. Teacher's Tip: Try using light and dark shades of green to show where the sun hits the hills, adding a 3D effect to your drawing.
More Tutorials


