How to Draw a Fallen Angel: Easy 10-Step Fantasy Art Guide
Ready to bring a fantasy character to life? This tutorial is perfect for artists ages 8+ looking to practice expressive character design. You will need a pencil, an eraser, and a fine-liner pen to complete this piece, which focuses on mastering wing structure and flowing hair.
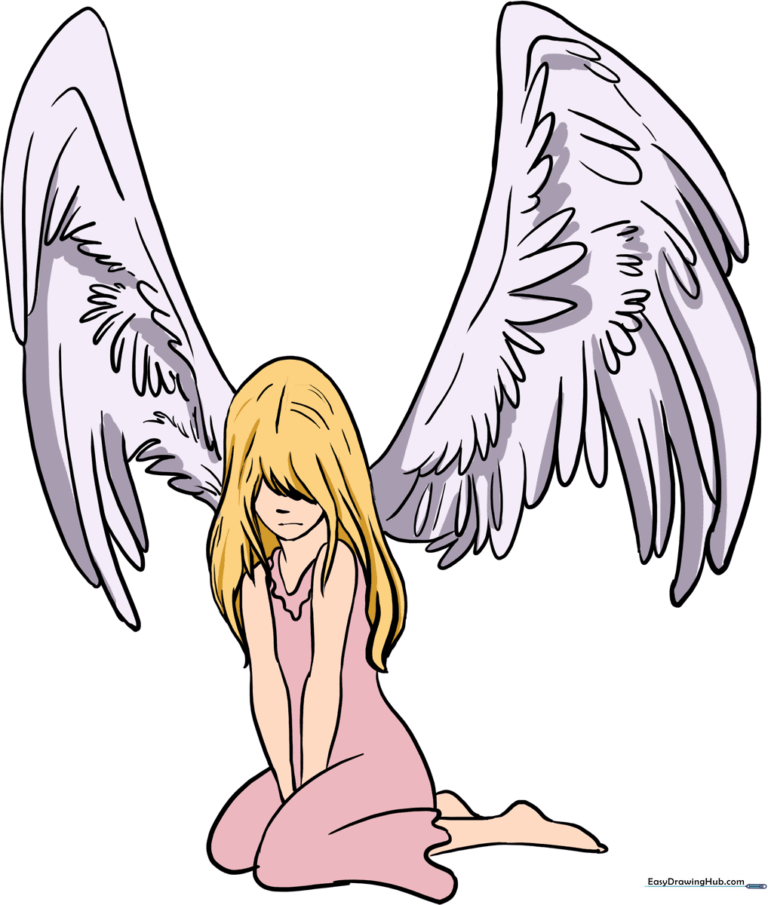
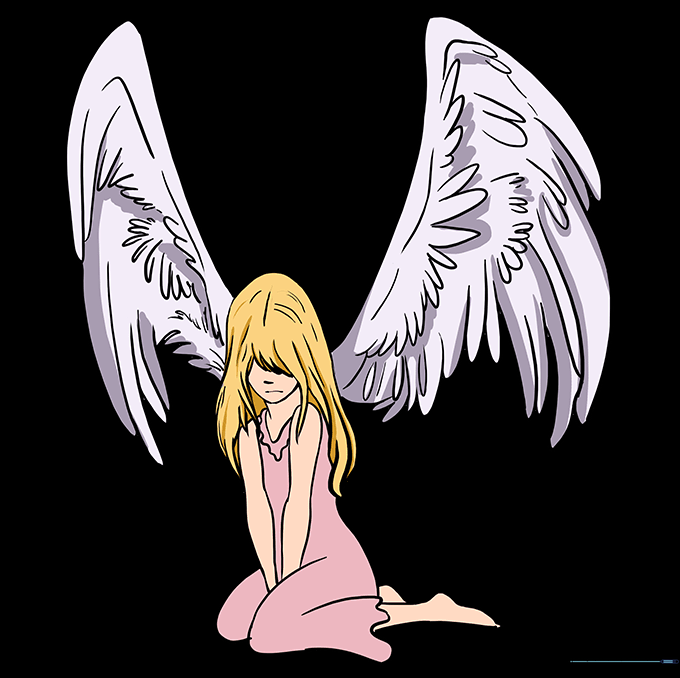
🎯 Final Result
Step-by-Step Instructions
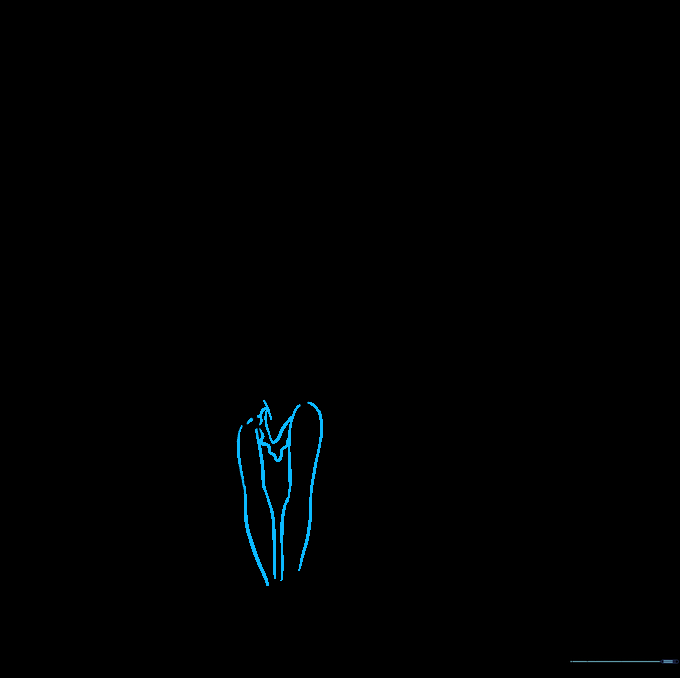
Step 1: Sketching the Face and Hair

Outline the chin and the top of the hair using long, sweeping curves. Add shorter, jagged lines to create locks of hair that frame the face. Teacher's Tip: Keep your pencil pressure light here so you can easily adjust the hair volume later.
Step 2: Defining the Neck and Shoulders
Draw the collar of the garment using scalloped lines, then sketch the arms using pairs of lines. Teacher's Tip: Add a slight inward curve at the elbows to give the arms a more natural, anatomical look.
Step 3: Shaping the Dress
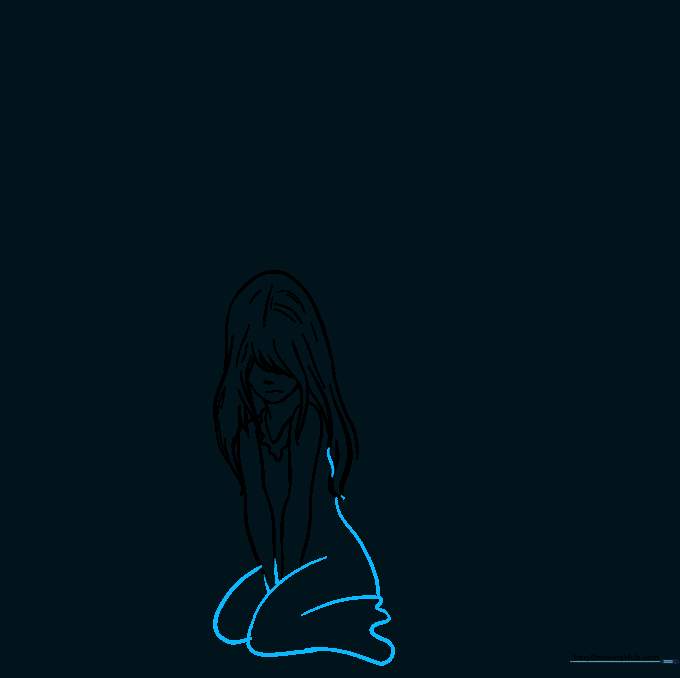
Use long, sweeping curves to draw the dress, tucking the fabric between the legs. Teacher's Tip: Think of the fabric as a soft, flowing material; use smooth, continuous strokes to suggest movement.
Step 4: Drawing the Legs
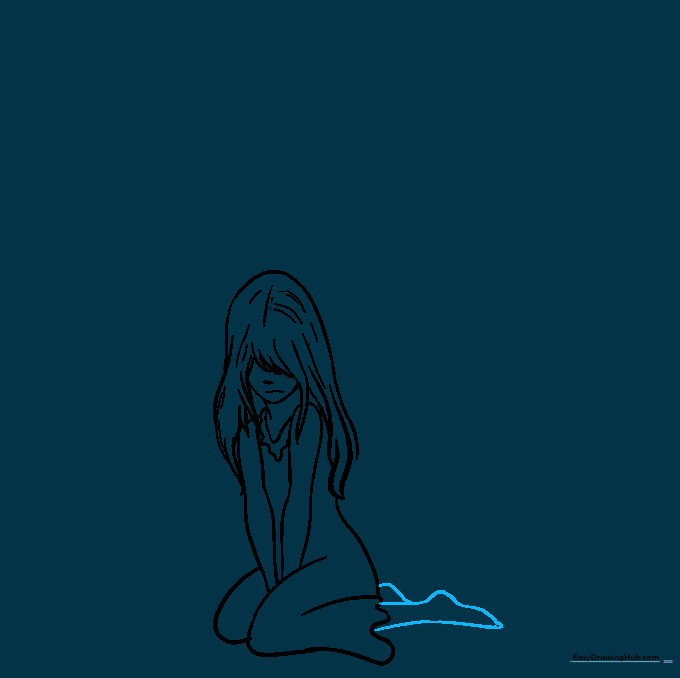
Sketch the bent legs extending behind the figure. Teacher's Tip: Overlap the lines slightly to show depth, making one leg appear closer than the other.
Step 5: Starting the First Wing
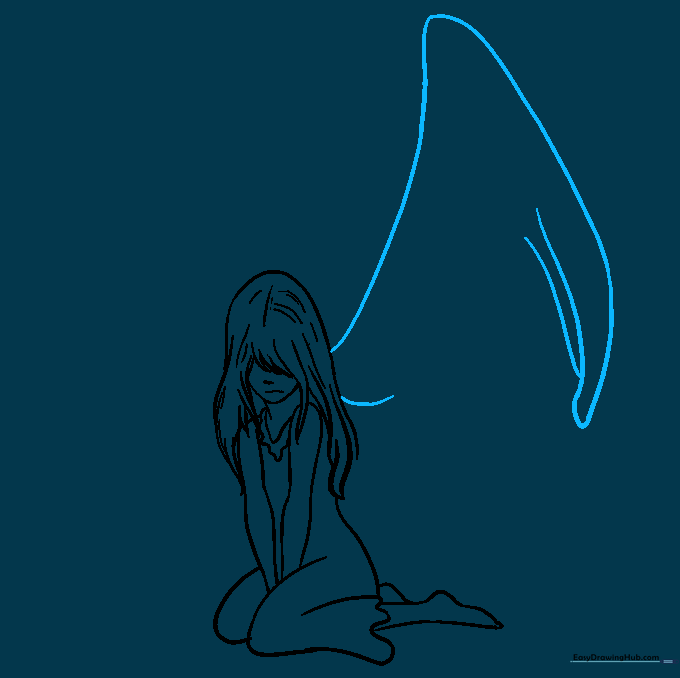
Extend a long, curved line from the shoulder to create the primary wing structure. Bend the line back to form the first flight feather. Teacher's Tip: Make the flight feather long and pointed to emphasize the 'fallen' aesthetic.
Step 6: Adding Feather Layers
Use a series of connected 'U' shapes to create layers of feathers along the wing. Teacher's Tip: Vary the size of your 'U' shapes to make the wing look more organic and realistic.
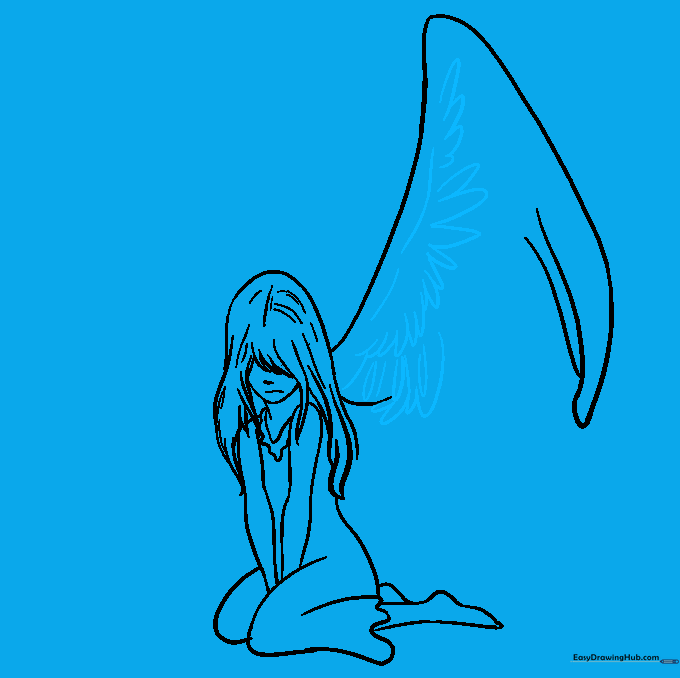
Step 7: Completing the First Wing

Fill the rest of the wing with larger flight feathers, ensuring they connect smoothly to the base. Erase any overlapping guide lines. Teacher's Tip: Clean lines are key—take your time erasing the construction marks.
Step 8: Starting the Second Wing
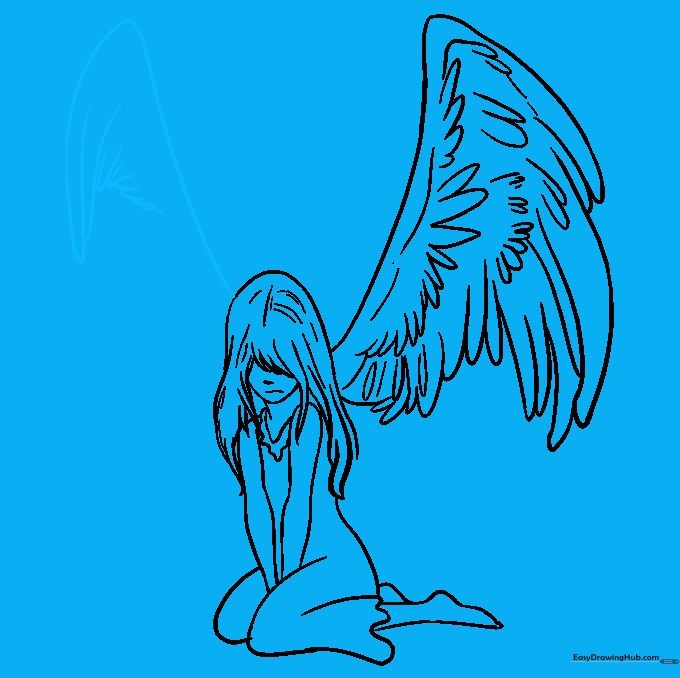
Repeat the process on the opposite side to create the second wing. Teacher's Tip: Try to mirror the curve of the first wing to maintain balance in your composition.
Step 9: Finalizing the Second Wing
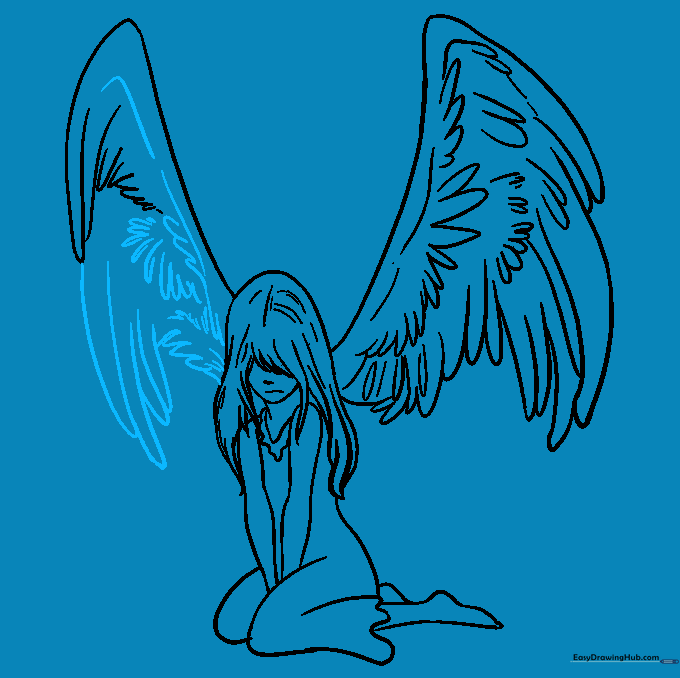
Continue adding 'U' shaped feathers until the second wing matches the detail of the first. Teacher's Tip: Check your symmetry one last time before moving to the final ink stage.
Step 10: Adding Color
Bring your drawing to life with color! Use darker shades for the shadows under the feathers to give the wings depth. Teacher's Tip: Use a cool color palette (blues, purples, or greys) to enhance the 'fallen' theme.
More Tutorials


