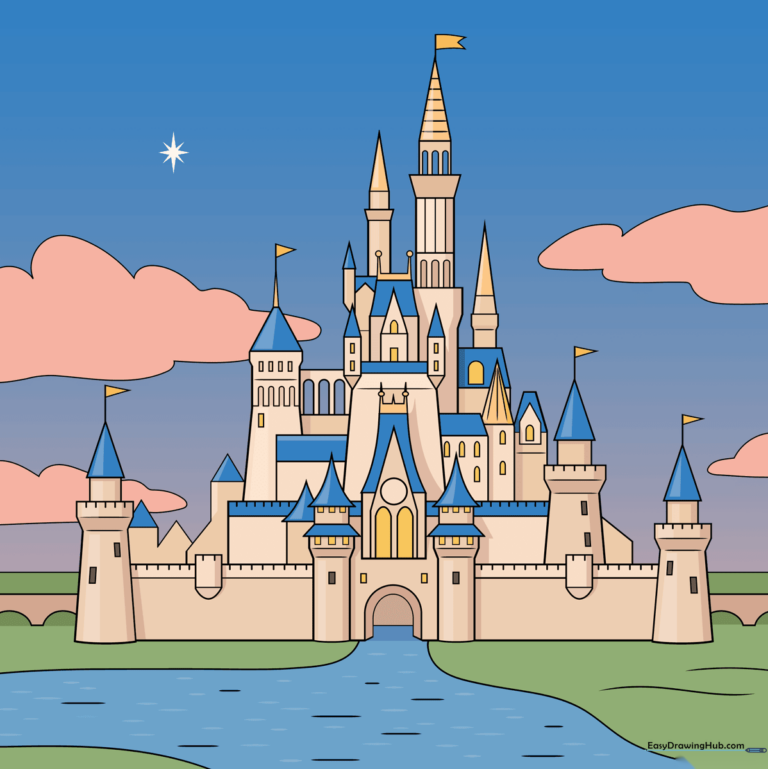
How to Draw a Disney Castle: Easy 10-Step Guide
Bring a touch of magic to your sketchbook with this whimsical castle drawing tutorial. Designed for young artists ages 6+, this lesson uses basic geometric shapes to build a complex-looking structure. Grab your pencil, eraser, and paper, and let’s create a fairy-tale masterpiece together.
🎯 Final Result
Step-by-Step Instructions
Step 1: Establishing the Foundation
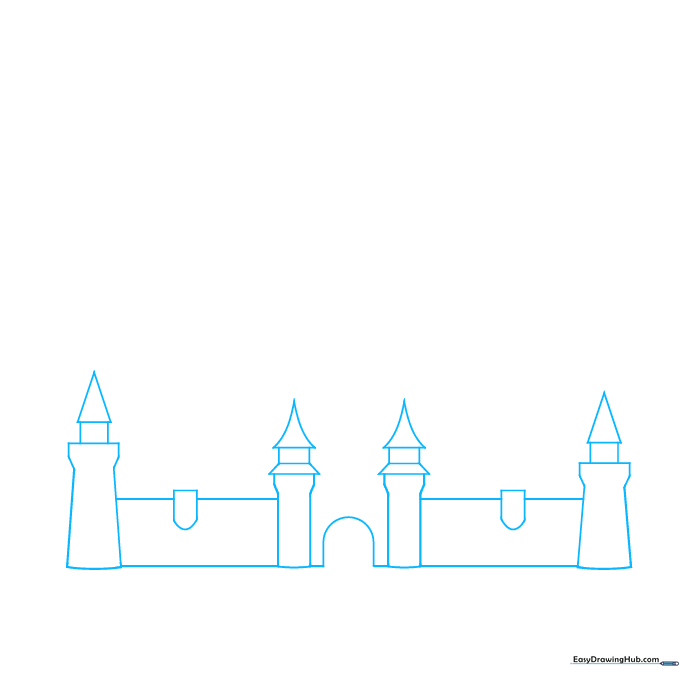
Start by sketching the base walls using a series of pawn-like shapes connected by straight lines. Teacher's Tip: Keep your pencil pressure light so you can easily adjust the proportions if the towers look a bit wobbly.
Step 2: Adding Architectural Details
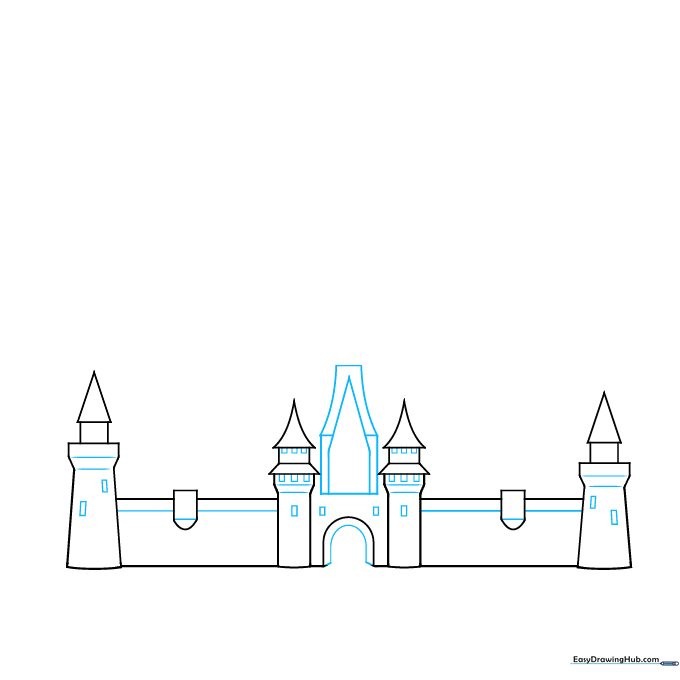
Add an arched doorway and small rectangular windows to your walls. Above the gate, sketch a triangle inside a rectangle to create depth. Teacher's Tip: Use a ruler if you want perfectly straight lines, or embrace the hand-drawn charm for a more whimsical look.
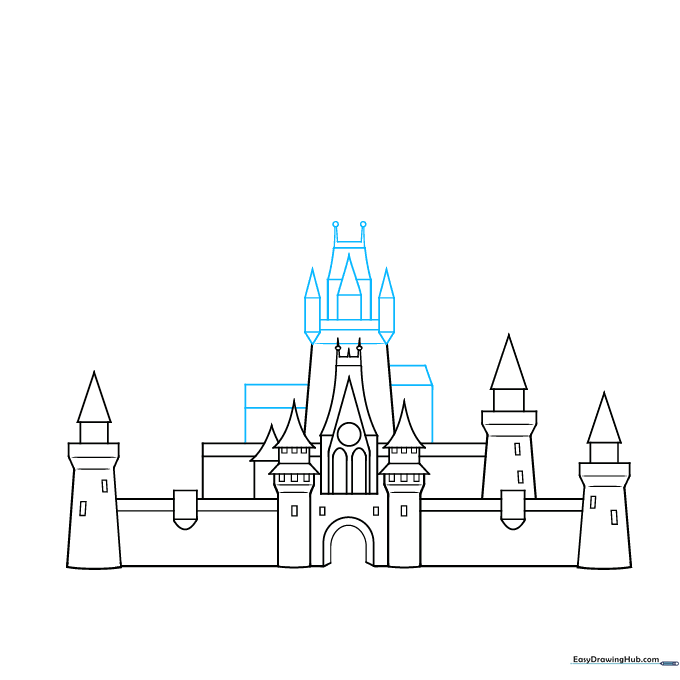
Step 3: Building the Central Spire
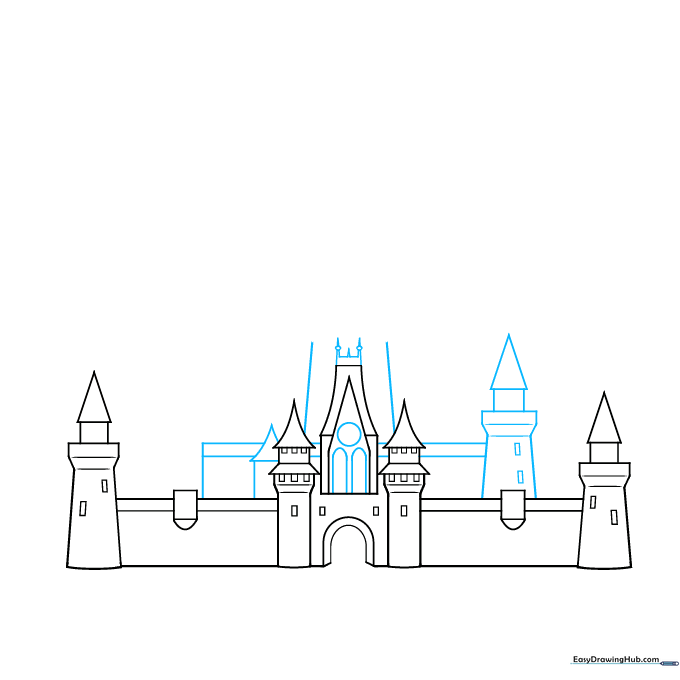
Draw additional towers with triangular roofs and decorate the central tower with small circles and spires. Teacher's Tip: Think of these as building blocks—stacking shapes on top of each other is the secret to drawing any tall structure.
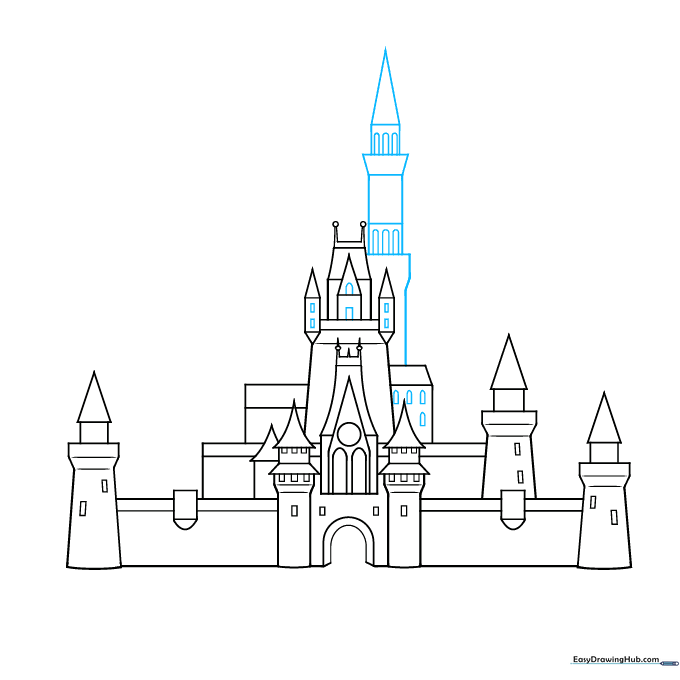
Step 4: Refining the Heights
Continue extending the central tower using trapezoids and triangles. Add circle-topped spires to give it that classic fairy-tale silhouette. Teacher's Tip: Varying the height of your towers makes the castle look much more realistic and grand.
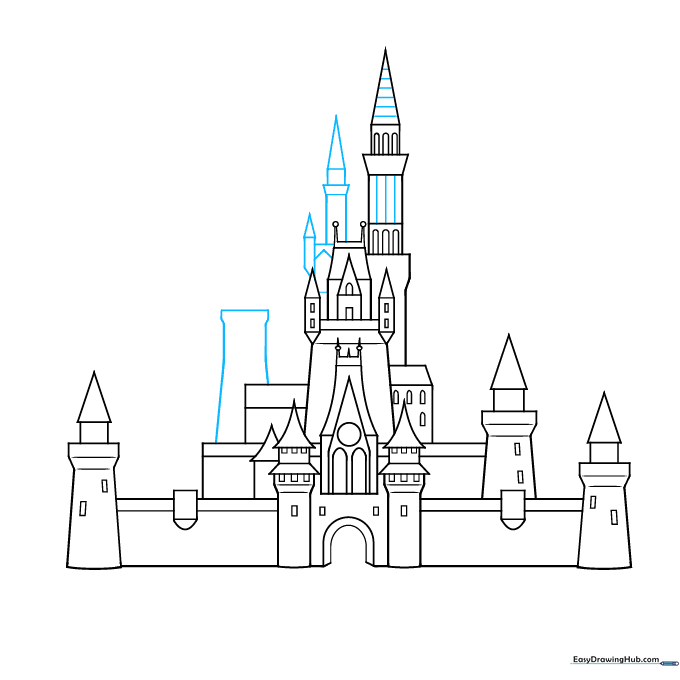
Step 5: Expanding the Side Towers
Extend the side towers upward using a mix of rectangles and arched shapes. Teacher's Tip: If you make a mistake, don't worry! Just use your eraser to soften the line and try again—art is all about practice.
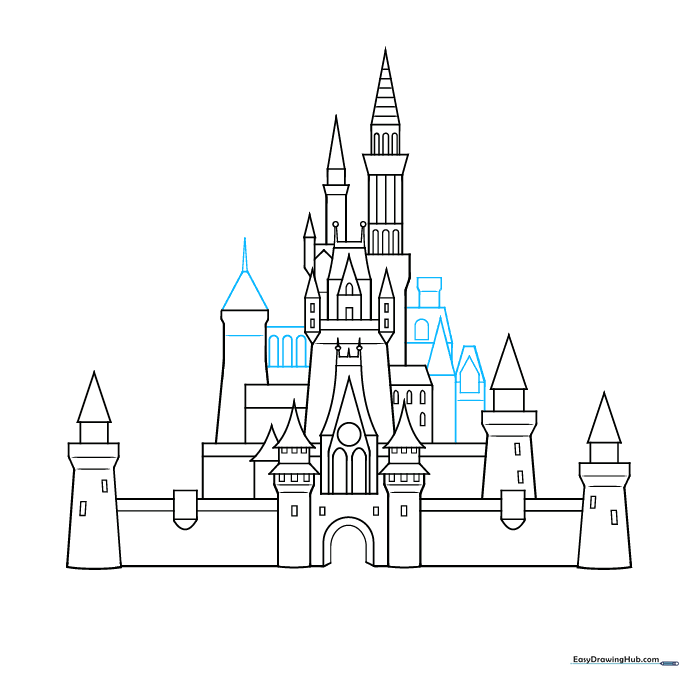
Step 6: Adding Curvature
Add a curved triangular tower to the side of your central structure. This adds a nice sense of movement to the drawing. Teacher's Tip: Focus on keeping your curves smooth to contrast with the sharp lines of the roof.
Step 7: Filling the Gaps
Connect your towers with walls using pentagons and trapezoids. Teacher's Tip: Imagine you are building a real fortress; make sure the walls look sturdy and connected to the towers.
Step 8: Adding Texture and Flags
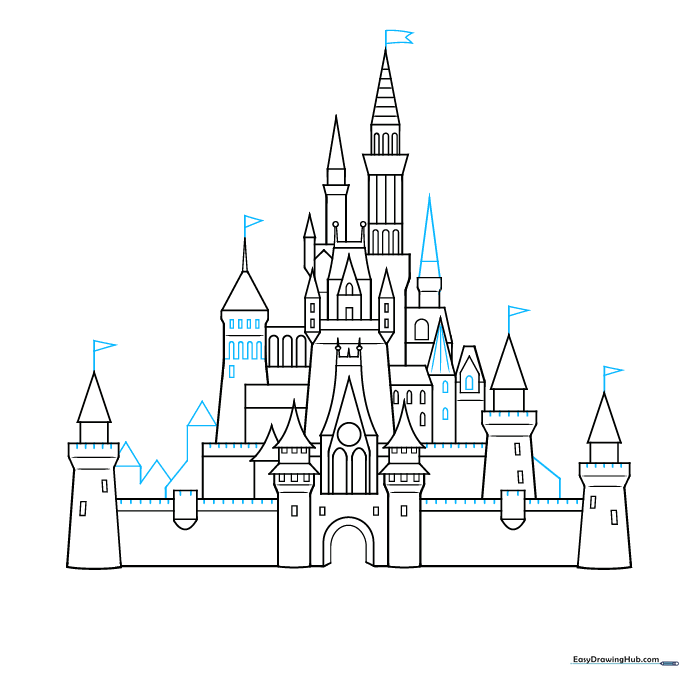
Add pennant flags to the tops and use short lines to texture the walls like stone blocks. Teacher's Tip: Adding small details like flags makes your castle look like it belongs in a storybook.
Step 9: Setting the Scene
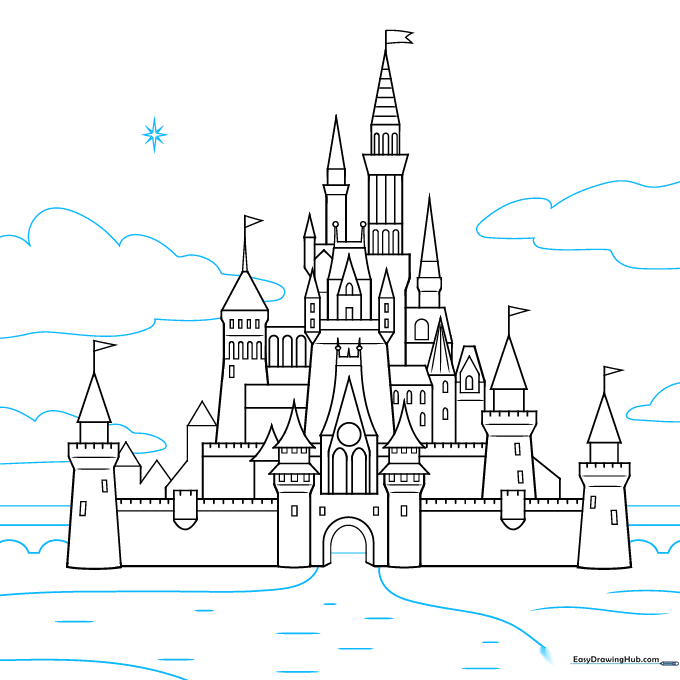
Draw a star in the sky and add a bridge and clouds at the bottom. Teacher's Tip: Use light, wavy lines for the clouds to keep them looking soft and fluffy compared to the rigid castle walls.
Step 10: Bringing it to Life with Color
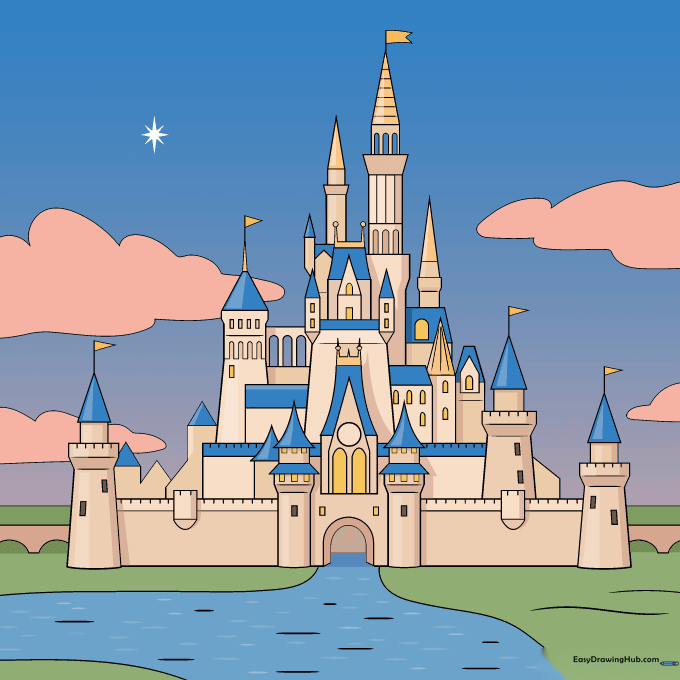
Time to color! Use soft beige or light pink for the walls and royal blue for the roofs. Teacher's Tip: Try using colored pencils to shade the sides of the towers to give your castle a 3D effect.
More Tutorials


