How to Draw a Dinosaur Skull: Easy 9-Step Guide
Ready to bring a prehistoric predator to life? This tutorial is perfect for young artists ages 8+ who want to master structural drawing. Grab your graphite pencil, a good eraser, and some paper to start sketching this fascinating fossil step-by-step.
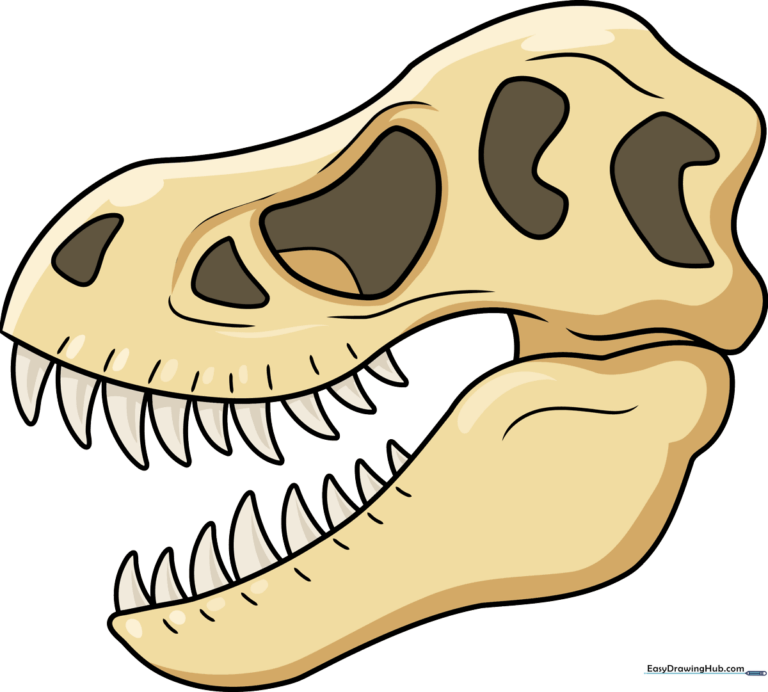
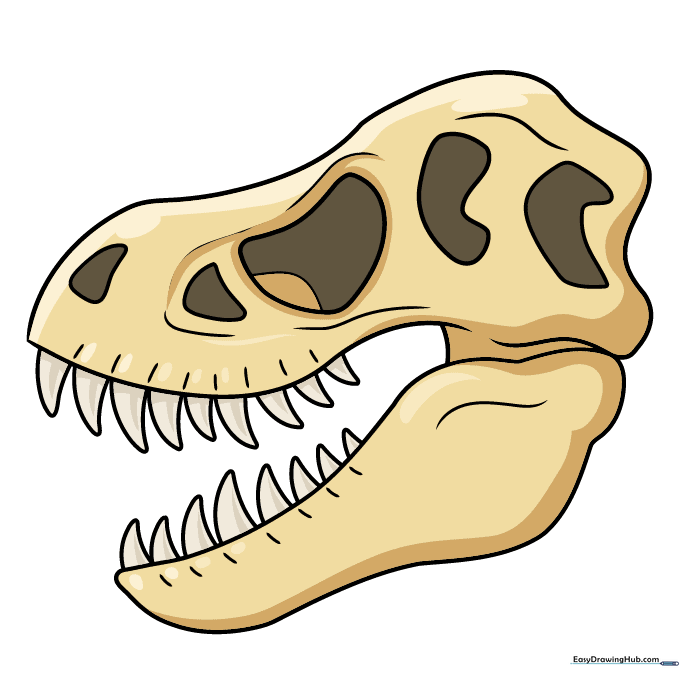
🎯 Final Result
Step-by-Step Instructions
Step 1: Sketching the Cranial Arch
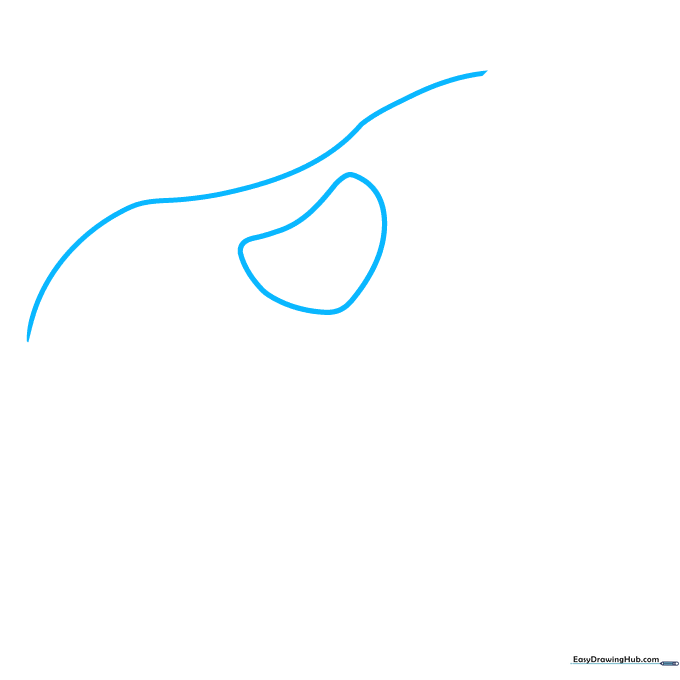
Draw a long, smooth curved line to form the top of the skull. Below it, add an irregular, bean-like shape. Teacher's Tip: This is the antorbital fenestra; keep it light, as this is just a guide for the skull's internal structure.
Step 2: Defining the Snout and Naris
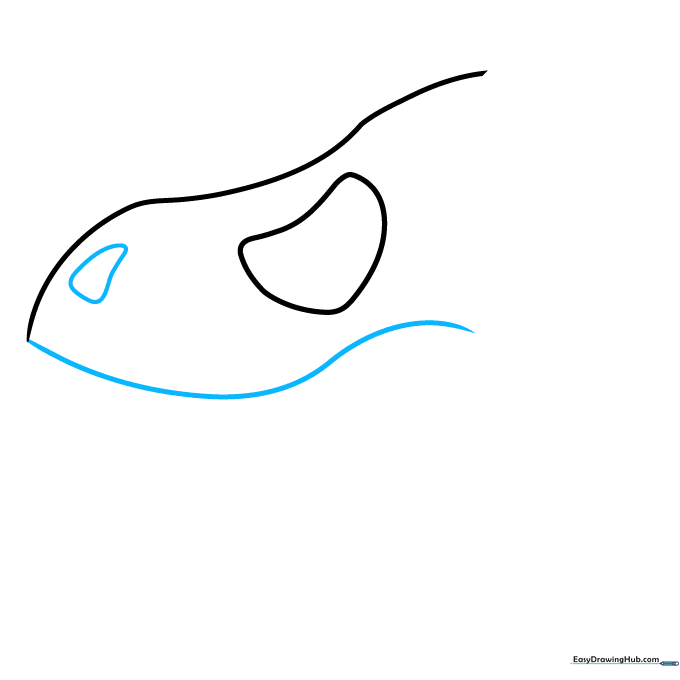
Extend a curved line from the front to create the upper jaw. Near the tip, draw a small, rounded triangle for the naris (nose opening). Teacher's Tip: Use a light touch here—this area defines the dinosaur's profile.
Step 3: Sketching the Jawline
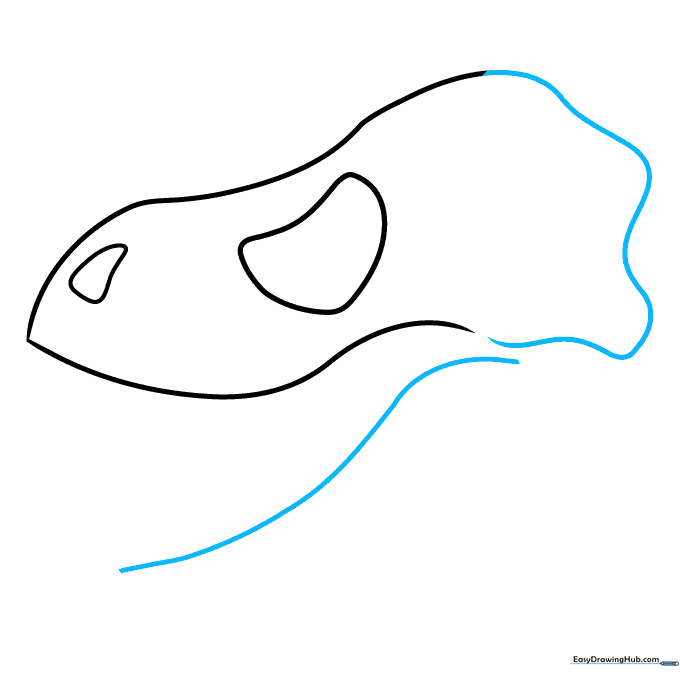
Extend the top line to form the back of the head. Below this, draw a separate, long curved line for the top of the lower jaw. Teacher's Tip: Leave a small gap between the upper and lower jaw sections for now.
Step 4: Closing the Jaw
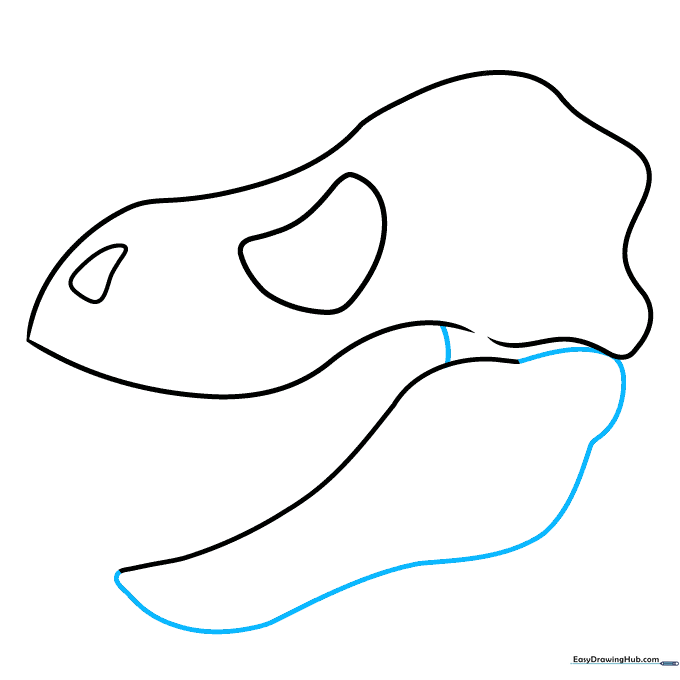
Extend the lower jaw line, looping it back to connect with the skull base. Add a small hinge line at the back. Teacher's Tip: Ensure the jaw looks sturdy—this is a predator, after all!
Step 5: Adding Front Teeth
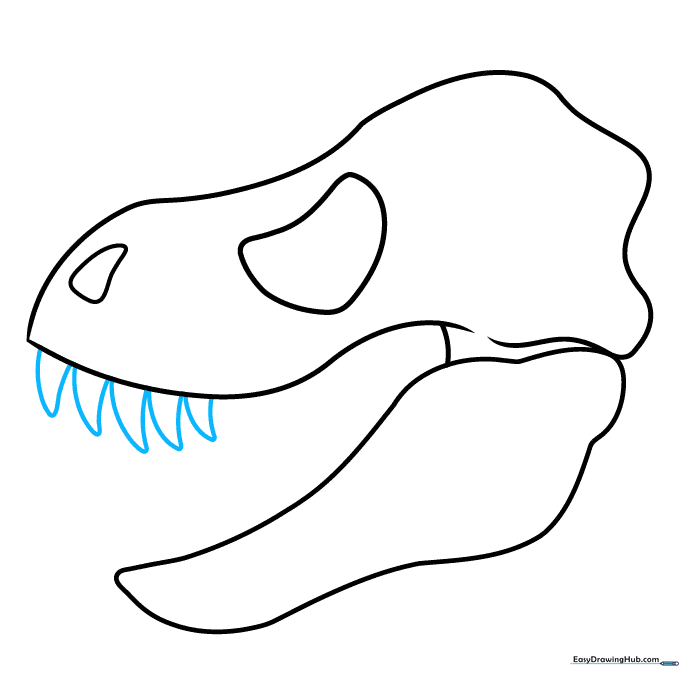
Draw sharp, triangular teeth along the front of the upper and lower jaws. Teacher's Tip: Vary the sizes slightly to make them look more natural and menacing.
Step 6: Filling the Jawline

Continue adding teeth along the rest of the upper and lower jaw. Teacher's Tip: Keep the teeth pointing slightly inward toward the throat for a realistic look.
Step 7: Adding Eye and Bone Openings
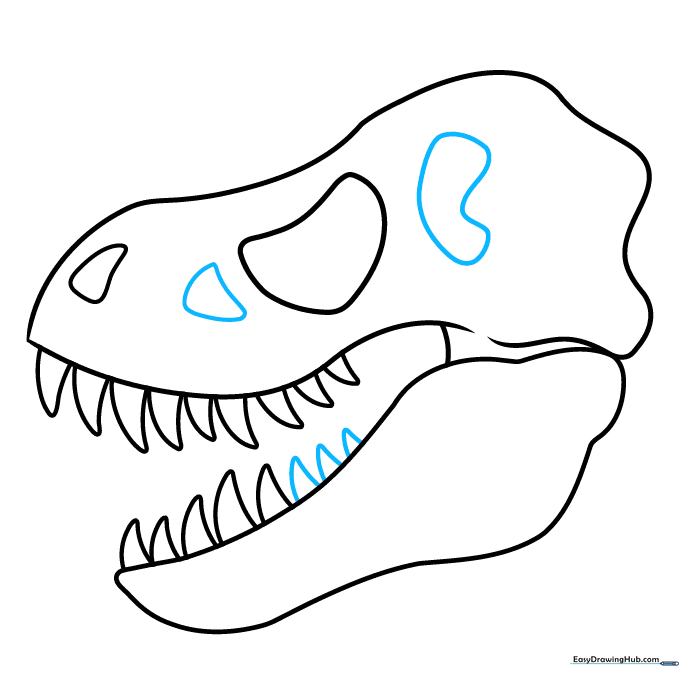
Draw the maxillary fenestra and the large orbital fenestra (eye socket) behind it. Teacher's Tip: The eye socket should be the largest opening on the skull.
Step 8: Finalizing Bone Contours

Add the lateral temporal fenestra near the back and contour the bone plates with curved lines. Teacher's Tip: Use these lines to show the thickness of the bone.
Step 9: Final Details
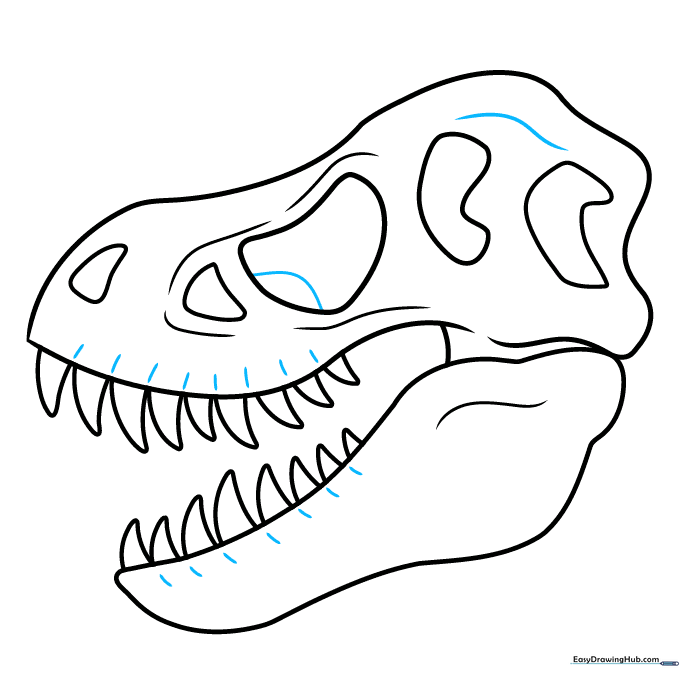
Refine your lines and add small details around the teeth and eye socket. Teacher's Tip: Erase any overlapping guide lines to make your drawing look clean and professional.
Step 10: Adding Color
Time to color! Use earthy tones like stone gray, sandy beige, or dark brown to give your fossil an ancient look. Teacher's Tip: Use a darker shade in the eye socket to create depth.
More Tutorials


