How to Draw a Dia de Los Muertos Skull: Easy 9-Step Guide
Celebrate culture and creativity with this fun sugar skull drawing project, perfect for artists ages 6 and up. You will only need a pencil, an eraser, and your favorite markers or colored pencils to bring this design to life. Follow along to master symmetrical patterns and bold, festive shapes.
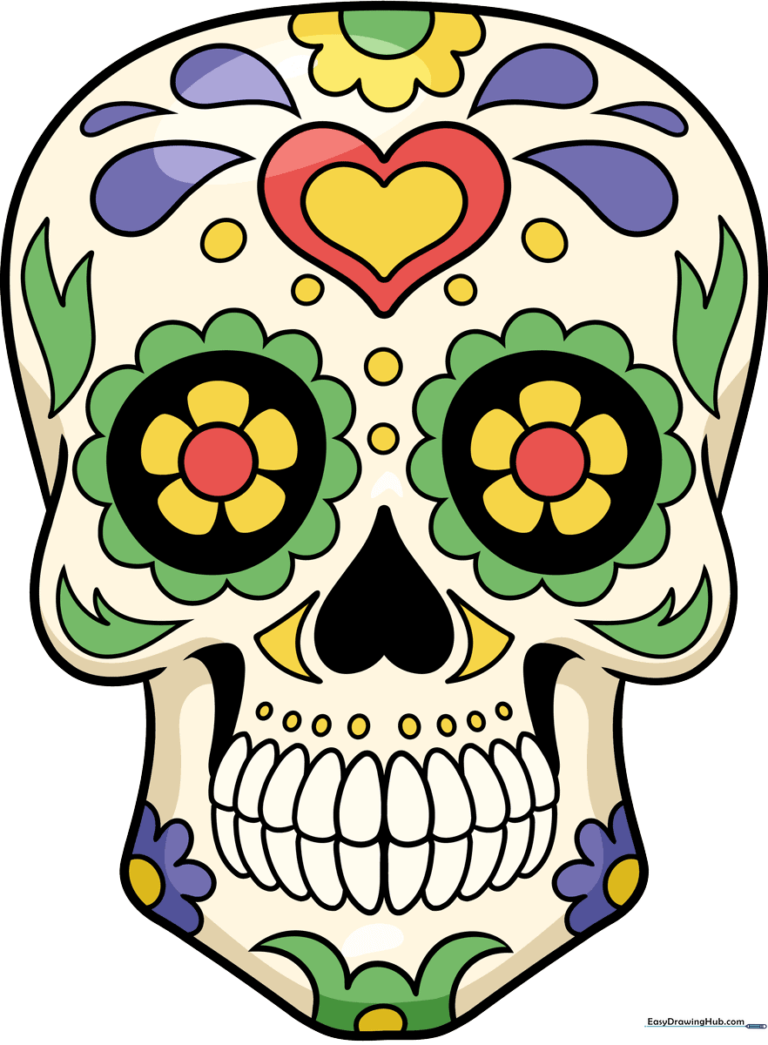
🎯 Final Result
Step-by-Step Instructions
Step 1: Sketching the Head and Eye Sockets
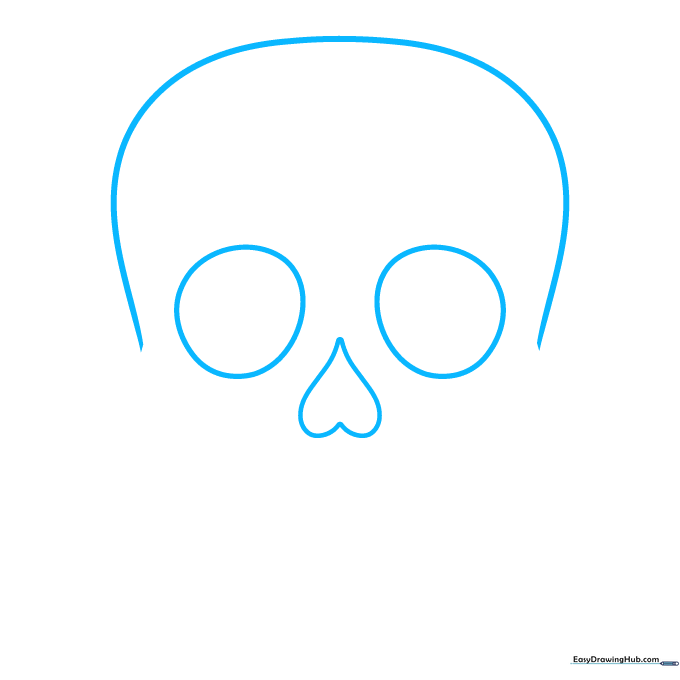
Draw a large, rounded arch for the top of the skull. Add two big circles for the eyes and an upside-down heart for the nasal cavity. Teacher's Tip: Keep your pencil lines light so you can easily refine the shape later if needed.
Step 2: Defining the Jaw and Teeth
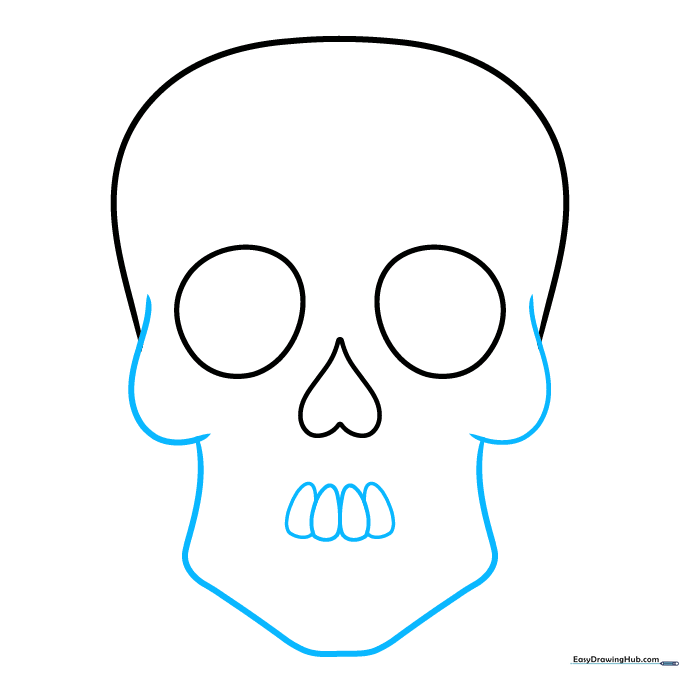
Use curved lines to connect the cheekbones down to the jaw. Sketch four overlapping, rounded teardrop shapes for the teeth. Teacher's Tip: Focus on keeping the teeth uniform in size to maintain a balanced look.
Step 3: Completing the Teeth
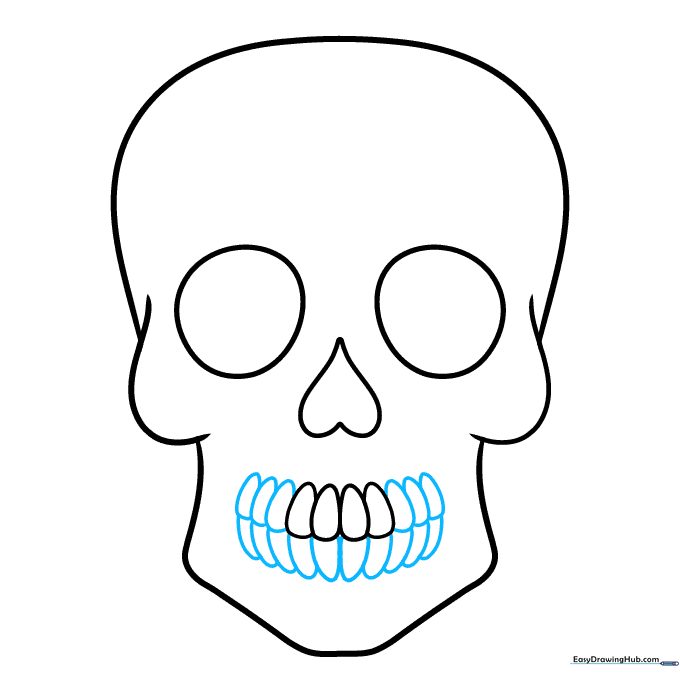
Add more teeth using overlapping teardrop and triangle shapes along the jawline. Teacher's Tip: Don't worry if they aren't perfect; sugar skulls are known for their whimsical, hand-drawn character.
Step 4: Adding Eye Details
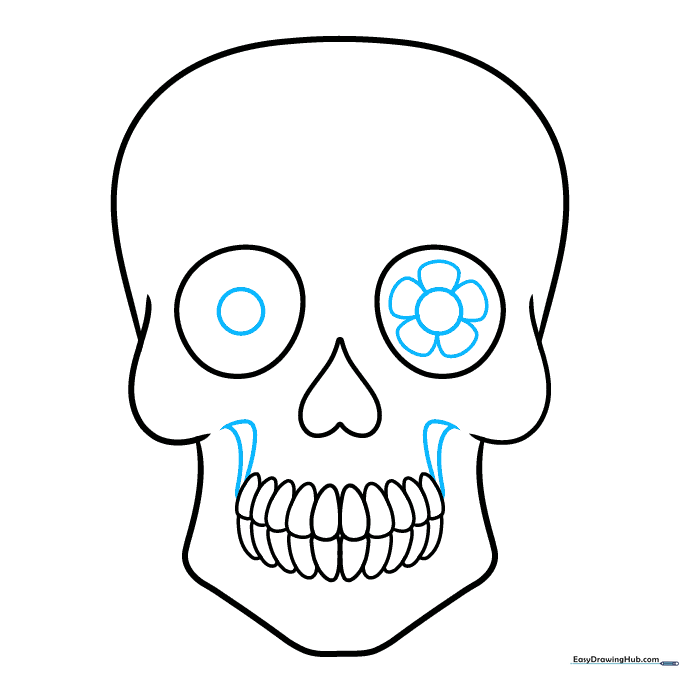
Draw curved lines extending from the mouth corners. Add a small circle in the center of each eye, then surround one with five petals to create a flower. Teacher's Tip: Use a steady hand to keep the flower petals symmetrical.
Step 5: Decorating the Eye Sockets
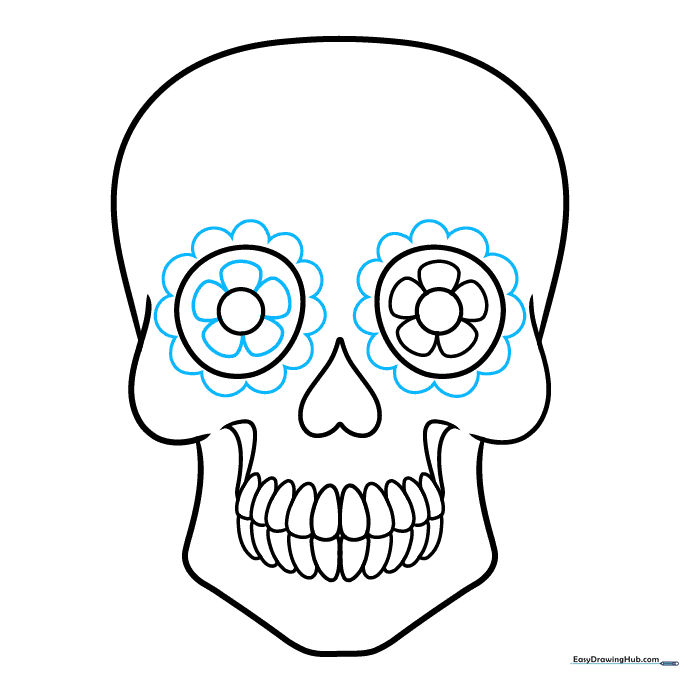
Repeat the petal design for the second eye. Then, add a scalloped border around both eye sockets. Teacher's Tip: Scalloped lines are just a series of connected 'U' shapes—practice them on a scrap piece of paper first!
Step 6: Adding Cheek and Nose Accents
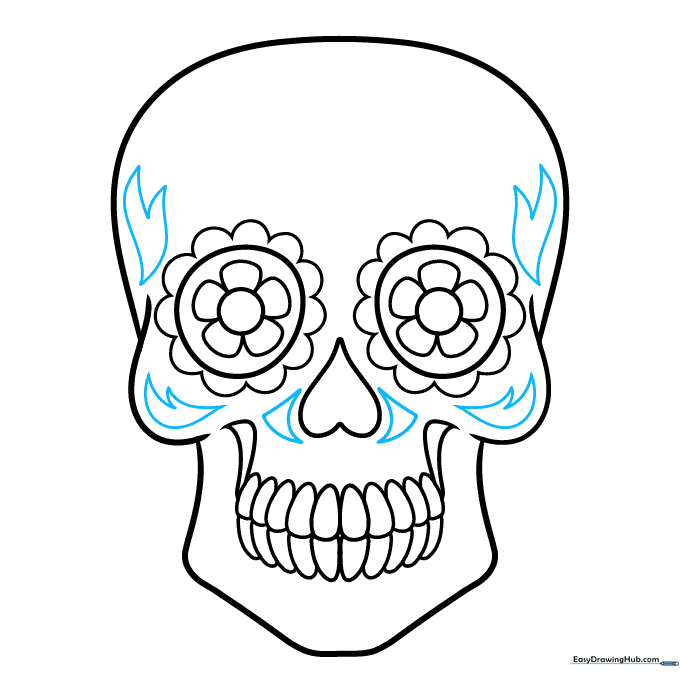
Add small triangles next to the nose and flame-like patterns on the cheeks. Teacher's Tip: These patterns represent the traditional 'papel picado' style, so feel free to make them as jagged or smooth as you like.
Step 7: Adding Forehead and Jaw Flowers
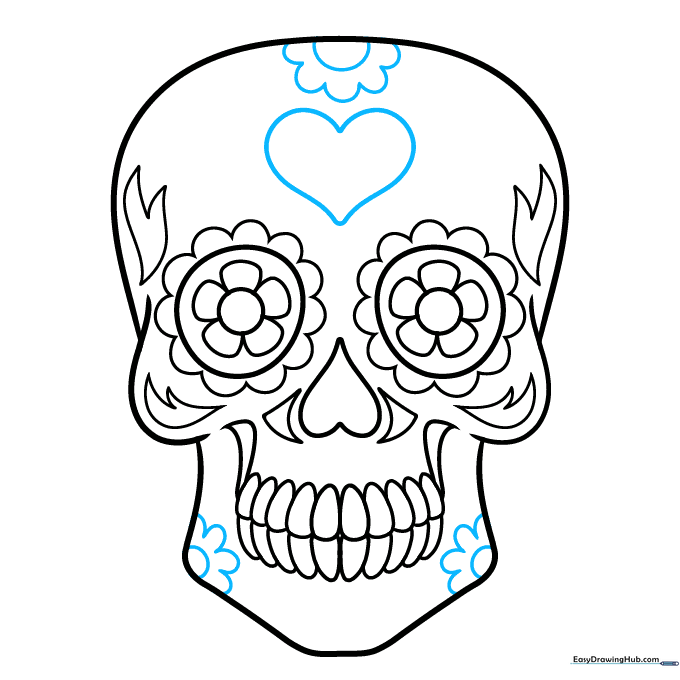
Draw a heart on the forehead and a large flower on top of the skull. Add two smaller daisy-like flowers on the jaw. Teacher's Tip: Use a circular motion to build the flower centers for a natural look.
Step 8: Refining the Details
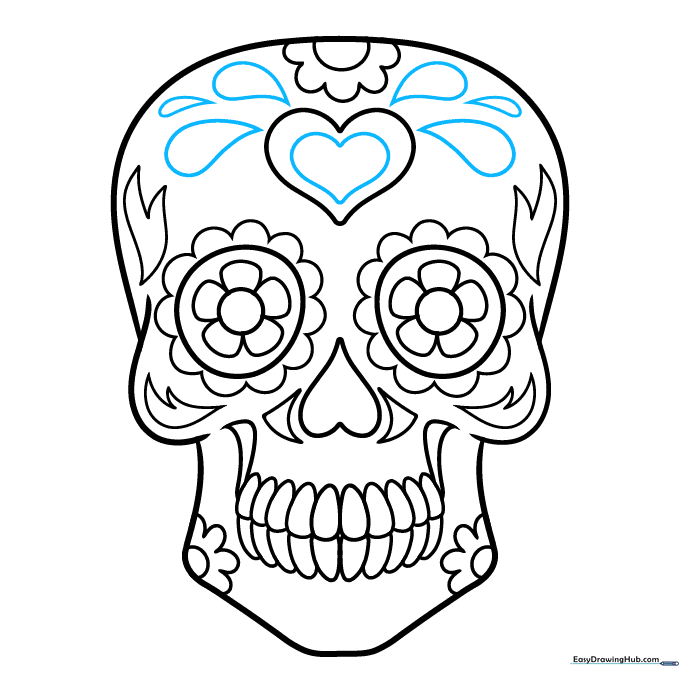
Add a smaller heart inside the forehead heart and scatter teardrop shapes around it. Teacher's Tip: Varying the size of the teardrops adds visual interest and depth to your design.
Step 9: Final Touches
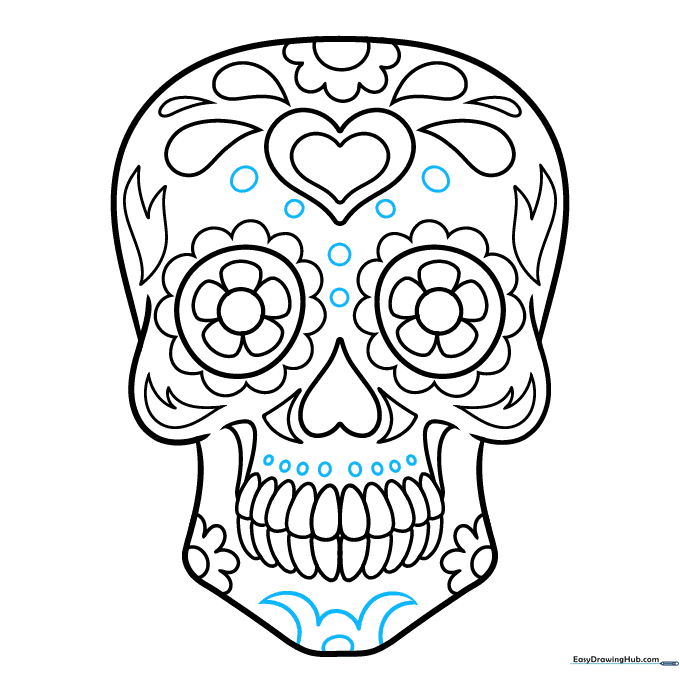
Add small circles on the forehead and chin to finish the pattern. Your outline is now ready for color! Teacher's Tip: Use bright, bold colors like magenta, turquoise, and marigold to capture the festive spirit of the holiday.
Step 10: Bring It to Life with Color
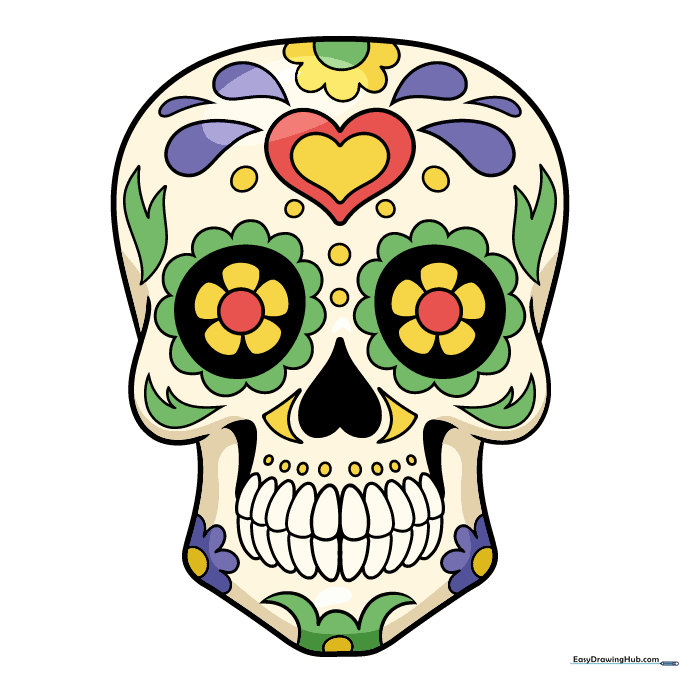
Time to color! Keep the base of the skull white or cream, and use vibrant markers to fill in the flowers and patterns. Teacher's Tip: Don't be afraid to mix colors—sugar skulls are all about joyful, bold expression.
More Tutorials


