How to Draw a Demon Girl: Easy Step-by-Step Guide
Ready to create your own fantasy character? This tutorial is perfect for young artists ages 8+ looking to master stylized facial features and hair. Grab a pencil, eraser, and paper to follow along as we build this character from basic shapes to a finished illustration.
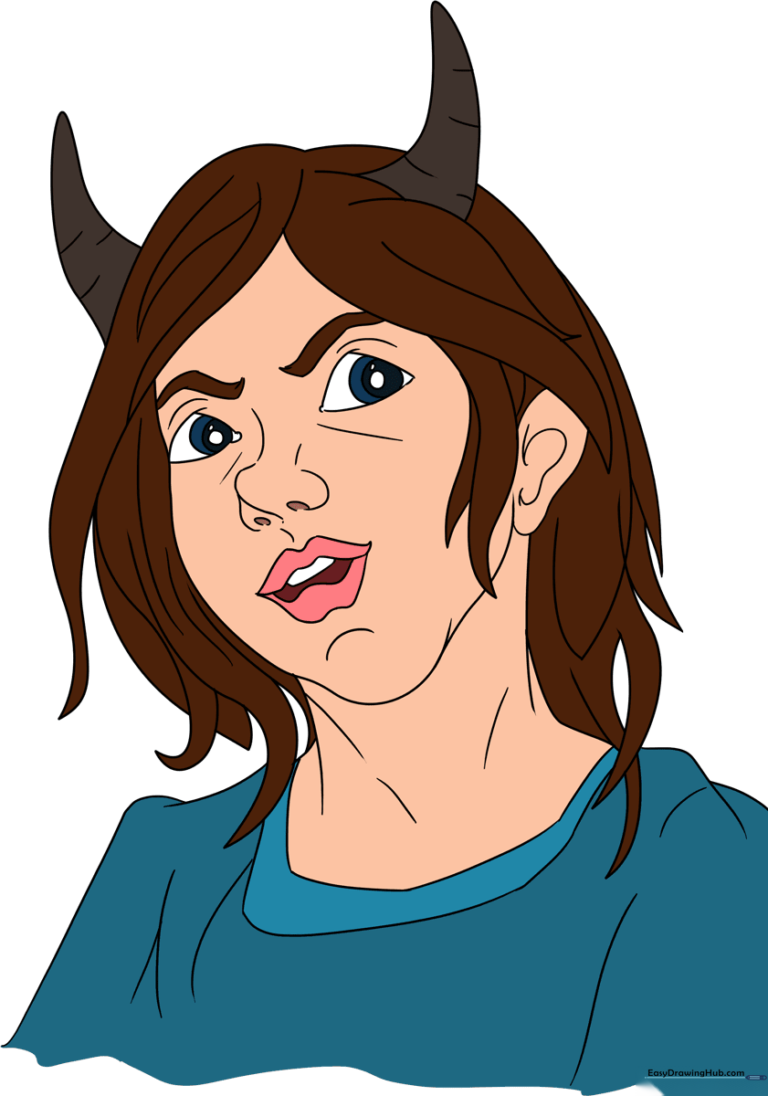
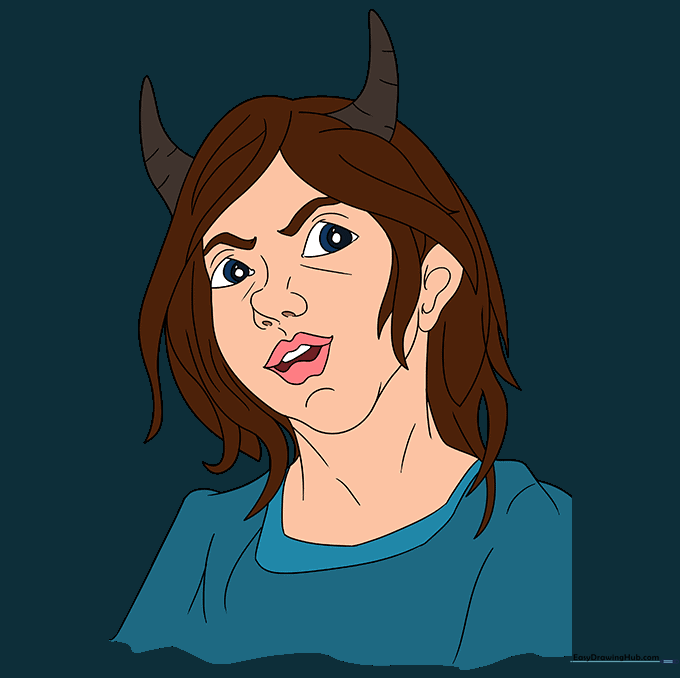
🎯 Final Result
Step-by-Step Instructions
Step 1: Sketching the Face Shape
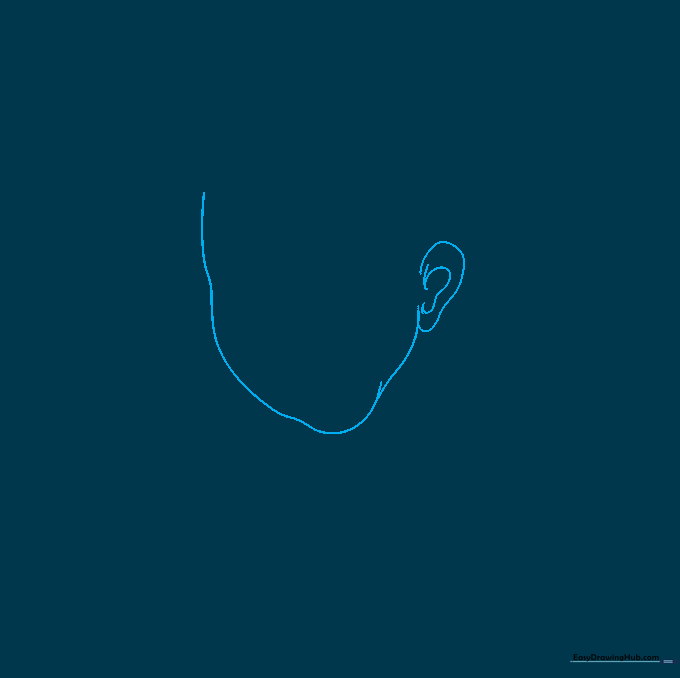
Begin by sketching the girl’s face. Use curved lines to draw the brow, cheek, chin, and ear. Teacher's Tip: Keep your pencil pressure light so you can easily adjust the chin shape if it looks too sharp or too round.
Step 2: Establishing the Hairline

Use long, curved lines that meet at points to draw the girl’s hair. Notice that locks of hair flow in both directions from the center. Tip: Think of these as 'V' shapes to give the hair a natural, spiky anime-inspired look.
Step 3: Adding Hair Layers and Neck
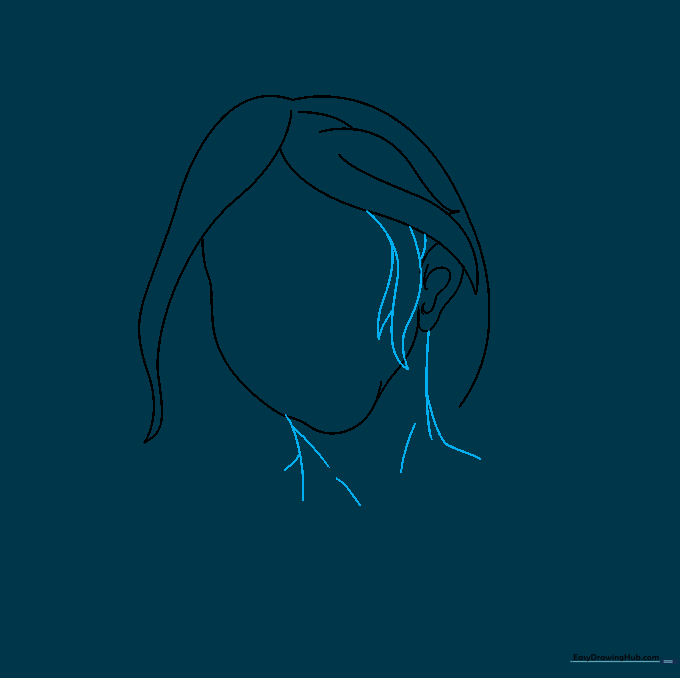
Draw more locks of hair crossing the face, then sketch the neck. Tip: Use overlapping curved lines for the neck to create a sense of depth and shadow, making the character look less flat.
Step 4: Drawing the Horns

Draw the iconic horns using two curved lines that meet at a gentle point. Tip: Try to make the horns symmetrical in size, but feel free to add a slight curve to give them personality.
Step 5: Framing the Shoulders
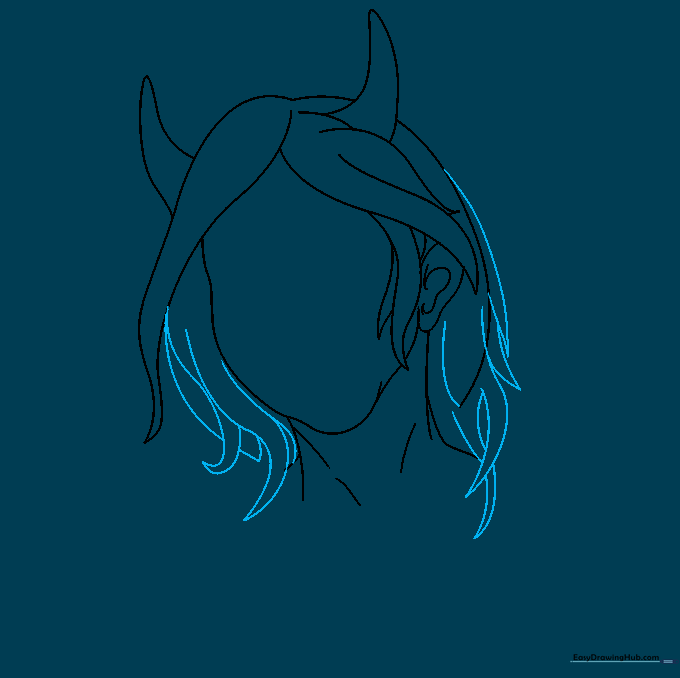
Draw more hair falling across the shoulders. Tip: Vary the length of the hair strands to make the drawing look more organic and less like a rigid shape.
Step 6: Detailing the Eyes
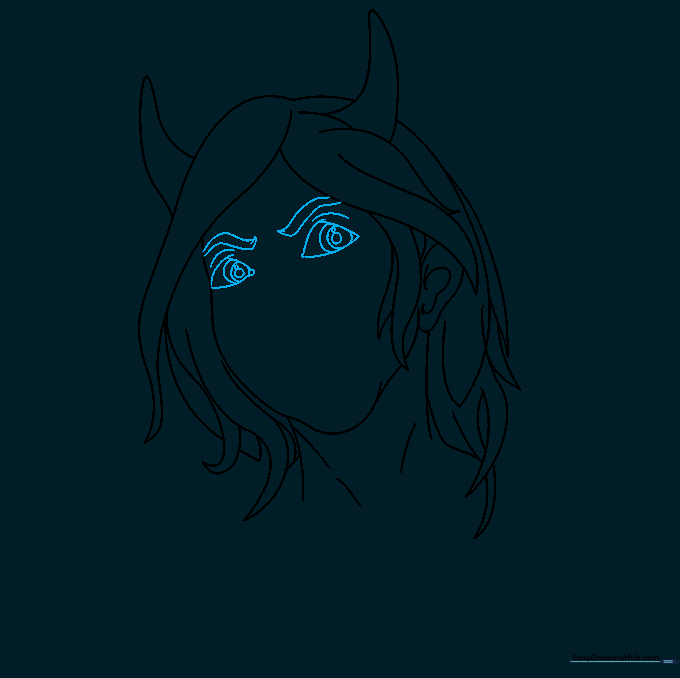
Outline a rounded triangular shape for the eyes and add smaller circles inside for the pupils. Add wavy brows above. Tip: Focus on keeping the eyes level with each other; this is the most important part of getting the character's expression right.
Step 7: Facial Features
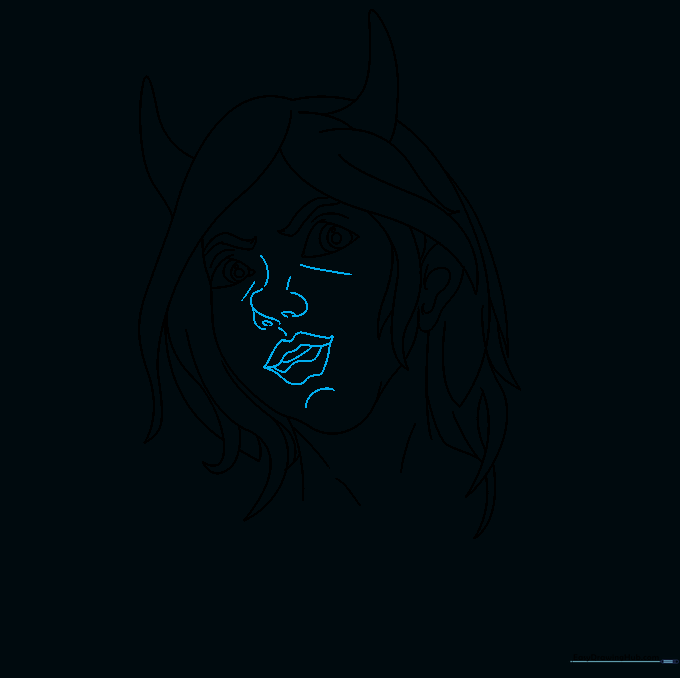
Use delicate curved lines to sketch the nose, mouth, and subtle lines below the eyes. Tip: Keep the mouth small and simple to maintain a clean, cartoon aesthetic.
Step 8: Clothing Details
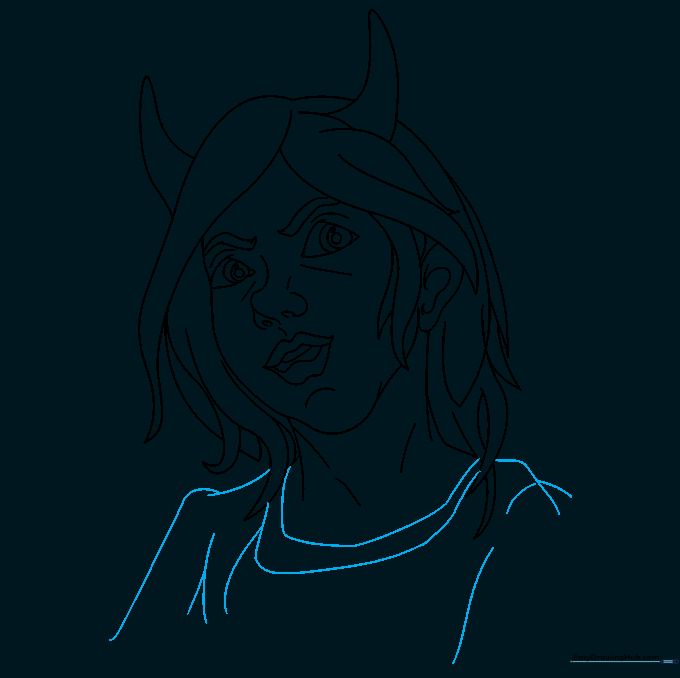
Sketch the shirt neckline and shoulders using overlapping lines. Tip: Use slightly thicker lines for the clothing to distinguish it from the hair and skin.
Step 9: Adding Texture
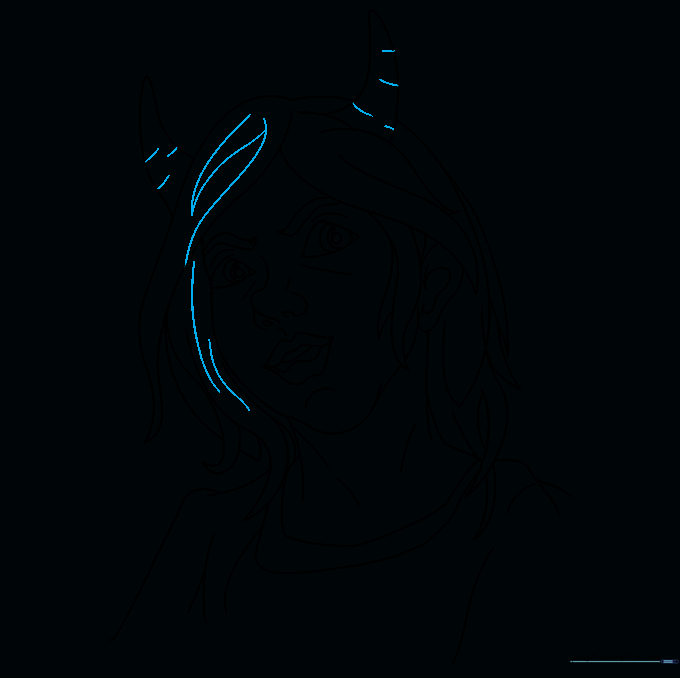
Add texture to the hair and horns with small, curved lines. Tip: These lines act as 'contour lines'—follow the curve of the horn to make it look 3D.
Step 10: Final Polish and Color
Erase any stray guidelines and add your favorite colors! Tip: Use a darker shade of your base color for the horns to give them a 'shadowed' effect.
More Tutorials


