How to Draw a Dead Flower: Easy 9-Step Art Guide
This tutorial is perfect for young artists ages 6+ looking to explore expressive, slightly moody nature art. You will only need a pencil, an eraser, and a piece of paper to bring this wilting flower to life. By following these steps, you'll master how to draw organic, drooping shapes that add character to your sketchbook.
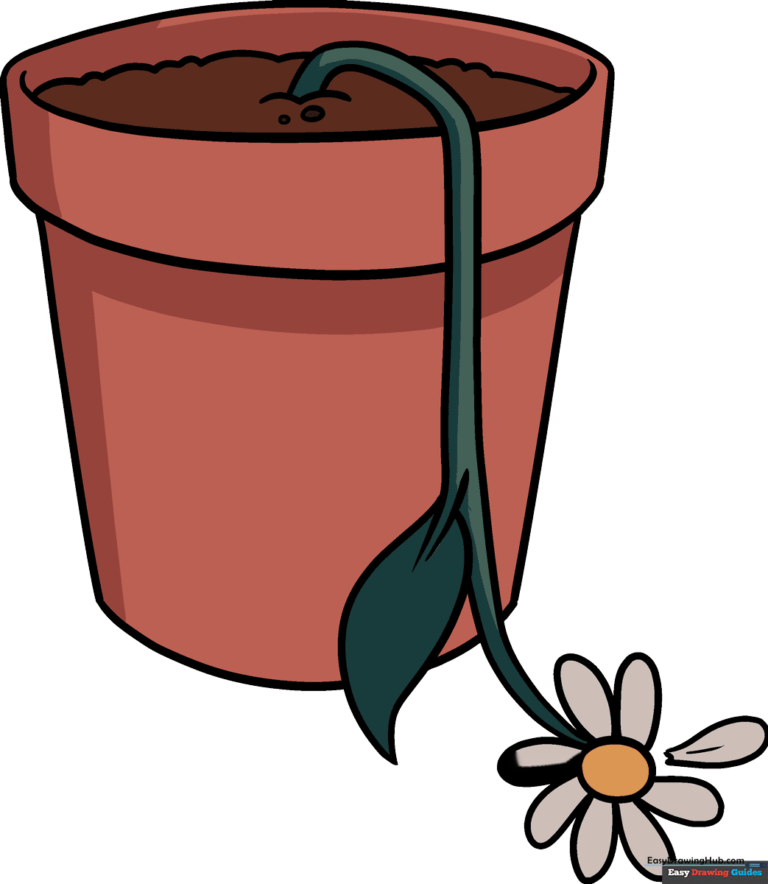
🎯 Final Result
Step-by-Step Instructions
Step 1: Sketching the Pot Rim

Draw two horizontal curved lines and connect them with short vertical lines to create a blunt oval. Teacher's Tip: Keep your pencil pressure light so you can easily adjust the shape if it looks a bit lopsided!
Step 2: Defining the Pot Base
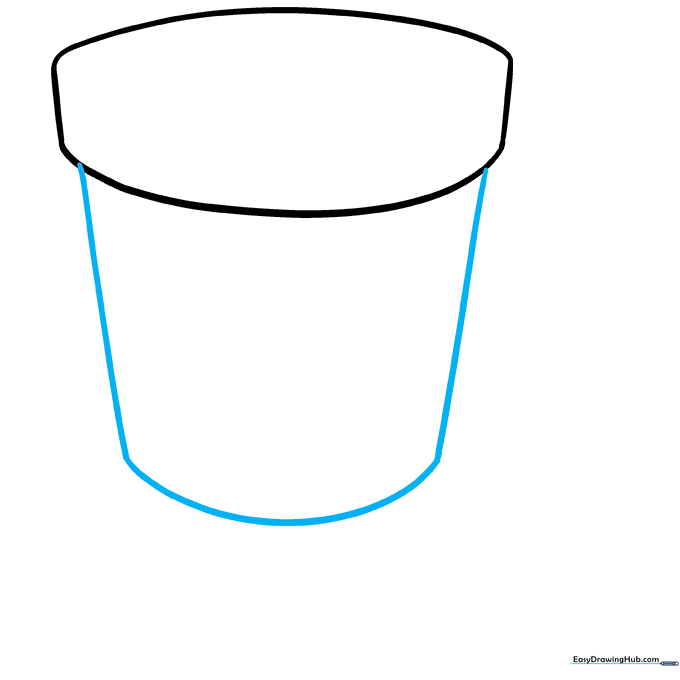
Draw two straight lines downward from the rim and connect them with a gentle curve at the bottom. Teacher's Tip: Imagine the pot is a sturdy container; keep the sides straight to give it a solid, grounded look.
Step 3: Adding Soil Texture
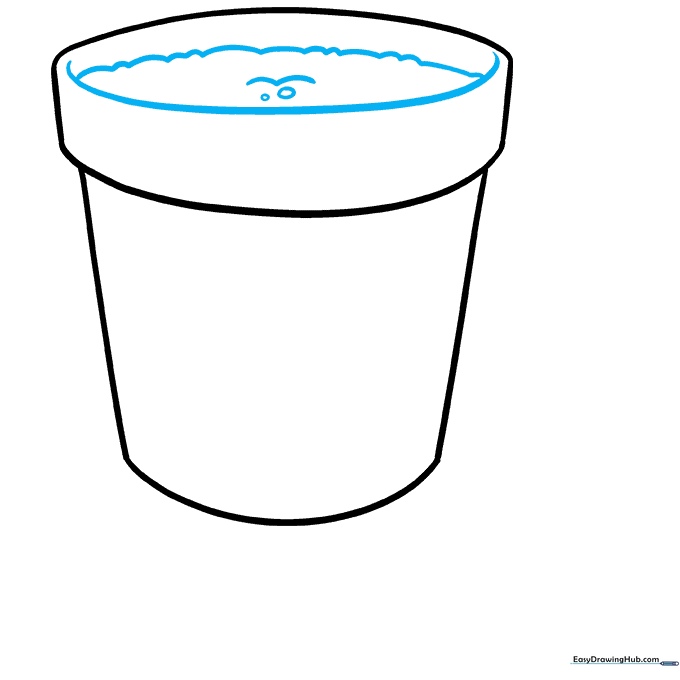
Draw a curved line inside the rim to show the soil level. Add small ovals and dashes to create a bumpy, realistic dirt texture. Teacher's Tip: Don't make the ovals too uniform—dirt is naturally messy and uneven!
Step 4: Sketching the Drooping Stem
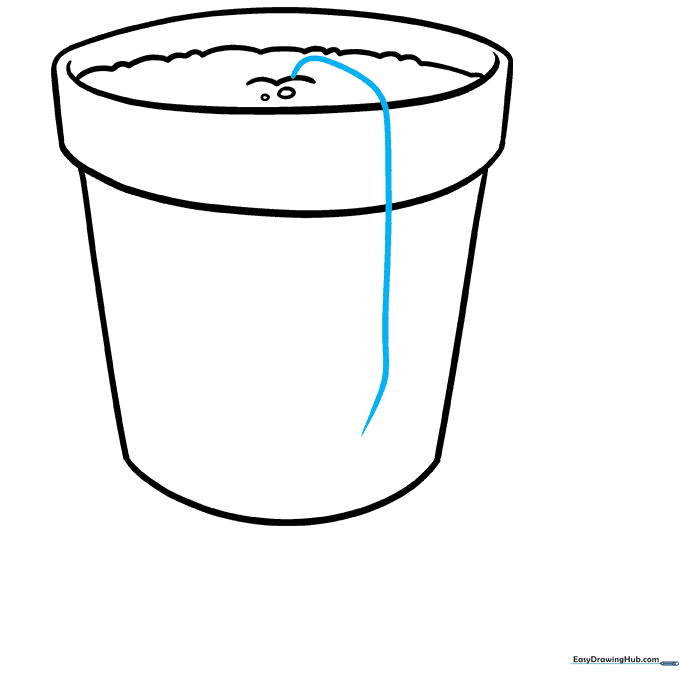
Extend a long, graceful curved line from the center of the soil. This will be the main stem hanging over the pot. Teacher's Tip: Use a fluid motion with your wrist to get that natural, wilting curve.
Step 5: Forming the Leaf
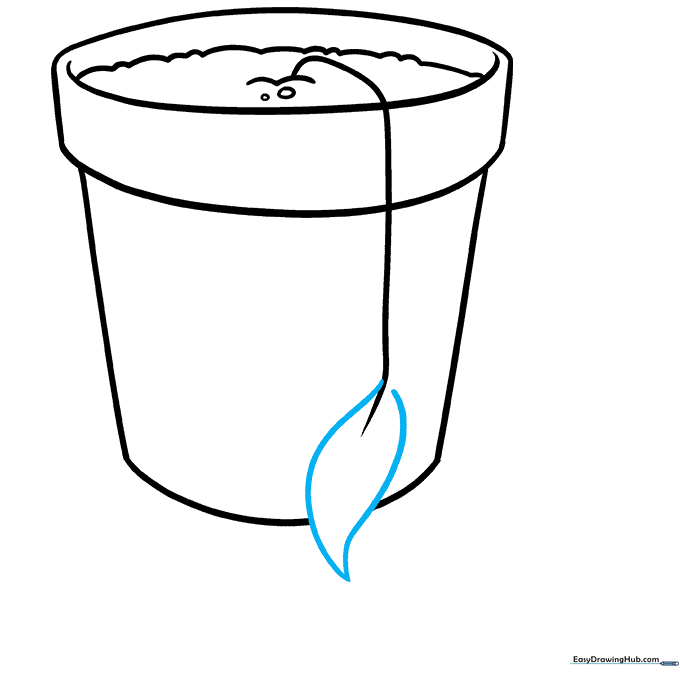
Draw a leaf shape around the end of your stem line using two curved lines that meet at a sharp point. Teacher's Tip: Think of a teardrop shape—it’s the perfect base for a leaf.
Step 6: Refining the Stem
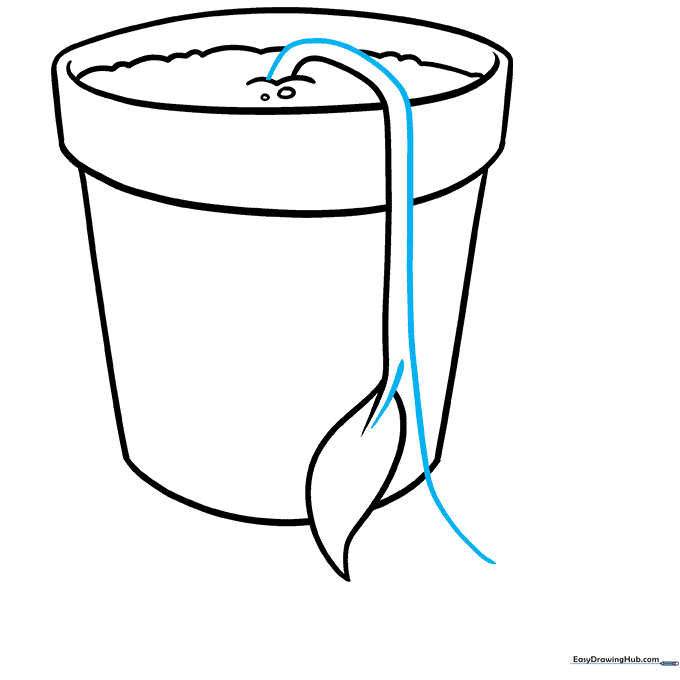
Draw a second line parallel to the first to give the stem thickness. Erase any overlapping lines inside the stem to make it look clean. Teacher's Tip: Keep the stem slightly thinner near the flower head for a realistic look.
Step 7: The Flower Center
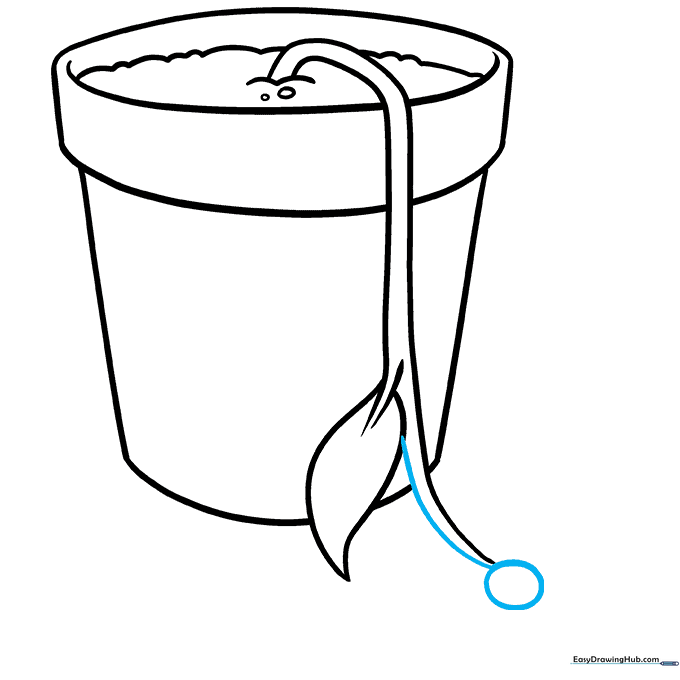
Extend the stem line to the tip and draw a small circle at the end. This is the center of your flower. Teacher's Tip: Don't worry about making the circle perfect; a slightly wobbly circle adds to the 'dead' or wilting aesthetic.
Step 8: Adding Petals
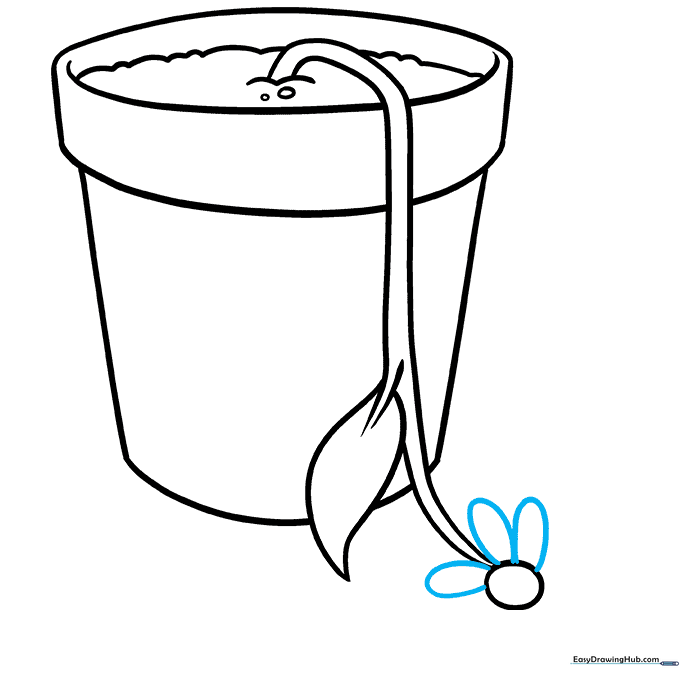
Draw several 'U' shaped petals around the center circle. Teacher's Tip: Vary the size of your 'U' shapes to make the flower look more natural and less like a rigid cartoon.
Step 9: Final Details
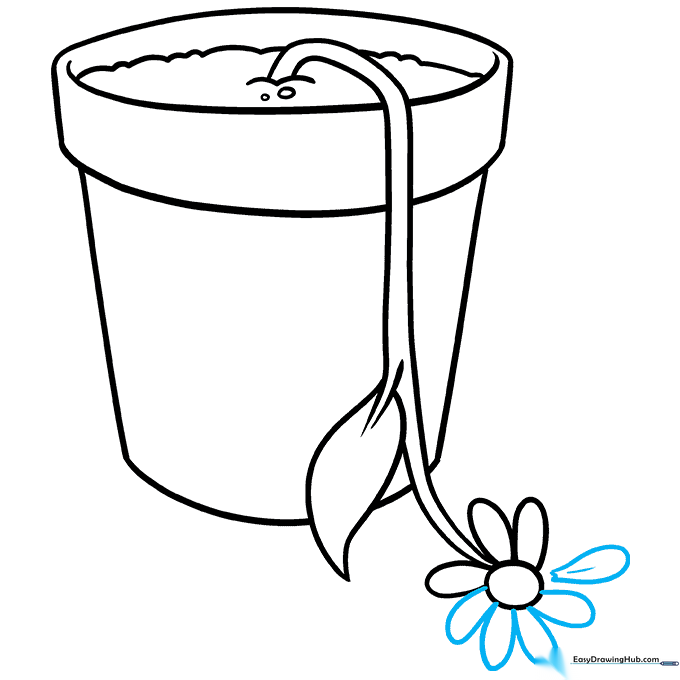
Finish the last petal with a small zig-zag line to show it’s wilting. Add a tiny curved line inside that petal for extra detail. Teacher's Tip: This final touch really sells the 'withered' look!
Step 10: Bringing it to Life with Color
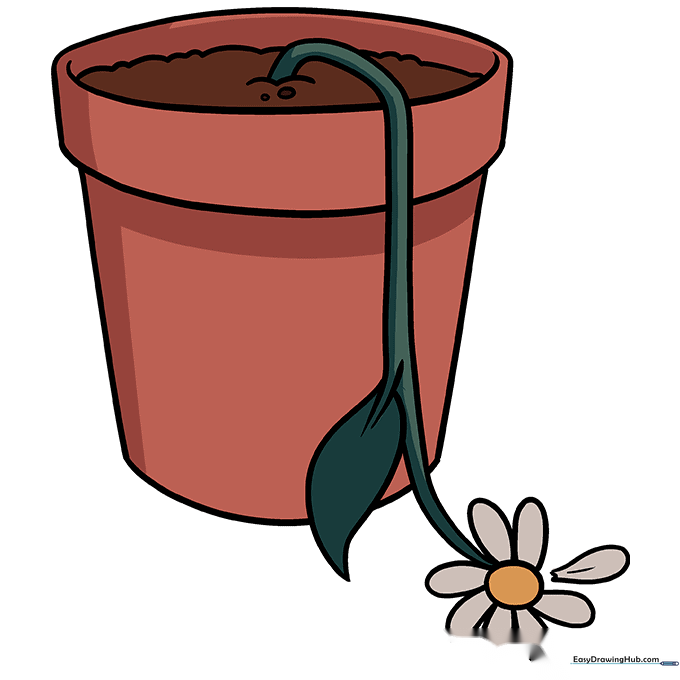
Time to color! Use earthy tones like terra cotta for the pot, and muted yellows or oranges for the flower to emphasize the theme. Teacher's Tip: Use light pressure with your colored pencils to create soft, faded shades.
More Tutorials


