How to Draw a Dancing Skeleton: Easy 9-Step Guide
Bring a spooky character to life with this fun, rhythmic drawing project. Perfect for artists ages 6 and up, this guide requires only a pencil, paper, and an eraser. Follow along to master basic skeletal proportions while creating a lively, dancing pose.
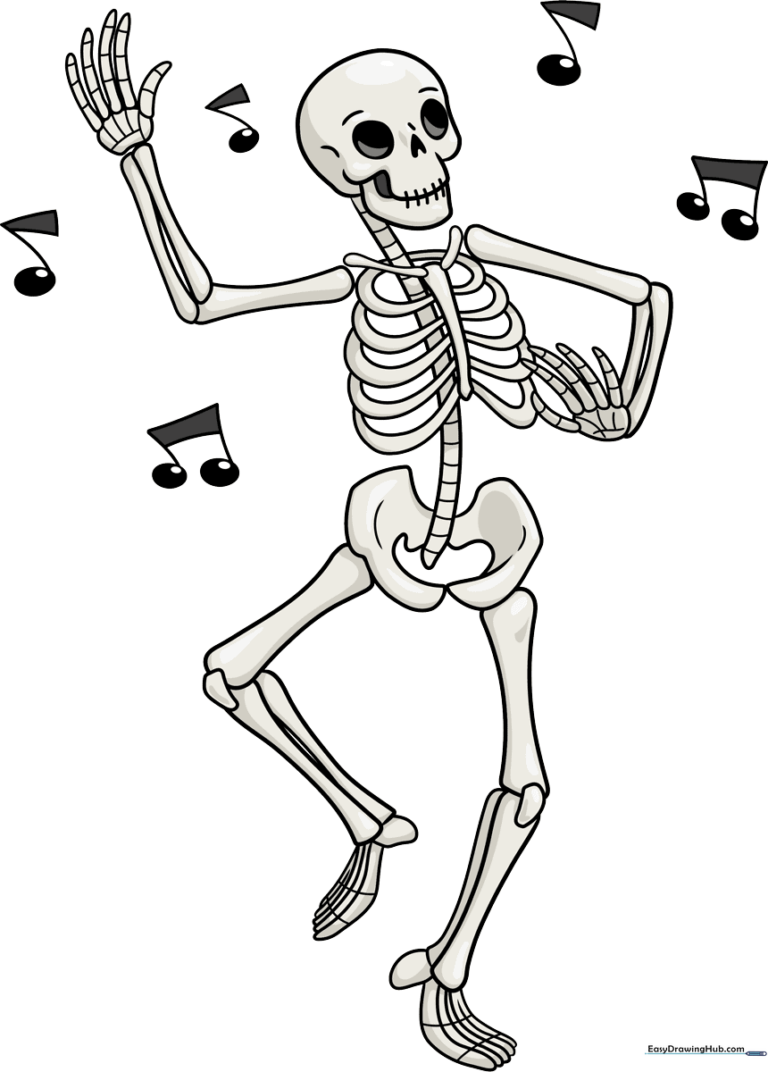
🎯 Final Result
Step-by-Step Instructions
Step 1: Sketching the Skull
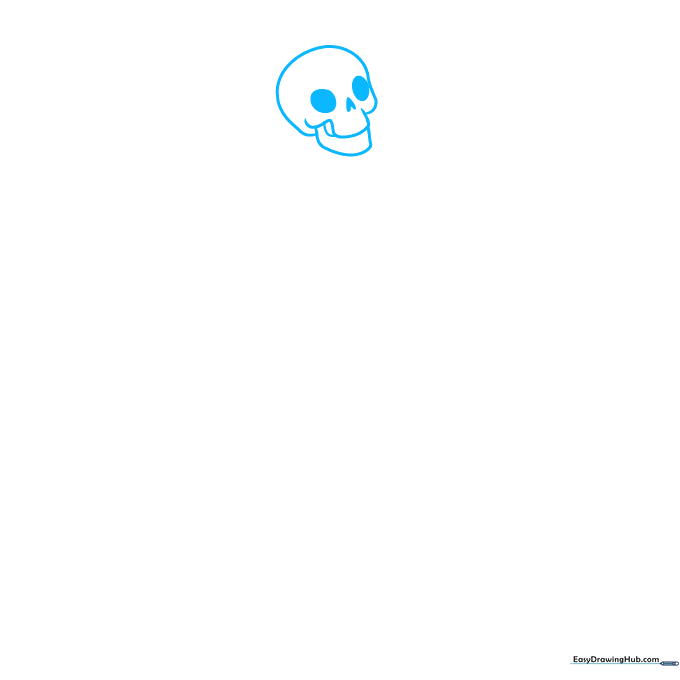
Draw two ovals for eye sockets and an upside-down heart for the nose near the top of your page. Add a semi-circle above for the cranium and a rectangular jawbone below. Teacher's Tip: Keep the jaw slightly open to give your skeleton a friendly, singing expression.
Step 2: Adding the Neck and Ribcage
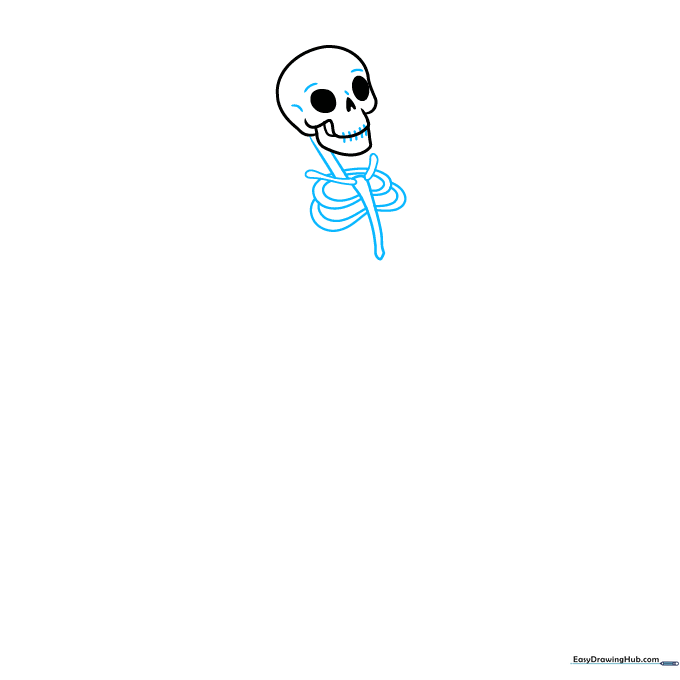
Sketch two vertical lines for the neck, followed by a narrow tube for the breastbone. Add small, curved 'noodle' shapes for the collarbones and rib arches. Teacher's Tip: Don't worry about perfect anatomy; focus on creating a balanced, symmetrical frame.
Step 3: Shaping the Arms
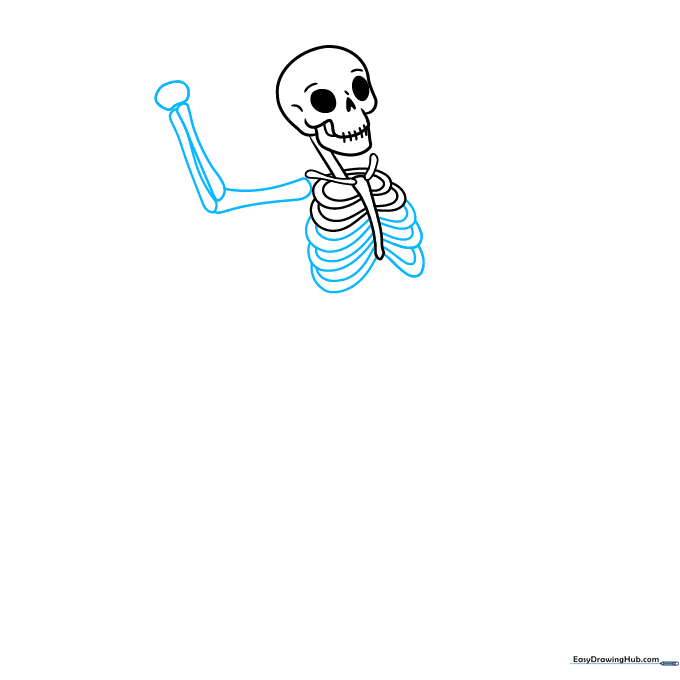
Draw six ribs on each side, then sketch a curvy rectangle for the upper arm. Use wavy lines to create the forearm, resembling thin twigs. Teacher's Tip: Use a light touch here—the more 'wavy' the lines, the more animated your skeleton will look.
Step 4: Drawing the Hands
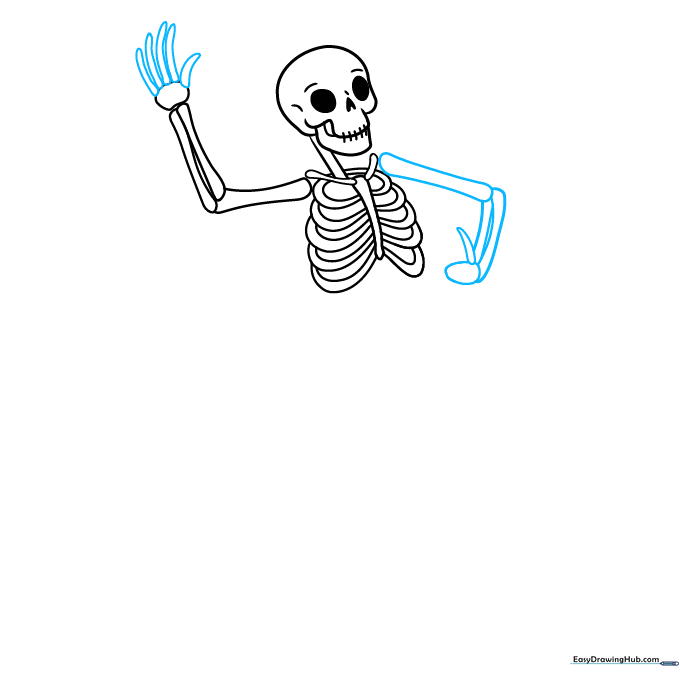
Sketch five fingers using long, narrow triangles attached to a semi-oval palm. Repeat this for the other arm, ensuring the thumb is positioned correctly. Teacher's Tip: Keep the fingers slightly spread to emphasize the 'dancing' movement.
Step 5: The Spine and Pelvis
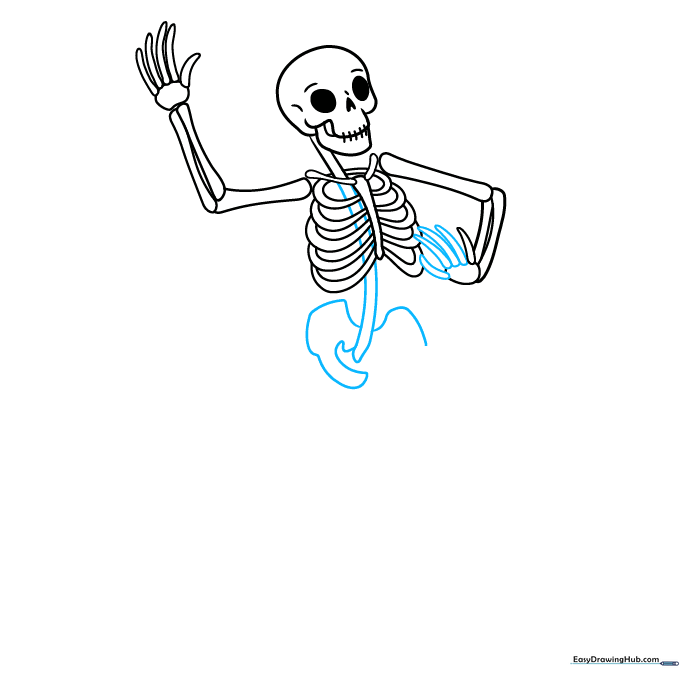
Draw two curved lines for the spine, then build the pelvis using triangles and rounded rectangles. Teacher's Tip: The pelvis is the center of gravity; make sure it's tilted to match the angle of your skeleton's dance move.
Step 6: Forming the Legs
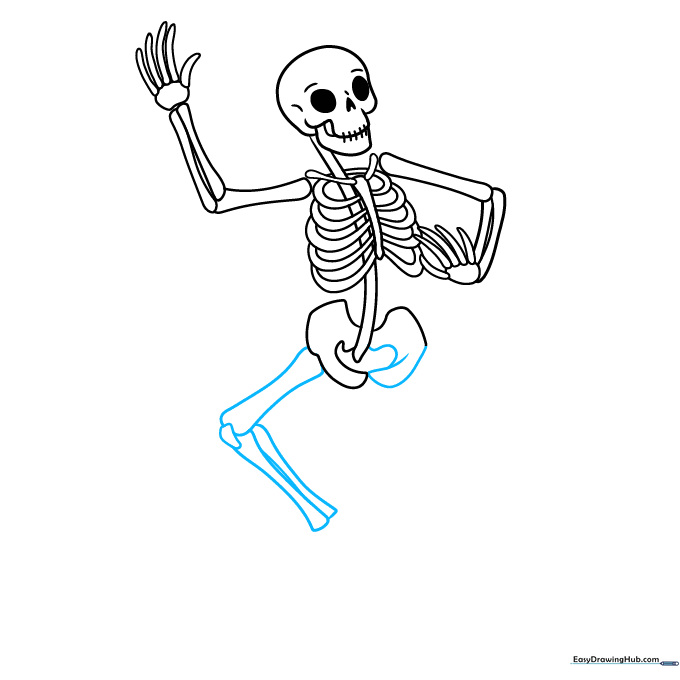
Complete the pelvis with a semi-heart shape. Draw the legs using long, noodle-like segments and add an oblong shape for the kneecap. Teacher's Tip: Vary the length of the leg segments to create a natural-looking bend at the knee.
Step 7: Drawing the Feet
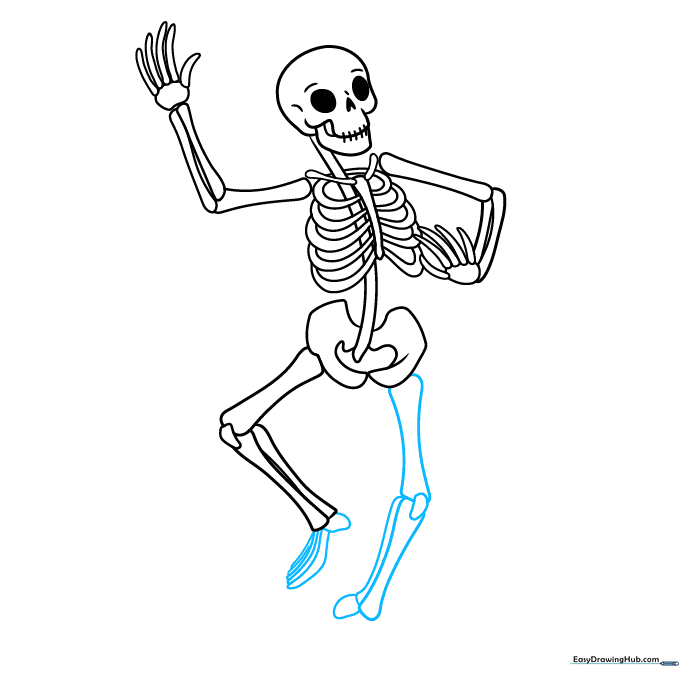
Sketch the heel with an uneven oval, then add five narrow, overlapping banana shapes for the toes. Repeat for the second leg. Teacher's Tip: Overlapping shapes create depth, making the feet look like they are planted on the floor.
Step 8: Adding Texture Details
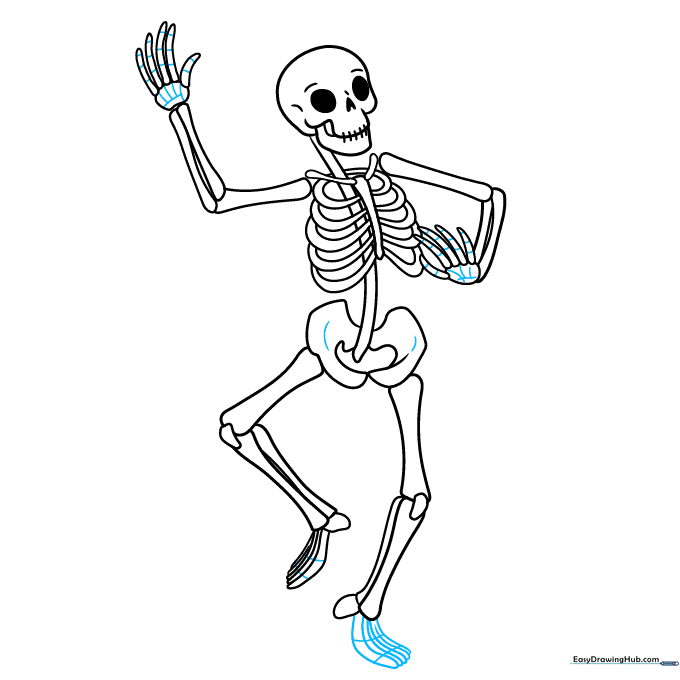
Add small lines across the feet and dashes inside the hands and pelvis to suggest bone texture. Teacher's Tip: Use short, quick strokes to keep the texture looking light and 'bony' rather than heavy.
Step 9: Final Touches and Inking
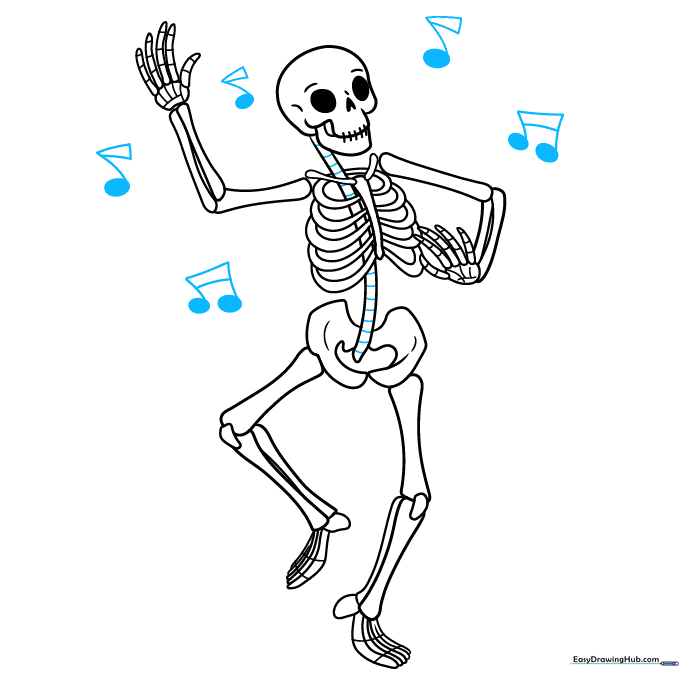
Scatter music notes around your skeleton to complete the scene. Outline everything in black ink, then erase your pencil marks. Teacher's Tip: Ensure your ink is completely dry before erasing to prevent smudging.
Step 10: Adding Color and Shade
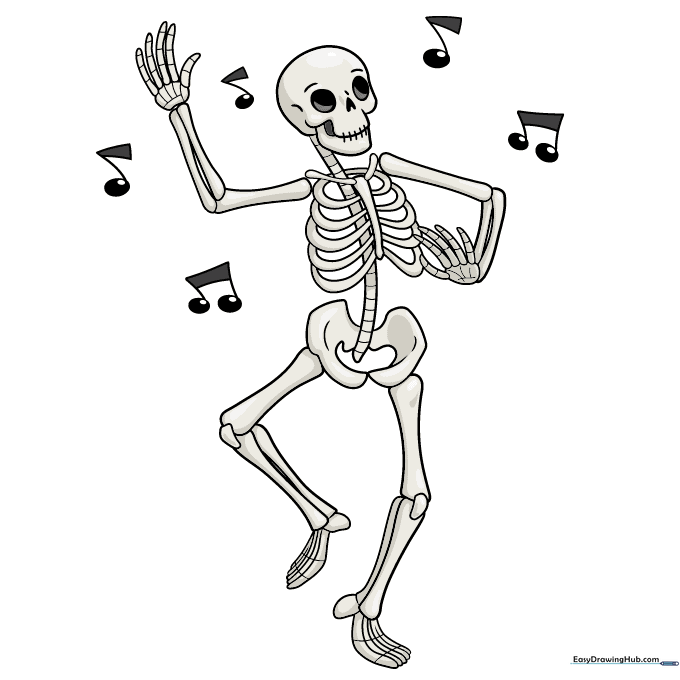
Use light gray for the bones and dark gray for the music notes. Add white highlights to the notes for a polished look. Teacher's Tip: Use a blending stump or your finger to soften the gray shading for a more realistic, aged bone effect.
More Tutorials


