How to Draw a Dancing Girl: Easy 9-Step Guide
Bring movement and joy to your sketchbook with this fun dancing girl tutorial. Designed for ages 6 and up, this project uses basic shapes to build a dynamic character. All you need is a pencil, an eraser, and your favorite coloring supplies to get started.
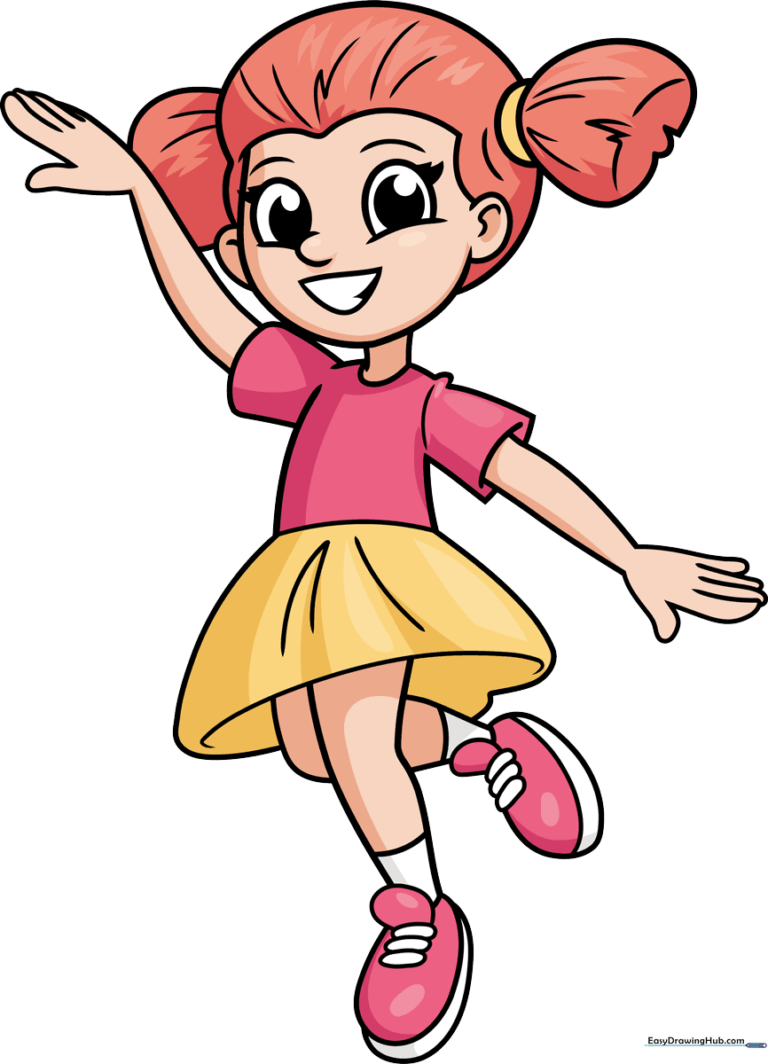
🎯 Final Result
Step-by-Step Instructions
Step 1: Sketching the Face
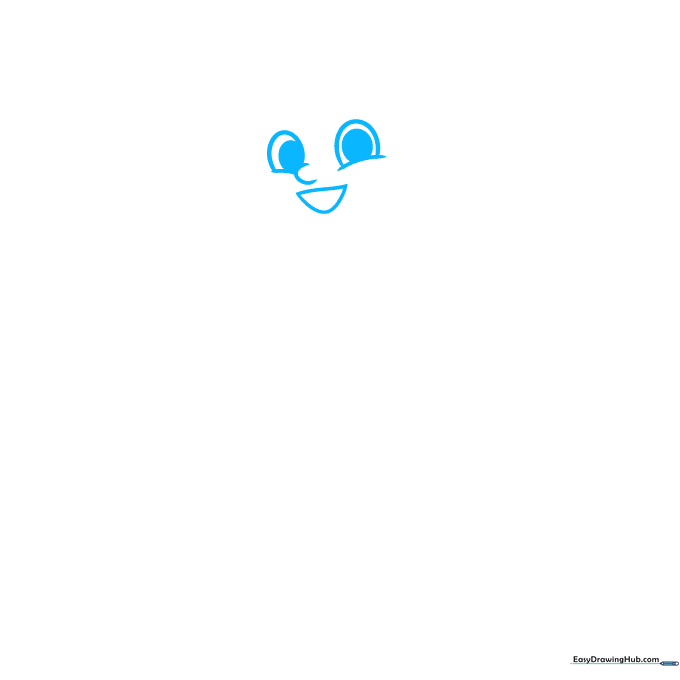
Start by drawing a rounded shape for the head. Add two small circles for the eyes and a simple curved line for a happy, smiling mouth. Teacher's Tip: Keep the face shape light and loose; it’s easier to refine the chin later if you don't press too hard.
Step 2: Defining the Face Shape
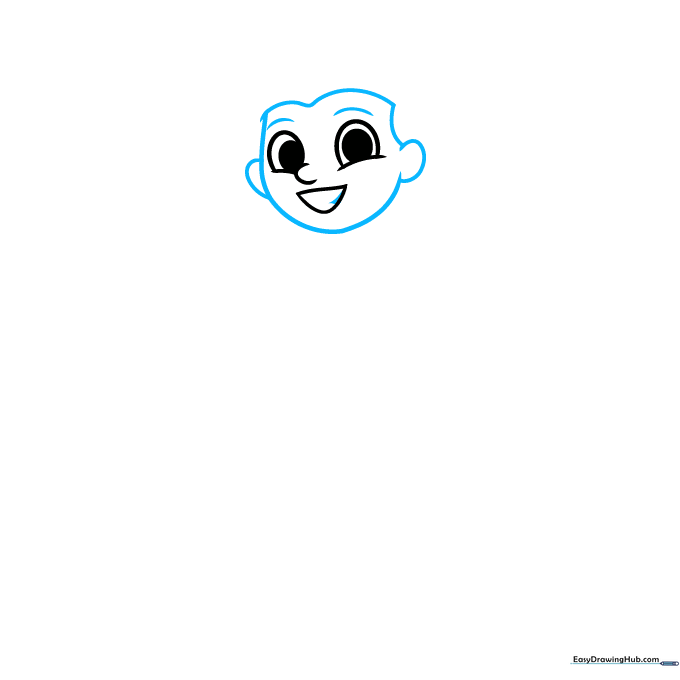
Use smooth, overlapping curved lines to define the cheeks and ears. Add small arches for the eyebrows. Teacher's Tip: Use short, quick strokes for the eyebrows to give them a natural, expressive look.
Step 3: Adding the Pigtails
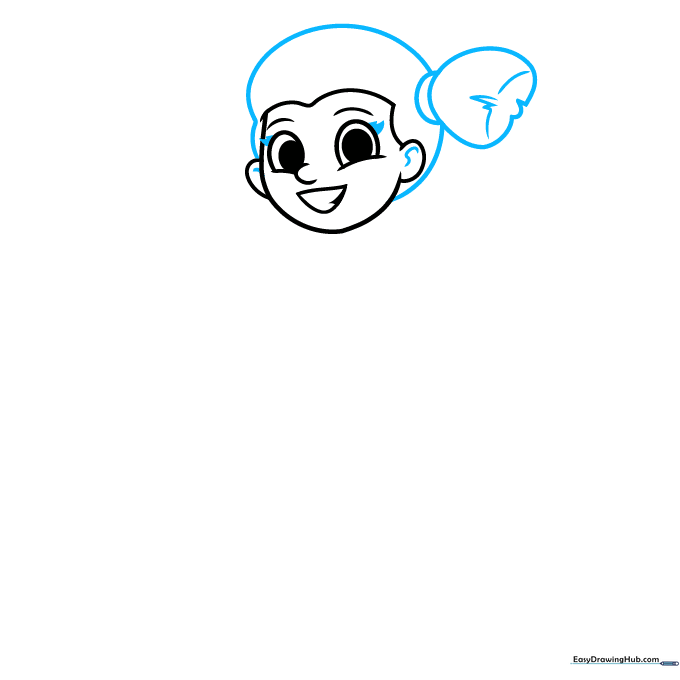
Draw the pigtails using jagged, irregular lines to create a bouncy hair texture. Add small circles for the hair ties. Teacher's Tip: Don't worry about making the hair perfectly symmetrical; hair naturally flows in different directions!
Step 4: Sketching the Neck and Arms
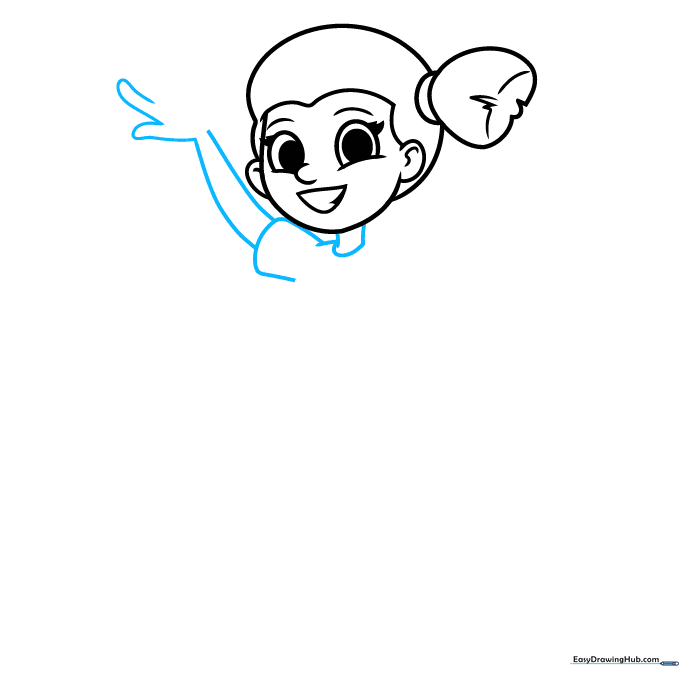
Extend two lines downward for the neck, connecting them with a U-shape. Sketch the shoulders and arms in a raised position. Teacher's Tip: Keep the arms slightly curved to show movement, as if she is mid-dance.
Step 5: Finishing the Arms
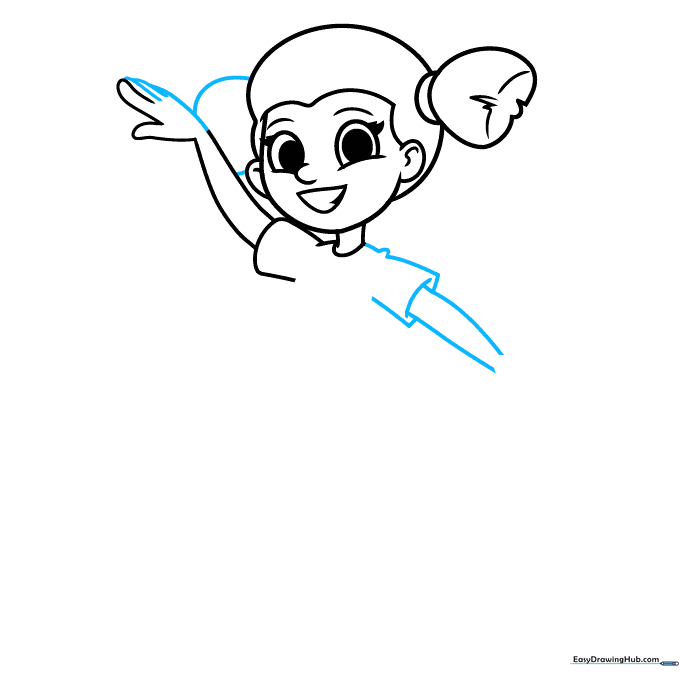
Complete the hands using small, overlapping curves for fingers. Add the second ponytail on the opposite side. Teacher's Tip: If drawing fingers is tricky, keep them as simple rounded shapes for now.
Step 6: Drawing the Torso
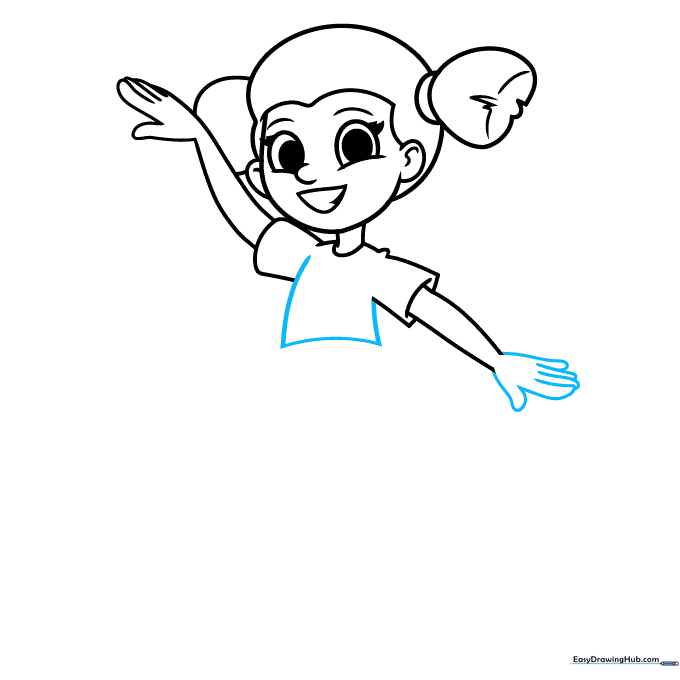
Draw a rectangular shape for the torso to connect the arms to the skirt. Teacher's Tip: Ensure the torso is centered so your dancer looks balanced and ready to spin!
Step 7: Adding the Skirt and Leg
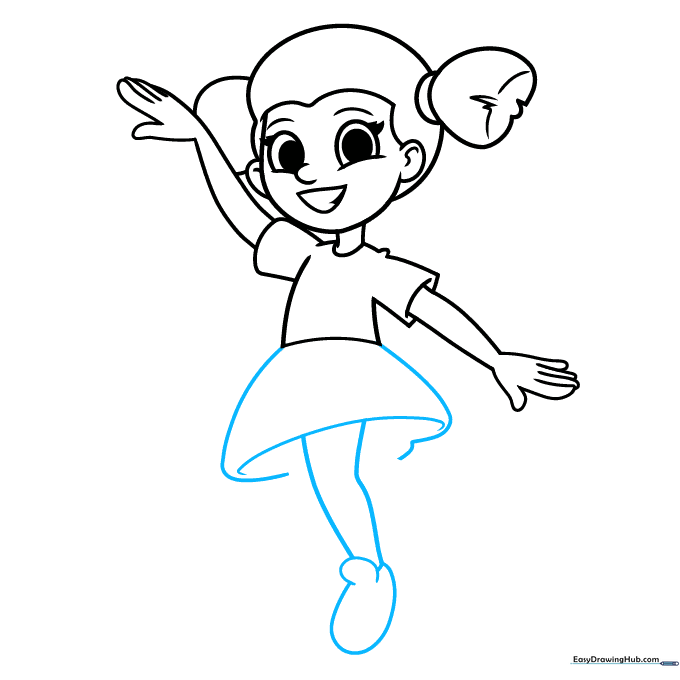
Extend two long lines from the torso to create a flared skirt. Add one leg extending downward with a simple shoe at the end. Teacher's Tip: Use a 'C' shape for the bottom of the skirt to give it a sense of volume.
Step 8: The Second Leg
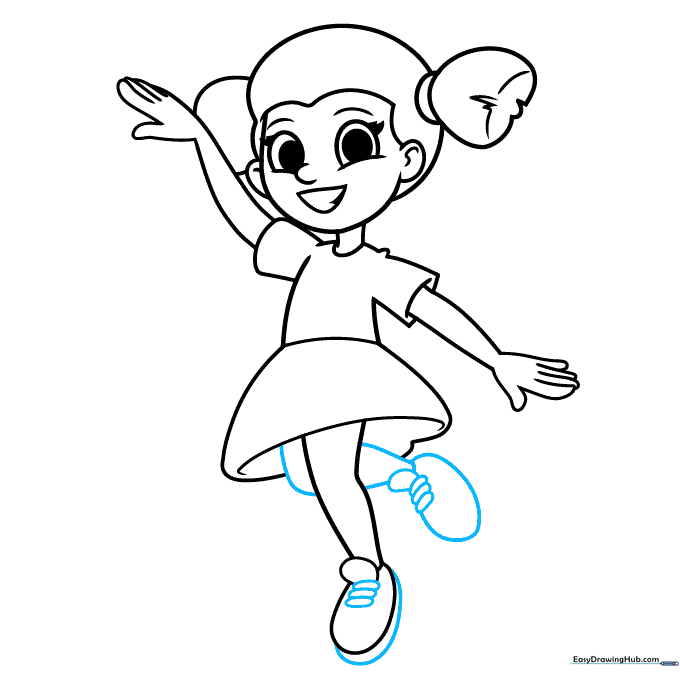
Draw the second leg in a bent position to show she is dancing. Add details like laces to the shoes. Teacher's Tip: Drawing the leg bent adds 'action' to your character, making it look like she is mid-twirl.
Step 9: Final Details
Add socks, shoe soles, and texture lines to the skirt and sleeves. Teacher's Tip: Use light, quick strokes to add fabric folds to the skirt, which makes the drawing look more realistic.
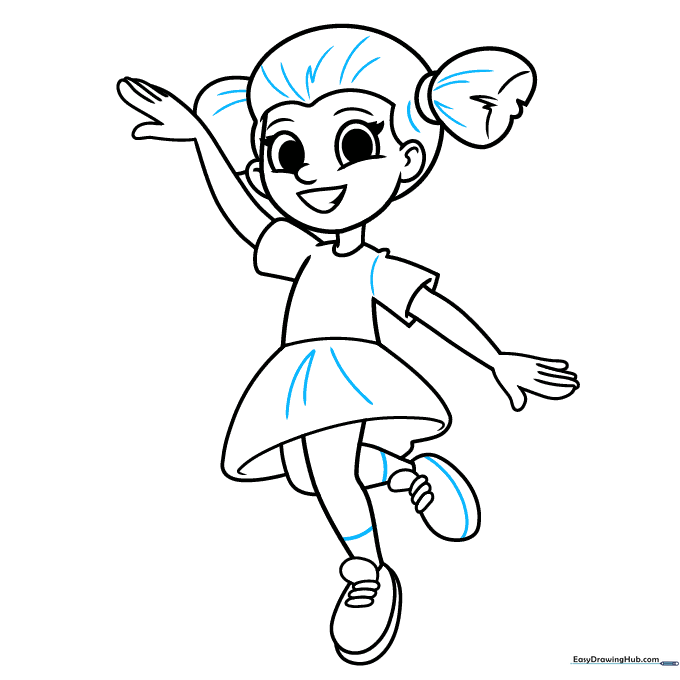
Step 10: Color Your Creation
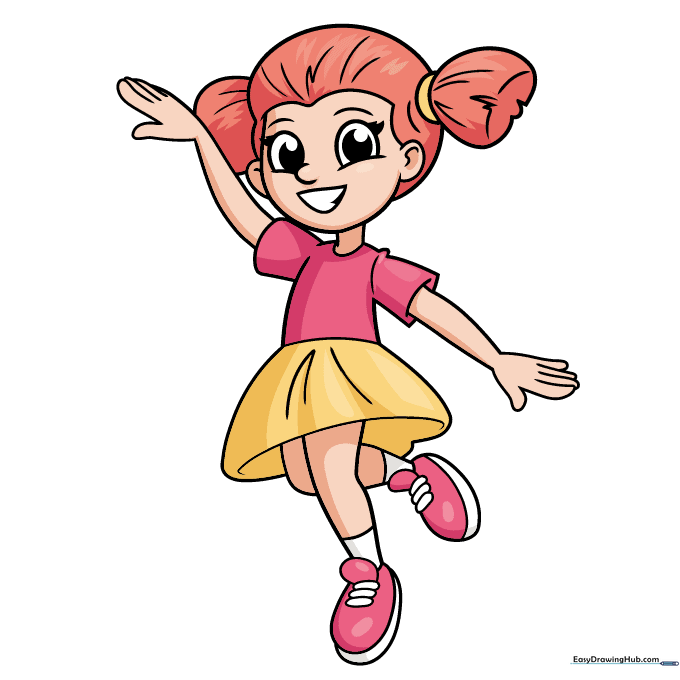
Your outline is complete! Now, bring your dancer to life with your favorite colors. Teacher's Tip: Use bright colors for the skirt to emphasize the fun, energetic theme of the dance.
More Tutorials


