How to Draw a Dagger: Easy 10-Step Guide for Beginners
Ready to add some adventure to your sketchbook? This tutorial is perfect for young artists ages 7+ looking to master symmetrical shapes and sharp lines. All you need is a pencil, an eraser, and a piece of paper to bring this legendary blade to life.
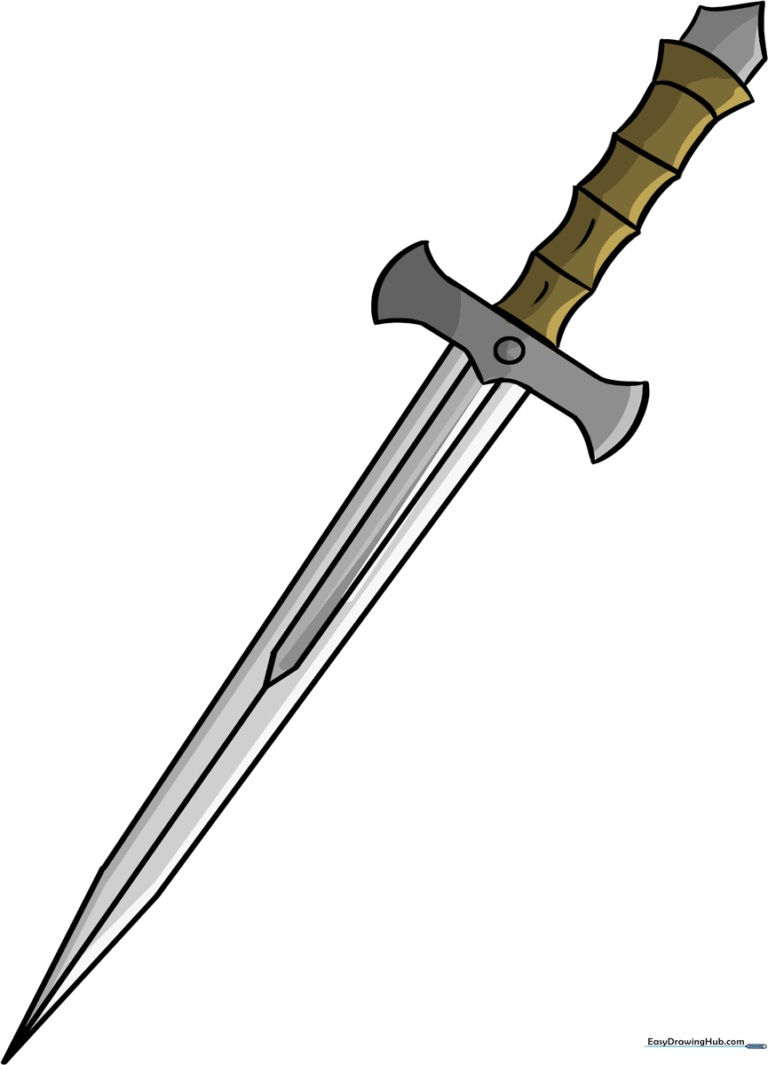
🎯 Final Result
Step-by-Step Instructions
Step 1: Sketching the Handle Base

Draw two square shapes stacked diagonally. Tip: Keep your pencil pressure light so you can easily adjust the alignment if the handle starts to lean too far!
Step 2: Extending the Grip
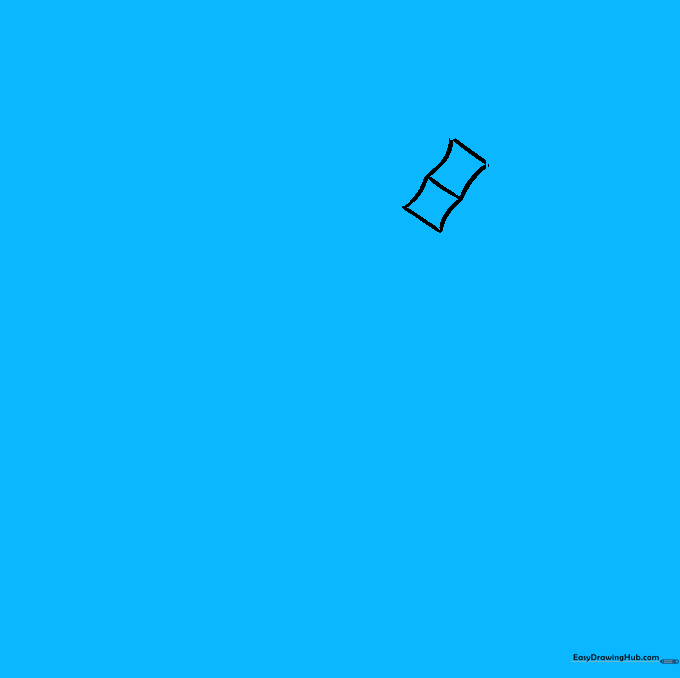
Add two more squares with slightly concave sides on top of the first set. Tip: Use short, rhythmic curved lines to give the handle a textured, ergonomic look.
Step 3: Crafting the Pommel

Draw a small parallelogram at the end of the handle, topped with a pentagon. Tip: This is the pommel, the counterweight that balances the blade—make sure it's centered!
Step 4: Defining the Crossguard

Sketch a rectangle at the base of the handle. Tip: This is the crossguard, which protects the user's hand. Keep the lines straight and parallel to the handle's base.
Step 5: Shaping the Guard
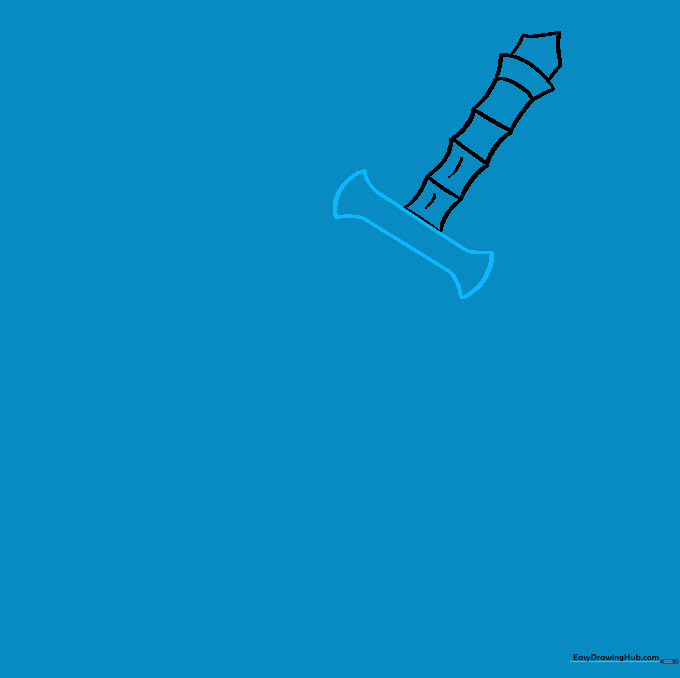
Erase the outer ends of the rectangle and replace them with smooth, sweeping curves. Tip: Imagine the guard is like a pair of wings extending from the handle.
Step 6: Adding Decorative Details
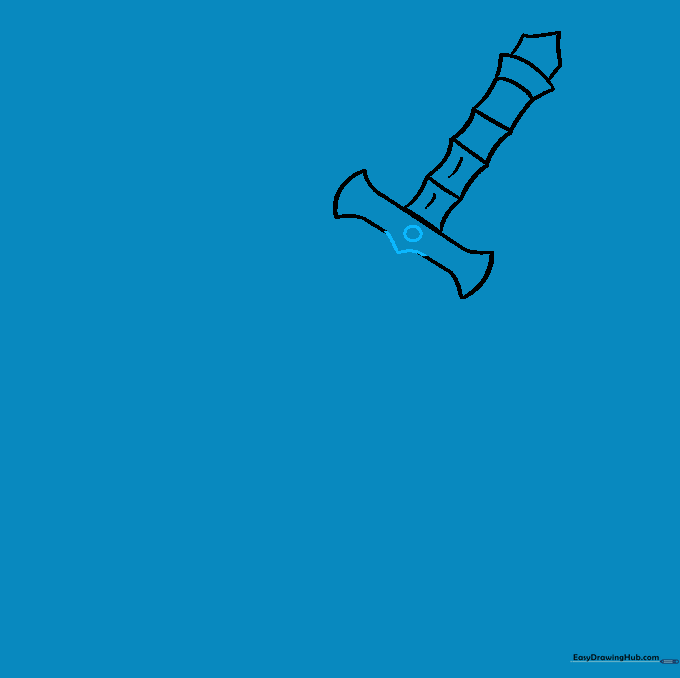
Erase the center of the guard and draw a point with a small circle beneath it. Tip: This adds a 'jewel' effect—great for fantasy-themed drawings!
Step 7: Drawing the Blade
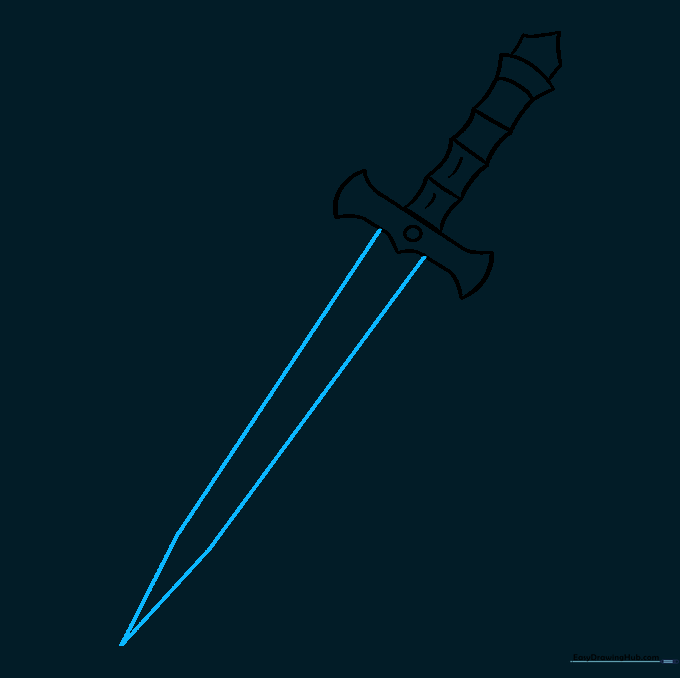
Extend two long lines from the guard, angling them inward to meet at a sharp point. Tip: Use a ruler if you struggle with straight lines, but try freehand for a more organic feel.
Step 8: Adding the Fuller
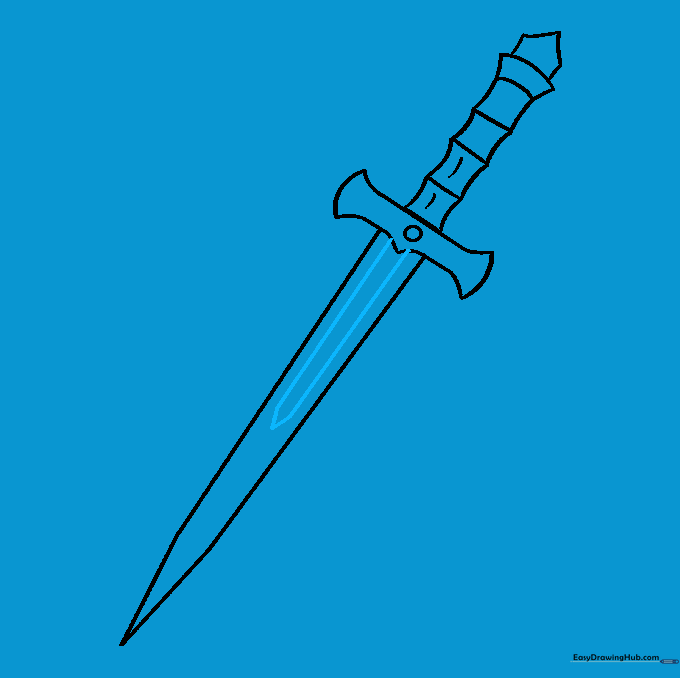
Draw a narrow, pointed shape inside the blade. Tip: This is called the 'fuller' or blood groove. It adds depth and makes your drawing look much more professional.
Step 9: Finalizing the Blade

Draw a single straight line from the tip of the fuller to the tip of the blade. Tip: This creates a sharp edge, making the blade look ready for action.
Step 10: Color and Character
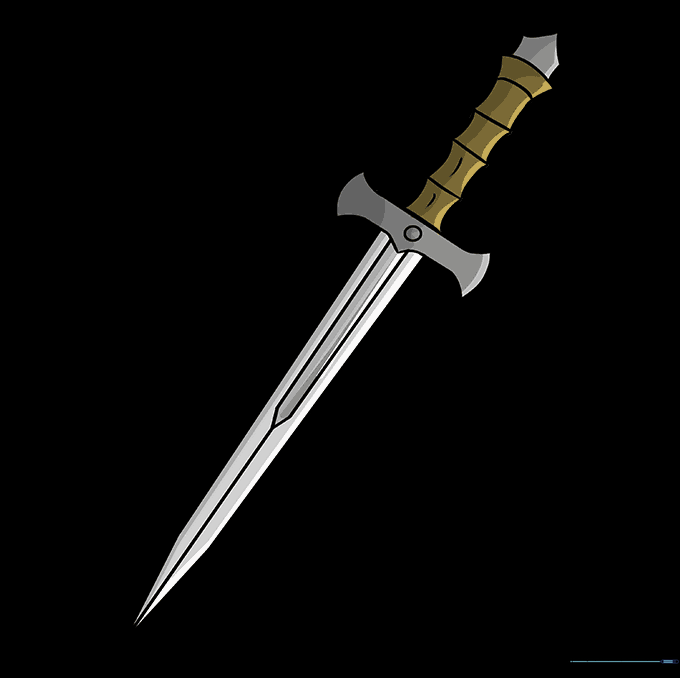
Add your favorite colors! Use metallic grays for the blade and rich browns or golds for the handle. Tip: Once finished, try drawing a ninja or knight to hold your new creation!
More Tutorials


