How to Draw a Cute Lion: Easy Step-by-Step Guide
Bring the king of the jungle to life with this friendly lion drawing tutorial, perfect for artists ages 5 and up. You will only need a pencil, an eraser, and a piece of paper to get started. Follow these simple steps to build confidence and develop your character-drawing skills.
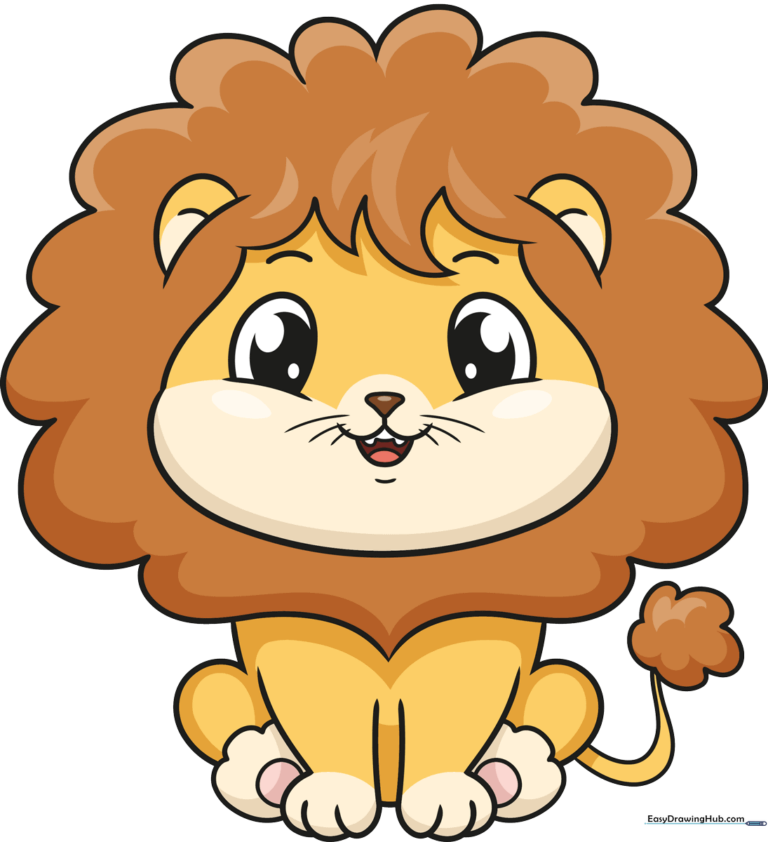
🎯 Final Result
Step-by-Step Instructions
Step 1: Sketching the Expressive Eyes
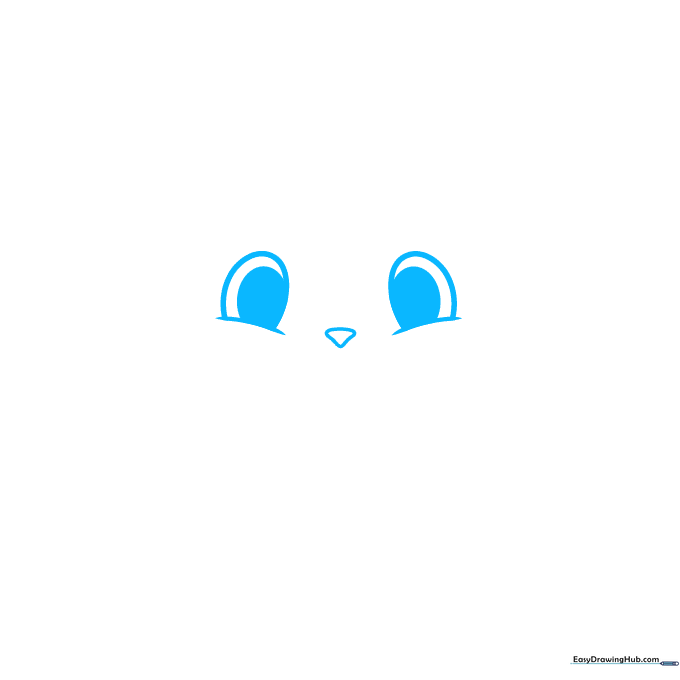
Start by drawing two curved lines for the upper eyelids, then add an oval on top of each. Shade in a smaller oval inside for the pupils. Place a small inverted triangle between the eyes for the nose. Teacher's Tip: Keep the eyes close together to make your lion look extra friendly and cute!
Step 2: Adding the Happy Mouth
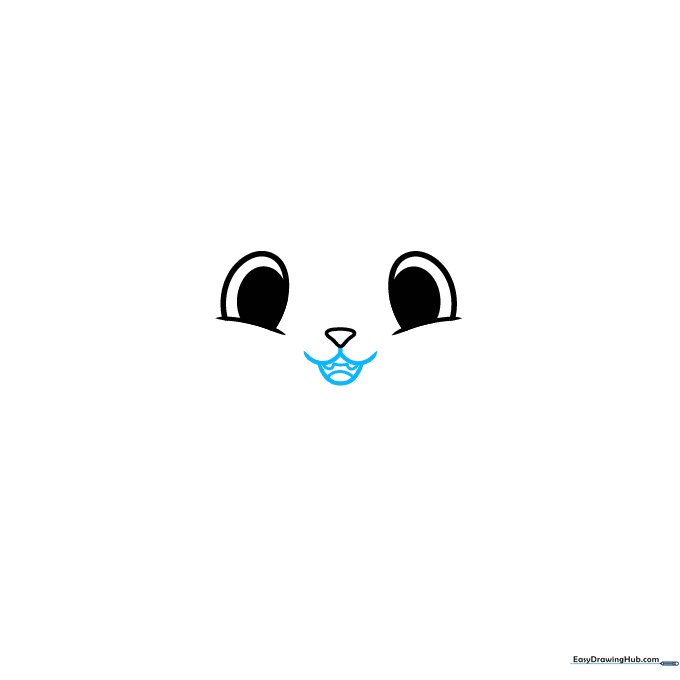
Draw a wide 'W' shape under the nose, followed by a 'U' curve for the chin. Add two small fangs and a tongue inside. Teacher's Tip: Use short, quick strokes for the teeth to keep them looking sharp and tidy.
Step 3: Defining the Face and Whiskers
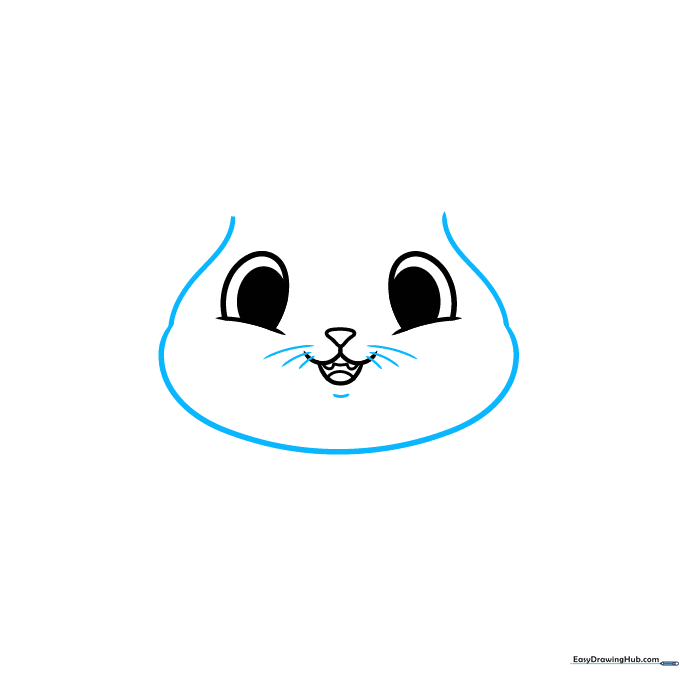
Outline the face with a long, smooth curved line. Add three small dots or short lines on each side of the nose for whiskers. Teacher's Tip: Don't press too hard on your pencil here; a soft touch makes the face look more rounded and gentle.
Step 4: Ears and Mane Base
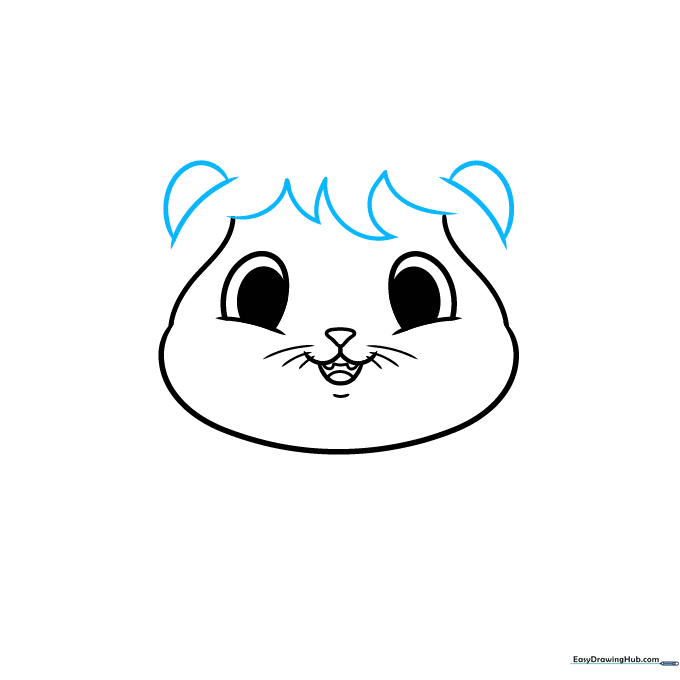
Add two 'C' shaped ears on the sides of the head. Start the mane by drawing pairs of curved lines that meet at points around the top of the head. Teacher's Tip: Vary the size of the mane spikes to make the lion look fluffy.
Step 5: Fluffing the Mane
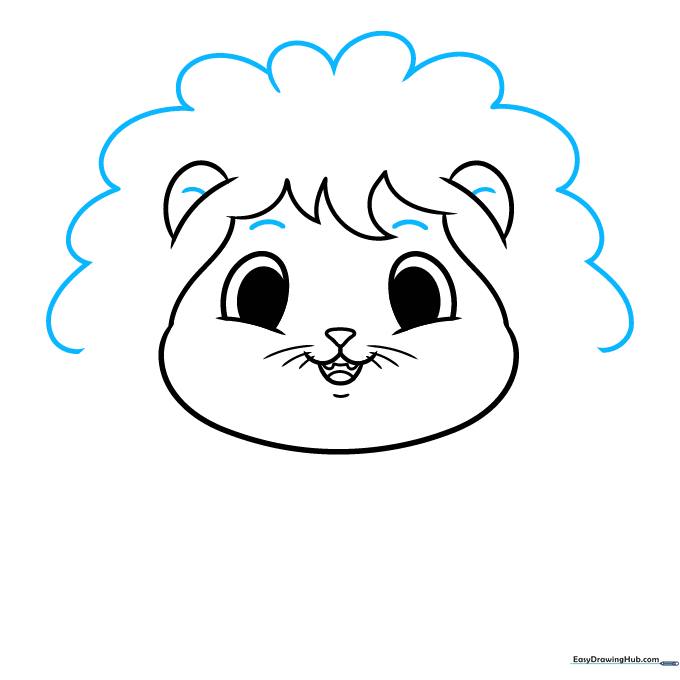
Connect the mane spikes with curved lines to create a cloud-like shape around the head. Add small details inside the ears and draw two arched eyebrows. Teacher's Tip: Eyebrows are the secret to giving your lion personality—try tilting them to make him look surprised or happy!
Step 6: Drawing the Front Leg
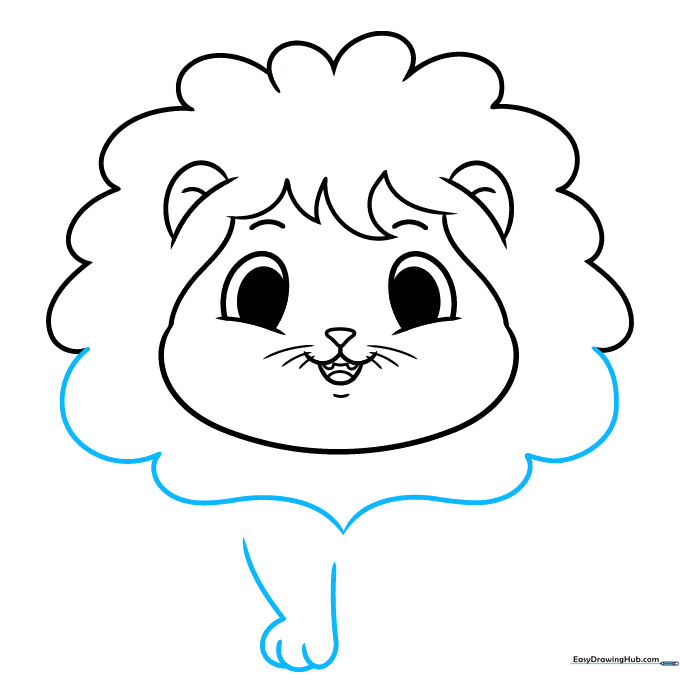
Continue the mane down the neck and draw the first front leg and paw using smooth, curved lines. Teacher's Tip: Keep the paw rounded to maintain the 'cute' cartoon style.
Step 7: Shaping the Body
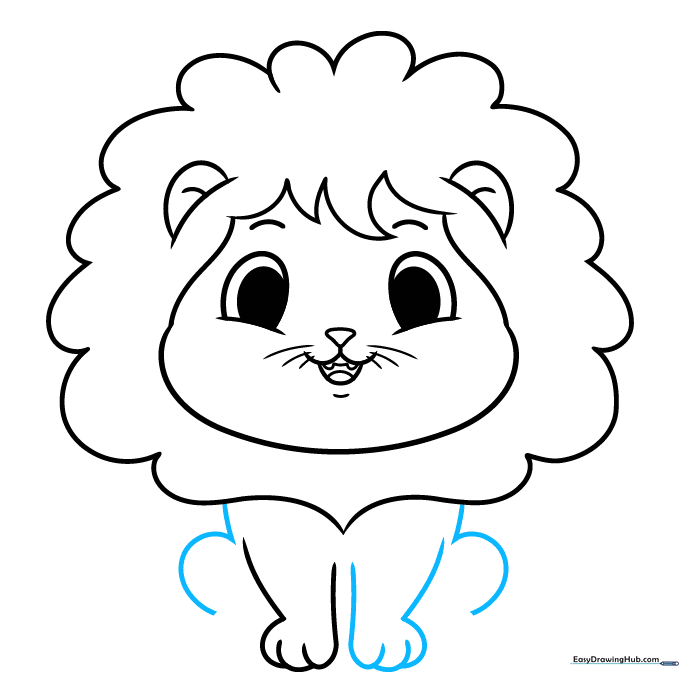
Draw the second front leg, then use curved lines to connect the mane to the body, forming the back and rear legs. Teacher's Tip: Imagine the lion is sitting down; this helps you place the legs in a natural, cozy position.
Step 8: Adding Feet and Tail
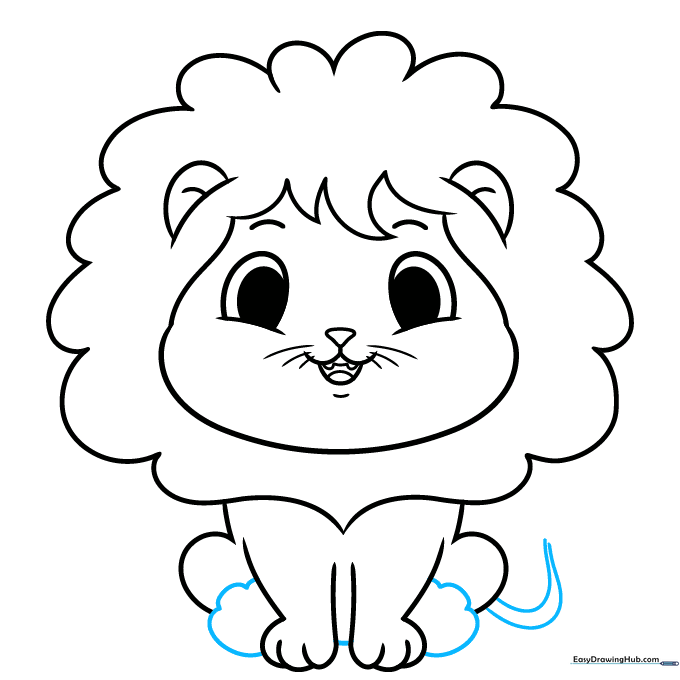
Enclose the rear feet with curved lines. Extend a long, sweeping line from the back to create the tail. Teacher's Tip: Make the tail curve slightly to give your lion a sense of movement.
Step 9: Final Details
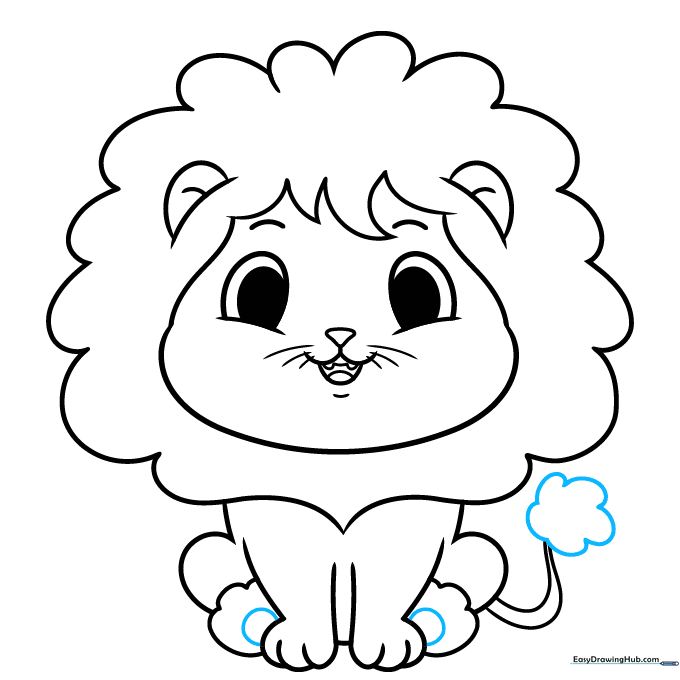
Add small partial circles to the bottom of the feet for paw pads. Finish the tail with a fluffy tuft of fur using quick, curved strokes. Teacher's Tip: The tuft of fur should look like a small cloud at the end of the tail.
Step 10: Bringing Your Lion to Life with Color
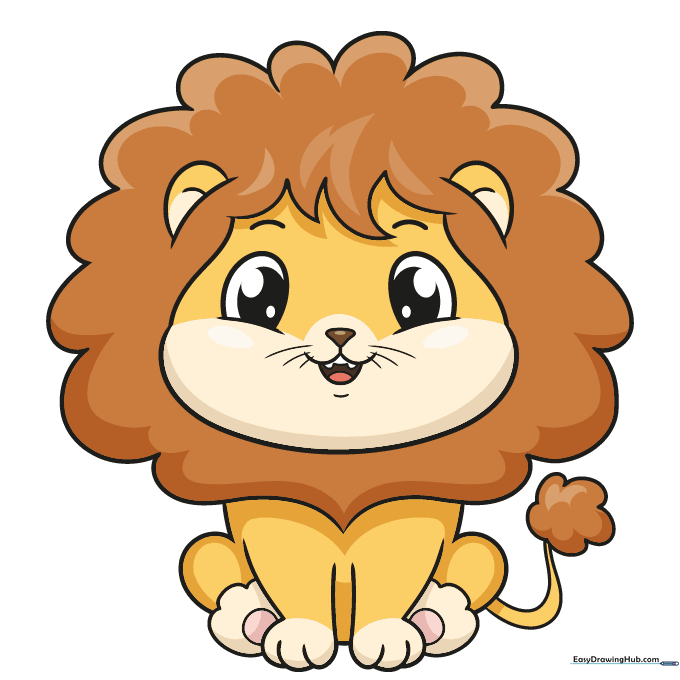
Your outline is complete! Use warm yellows and tans for the body, and a darker brown for the mane. Teacher's Tip: Use a lighter shade of brown for the paw pads to add a professional touch to your artwork.
More Tutorials


