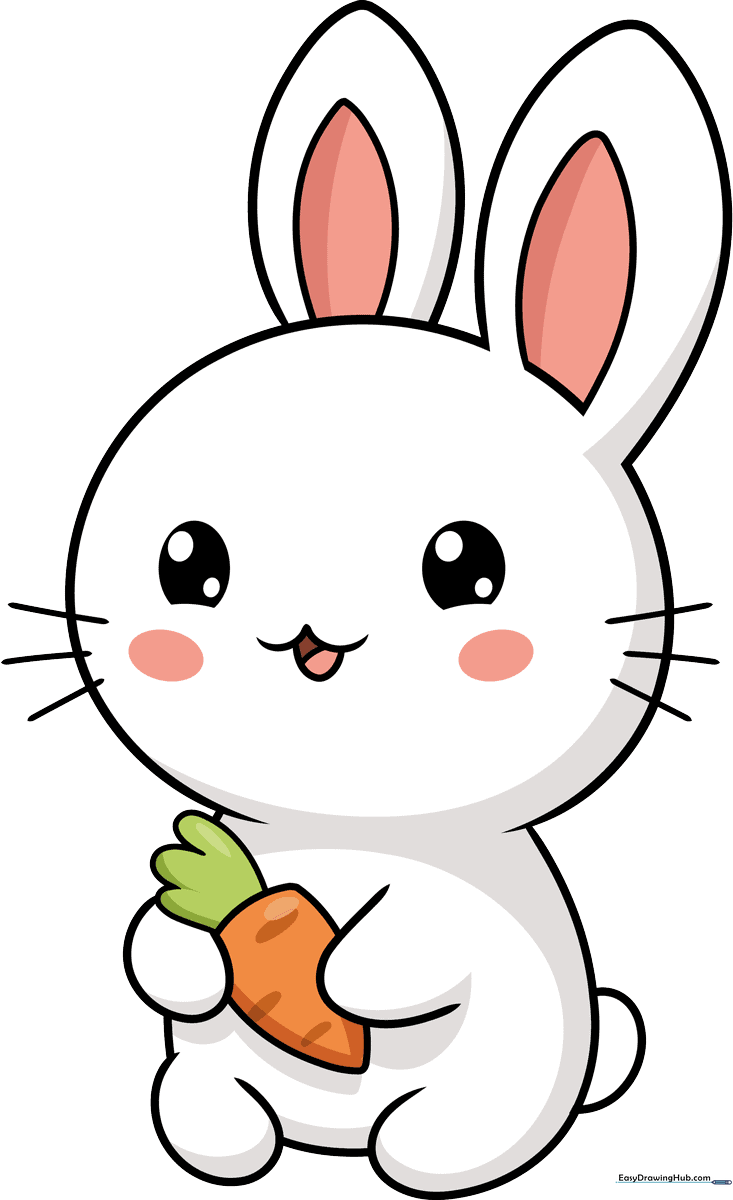
How to Draw a Cute Kawaii Bunny: Easy 10-Step Guide
This step-by-step guide is perfect for artists ages 5 and up looking to master the adorable 'kawaii' aesthetic. All you need is a pencil, an eraser, and a piece of paper to bring this happy bunny to life. By the end, you'll have a charming character snacking on a crunchy carrot, ready to be colored in your own unique style.
🎯 Final Result
Step-by-Step Instructions
Step 1: Sketching the Expressive Eyes

Draw two flat-bottomed ovals for the eyes. Add smaller circles inside each to create a 'glint' effect, then shade the surrounding area. Tip: Leave the small inner circles white to make the eyes look bright and lively!
Step 2: Shaping the Head and Mouth
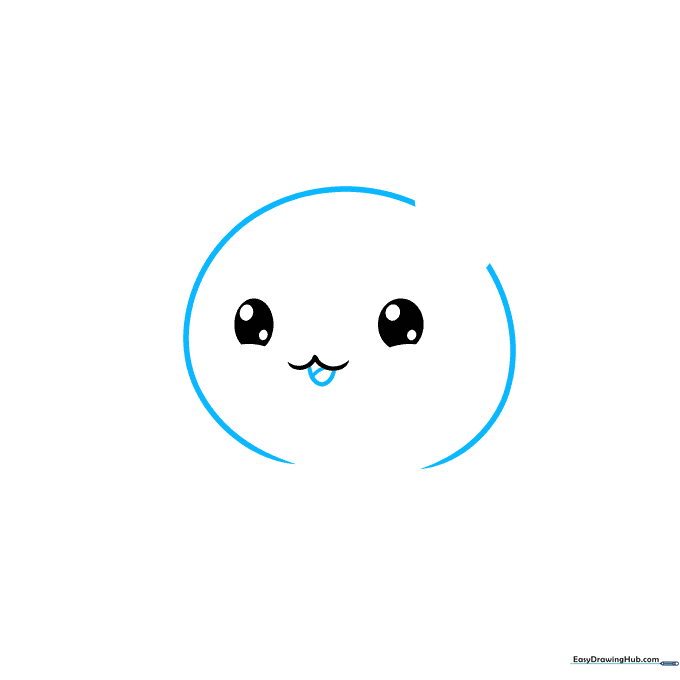
Create the head using two curved lines that remain open at the top and bottom. Below the 'W' mouth, add a 'U' shape with a small line inside to represent the tongue. Tip: Keep the head shape soft and rounded to emphasize the 'cute' factor.
Step 3: Drawing the Long Ears
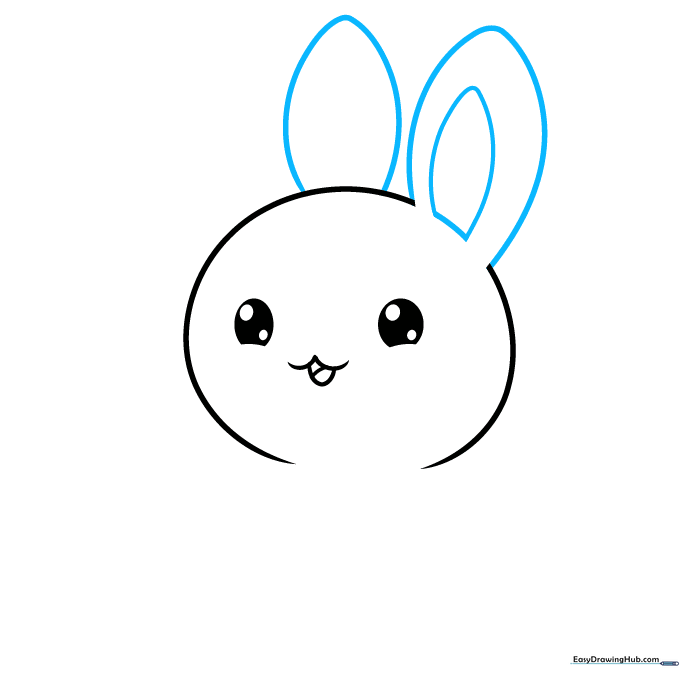
Extend a long, curved line from the top of the head and double it back to form the first ear. Add a smaller inner shape for depth. Repeat this for the second ear. Tip: Make the ears slightly different heights to give your bunny a playful, curious expression.
Step 4: Sketching the Body and Arm
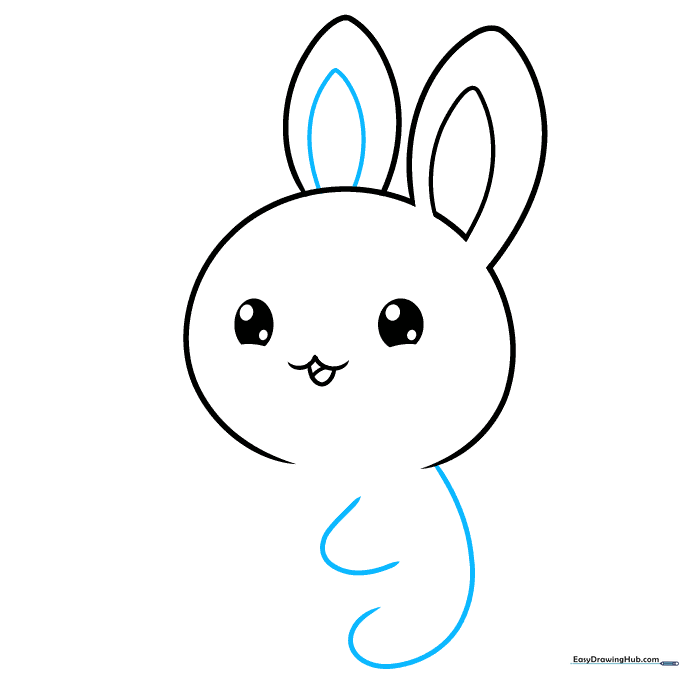
Extend a curved line from the head to create the body, curving it at the bottom for the foot. Add a 'U' shape for the arm. Tip: Think of the body as a soft pear shape to keep the proportions balanced.
Step 5: Adding the Carrot
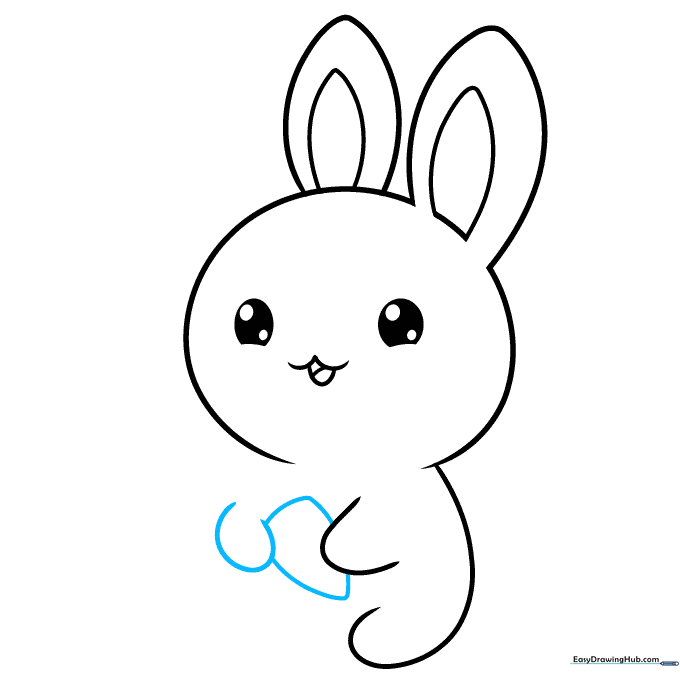
Draw a 'C' shape for the second paw, then sketch a small triangle with rounded corners between the paws. This is the base of the carrot! Tip: Keep the triangle small so it looks like the bunny is holding it snugly.
Step 6: Carrot Greens and Body Details
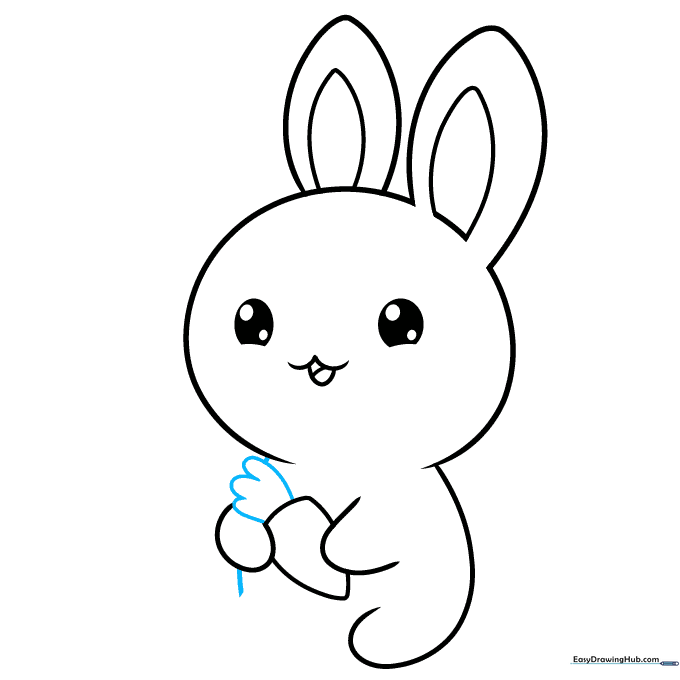
Use quick, curved strokes to draw the leafy top of the carrot. Add short lines to define the body and arm. Tip: Use a light touch for the leafy greens to make them look soft and fluffy.
Step 7: Legs and Tail
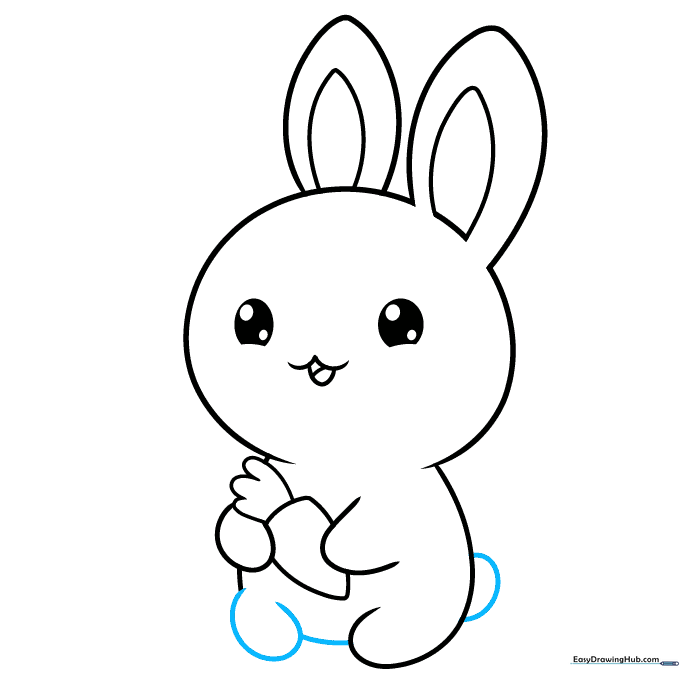
Add the second rear leg using a 'C' shape and connect it to the body. Don't forget a small, fluffy 'C' shaped tail! Tip: A round, fluffy tail is a hallmark of a cute bunny drawing.
Step 8: Blushing Cheeks and Whiskers
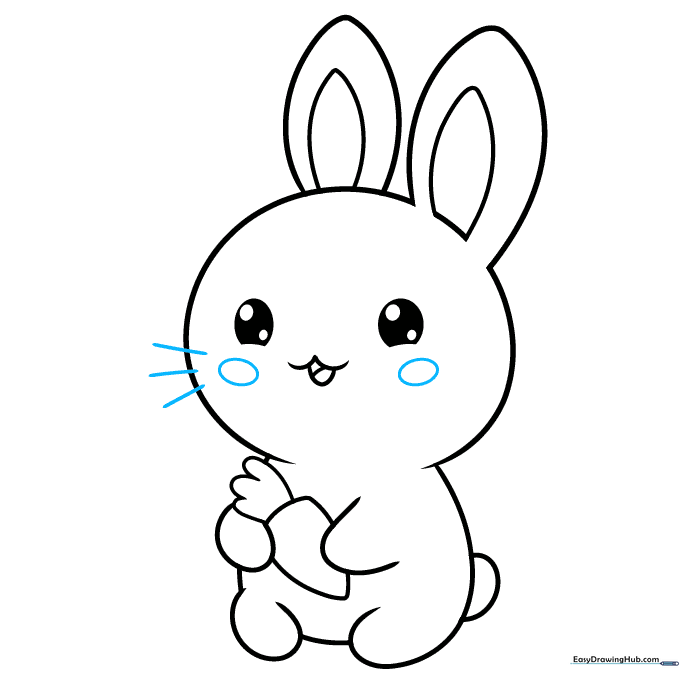
Draw small ovals under the eyes for rosy cheeks, then add three straight lines for whiskers on each side. Tip: Keep the whiskers thin and delicate to maintain the cute aesthetic.
Step 9: Final Texturing
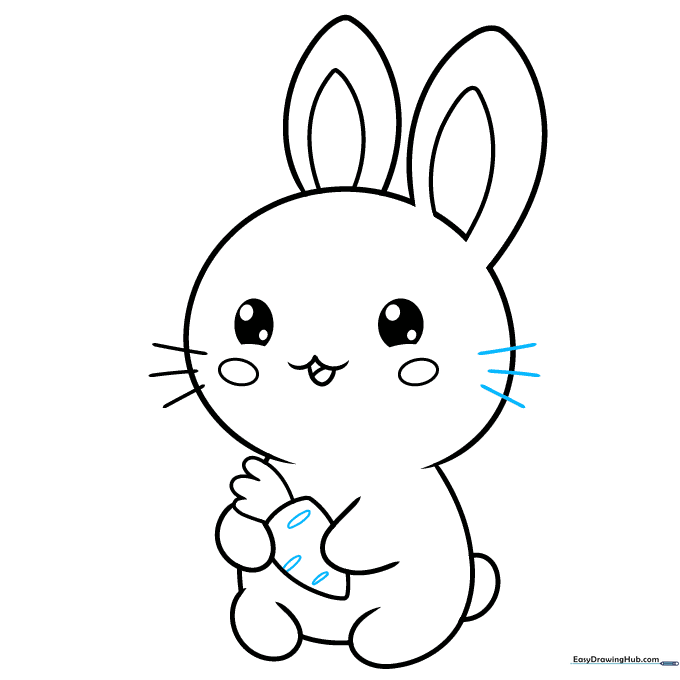
Finish the whiskers and add small, flat ovals to the carrot to give it texture. Tip: These small details make the drawing look professional and complete.
Step 10: Bringing It to Life with Color
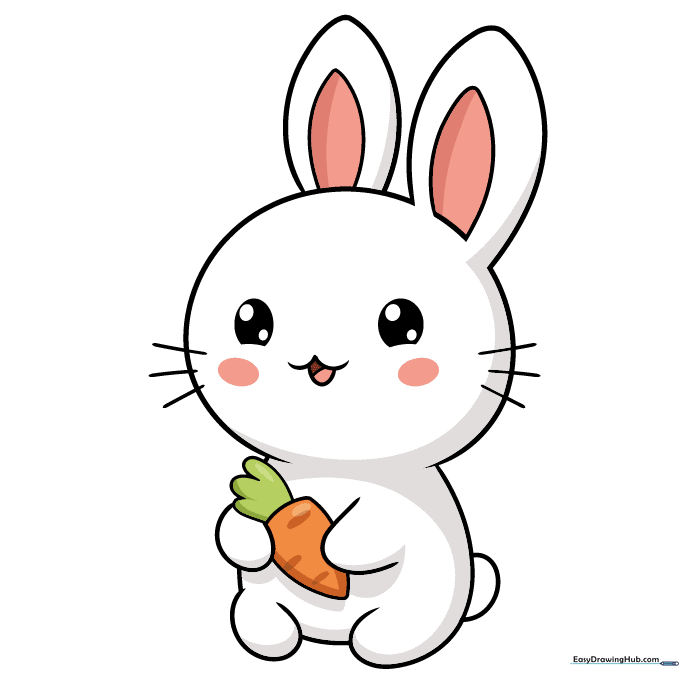
Now for the fun part! Add color to your bunny. Use soft pinks for the cheeks and vibrant orange for the carrot. Tip: Use a light hand with your coloring pencils to keep the 'kawaii' look soft and airy.
More Tutorials


