How to Draw a Cute Elephant: Easy 10-Step Guide
Ready to bring a friendly safari friend to life? This tutorial is perfect for young artists ages 5+ to practice basic shapes and line control. You will only need a pencil, an eraser, and a piece of paper to create your own adorable, chibi-style elephant.
🎯 Final Result

Step-by-Step Instructions
Step 1: Sketching the Expressive Eye

Start by drawing the eye using four soft, curved lines to create a friendly shape. Inside, draw three circles of decreasing size, shading the largest one to form the pupil. Teacher's Tip: Keep your pencil pressure light so you can easily adjust the shape if it looks a bit lopsided.
Step 2: Shaping the Trunk

Draw two curved lines extending downward to form the trunk. Beside the trunk, add the second eye using the same technique as before. Teacher's Tip: Make the trunk lines slightly wavy to give the elephant a playful, curious personality.
Step 3: Defining the Face
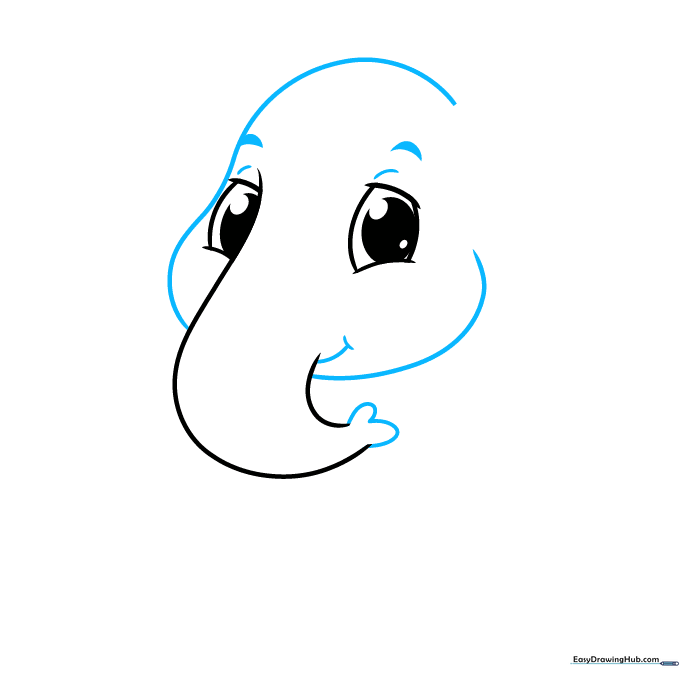
Use long, smooth curved lines to outline the head and cheeks. Add small details like a tiny mouth and the tip of the trunk. Teacher's Tip: Use short, quick strokes for the eyebrows to give your elephant a happy, surprised expression.
Step 4: Drawing Large Ears
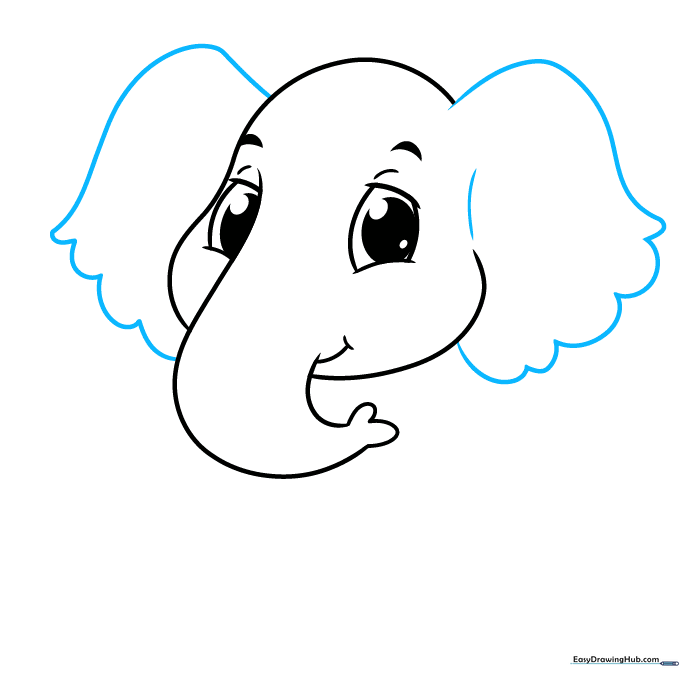
Sketch the tops of the ears using large, sweeping curves. Connect them to the face with a scalloped, wavy line. Teacher's Tip: Don't worry if the ears aren't perfectly symmetrical; real elephants have unique, floppy ears!
Step 5: Sketching the Chest and Front Legs
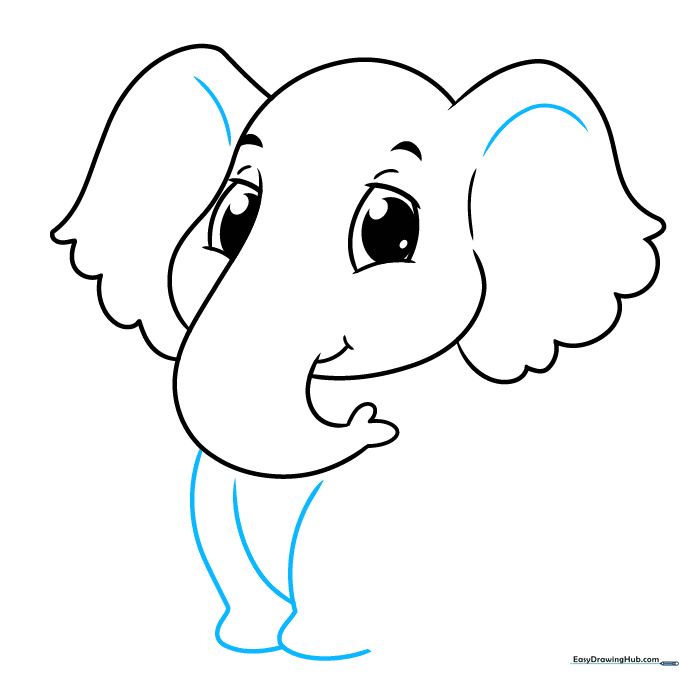
Add depth to your drawing by sketching the chest and front legs using overlapping curved lines. Teacher's Tip: Overlapping lines create the illusion of a 3D body, making your drawing look more professional.
Step 6: Adding the Back and Hind Leg

Draw a long, smooth curve for the back and a rounded, chubby shape for the back leg. Teacher's Tip: Keep the lines rounded to maintain that 'cute' chibi aesthetic.
Step 7: The Tail and Final Leg

Complete the body by adding the remaining leg and a small, pointed tail with a tuft of hair at the end. Teacher's Tip: Draw the tail tuft like a teardrop shape to make it look fluffy.
Step 8: Adding Toenails

Draw small 'U' shaped lines on the bottom of each foot to represent toenails. Teacher's Tip: Make sure the toenails are spaced evenly to keep the feet looking balanced.
Step 9: Final Details

Add finishing touches like contour lines on the ears, knees, and a little tuft of hair on the head. Teacher's Tip: These small lines add texture and make your drawing look more finished.
Step 10: Bring Your Elephant to Life with Color

Your outline is ready! Use soft grays for the body and a touch of blush pink on the ears to make your elephant look extra sweet. Teacher's Tip: Try using light circular motions with your colored pencils for a smooth, even finish.
More Tutorials


