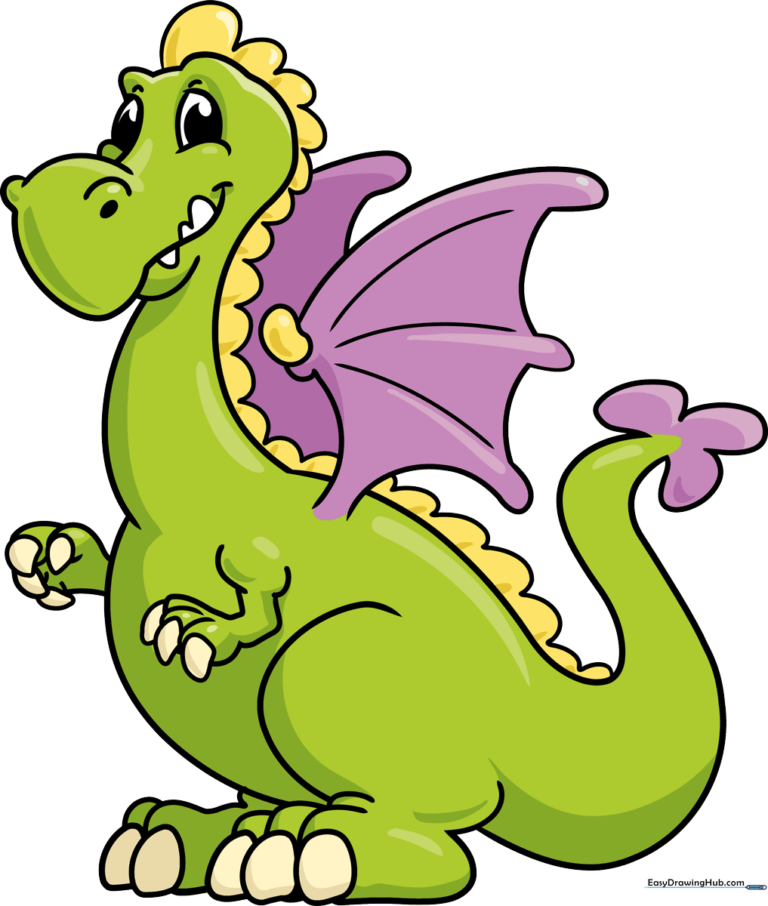
How to Draw a Cute Dragon: Easy 10-Step Guide for Kids
Ready to bring a friendly mythical creature to life? This tutorial is perfect for young artists ages 5 and up. Grab a pencil, an eraser, and a piece of paper to follow along as we build a cute dragon shape-by-shape, helping you master basic curves and proportions.
🎯 Final Result
Step-by-Step Instructions
Step 1: Sketching the Snout and Eyes

Start by sketching the dragon's face using overlapping curved lines for the snout. Teacher's Tip: Keep your pencil strokes light so you can easily erase any overlapping lines later. Add two partial ovals for the eyes and shade in small pupils to give your dragon a curious, friendly expression.
Step 2: Defining the Head and Teeth

Use a wavy line to define the top of the head and the neck. Add a small oval for the nostril and draw tiny triangles for teeth. Teacher's Tip: Think of this like drawing a friendly dinosaur; keep the chin rounded to maintain that 'cute' factor.
Step 3: Outlining the Body and Arm

Draw long, sweeping curved lines to form the neck and belly. Add a small arm with a single triangular claw. Teacher's Tip: Focus on the flow of the line; imagine the dragon is stretching its tummy.
Step 4: Sketching the Rear Leg

Complete the front arm and start the rear leg using overlapping curves for the hip and foot. Teacher's Tip: Keep the foot shape rounded to make the dragon look soft and approachable.
Step 5: Drawing the Wings
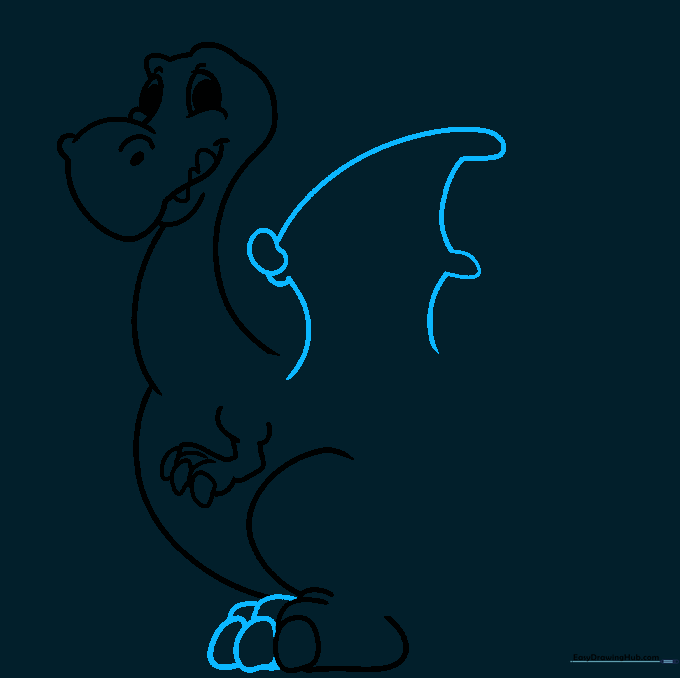
Sketch the bat-like wings using curved lines for the 'fingertips' and sails. Teacher's Tip: Don't worry if the wings aren't perfectly symmetrical; dragons come in all shapes and sizes!
Step 6: Adding the Tail

Detail the wing membrane with long curves, then draw a long, tapering tail using parallel curved lines. Teacher's Tip: A long tail helps balance the dragon's pose on the page.
Step 7: Refining the Tail and Second Arm
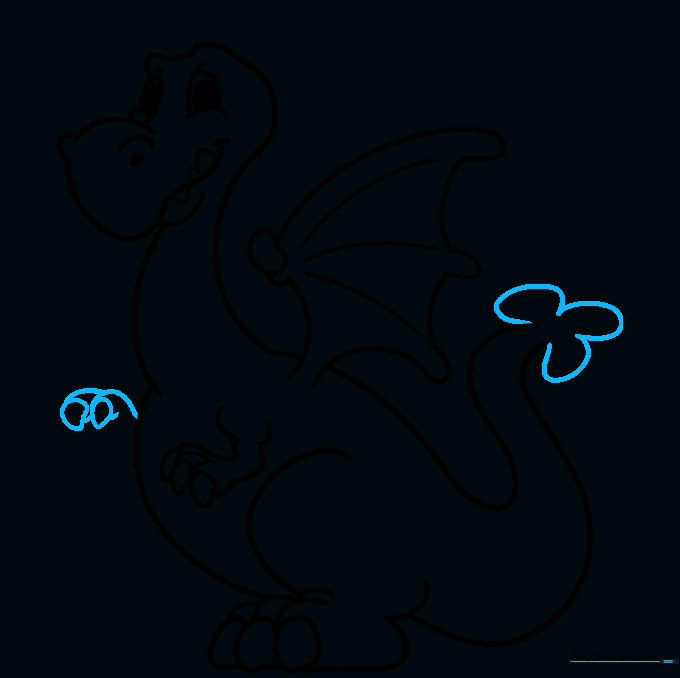
Add a 'U' shaped tip to the tail and begin sketching the second arm. Teacher's Tip: Overlapping lines for the fingers create depth, making the hand look like it's reaching forward.
Step 8: Finishing Hands and Feet
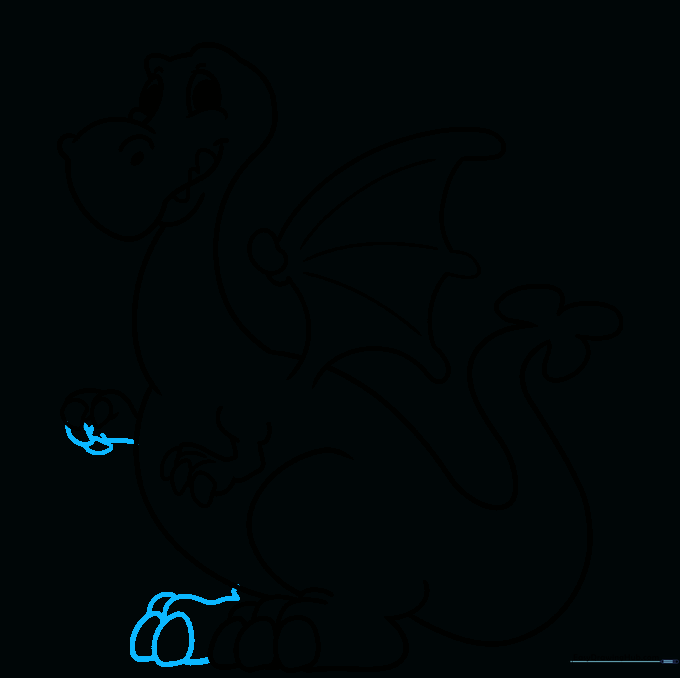
Complete the second hand and foot by adding pointed claws and defining the toes. Teacher's Tip: Use short, firm strokes for the claws to make them stand out.
Step 9: Adding Spikes and Final Wing
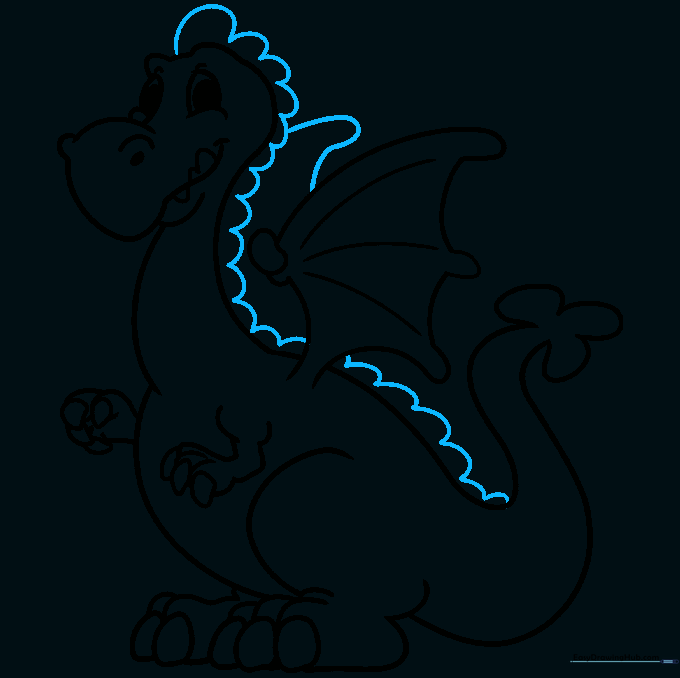
Draw the final wing and add a series of 'U' shaped spikes down the back. Teacher's Tip: Vary the size of the spikes slightly to give the dragon a more natural, fun look.
Step 10: Bringing Your Dragon to Life with Color

Time to color! Use your favorite markers or crayons. Whether you choose classic green, fiery red, or a magical purple, let your imagination run wild. Teacher's Tip: Try coloring the spikes a different shade than the body to make them pop!
More Tutorials


