How to Draw a Cute Dinosaur: Easy 10-Step Guide
Bring a friendly prehistoric pal to life with this simple drawing guide, perfect for artists ages 5 and up. All you need is a pencil, an eraser, and a piece of paper to get started. Follow these steps to build confidence in your sketching skills while creating an adorable cartoon character.
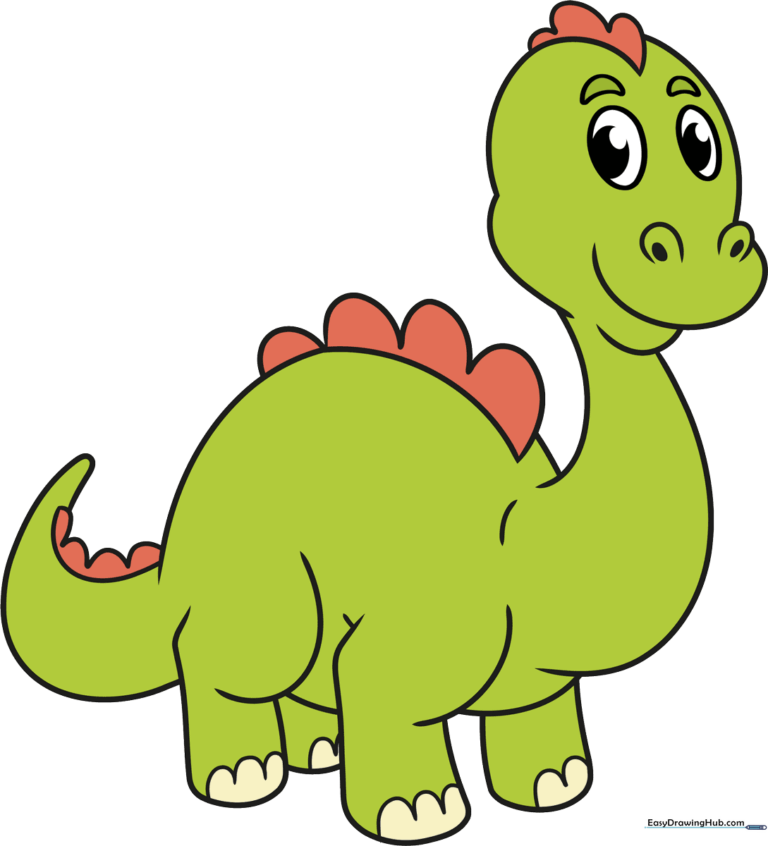
🎯 Final Result
Step-by-Step Instructions
Step 1: Sketching the Neck and Back

Draw two long, curved lines for the neck and a third line for the back. Teacher's Tip: Keep your pencil pressure light so you can easily adjust the curves if they don't look quite right on the first try.
Step 2: Outlining the Chest and Foreleg
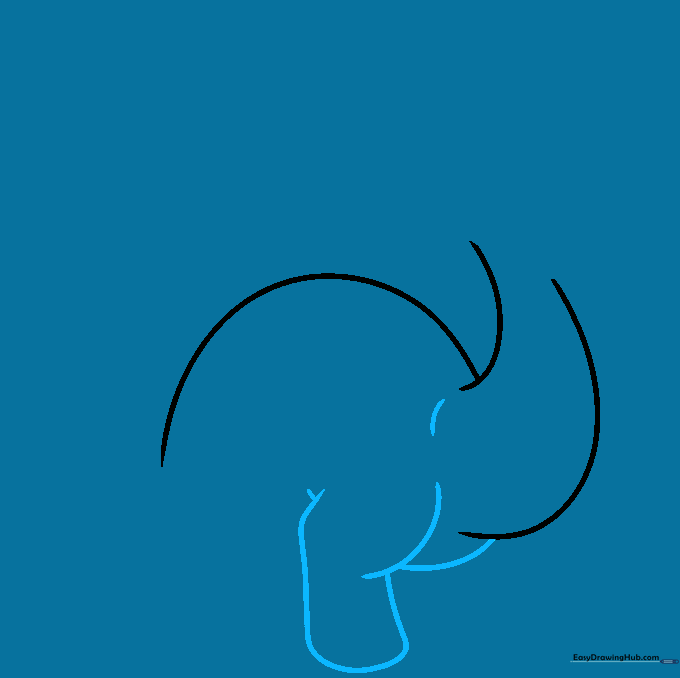
Use two curved lines to define the chest and shoulder, then extend a line downward to form the leg. Teacher's Tip: Think of the leg as a rounded rectangle; keep the corners soft to maintain that 'cute' cartoon style.
Step 3: Adding the Second Front Leg
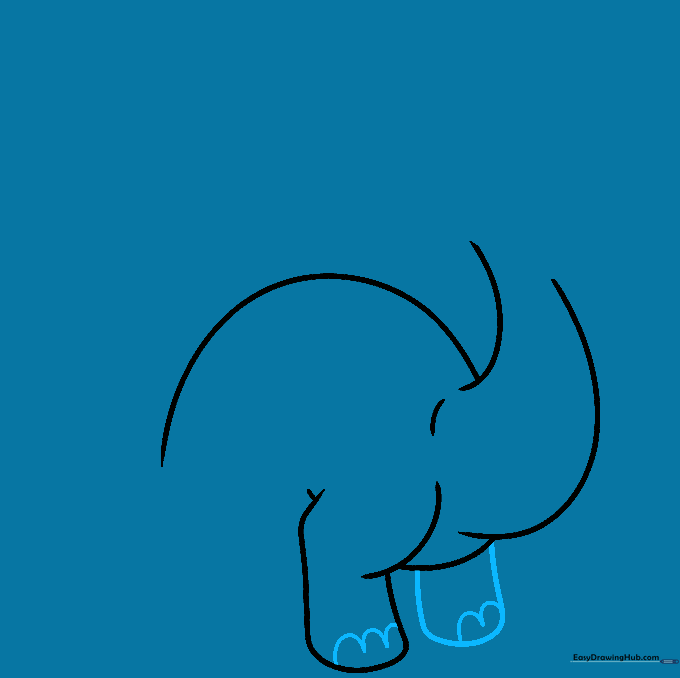
Draw the second front leg and add 'U' shaped lines for the toenails. Teacher's Tip: Drawing the nails as small 'U' shapes is a great way to practice steady hand control for younger artists.
Step 4: Sketching the Rear Leg
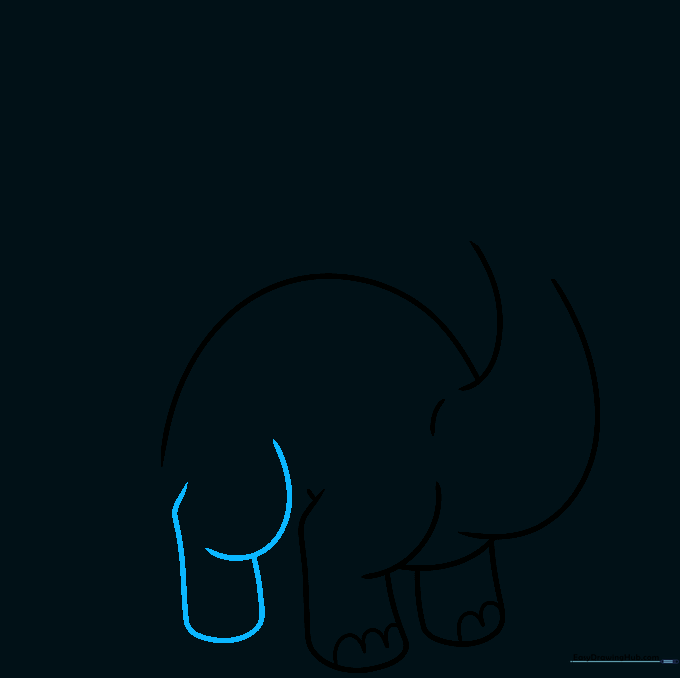
Sketch the rear leg using a curved line that overlaps the body. Teacher's Tip: The overlap creates depth, making your dinosaur look like it has a 3D shape rather than being flat on the page.
Step 5: Defining the Belly and Rear Foot
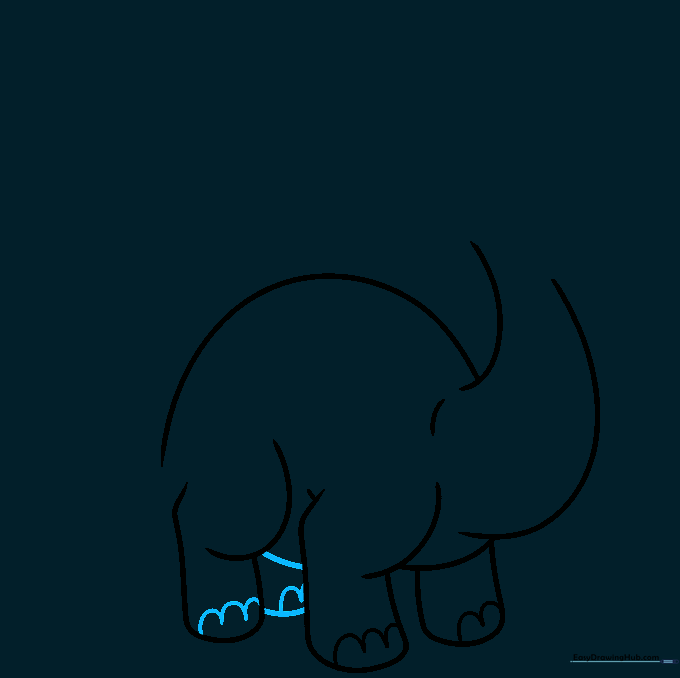
Connect the legs with a curved belly line and add the final set of toenails. Teacher's Tip: Make sure the belly line has a gentle curve to give your dinosaur a friendly, round appearance.
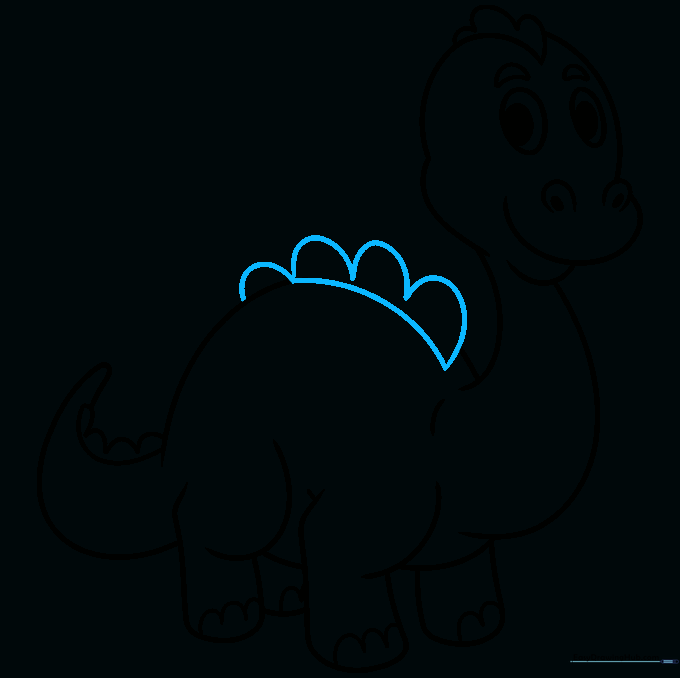
Step 6: Drawing the Head and Crest
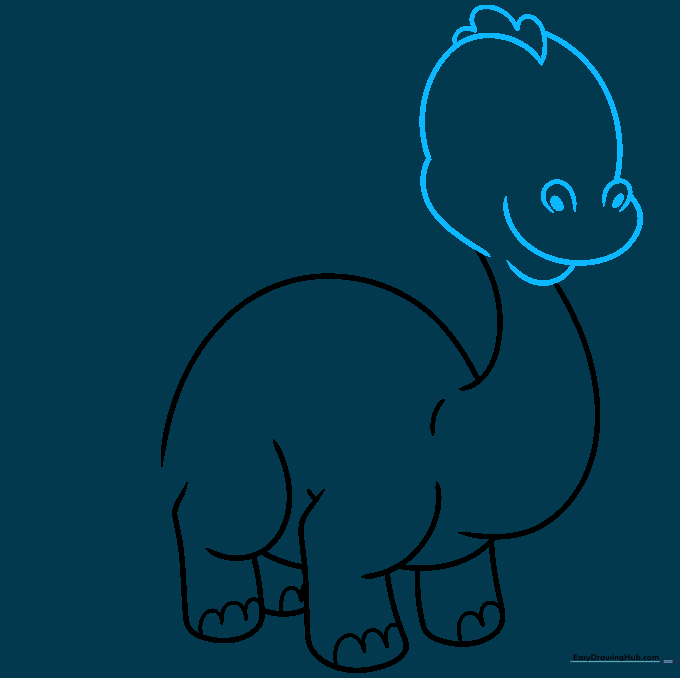
Outline the jaw, snout, and head, then add a series of 'U' shapes for the crest. Teacher's Tip: Don't worry if the spikes aren't perfectly even; nature is rarely perfectly symmetrical!
Step 7: Adding Eyes and Brows
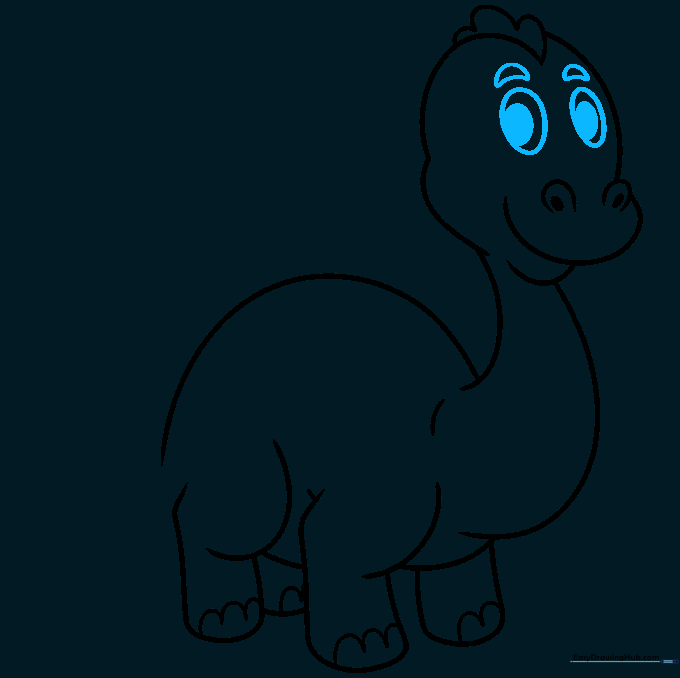
Draw two ovals for eyes with shaded pupils and curved eyebrows. Teacher's Tip: Placing the eyebrows at a slight angle can change the dinosaur's expression from surprised to happy or curious.
Step 8: Shaping the Tail
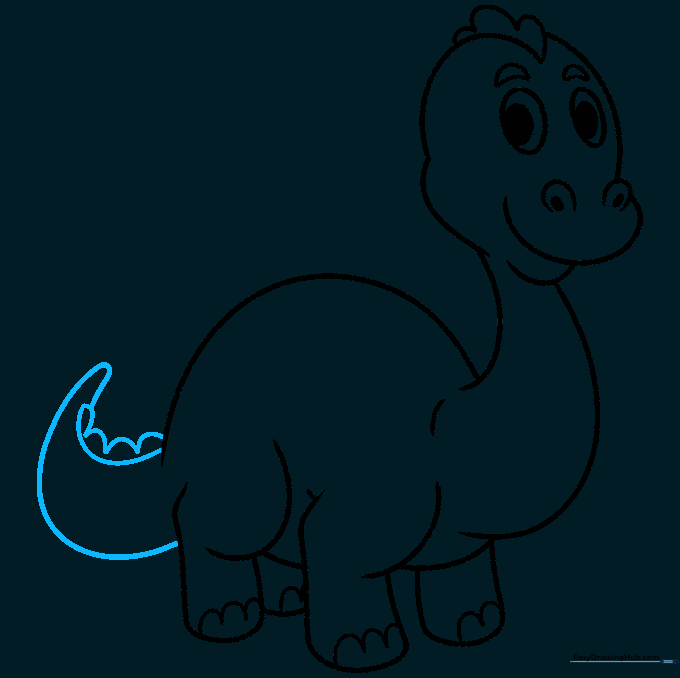
Extend lines from the back and leg to form a pointed tail, adding spikes along the top. Teacher's Tip: Use long, sweeping motions for the tail to make it look smooth and fluid.
Step 9: Finalizing the Outline
Clean up your drawing by erasing any overlapping guide lines and darkening your final strokes. Teacher's Tip: Use a kneaded eraser if you have one—it's great for lifting graphite without damaging the paper.
Step 10: Adding Color
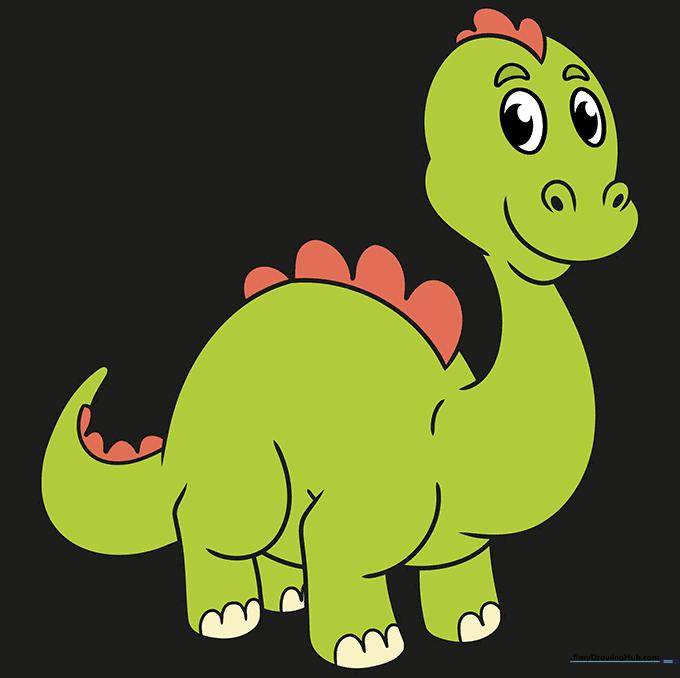
Bring your dinosaur to life with your favorite colors! Teacher's Tip: Since we don't know what color dinosaurs were, try using bright, fun colors like neon green, purple, or even polka dots to make your character unique.
More Tutorials


