How to Draw a Cute Cartoon Mouse: Easy 10-Step Guide
Bring a friendly character to life with this simple, screen-free drawing activity designed for ages 5 and up. You only need a pencil, an eraser, and a piece of paper to get started. By following these guided steps, you will master basic shapes and character proportions while building confidence in your artistic skills.
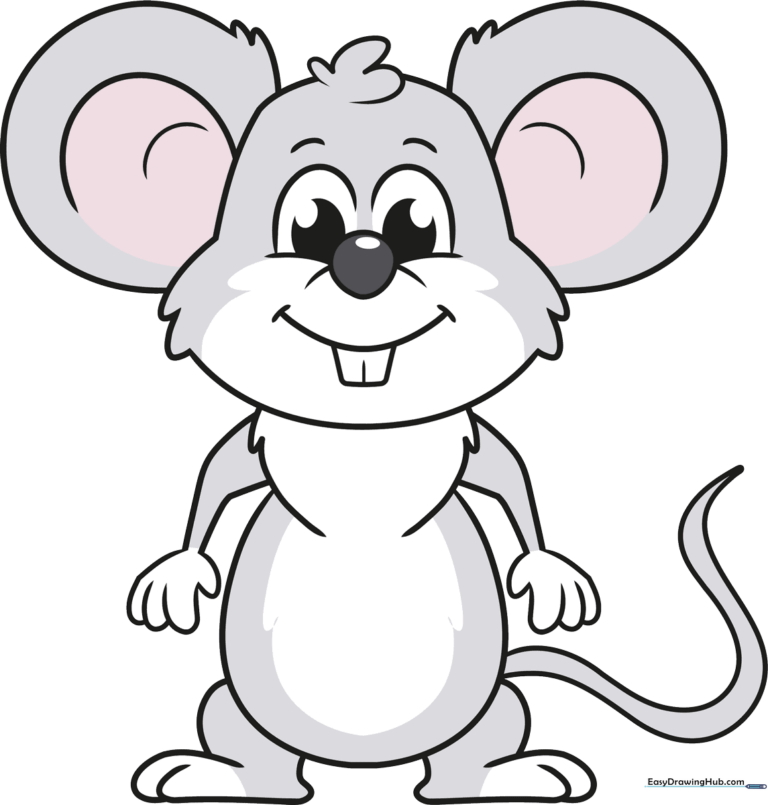
🎯 Final Result
Step-by-Step Instructions
Step 1: Sketching the Head Shape

Start by drawing two gentle, curved lines that meet at the top. Teacher's Tip: Keep these lines light and airy; they serve as the foundation for your mouse's head shape.
Step 2: Adding the Furry Tuft

Draw a series of small, connected curves between the top lines to create a tuft of fur. Tip: Think of these as tiny 'm' shapes to give the mouse a soft, textured look.
Step 3: Defining the Cheeks

Add curved lines at the bottom of the head to define the cheeks. Tip: Make these curves slightly wider than the head to give your mouse a friendly, chubby appearance.
Step 4: Closing the Head and Starting the Body

Connect the cheek lines to finish the head shape, then add a few curved lines below to start the body. Tip: Keep the body lines flowing naturally from the head to maintain a cohesive character shape.
Step 5: Shaping the Torso

Mirror the lines from the previous step to create the other side of the body, then draw a large, rounded curve at the bottom to enclose the torso. Tip: A nice, round belly makes the character look much cuter!
Step 6: Drawing the Facial Features
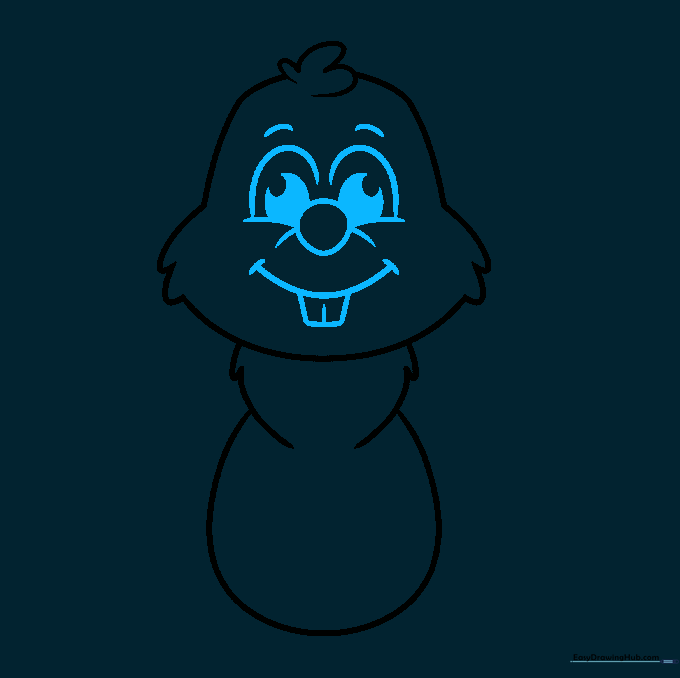
Draw a small circle for the nose, then add eyes with pupils and a wide, happy smile. Don't forget the two small rectangles for teeth! Tip: To make the eyes look shiny, leave a tiny white dot inside the pupil when coloring.
Step 7: Adding Large Ears
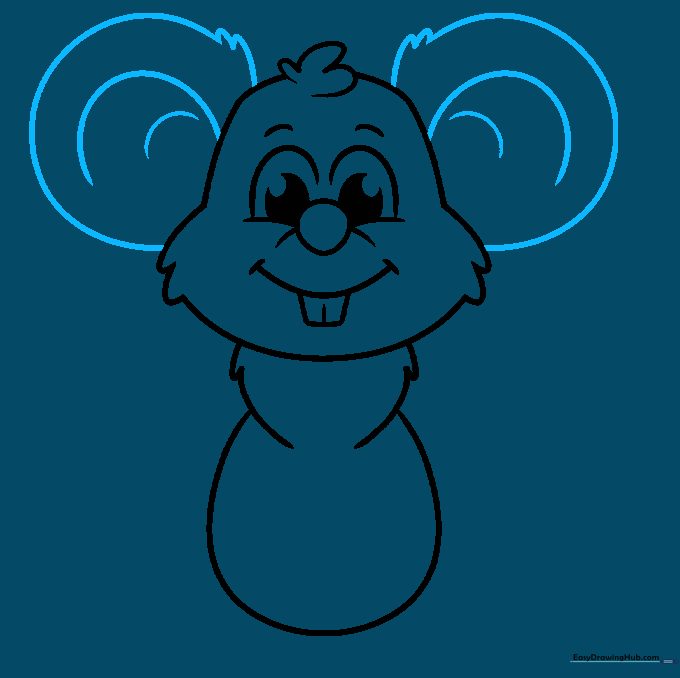
Draw two large, partial circles on the sides of the head for the ears. Add inner details with smaller curved lines. Tip: Mice are known for their big ears—don't be afraid to make them nice and wide!
Step 8: Sketching Arms and Legs
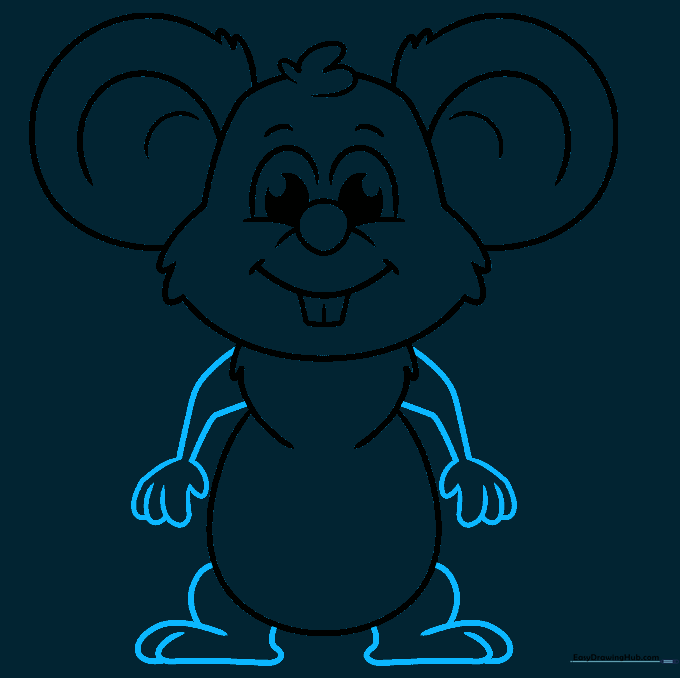
Draw simple arms with 'U' shaped fingers and rounded legs with feet. Tip: Keep the limbs simple and slightly curved to match the cartoon style of the body.
Step 9: Drawing the Tail

Extend two long, tapering curved lines from the back to create the tail. Tip: A nice, long, curvy tail adds character and movement to your drawing.
Step 10: Adding Color
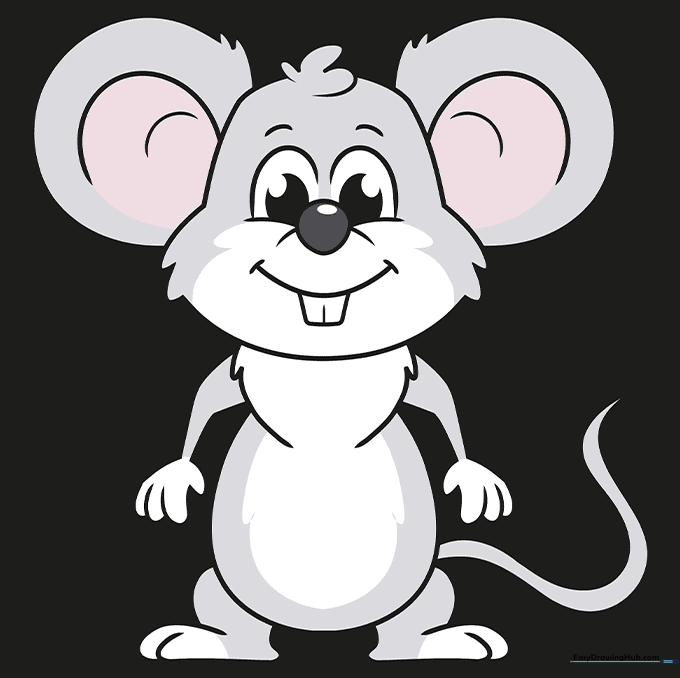
Bring your mouse to life with color! Use soft grays for the fur and a touch of pink for the ears. Tip: Use light pressure with your colored pencils to create smooth, even shading.
More Tutorials


