How to Draw a Crown: Easy 10-Step Guide for Kids
Ready to design your own royal headpiece? This tutorial is perfect for young artists ages 5 and up. All you need is a pencil, an eraser, and some paper to bring this majestic crown to life.
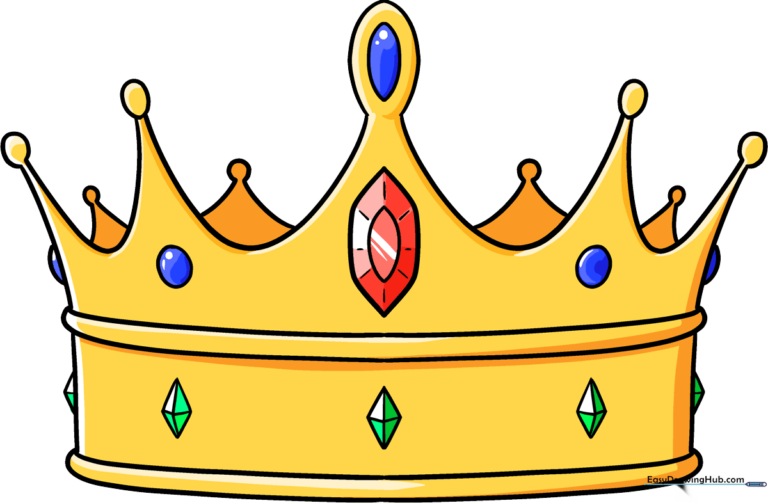
🎯 Final Result
Step-by-Step Instructions
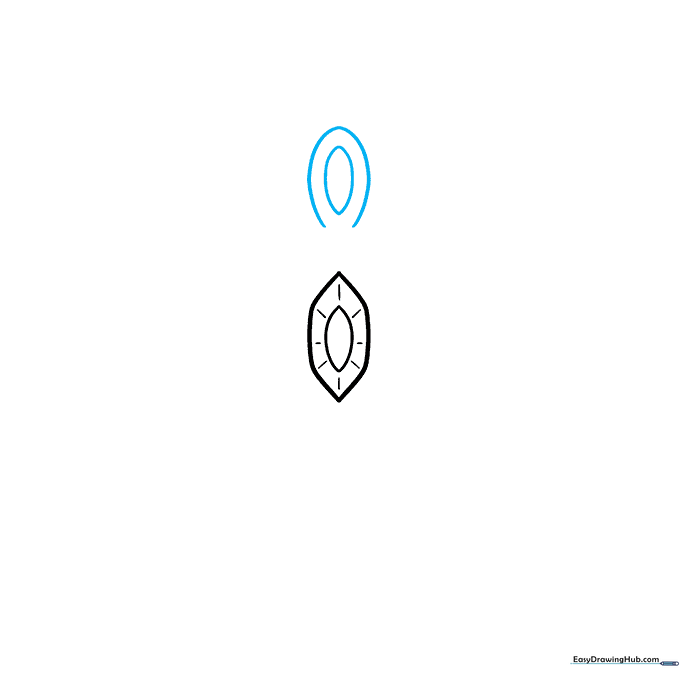
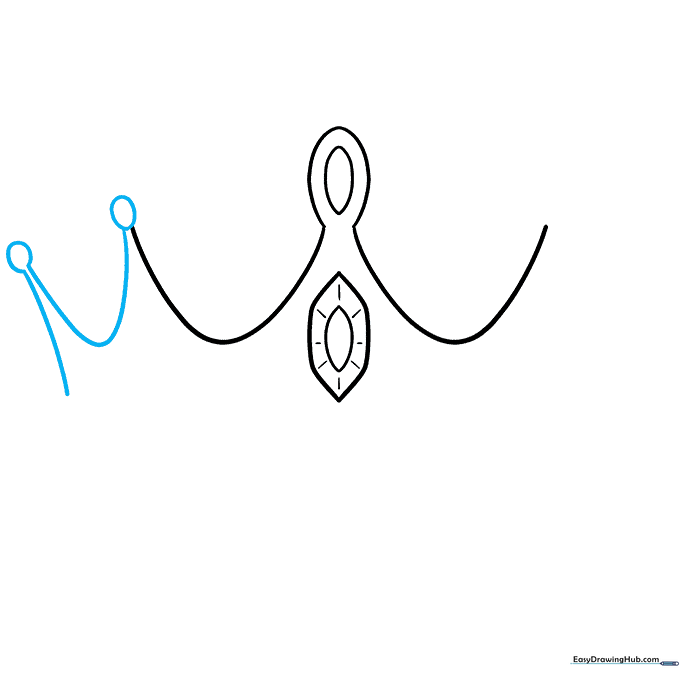
Step 1: Sketching the Center Gem
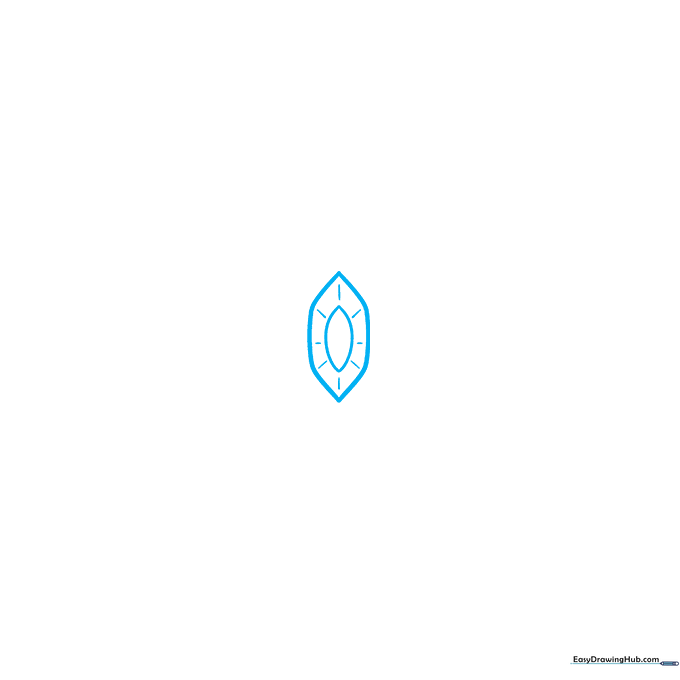
Start by drawing a hexagon shape in the center, then place a double-pointed ellipse inside it. Tip: Keep these lines light—this will be the focal point of your crown!
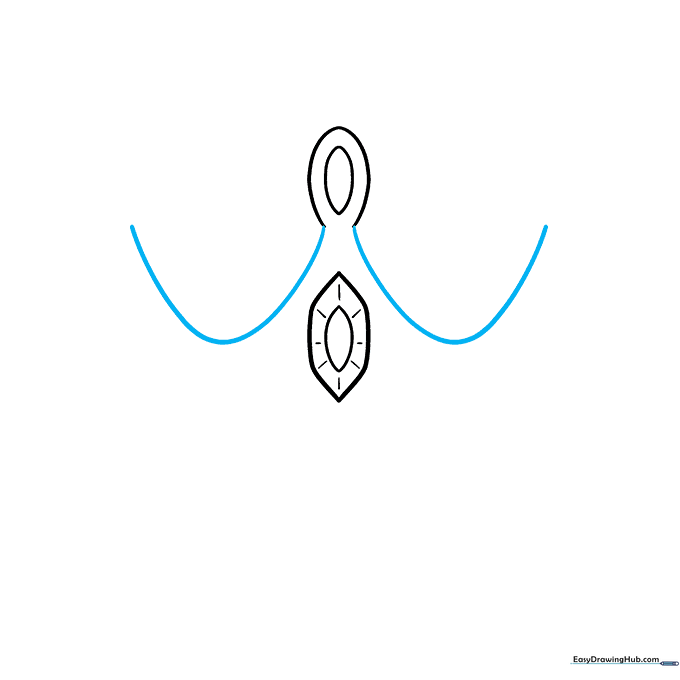
Step 2: Defining the Main Point
Draw an inverted “U” shape above the gem, adding another double-pointed shape inside. This creates the tallest, central spike of your crown.
Step 3: Adding Side Arches
Draw a large “U” shaped line on both sides of the center point. Tip: Try to make these symmetrical so your crown looks balanced.
Step 4: Creating the Side Points
Place a small oval at the top of one side arch, then extend a new “U” shape from it. This adds a decorative topper to your crown.
Step 5: Balancing the Design
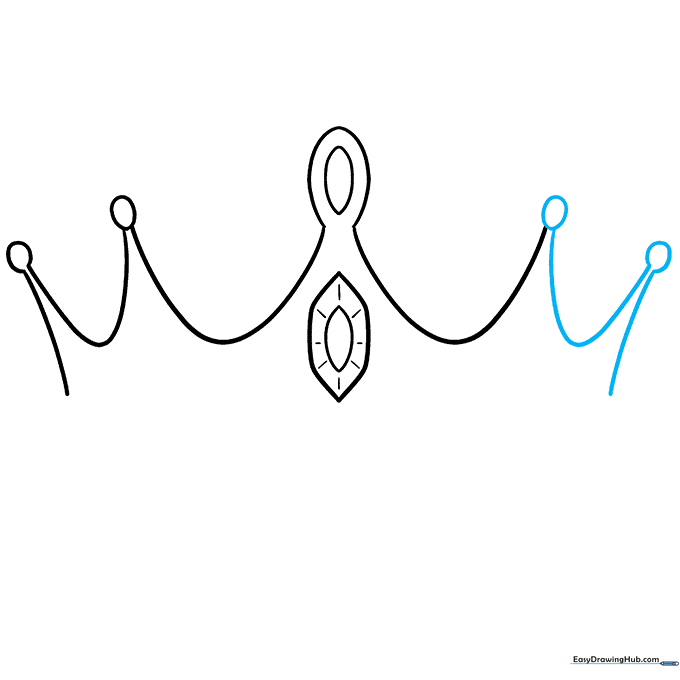
Repeat the previous step on the opposite side. Draw a small oval and a “U” shape to ensure your crown looks uniform.
Step 6: Adding the Crown Band
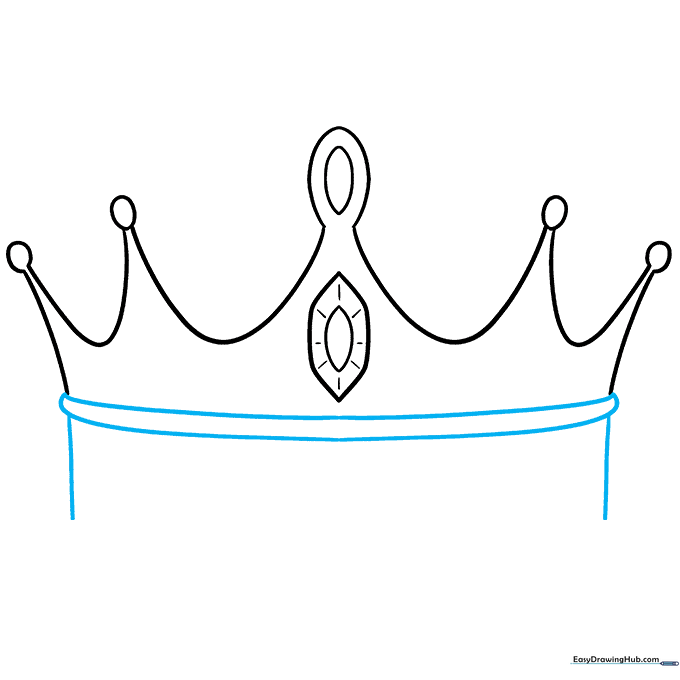
Use two curved lines to create a thick ridge around the center. Extend vertical lines downward to form the base of the crown.
Step 7: Detailing the Band
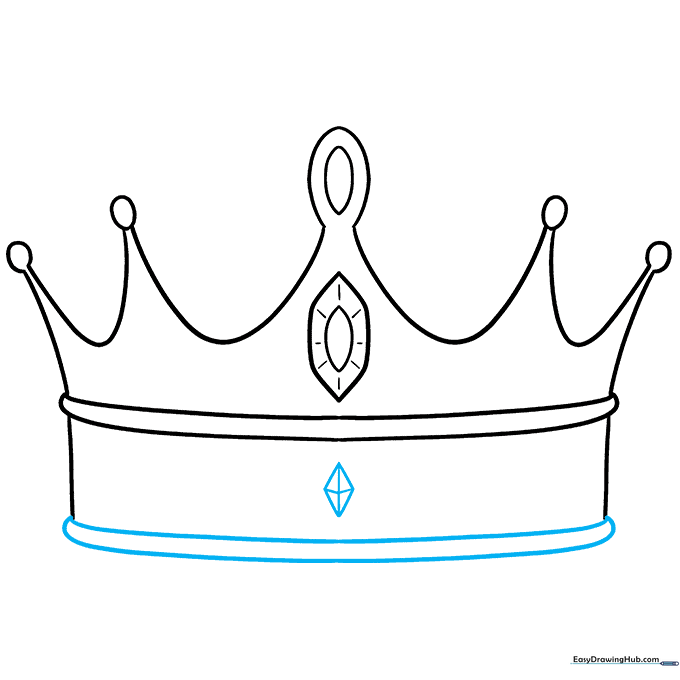
Connect the sides with curved lines. Add a small diamond shape in the center of the band, using perpendicular lines to give it a 3D faceted look.
Step 8: Adding More Jewels

Draw two small circles on the upper part and more diamonds on the band. Tip: Use short, quick strokes for the perpendicular lines to make the gems look shiny.
Step 9: Finalizing the Outline
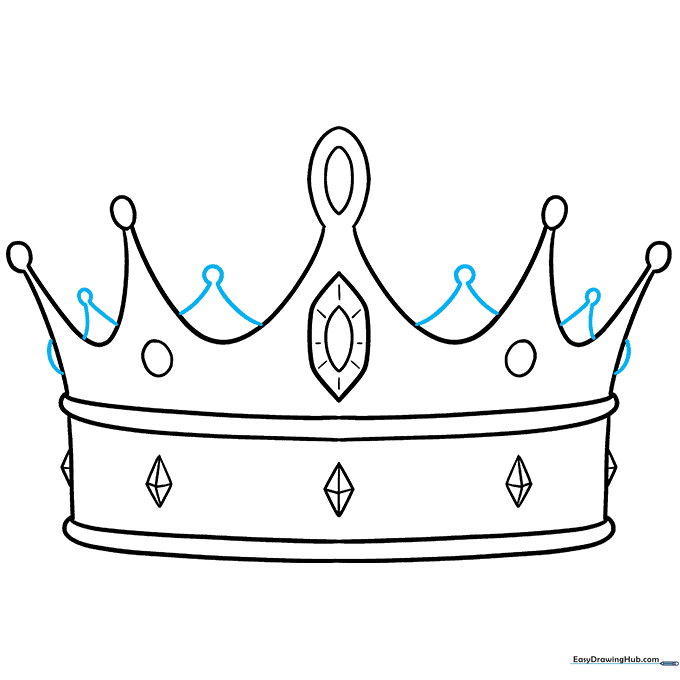
Enclose half-circles on the sides and add extra points between your existing ones to complete the crown's silhouette.
Step 10: Adding Color
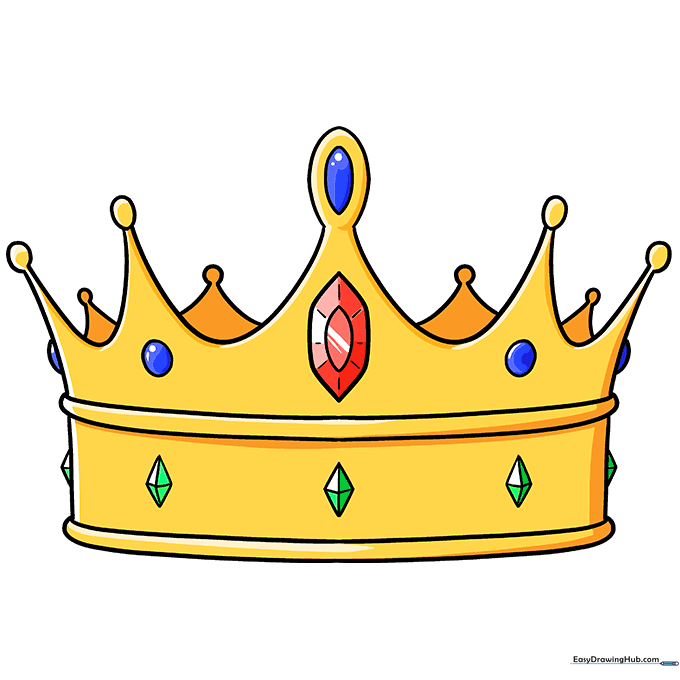
Time to shine! Use gold for the metal and vibrant colors like ruby red or emerald green for the jewels. Press harder with your pencil for deeper colors.
More Tutorials


