How to Draw a Cranberry: Easy 9-Step Art Guide
Bring a touch of nature to your sketchbook with this fun cranberry drawing tutorial! Designed for ages 5 and up, this activity requires only a pencil, eraser, and paper. You will learn how to create depth and texture using simple shapes and organic lines.
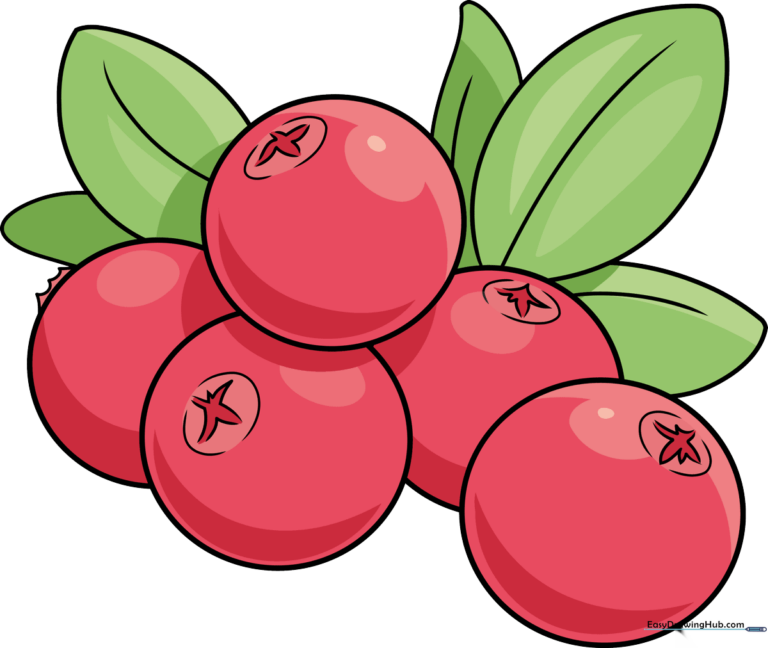
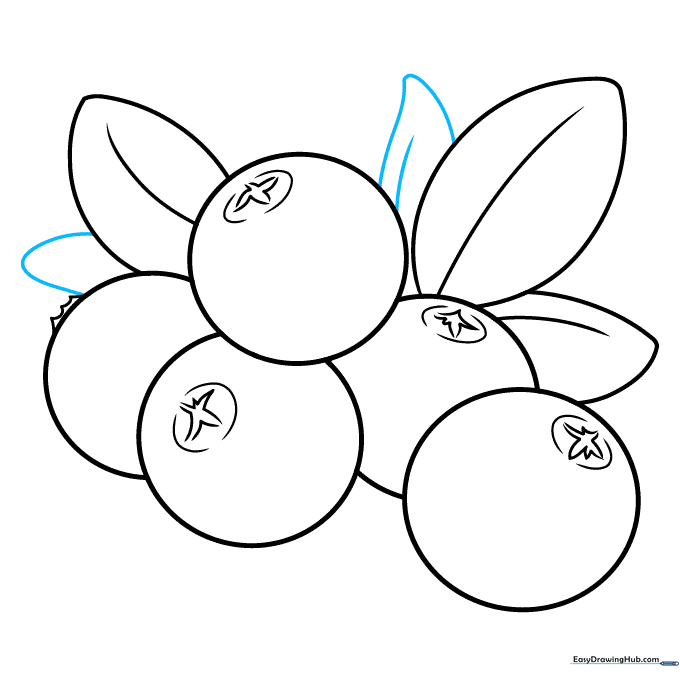
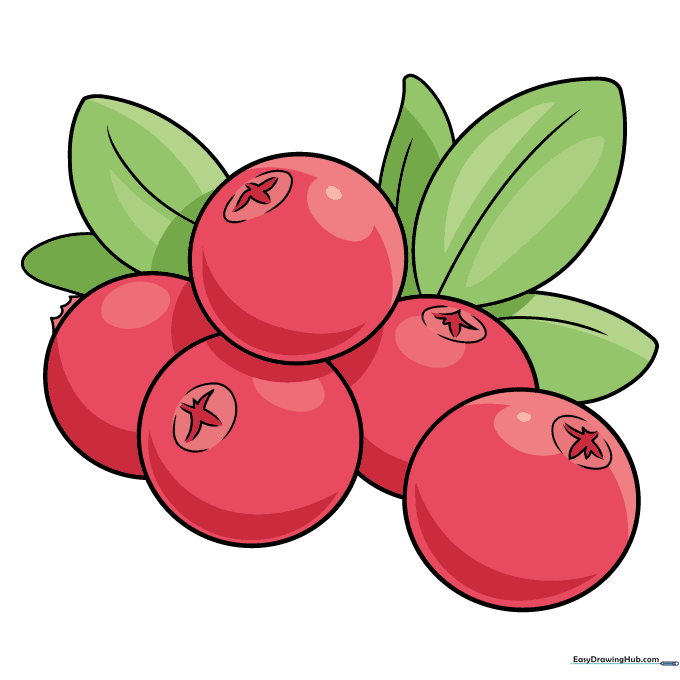
🎯 Final Result
Step-by-Step Instructions
Step 1: The First Berry Outline

Draw a rounded circle for the main berry. Near the top, add two small, disconnected curved lines to form the base of the calyx. Teacher's Tip: Keep the circle slightly imperfect—nature is rarely a perfect geometric shape!
Step 2: Adding Texture

Sketch a thick 'X' shape inside the top oval to represent the calyx. Add a second, overlapping circle behind the first. Tip: Overlapping shapes is the secret to making your drawing look 3D rather than flat.
Step 3: Detailing the Second Berry
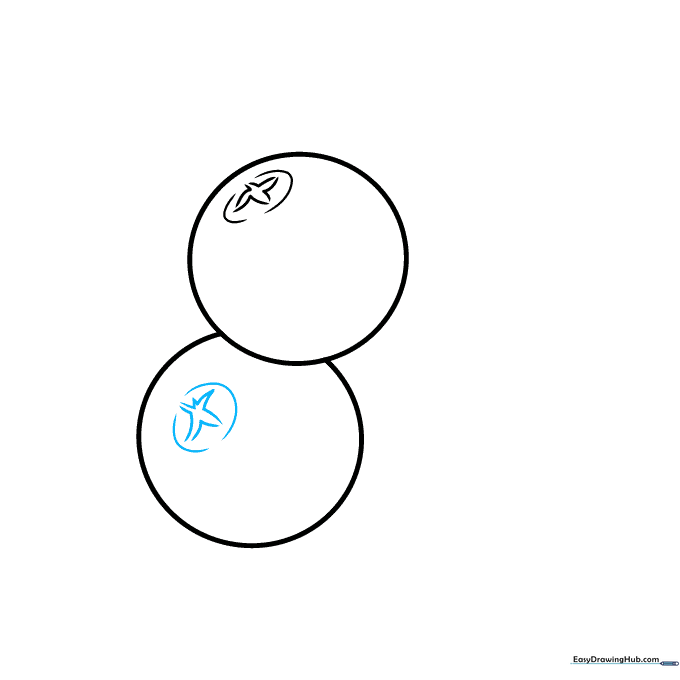
Add an oval shape to the second berry and sketch a star-like pattern inside it. This represents the dried blossom end. Tip: Use short, quick strokes for the star to keep it looking natural.
Step 4: Building the Cluster
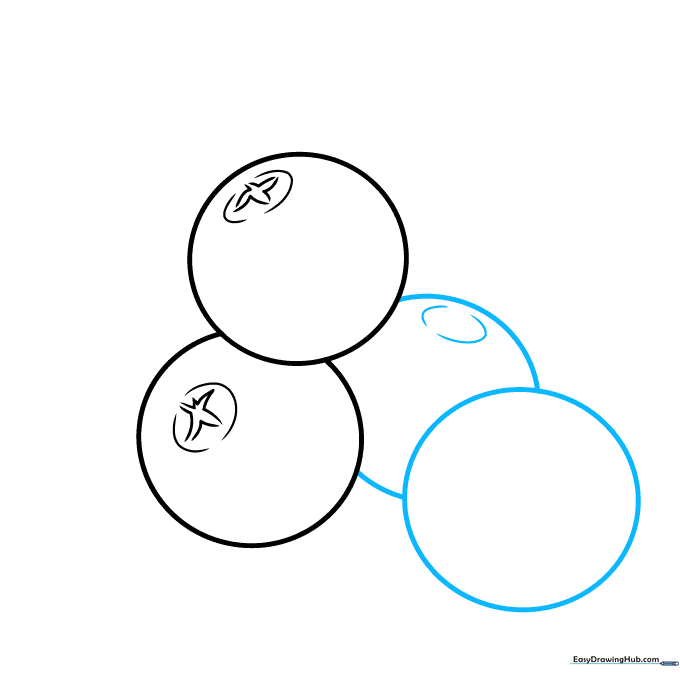
Draw a third circle, partially hidden behind the others. Add a small oval and star detail to the top. Tip: Don't worry if the circles aren't perfect; cranberries are naturally bumpy!
Step 5: Refining the Starbursts
Add starburst patterns to the remaining berries using jagged, pointed lines. This adds visual interest and realism. Tip: Press firmly with your pencil for these details to make them stand out.
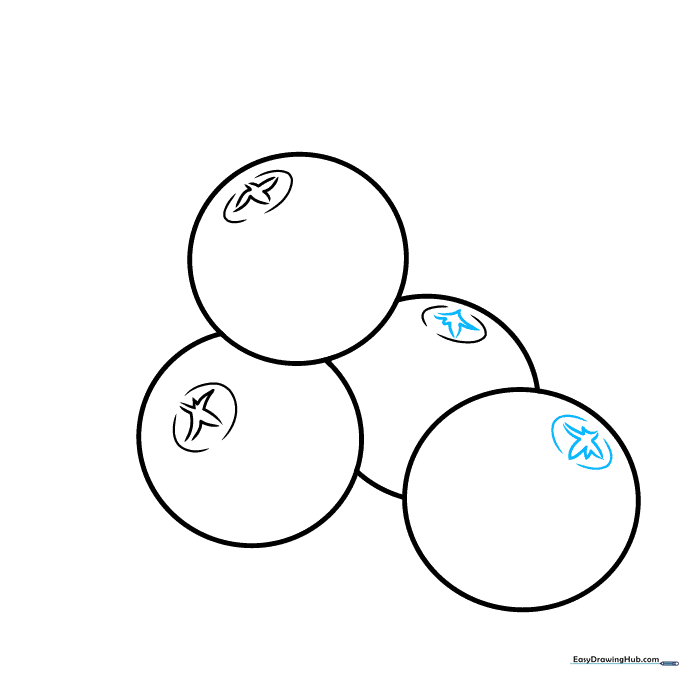
Step 6: Adding Leaves
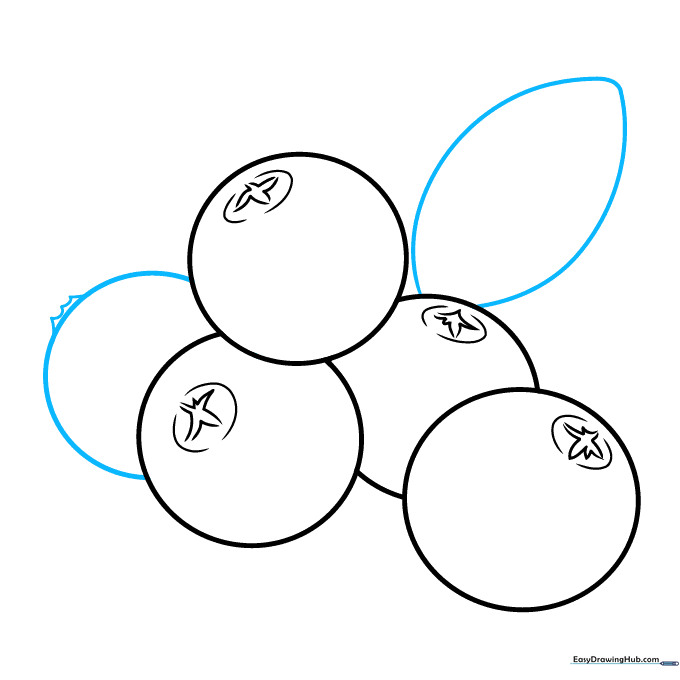
Draw a partial berry on the side with a scalloped edge. Then, sketch your first leaf by drawing two curved lines that meet at a sharp point. Tip: Leaves are great for filling empty space in your composition.
Step 7: Leaf Veins
Add a second leaf and draw a single curved line down the center of both leaves to represent the midrib vein. Tip: Keep the vein line light so it looks like a natural part of the leaf.
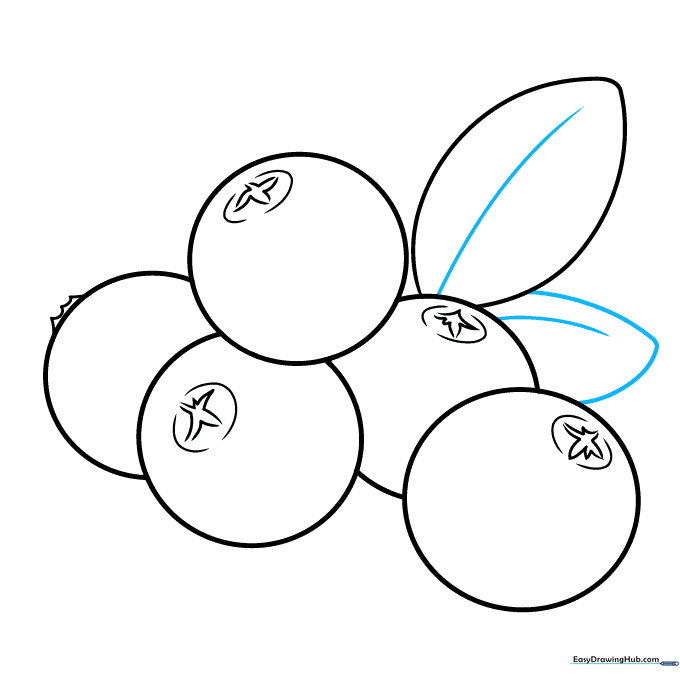
Step 8: More Foliage
Draw a third leaf to balance your cluster. Remember to add the center vein line. Tip: Vary the size of your leaves to make the drawing look more organic.
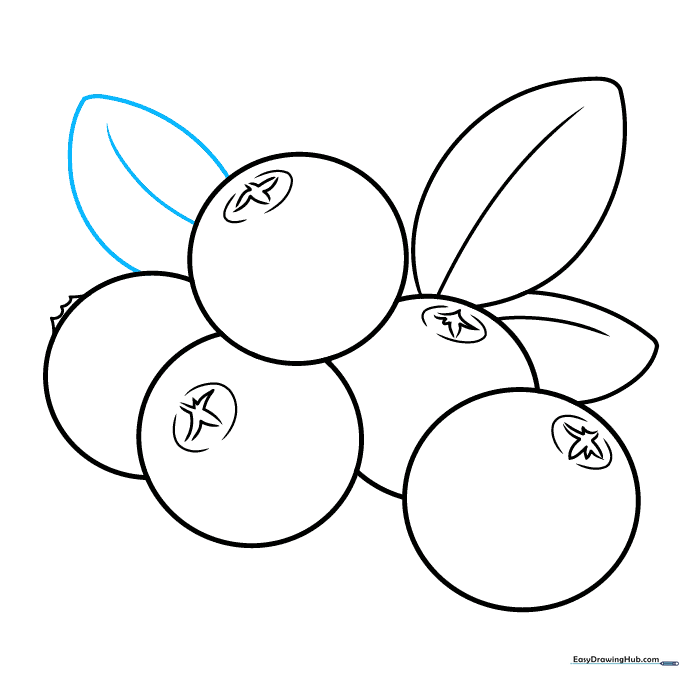
Step 9: Final Touches
Add two final leaves to complete the cluster. Your outline is now ready for color! Tip: Before coloring, use your eraser to clean up any overlapping lines you don't need.
Step 10: Coloring Your Masterpiece
Bring your drawing to life! Use bright red for the berries and vibrant green for the leaves. Tip: Leave a tiny white spot on the side of each berry to represent a highlight—this makes them look shiny and fresh!
More Tutorials


