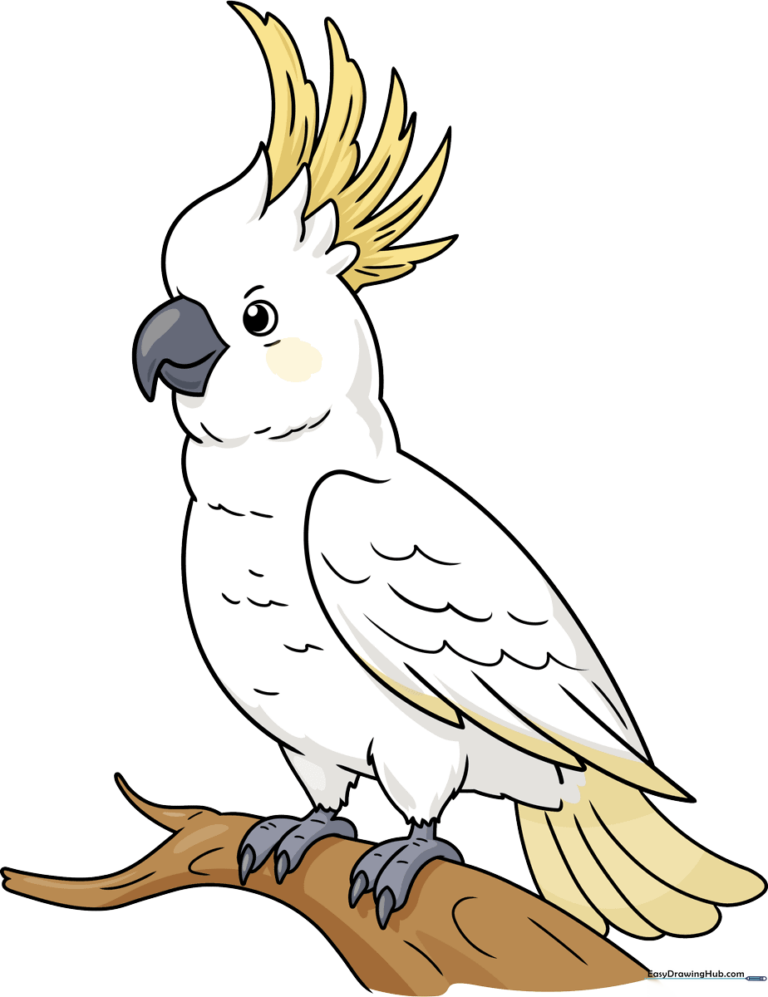
How to Draw a Cockatoo: Easy 10-Step Guide for Kids
Ready to bring a tropical bird to life? This tutorial is perfect for young artists ages 5 and up. All you need is a pencil, an eraser, and a piece of paper to practice your line work and create a vibrant, crested cockatoo.
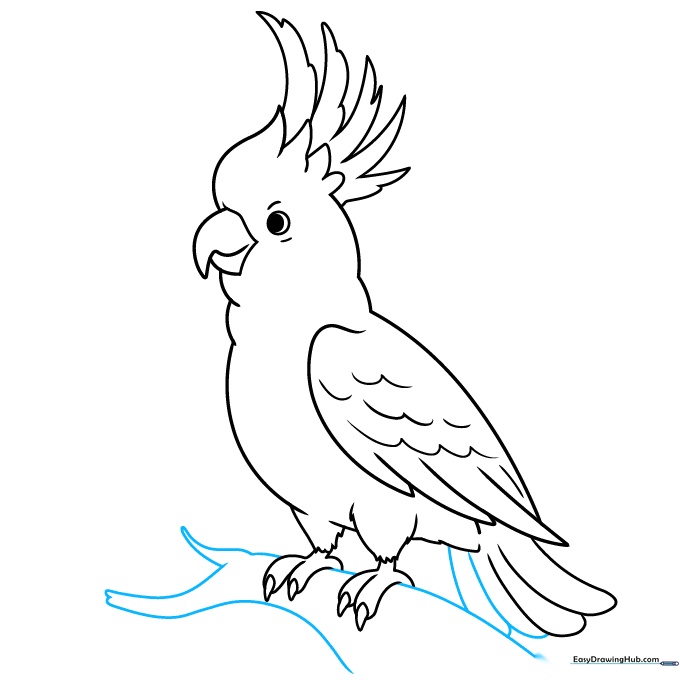
🎯 Final Result
Step-by-Step Instructions
Step 1: Sketching the Beak and Eye
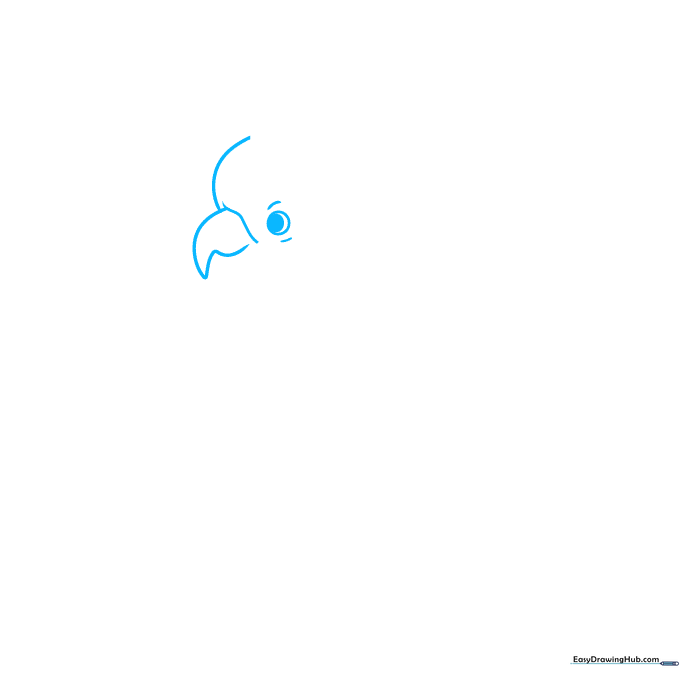
Start by drawing the curved, triangular beak and the front of the head. Add a circle within a circle for the eye and shade the center. Teacher's Tip: Keep your pencil lines light so you can easily adjust the shape if your bird looks a bit grumpy!
Step 2: Defining the Crest
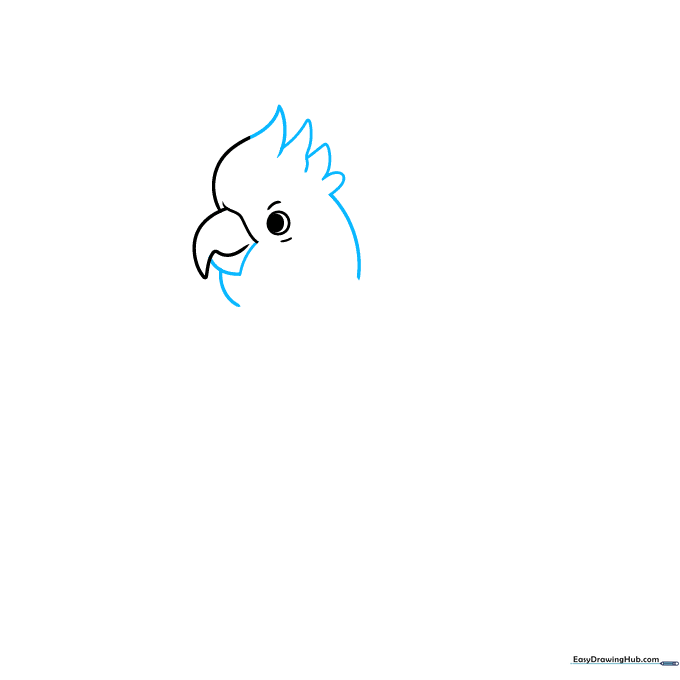
Use a 'V' shape to close the lower beak. On the back of the head, draw curved lines that meet at points to form the iconic crest. Teacher's Tip: Think of the crest like a fan—keep the lines sharp to make the feathers look perky.
Step 3: Adding Crest Height
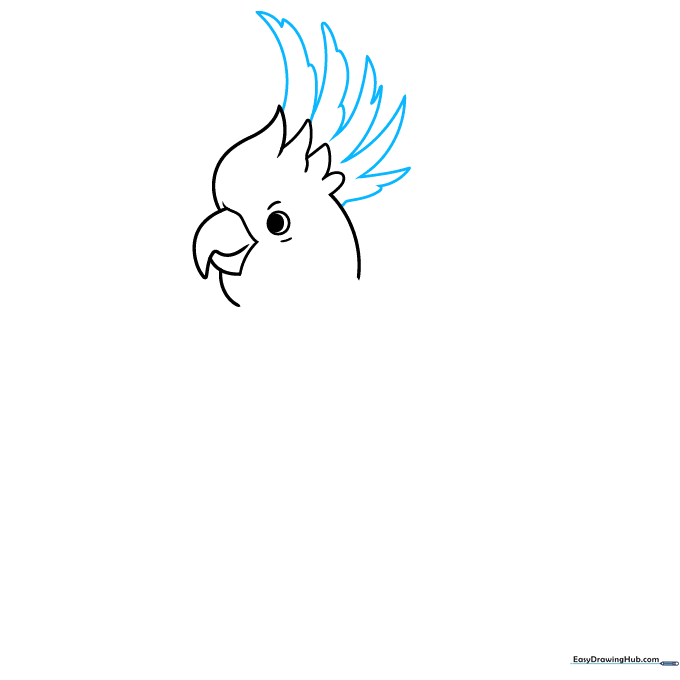
Draw the longer feathers of the crest using long, sweeping curves. Teacher's Tip: Vary the length of these lines to give your cockatoo a natural, fluffy look rather than a perfectly symmetrical one.
Step 4: Sketching the Body and Wing
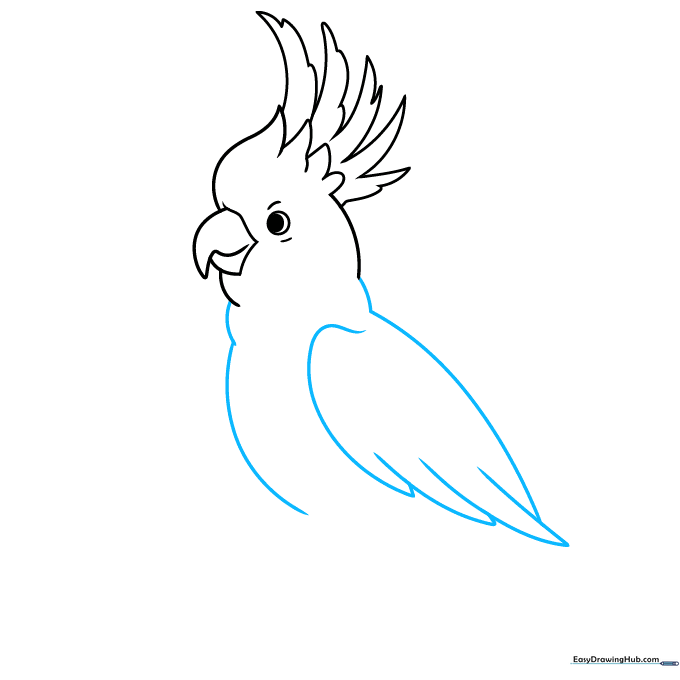
Sketch the neck and body contours. For the wing, draw overlapping curved lines that meet at points to represent flight feathers. Teacher's Tip: Imagine the wing is a folded hand—keep the lines flowing in the same direction.
Step 5: Adding Feather Texture
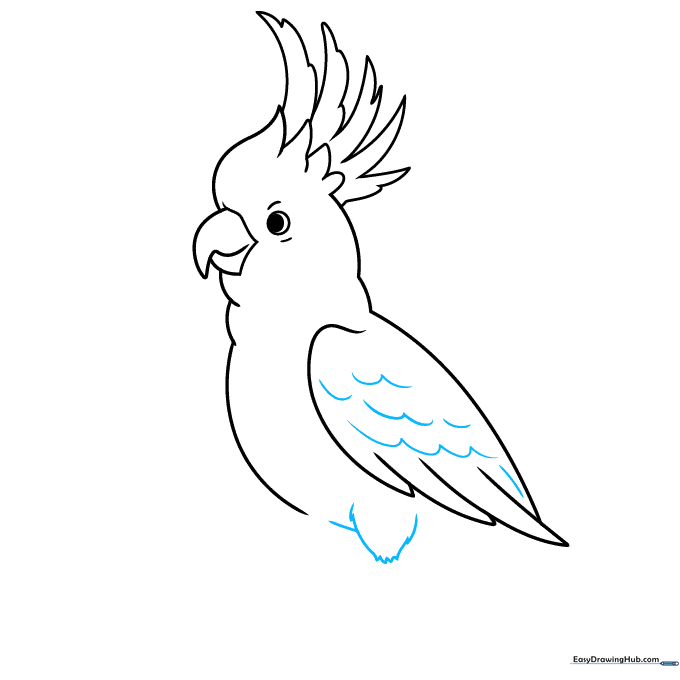
Texture the wing with rows of connected 'U' shaped lines. Add the feathered upper leg using short, jagged strokes. Teacher's Tip: The 'U' shapes act as a pattern; keep them consistent to make the feathers look uniform.
Step 6: Drawing the Feet and Claws
Draw the legs and toes using long, curved lines. Finish each toe with a small, curved triangle for the claw. Teacher's Tip: Bird feet are tricky! Focus on the 'grasping' shape to make it look like the bird is holding onto something.
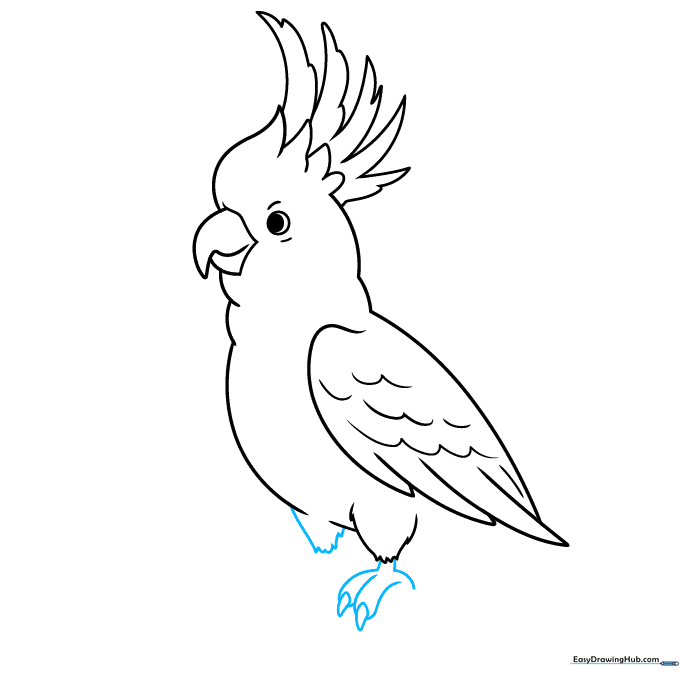
Step 7: Adding the Tail
Draw the second foot and begin sketching the long tail feathers using lines that double back on themselves. Teacher's Tip: Use long, fluid strokes for the tail to show movement.
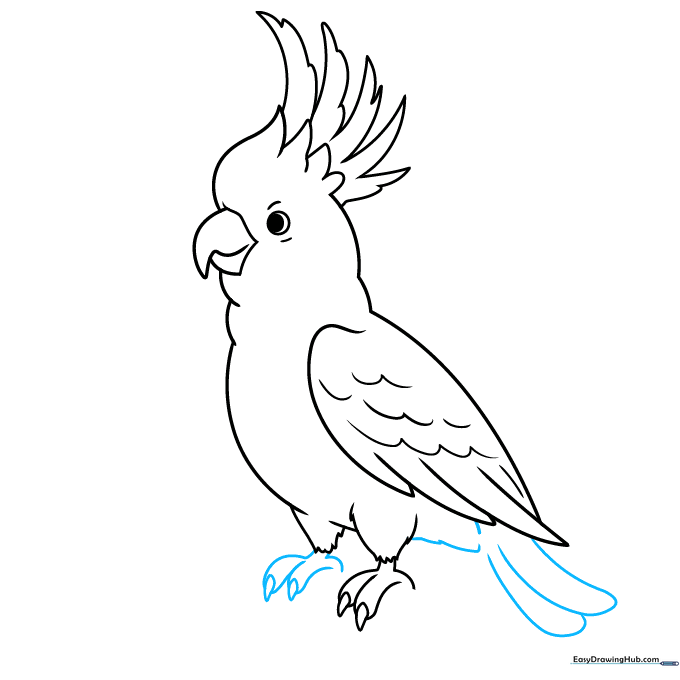
Step 8: Perching on a Branch
Finish the tail feathers and add a tree branch for your bird to perch on. Teacher's Tip: Draw the branch with slightly wavy lines to make it look like real wood, not a straight ruler line.
Step 9: Adding Final Texture

Add small, curved lines to the body and branch to create texture. Teacher's Tip: Use these lines sparingly to suggest feathers and wood grain without cluttering the drawing.
Step 10: Bringing it to Life with Color

Time to color! Use bright yellow for the crest, white for the body, and gray for the beak and feet. Teacher's Tip: If you want to make it look like a sulfur-crested cockatoo, focus the yellow on the head and keep the rest of the body clean and white.
More Tutorials


