How to Draw a Chinese Lantern: Easy 10-Step Guide
Bring a touch of celebration to your sketchbook with this fun Chinese lantern drawing! Designed for young artists and beginners, this project requires only a pencil, eraser, and paper. Follow these steps to master symmetry and decorative detailing while creating a vibrant piece of art.
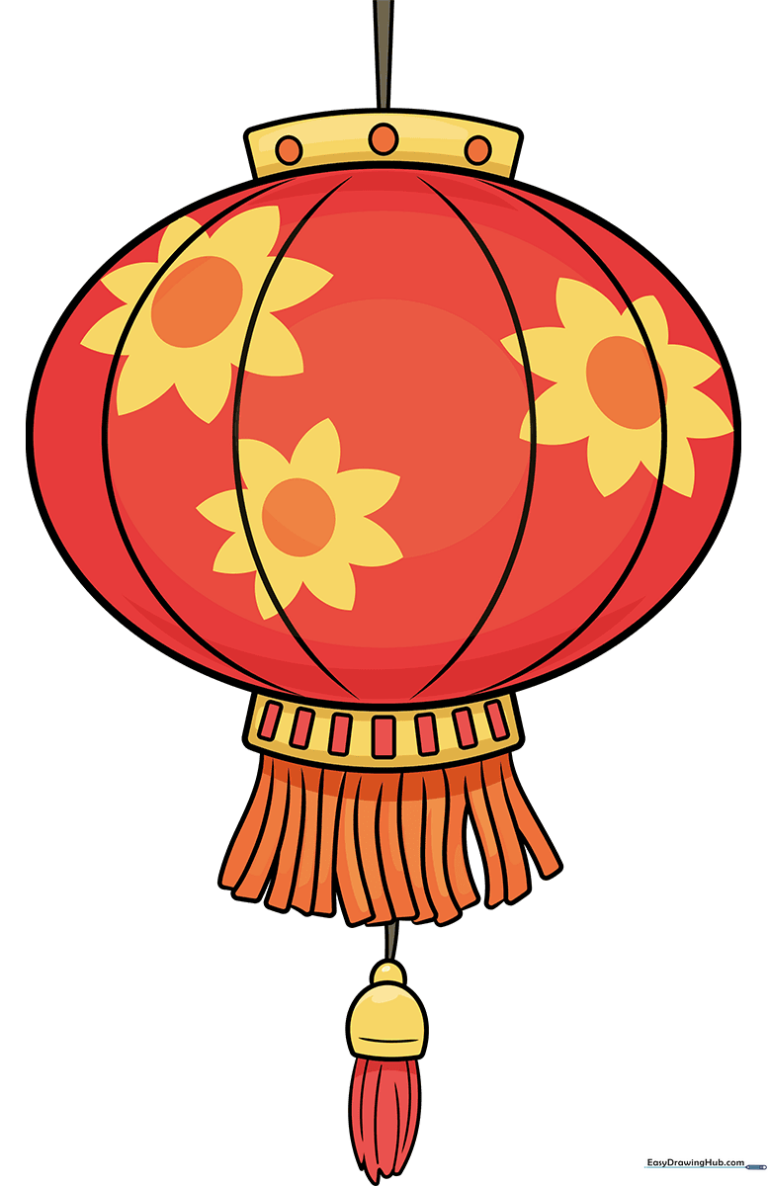
🎯 Final Result
Step-by-Step Instructions
Step 1: Sketching the Main Body

Draw a large, rounded oval for the lantern's body. Add a small, curved rectangle at the top and bottom to serve as the frame. Teacher's Tip: Keep your lines light and loose—don't worry about perfect symmetry yet!
Step 2: Adding Structural Ribs
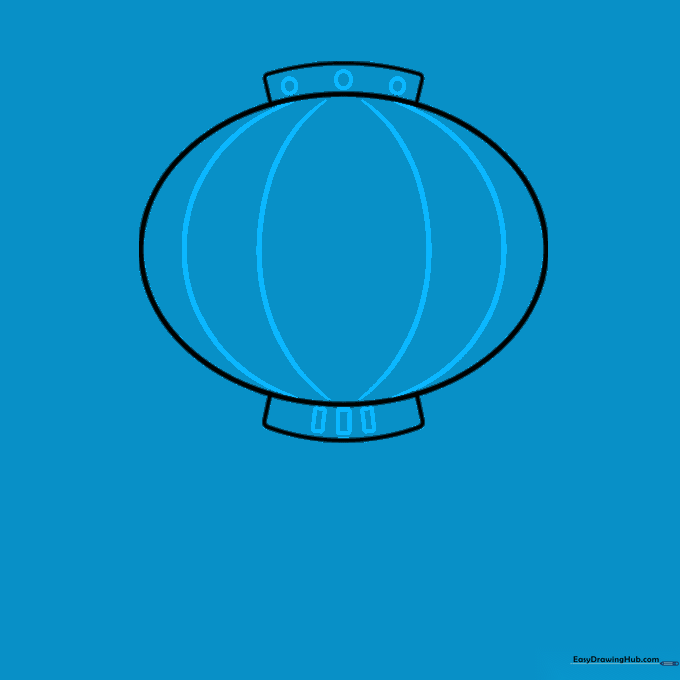
Draw long, curved lines across the oval to create the lantern's ribs, similar to a beach ball. Add small circles in the top rectangle and small rectangles in the bottom one. Teacher's Tip: Space your lines evenly to give the lantern a rounded, 3D look.
Step 3: Starting the Tassels
Begin the decorative tassels at the bottom using overlapping curved lines. Connect them with short, straight lines. Teacher's Tip: Think of these as soft, fabric loops hanging down.
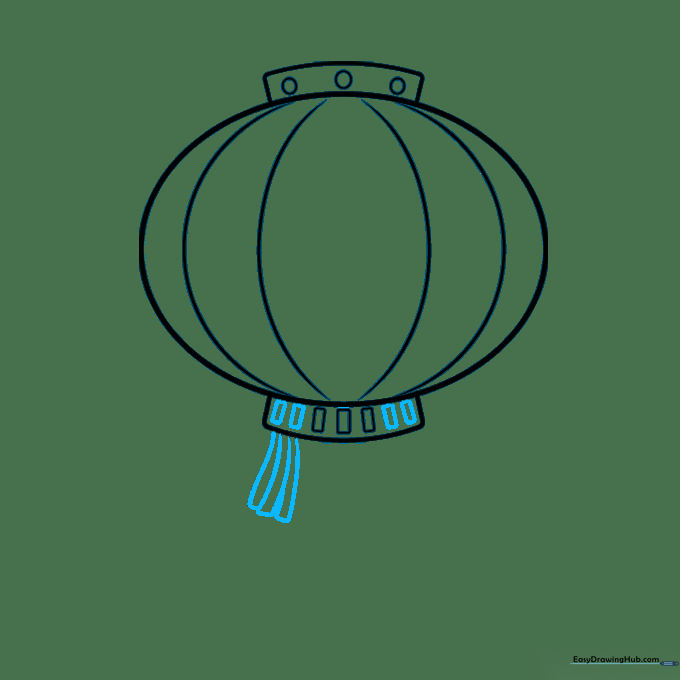
Step 4: Layering the Tassels

Add a second row of tassels below the first. Use the same overlapping curved line technique. Teacher's Tip: Vary the size of your curves slightly to make the tassels look more natural and flowy.
Step 5: Defining the Tassel Base
Complete the rectangular tassels and draw a 'C' shaped line underneath. Connect it back to the tassels with two small curves. Teacher's Tip: This creates the anchor point for the final fringe.
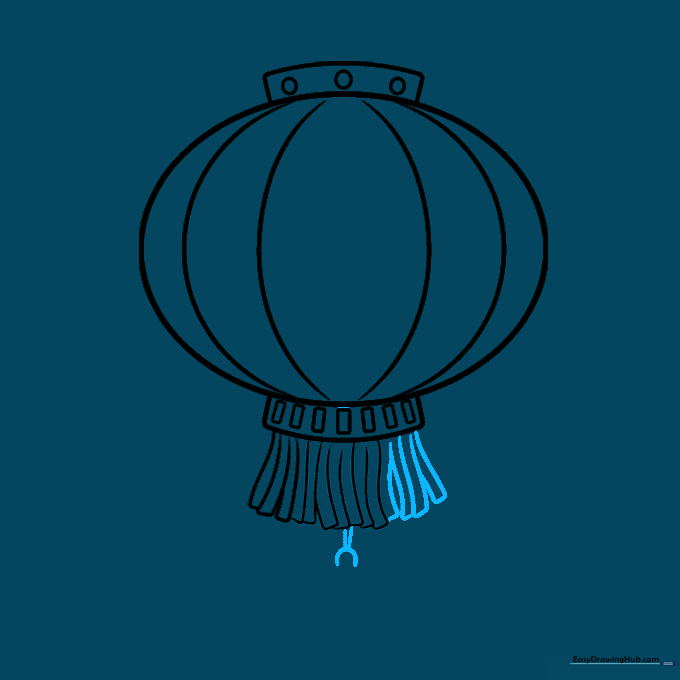
Step 6: Adding the Final Tassel
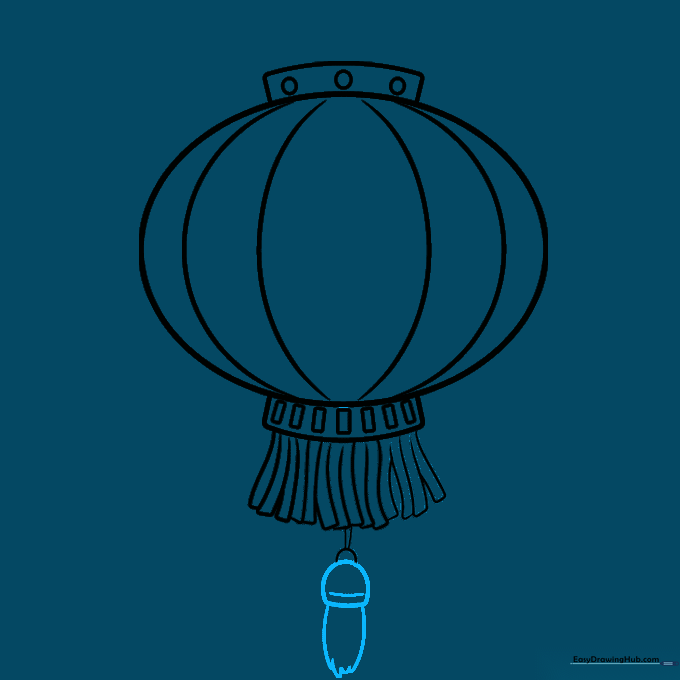
Draw a larger 'C' shape below the first, connect the ends, and add a final fringe using small curved lines. Teacher's Tip: Keep your pencil pressure light here to maintain a delicate look.
Step 7: Adding Texture and String

Add texture lines to the tassels and draw ovals on the lantern's surface. Extend two curved lines from the top to create the hanging string. Teacher's Tip: The string should look like it's pulling slightly upward.
Step 8: Decorative Floral Details

Draw more ovals on the lantern and surround one with petal shapes using curved lines that meet at points. Teacher's Tip: Try to space your flowers out so the lantern doesn't look too crowded.
Step 9: Finalizing the Patterns
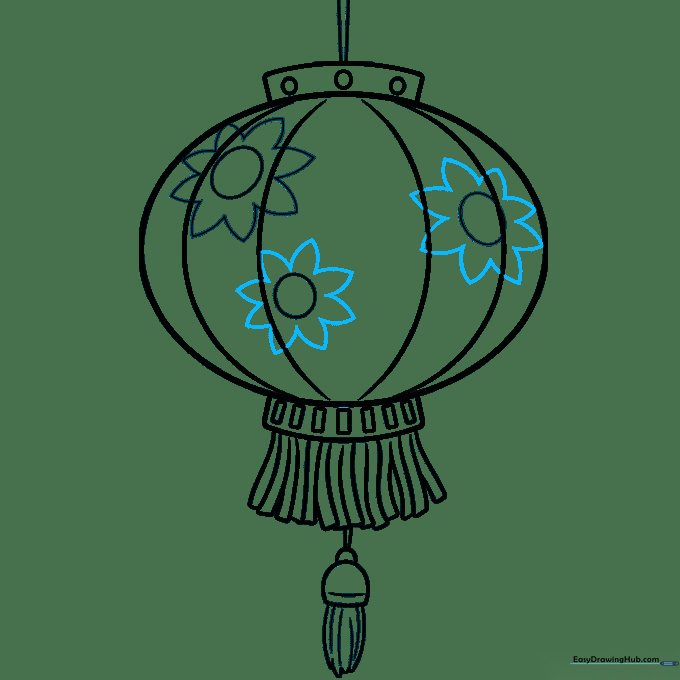
Complete the remaining flower petals around the other ovals. Teacher's Tip: Ensure your petals are consistent in size to keep the design balanced.
Step 10: Bringing it to Life with Color

Your outline is complete! Now, add vibrant colors. Red and gold are traditional, but feel free to use your favorite palette. Teacher's Tip: Use a darker shade of red for the shadows to give the lantern a sense of depth.
More Tutorials


