How to Draw a Chinchilla: Easy 9-Step Guide for Beginners
Ready to bring a fuzzy friend to life? This tutorial is perfect for young artists and beginners looking to practice character design. All you need is a pencil, an eraser, and a piece of paper to master this adorable chinchilla in just a few minutes.
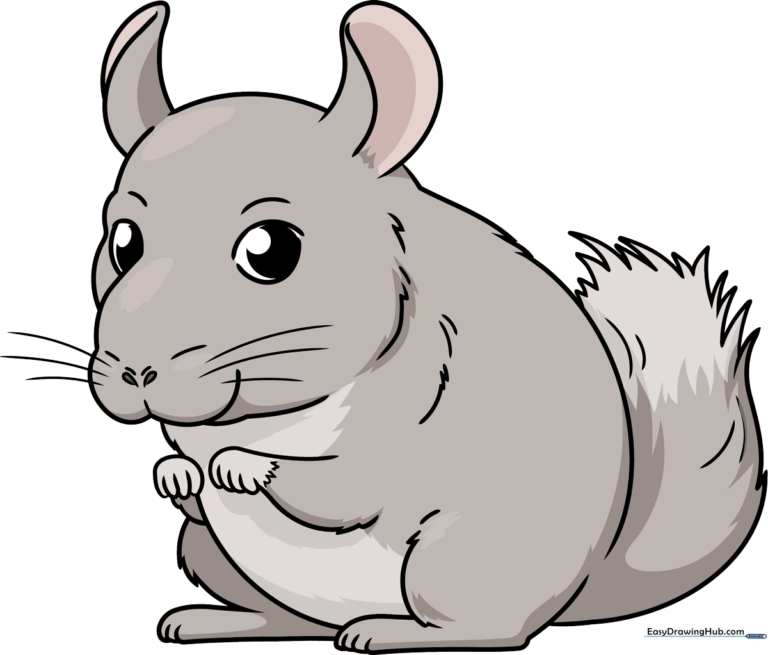
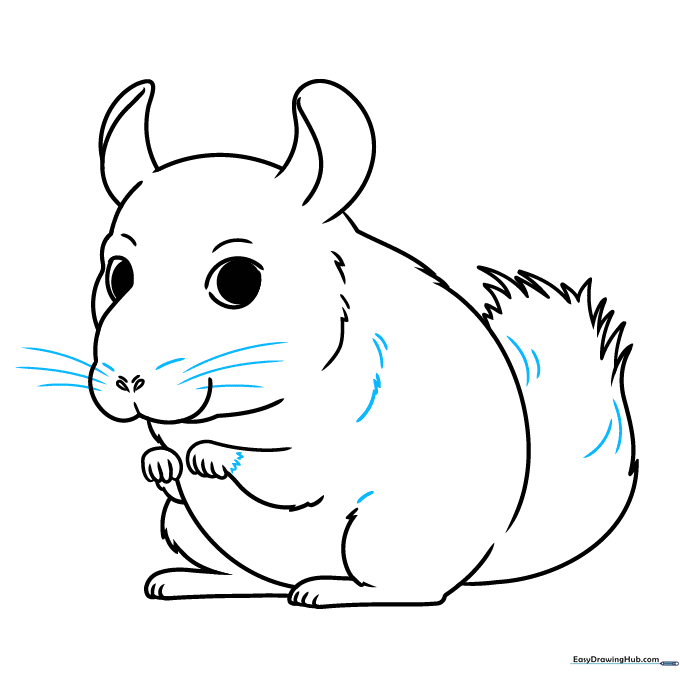
🎯 Final Result
Step-by-Step Instructions
Step 1: Sketching the Eyes and Nose

Start by drawing two large, rounded shapes for the eyes and a small, delicate nose. Teacher's Tip: Keep the eyes spaced apart to give your chinchilla a friendly, wide-eyed expression. Shade in large, dark pupils to make them pop.
Step 2: Defining the Mouth and Muzzle
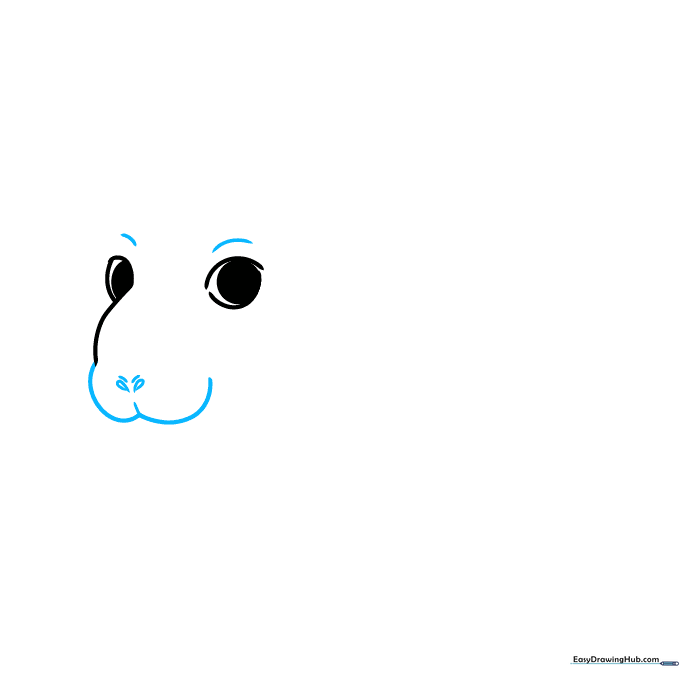
Draw a soft 'W' shape for the mouth and add two tiny teardrop shapes for the nostrils. Teacher's Tip: Use very light pressure here; these details define the character's personality.
Step 3: Shaping the Head and First Ear
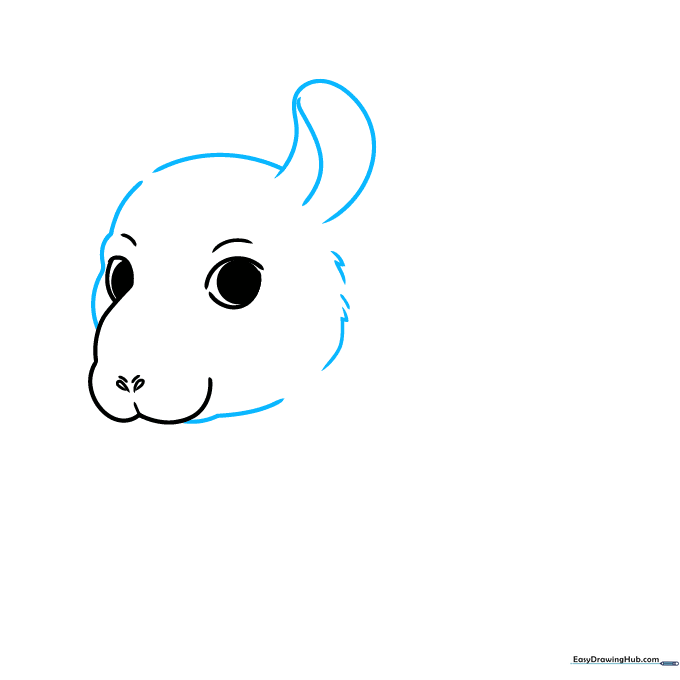
Use curved lines to outline the head, using short, jagged strokes on the sides to suggest soft fur. Add one large, rounded ear. Teacher's Tip: Think of the ear as a large petal shape; don't make it too stiff.
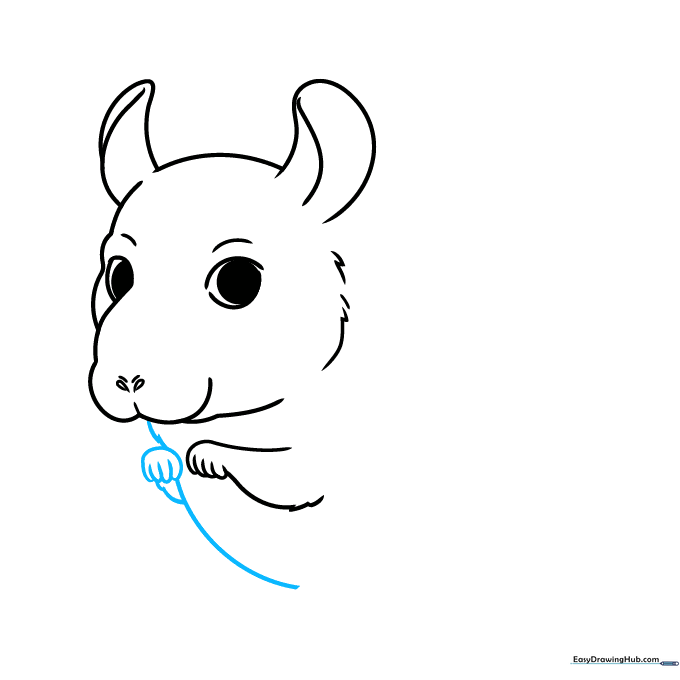
Step 4: Adding the Second Ear and Paw
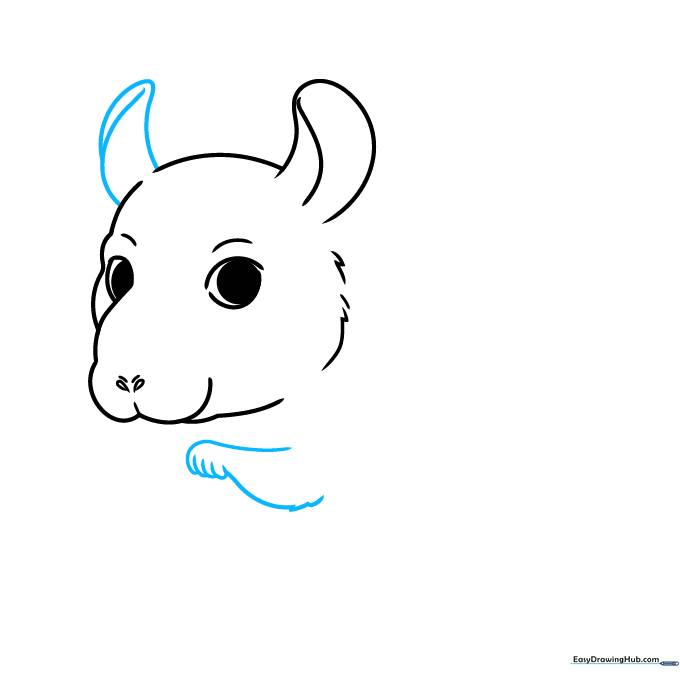
Draw the second ear to match the first, then sketch the raised arm and paw. Teacher's Tip: Use overlapping lines for the toes to give them a natural, rounded look.
Step 5: Drawing the Belly and Foreleg
Connect the head to the body with a long, smooth curved line for the belly. Add the second foreleg. Teacher's Tip: Keep the belly line slightly rounded to show the chinchilla's plump, cute shape.
Step 6: Sketching the Back and Rear Leg
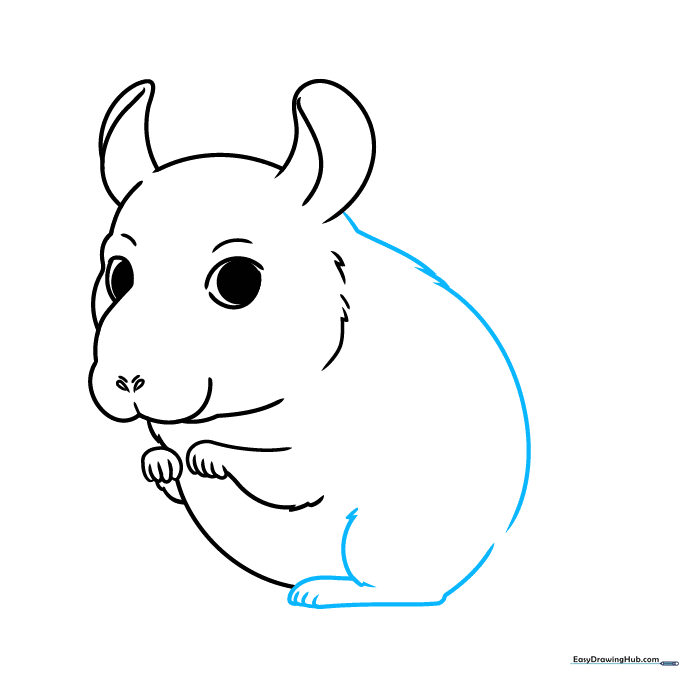
Extend a line from the head to form the back, then add the rear leg. Teacher's Tip: Use short, quick strokes at the knee to mimic the texture of thick, soft fur.
Step 7: The Second Rear Leg and Tail Base
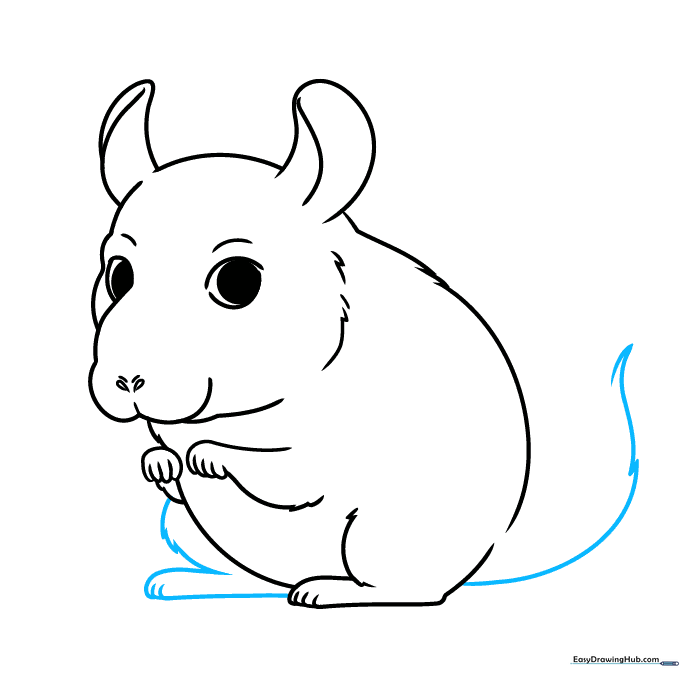
Draw the second rear leg and begin the bushy tail. Teacher's Tip: The tail should be large and fluffy—don't be afraid to make it look slightly oversized for extra cuteness!
Step 8: Completing the Bushy Tail
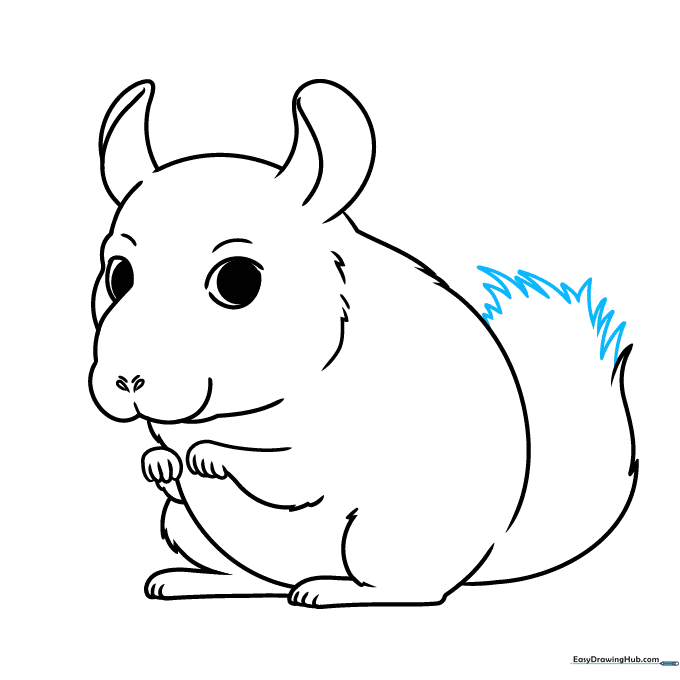
Finish the tip of the tail using jagged, overlapping lines to create a soft, voluminous effect. Teacher's Tip: Vary the length of your lines to make the tail look natural and fluffy.
Step 9: Final Details and Whiskers
Add final texture lines to the shoulders and wrists. Draw long, sweeping lines for the whiskers. Teacher's Tip: Whiskers should be drawn with a single, confident stroke to look realistic.
Step 10: Adding Color
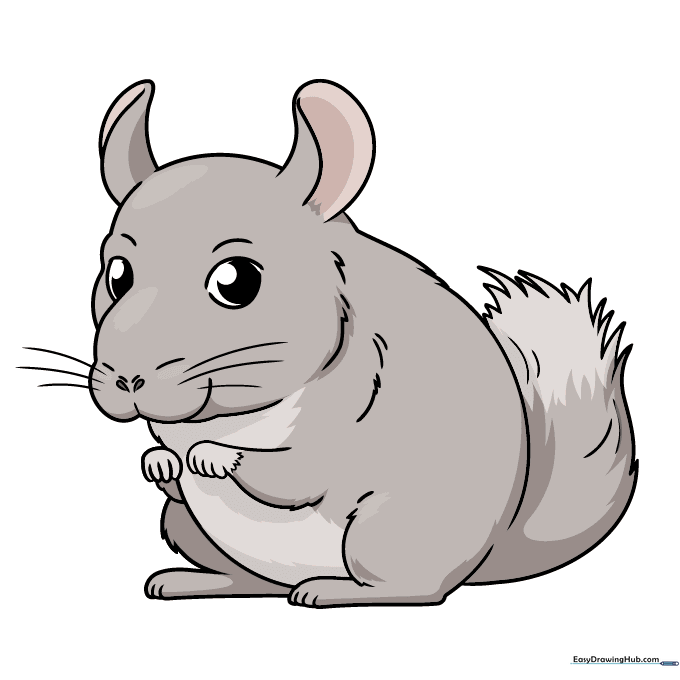
Bring your chinchilla to life with color! Use soft grays for a classic look, or try beige and cream for a domestic variety. Teacher's Tip: Use light, circular motions with your colored pencils to keep the fur looking soft.
More Tutorials


