How to Draw a Cheerleader: Easy 10-Step Guide for Kids
Ready to bring some spirit to your sketchbook? This tutorial is perfect for young artists ages 7+ looking to master character proportions. Grab your pencils, an eraser, and some markers, and let's create a vibrant cheerleader character step-by-step.
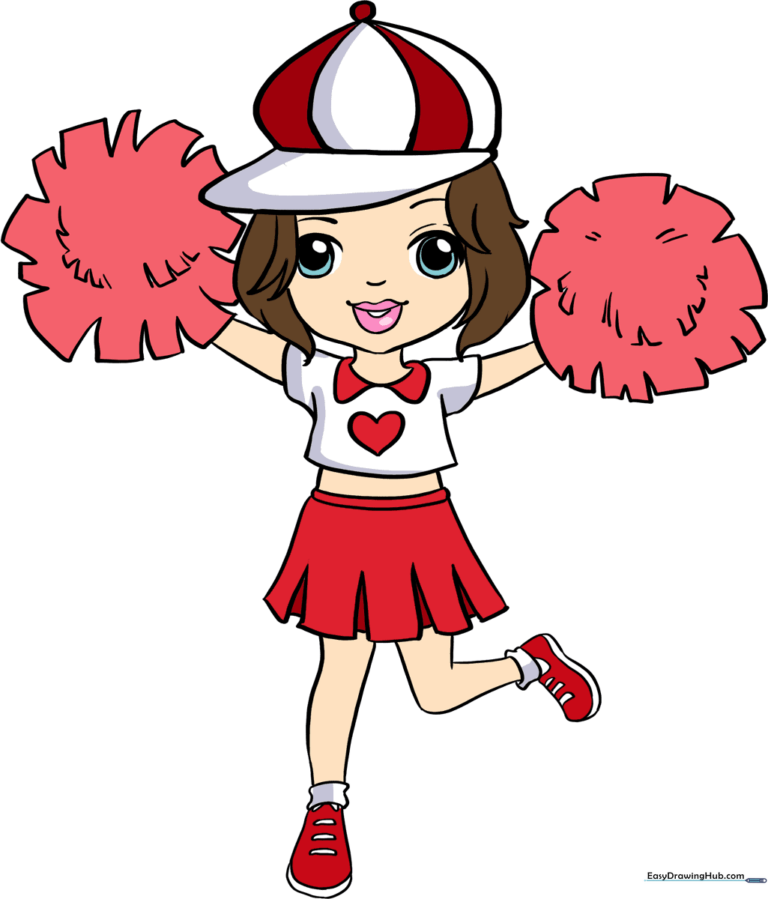
🎯 Final Result
Step-by-Step Instructions
Step 1: Sketching the Head and Hair
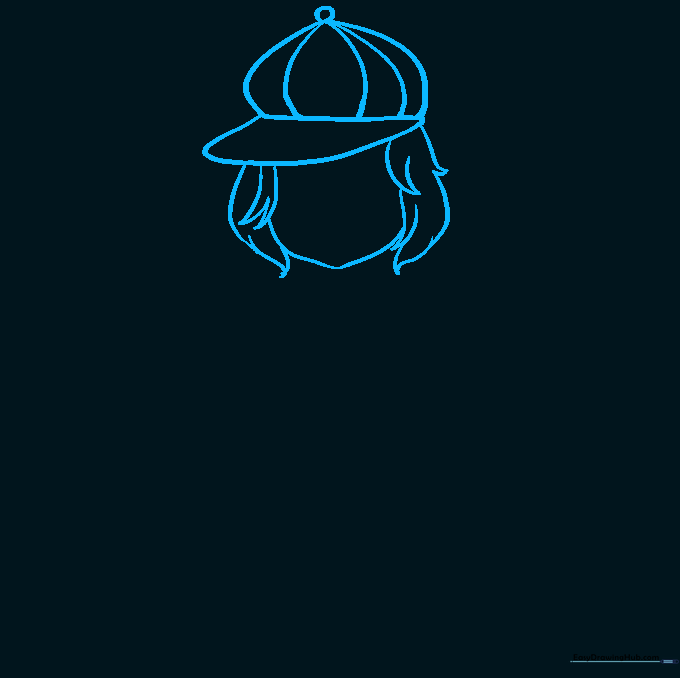
Start by drawing a soft, rounded shape for the head. Add the hat crown and bill on top, then frame the face with jagged, curved lines for hair. Teacher's Tip: Keep your pencil lines light and loose here so you can easily adjust the hair shape later.
Step 2: Defining the Uniform
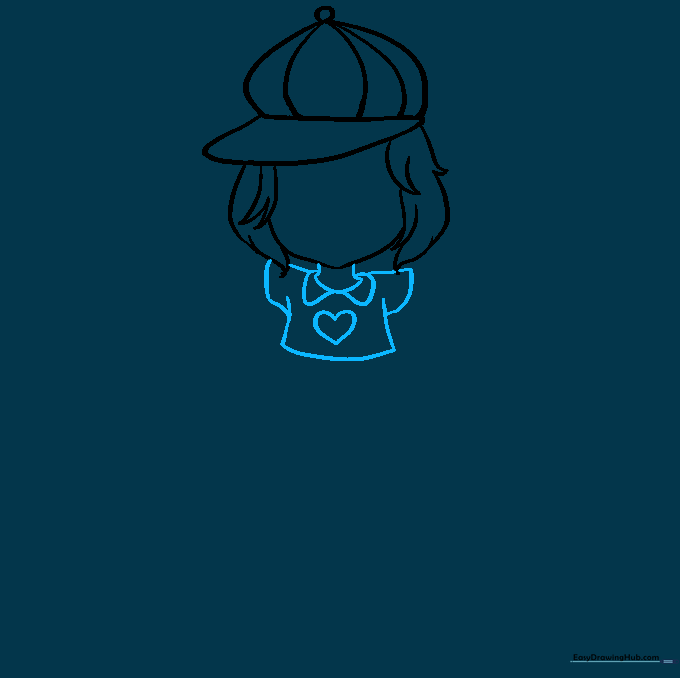
Draw the neck and the collar of the shirt. Sketch a simple 'T' shape for the uniform top and add a heart in the center for a fun detail. Teacher's Tip: Use a ruler if you struggle with the straight lines of the shirt, but try freehand for a more natural cartoon look.
Step 3: Creating the Pompoms
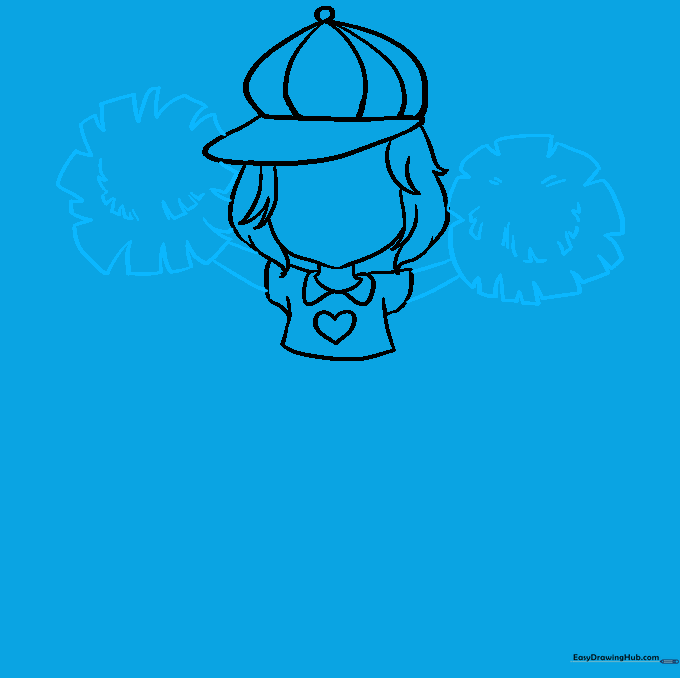
Extend the arms from the sleeves and draw rectangular shapes at the ends to represent the pompoms. Add short, quick strokes inside to give them a fluffy texture. Teacher's Tip: Don't worry about perfect lines; pompoms are messy and energetic, so let your hand move quickly!
Step 4: Drawing the Skirt
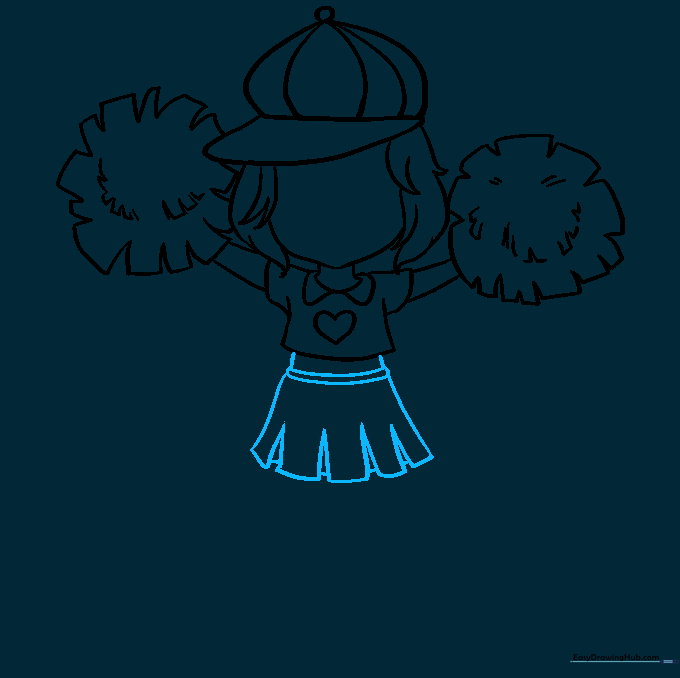
Draw the skirt starting from the waistline. Use inverted 'V' shapes to create the hemline. Teacher's Tip: Make the skirt flare out slightly to give the character a sense of movement, as if she is mid-cheer.
Step 5: Sketching the First Leg

Extend two curved lines downward from the skirt to form the first leg. Teacher's Tip: Keep the lines parallel to ensure the leg looks proportional to the body.
Step 6: Adding the Shoe
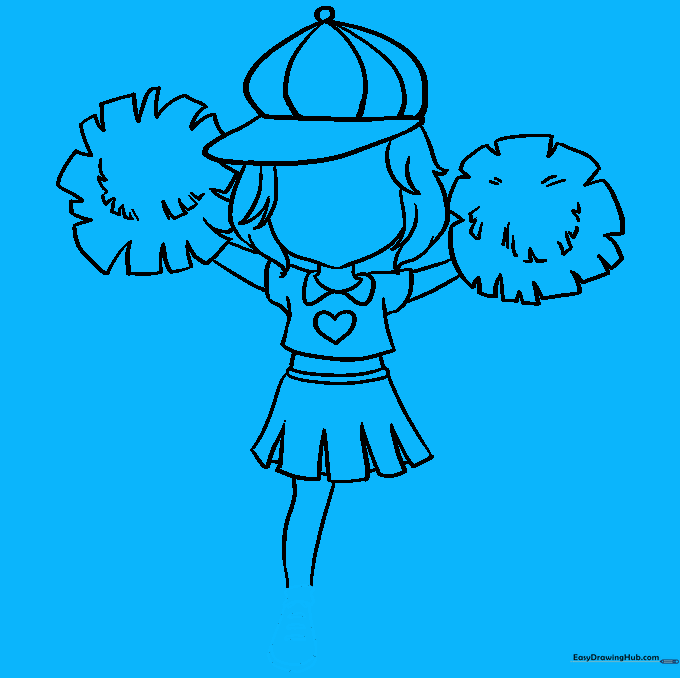
Draw a rounded shape at the bottom of the leg for the shoe. Add bands for the sock and sole, and small ovals for the laces. Teacher's Tip: Focus on the curve of the toe to make the shoe look like it's pointing forward.
Step 7: Drawing the Second Leg
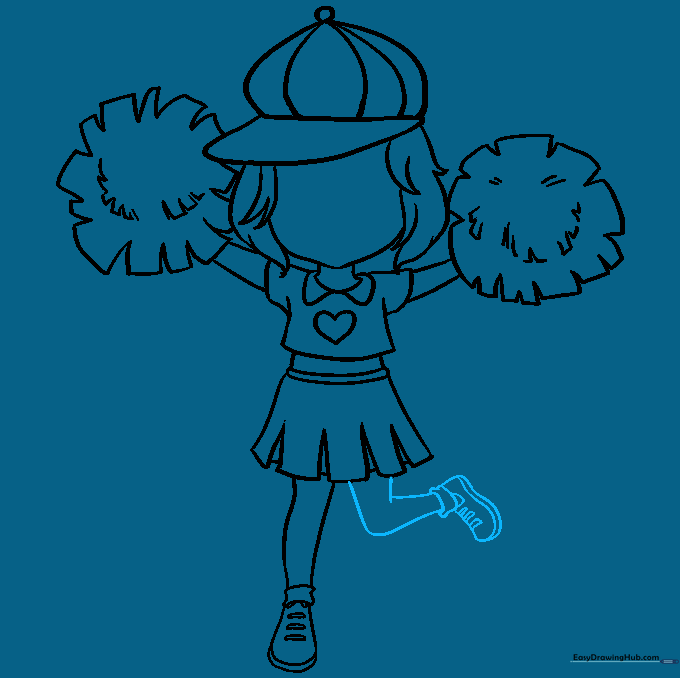
Draw the second leg, bending it at the knee to show action. Add the sock and shoe details to match the first leg. Teacher's Tip: The bend at the knee adds character—try to make the angle sharp to show energy.
Step 8: Drawing the Face

Draw the eyes using three circles of decreasing size, shading the smallest one for the pupil. Add eyelids and eyebrows. Teacher's Tip: Symmetry is key here—try to draw both eyes at the same time to keep them balanced.
Step 9: Final Facial Details

Finish the face with a simple nose and a happy, smiling mouth. Teacher's Tip: A small curve for the nose is all you need; keep it simple to maintain the cartoon style.
Step 10: Add Color
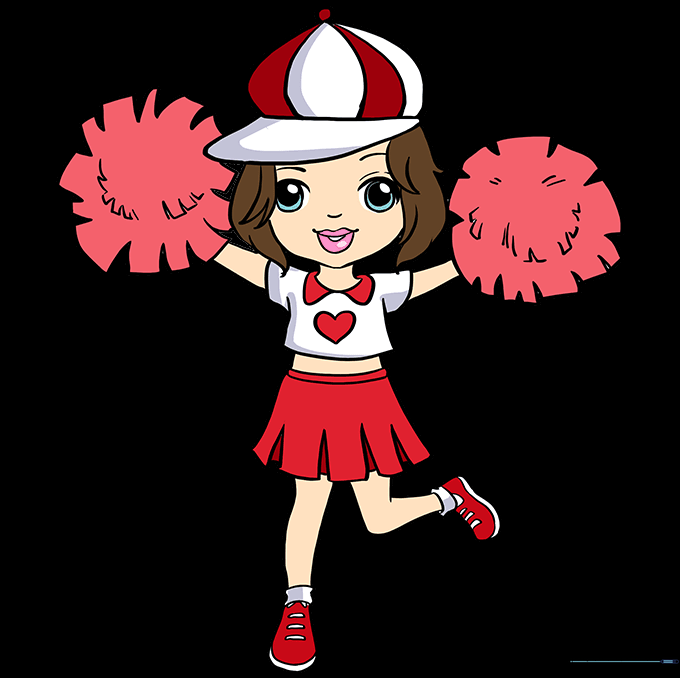
Bring your cheerleader to life with color! Use your school colors or your favorite team's colors to customize the uniform. Teacher's Tip: Use colored pencils for a soft look or markers for bold, vibrant team spirit.
More Tutorials


