How to Draw a Centaur: Easy 10-Step Guide for Beginners
Bring mythology to life with this step-by-step guide, perfect for young artists ages 8+. You will need a pencil, eraser, and paper to master the blend of human and horse anatomy. Follow along to build confidence in character design and proportions.
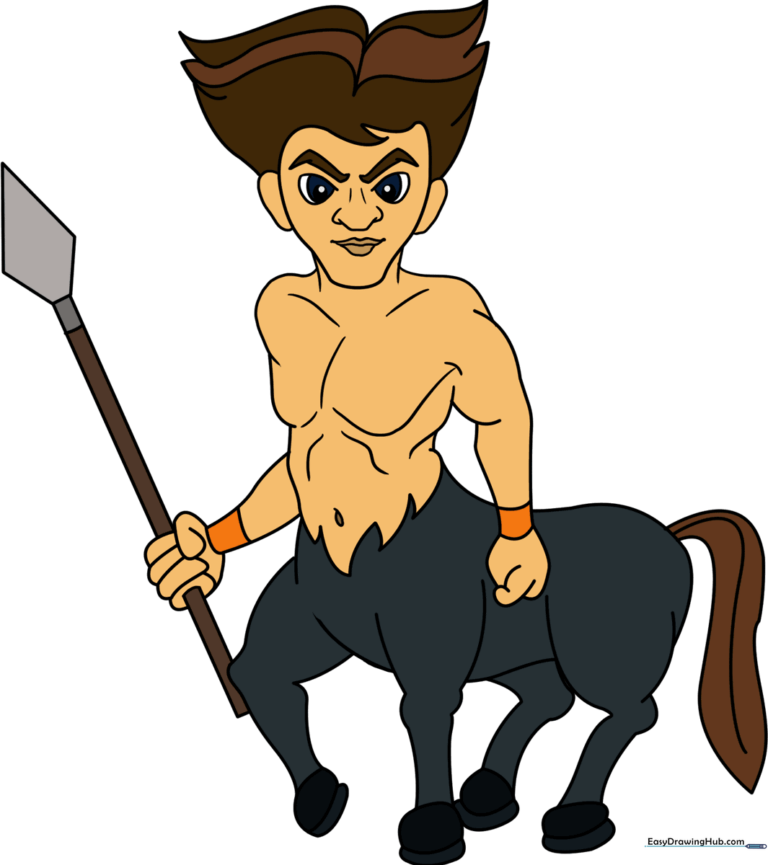
🎯 Final Result
Step-by-Step Instructions
Step 1: Sketching the Head and Chest

Draw a light oval for the head and an upside-down pentagon for the chest. Teacher's Tip: Keep these shapes loose and light; they are just the 'skeleton' for your character's posture.
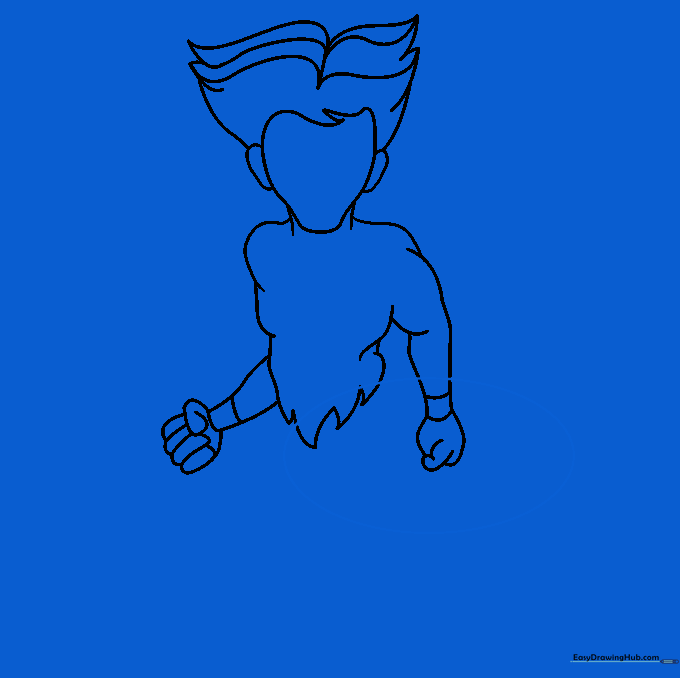
Step 2: Defining the Silhouette
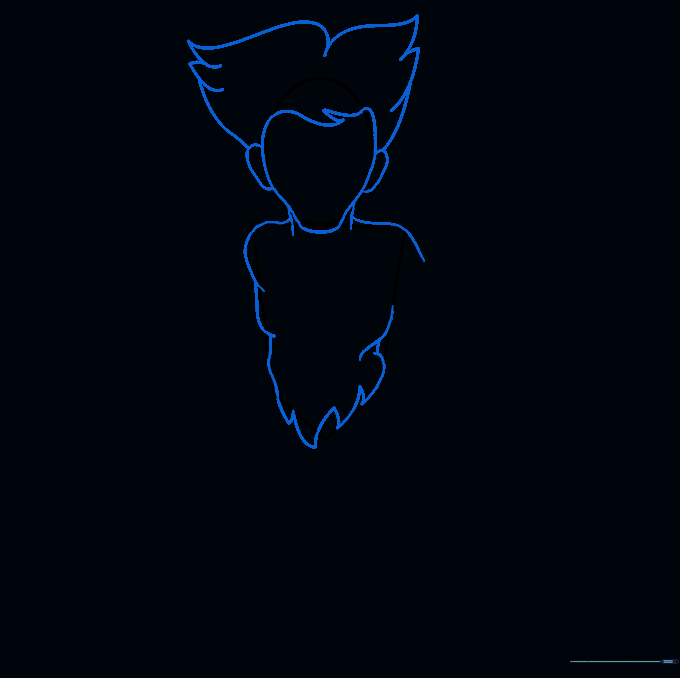
Outline the head and neck, adding wavy lines for hair and ears. Connect the neck to the shoulders. Teacher's Tip: Use short, quick strokes for the hair to make it look flowy rather than stiff.
Step 3: Refining the Human Torso

Erase your guide lines and add muscular arms with clenched fists. Add a band around the wrist for a bracelet. Teacher's Tip: If the hands look tricky, remember they are just simple shapes—don't overthink the fingers yet!
Step 4: Mapping the Horse Body
Draw a large horizontal oval overlapping the bottom of the human torso. Teacher's Tip: This oval acts as the 'anchor' for the horse half, so make sure it is large enough to support the upper body.
Step 5: Shaping the Horse Posterior
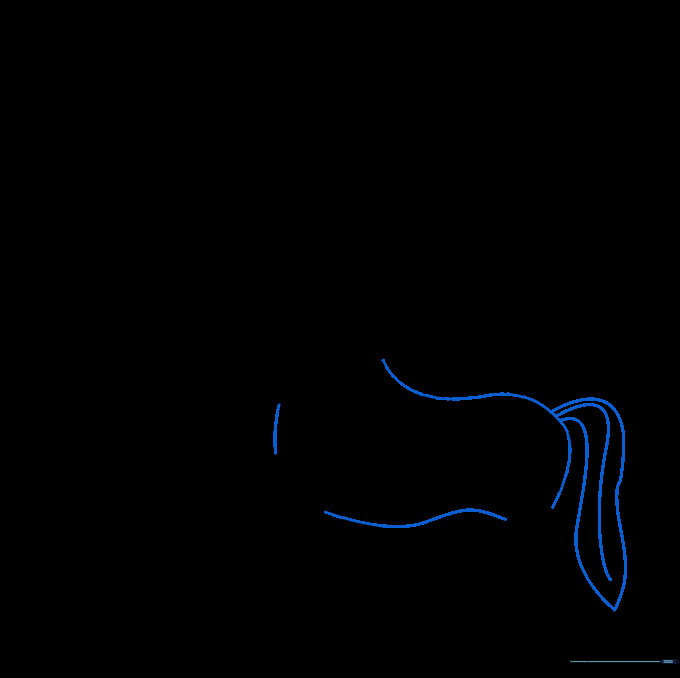
Contour the back, belly, and rump using smooth, long curves. Add a tail by drawing a curved line that doubles back. Teacher's Tip: Use long, sweeping motions for the tail to give it a sense of movement.
Step 6: Planning the Legs
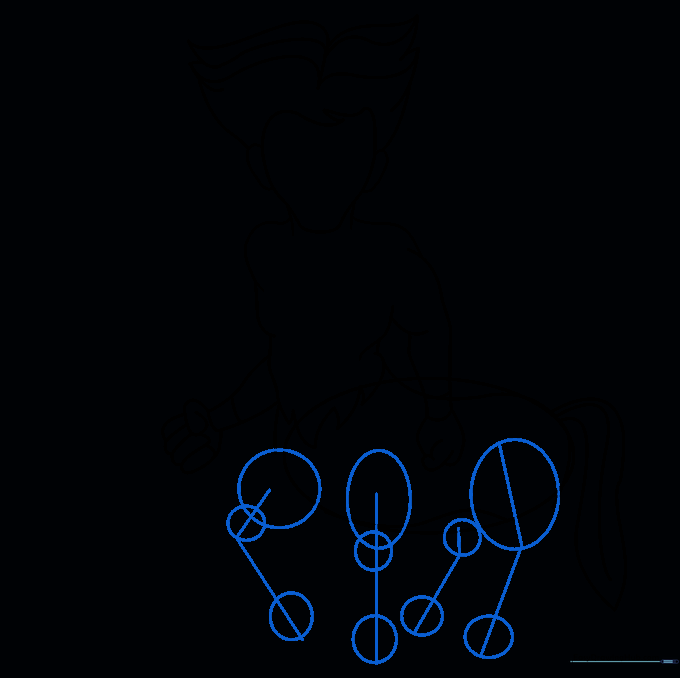
Draw ovals for the joints and straight lines for the leg bones. Teacher's Tip: Pay attention to the angles—horses have distinct 'knees' that bend forward and backward.
Step 7: Drawing the Hooves
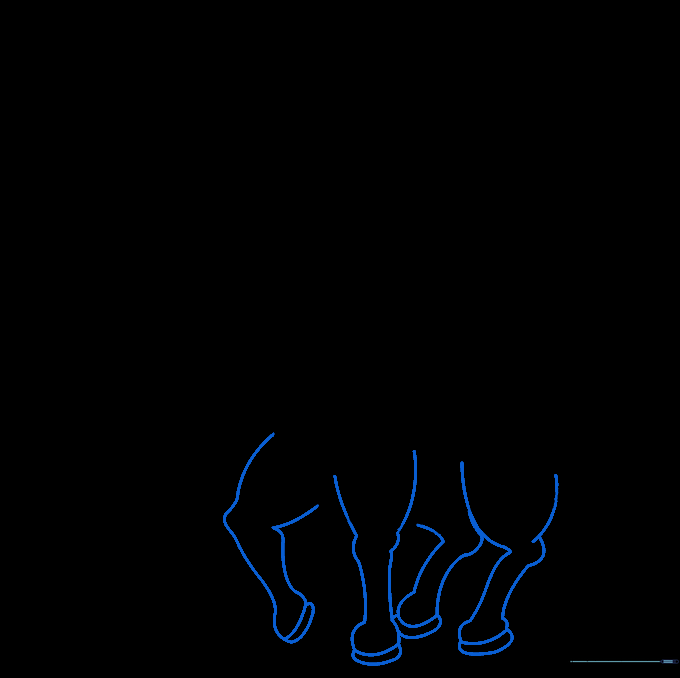
Flesh out the legs using curved lines and enclose the hooves at the bottom. Erase your guide ovals. Teacher's Tip: Keep the hooves slightly wedge-shaped to make them look sturdy.
Step 8: Adding the Spear
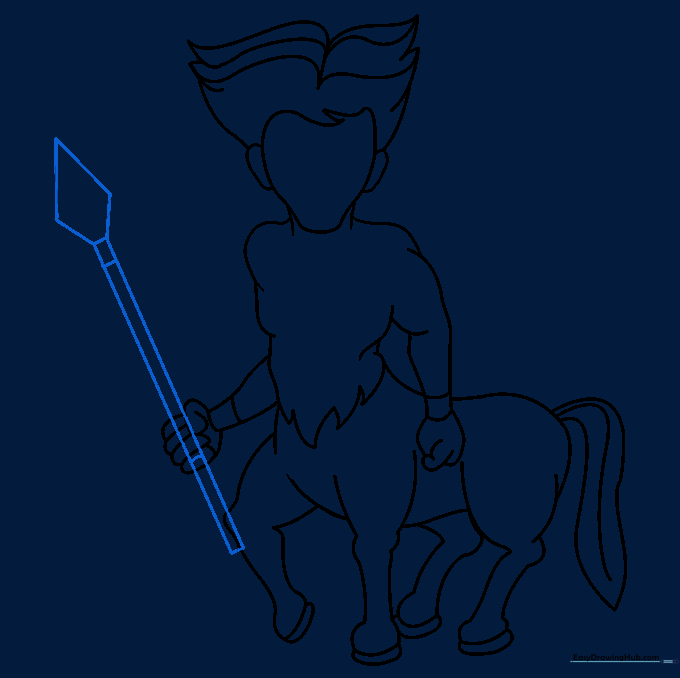
Draw a spear held in the hand using parallel lines and a pentagon tip. Teacher's Tip: Use a ruler if you want the spear shaft to be perfectly straight!
Step 9: Final Facial Details
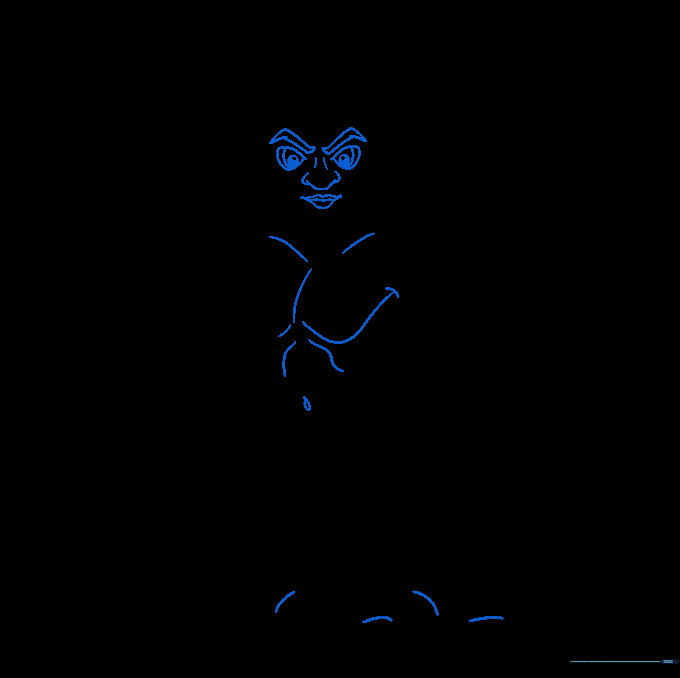
Add eyebrows, nose, mouth, and eyes. Use rounded shapes for the belly button. Teacher's Tip: Small details like the curve of an eyebrow can completely change the expression of your character.
Step 10: Adding Color

Bring your centaur to life with color! Use earthy tones for the horse body and vibrant colors for the clothing. Teacher's Tip: Try using light shading on one side of the body to make your drawing look 3D.
More Tutorials


