How to Draw a Celtic Knot: Easy 10-Step Guide
Looking for a screen-free way to build focus and fine motor skills? This Celtic knot tutorial is perfect for artists ages 7 and up. Grab a pencil, an eraser, and a piece of paper, and follow along as we break down this complex-looking pattern into simple, manageable shapes.
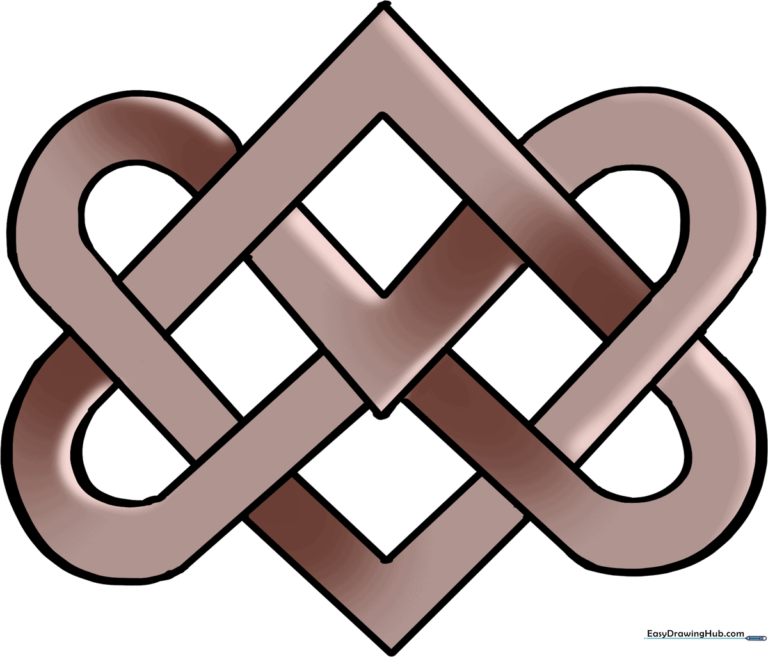
🎯 Final Result
Step-by-Step Instructions
Step 1: Sketching the Top V-Guides

Start by drawing two parallel upside-down 'V' shapes. Tip: Keep these lines light and centered on your page to act as the anchor for your entire knot.
Step 2: Adding the Heart Curves

Extend the ends of your V-shapes with smooth, curved lines. Tip: Aim for an upside-down heart shape; this creates the signature fluid look of Celtic art.
Step 3: Defining the Center

Draw two more parallel V-shapes inside the existing structure. Tip: Keep the spacing consistent between these lines to make the knot look balanced and professional.
Step 4: Creating the Side Loops
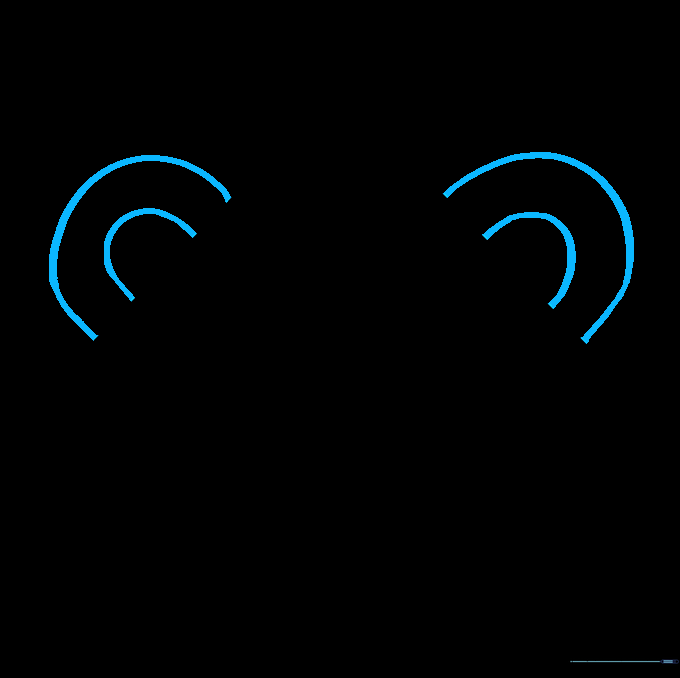
Add parallel 'U' shaped lines on both sides of the knot. Tip: Imagine you are drawing rounded 'ears' on the knot; keep them symmetrical for the best result.
Step 5: Extending the Curves

Extend your 'U' lines toward the far side of the knot. Tip: Use a steady hand to keep the curves smooth as they wrap around the center.
Step 6: Mirroring the Design

Repeat the process on the opposite side to create a perfect mirror image. Tip: Check your work against the first side to ensure the knot looks balanced.
Step 7: Cleaning Up the Lines

Carefully erase any overlapping guide lines. Tip: Use a kneaded eraser if you have one; it’s great for lifting graphite without smudging your paper.
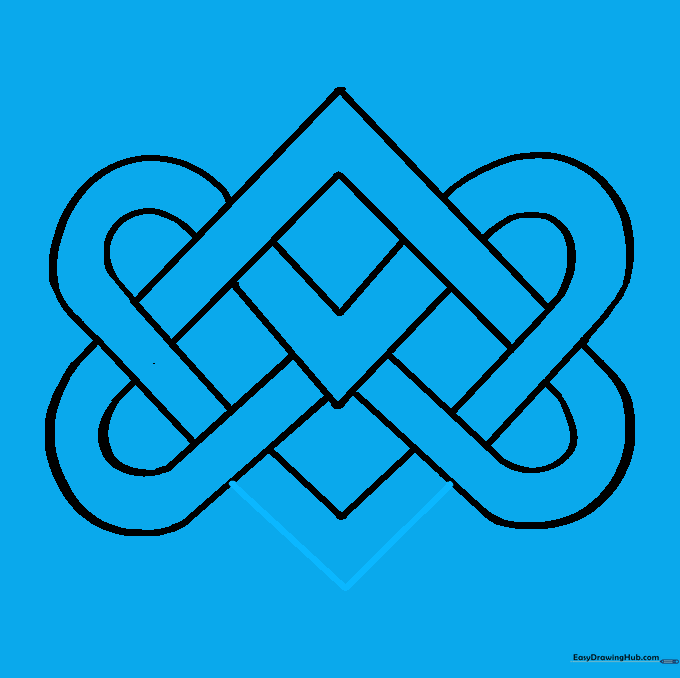
Step 8: Adding Bottom Details

Draw a V-shaped line at the bottom to close the knot. Tip: Ensure this line connects smoothly to the existing curves to maintain the 'intertwined' look.
Step 9: Finalizing the Outline
Draw the final parallel V-shape to complete the knot. Tip: Now that the structure is finished, you can trace over your lines with a pen to make them permanent.
Step 10: Adding Color

Bring your knot to life with color! Tip: Try using two different shades of the same color to highlight the 'over' and 'under' sections of the knot.
More Tutorials


