How to Draw a Cat Face: Easy 10-Step Guide for Kids
Ready to bring a feline friend to life? This tutorial is perfect for young artists ages 5 and up. You only need a pencil, an eraser, and a piece of paper to practice these essential shapes and build your confidence as an illustrator.
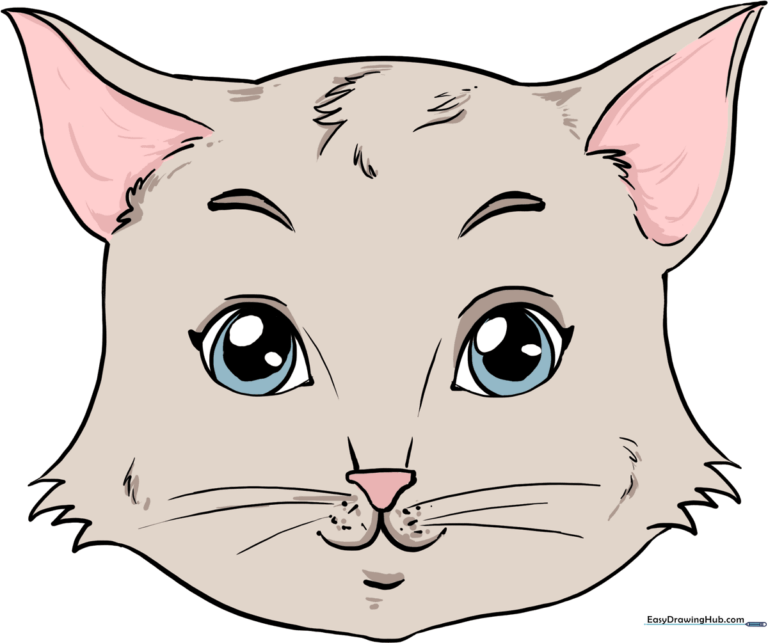
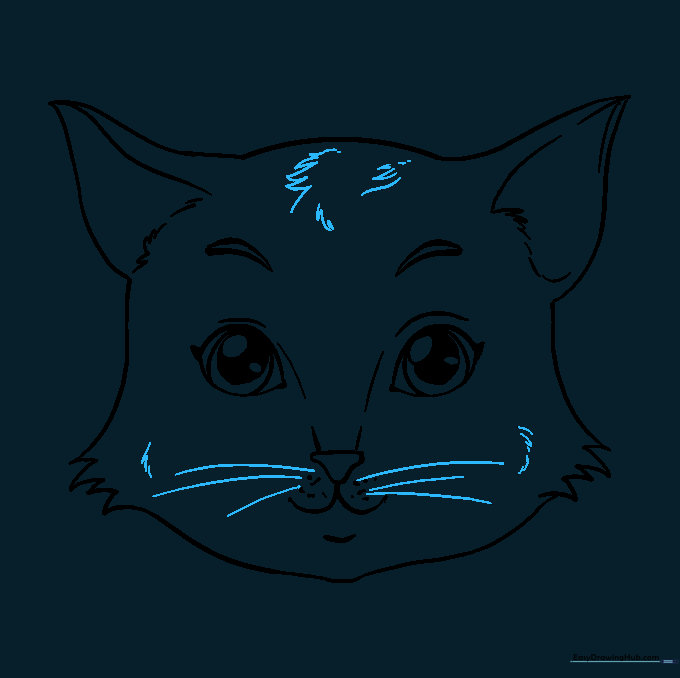
🎯 Final Result
Step-by-Step Instructions
Step 1: Sketching the Head Shape

Draw a light oval to serve as the base for the cat's face. Teacher's Tip: Keep this shape loose and light; it's just a guide for your final drawing.
Step 2: Adding Fluffy Cheeks

Extend long, curved lines from the sides of the oval, ending in a jagged zigzag pattern at the bottom. Teacher's Tip: Use short, quick strokes to make the fur look soft and textured.
Step 3: Defining the Chin

Connect the cheek tufts with a curved line to close the face, adding a small point for the chin. Teacher's Tip: Think of this as drawing a soft 'V' shape to give the cat a realistic jawline.
Step 4: Drawing the Ears
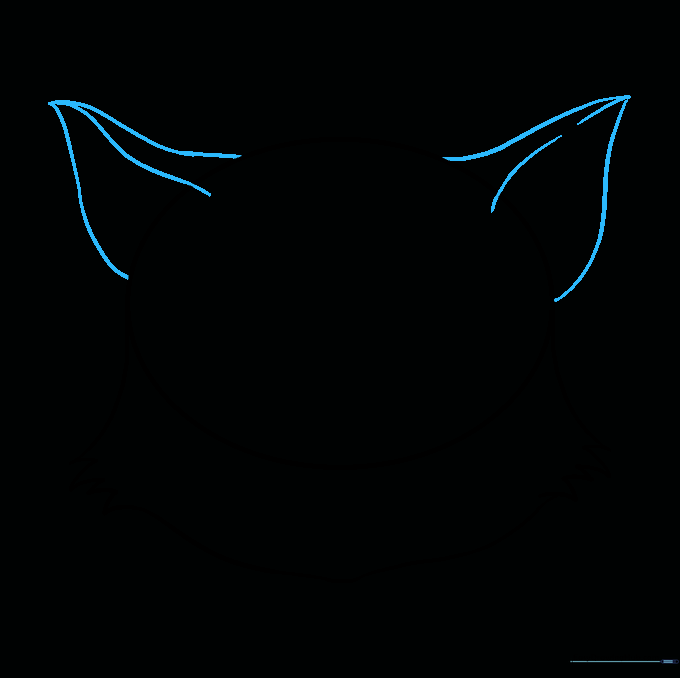
Add two pointed triangles to the top of the head. Teacher's Tip: Make the ears slightly rounded at the tips so they look natural rather than like sharp geometric shapes.
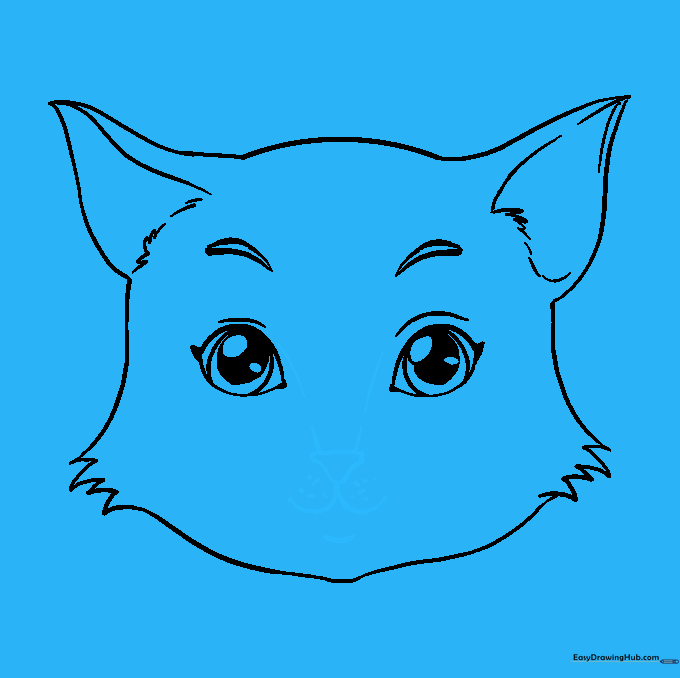
Step 5: Cleaning Up

Carefully erase the original oval guide line inside the ears and head. Teacher's Tip: Use a clean eraser and gentle pressure to avoid smudging your work.
Step 6: Adding Ear Detail

Draw a smaller curved line inside each ear to show depth. Add tiny, short strokes at the base of the ears to mimic fur. Teacher's Tip: These small details make the drawing look much more professional.
Step 7: Drawing Expressive Eyes
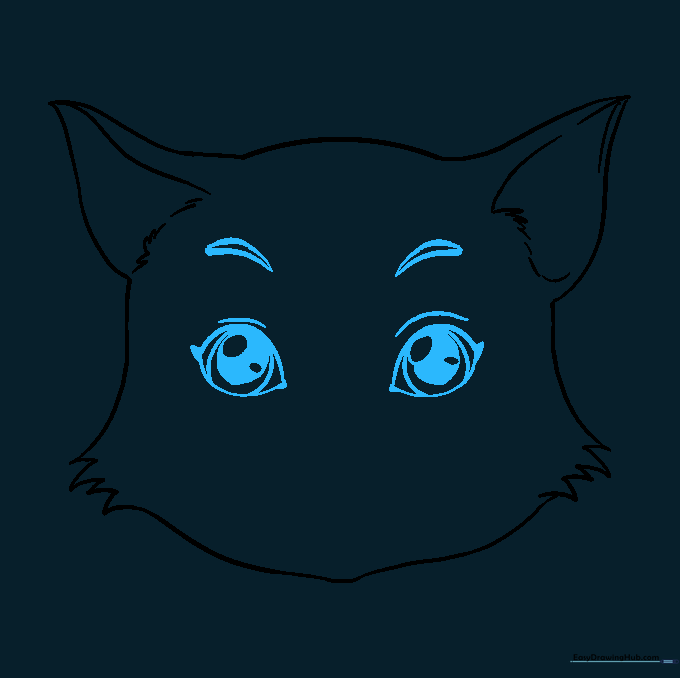
Draw two almond-shaped eyes with circular pupils. Add small highlights inside the pupils to make them sparkle. Teacher's Tip: Keep the eyes symmetrical to give the cat a friendly, balanced look.
Step 8: The Nose and Mouth
Draw a small, upside-down triangle for the nose and a 'W' shape for the mouth. Add a few dots above the mouth for whisker spots. Teacher's Tip: Keep these features small and centered to maintain the cat's cute proportions.
Step 9: Adding Whiskers and Final Fur
Draw long, sweeping lines for whiskers and add extra fur texture to the forehead and cheeks. Teacher's Tip: Use confident, fluid strokes for the whiskers to make them look natural.
Step 10: Bringing Your Cat to Life with Color

Color your cat! Whether you choose orange tabby stripes, solid black, or calico spots, use your favorite colors to make it your own. Teacher's Tip: Use light pressure with your colored pencils to layer colors for a more realistic fur effect.
More Tutorials


