How to Draw a Cartoon World: Easy 10-Step Guide
Bring the planet to life with this fun, expressive cartoon world drawing! Designed for young artists ages 5 and up, this activity requires only a pencil, paper, and your favorite markers. Follow along to practice basic shapes and character design while creating a friendly, personified globe.
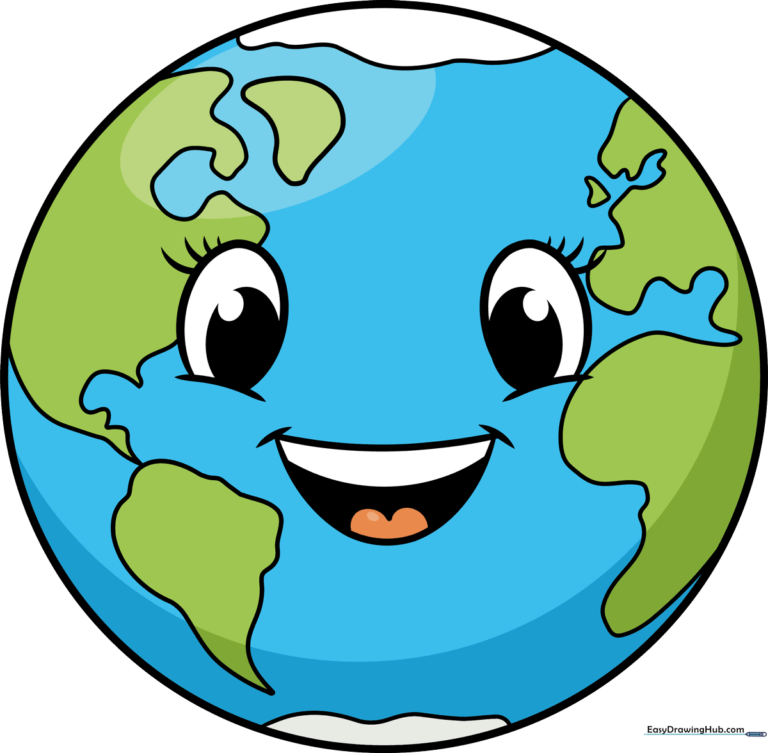
🎯 Final Result
Step-by-Step Instructions
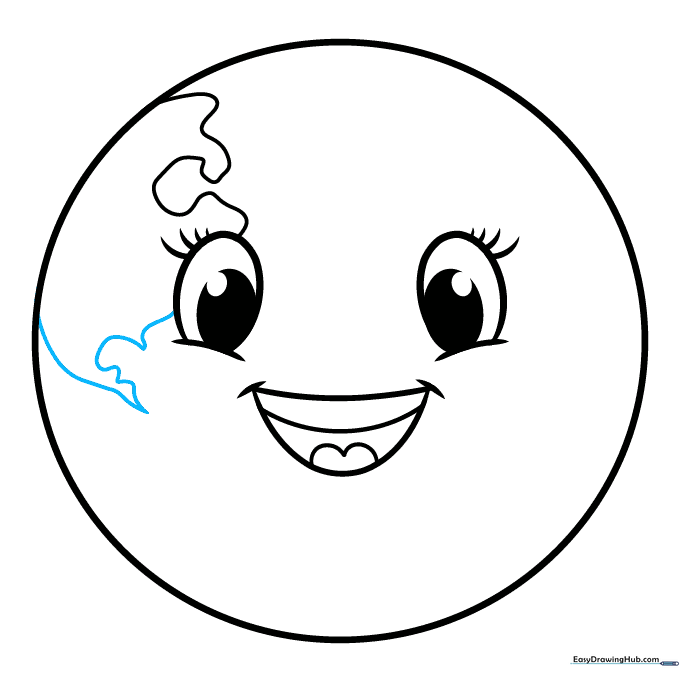
Step 1: Sketching the Base Shape

Draw a large, light circle for the planet's body. Add two small curved lines for cheeks and two large ovals above them for the eyes. Teacher's Tip: Keep your pencil pressure light so you can easily erase any stray marks later.
Step 2: Adding Expressive Eyes

Draw a smaller oval inside each eye to create pupils, then shade the space between them. Add curved lines at the outer edges of the eyes for eyelashes. Teacher's Tip: Darkening the pupils helps give your character a bright, alert expression.
Step 3: Creating a Happy Smile

Draw a wide, curved mouth with a smaller curve inside for the teeth. Add tiny lines at the corners of the mouth. Teacher's Tip: Use a steady hand to keep the smile symmetrical for a friendly look.
Step 4: Adding the Tongue and North America

Draw a rounded 'M' shape inside the mouth for the tongue. Then, sketch a squiggly line near the top of the circle to start the North American continent. Teacher's Tip: Don't worry about perfect geography—cartoon continents are all about fun, wavy shapes!
Step 5: Defining the Coastline
Continue the North American outline by adding the shapes for Florida and Mexico. Teacher's Tip: Use short, quick strokes to make the coastline look natural and rugged.
Step 6: Drawing South America
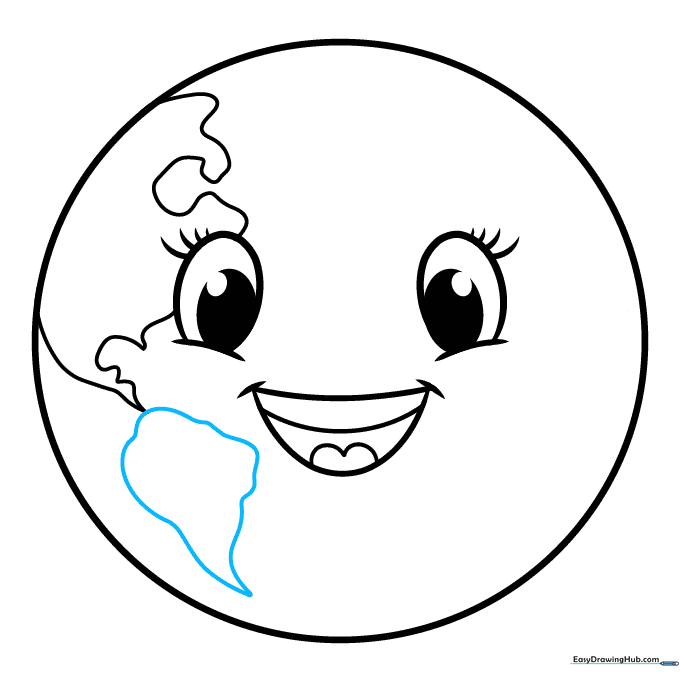
Sketch South America below the other landmasses using a teardrop shape that tapers to a point at the bottom. Teacher's Tip: A teardrop shape is a great way to simplify complex landforms for beginners.
Step 7: Adding Europe
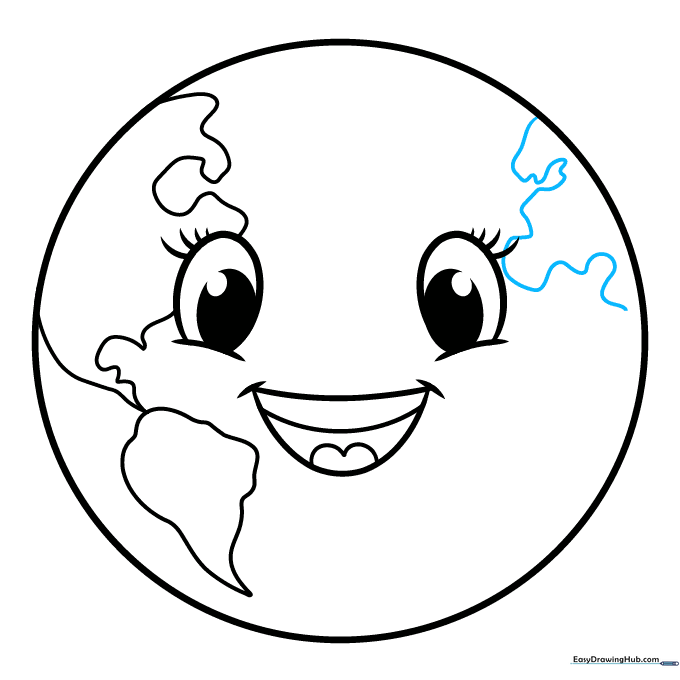
Draw Europe on the side of the circle using a long, squiggly line. Teacher's Tip: Let your hand move loosely to create those natural, jagged coastal edges.
Step 8: Adding Great Britain and Africa
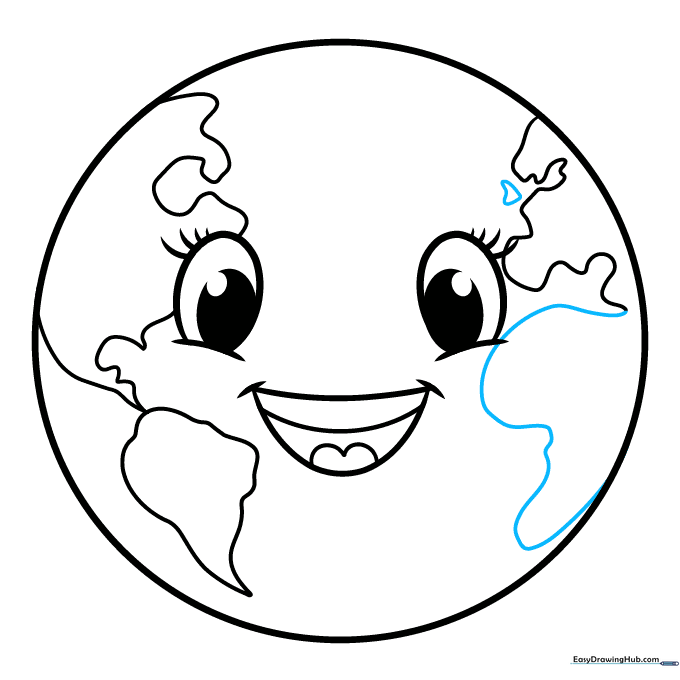
Draw a small, irregular shape for Great Britain near Europe, then extend the line downward to form the large shape of Africa. Teacher's Tip: Africa is quite large, so make sure to give it plenty of space on your paper.
Step 9: Finalizing the Poles
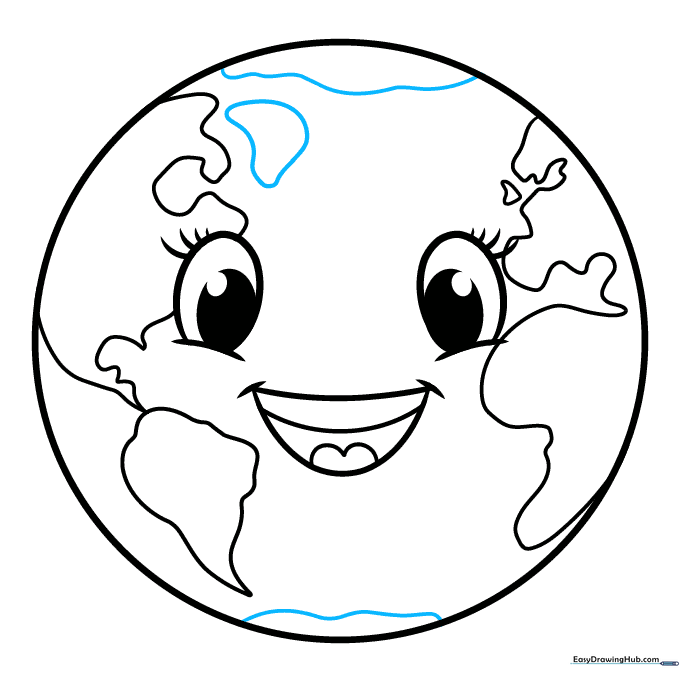
Add curved lines at the very top and bottom of the planet for the Arctic and Antarctica. Add a small shape above North America for Greenland. Teacher's Tip: These curved lines help give the drawing a 3D, spherical feel.
Step 10: Coloring Your World
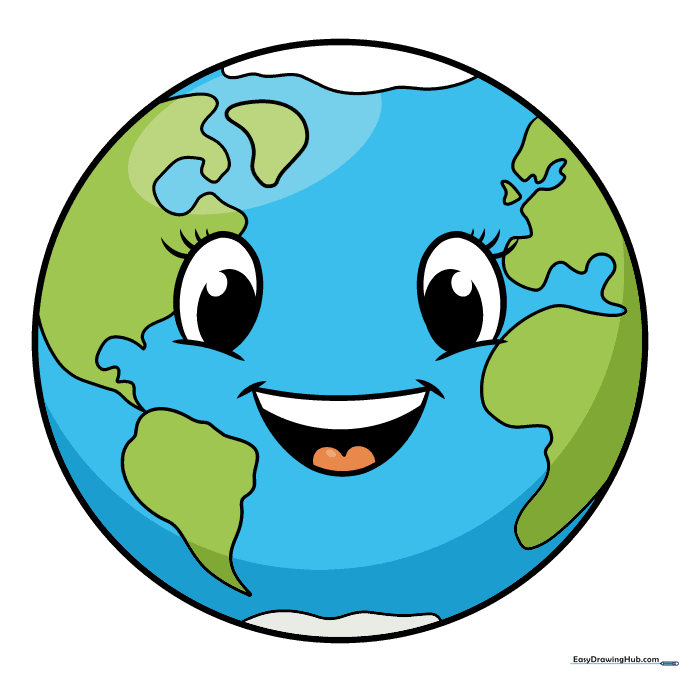
Time to color! Use blue for the oceans, green for the land, and white for the polar regions. You can even add brown for deserts. Teacher's Tip: Use light pressure with your colored pencils to blend colors smoothly.
More Tutorials


