How to Draw a Cartoon Wolf: Easy 9-Step Guide for Kids
Ready to bring a forest friend to life? This tutorial is perfect for young artists ages 6+ looking to master character design. Grab a pencil, eraser, and paper, and follow along to build your wolf using simple shapes and expressive fur details.
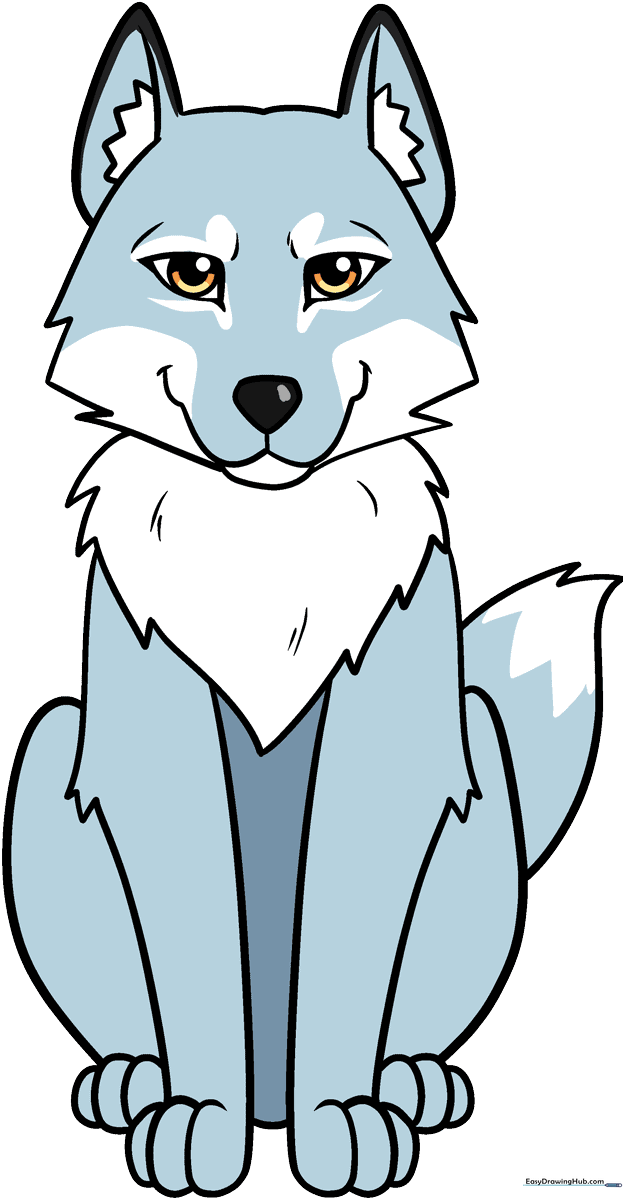
🎯 Final Result
Step-by-Step Instructions
Step 1: Sketching the Expressive Eyes

Draw two curved triangles for the eyes. Inside each, add smaller circles for the iris and pupil. Teacher's Tip: Keep your pencil lines light here so you can easily adjust the expression if the eyes look a bit too sleepy or surprised!
Step 2: Defining the Snout and Smile
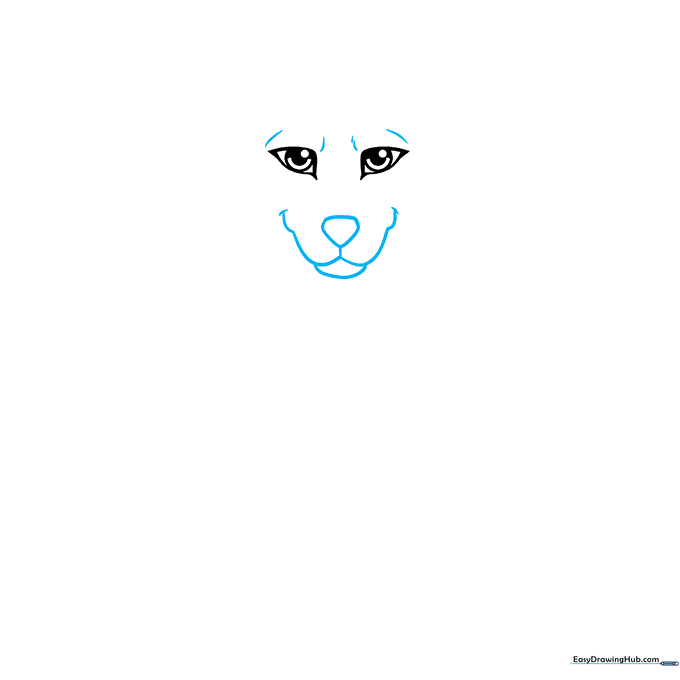
Contour the brow above the eyes, then add a rounded triangle for the nose. Draw a 'W' shape below for the mouth. Teacher's Tip: A slightly curved 'W' makes the wolf look friendly rather than grumpy.
Step 3: Adding Fluffy Cheeks
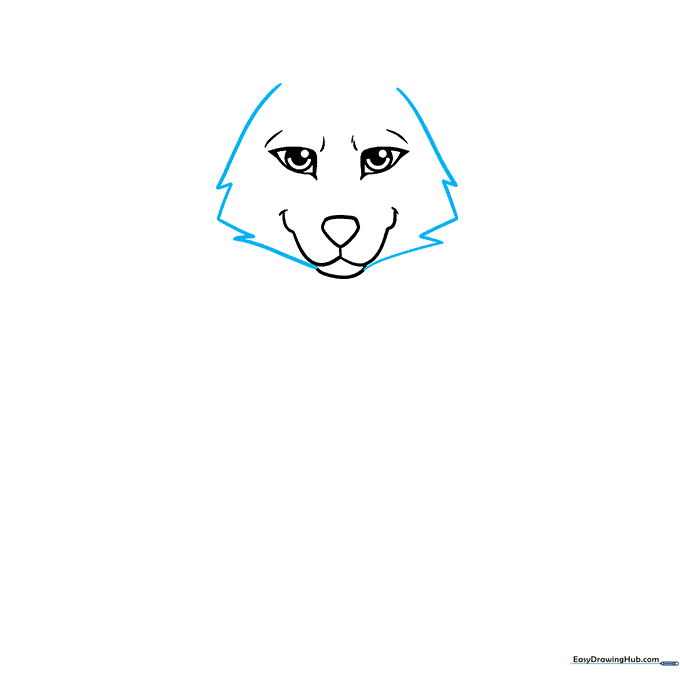
Use short, jagged strokes to outline the sides of the face. Teacher's Tip: Don't make the lines perfectly straight; the 'zig-zag' motion mimics the texture of real fur.
Step 4: Drawing the Ears
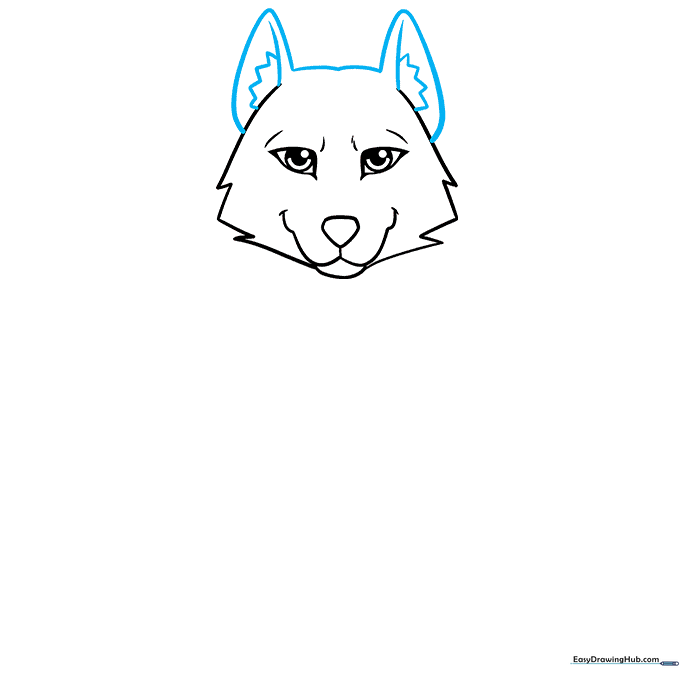
Sketch two triangular ears on top of the head, connecting them with a curved line. Add inner ear detail with more jagged lines. Teacher's Tip: Make one ear slightly tilted to give your wolf personality.
Step 5: Sketching the Chest Fur
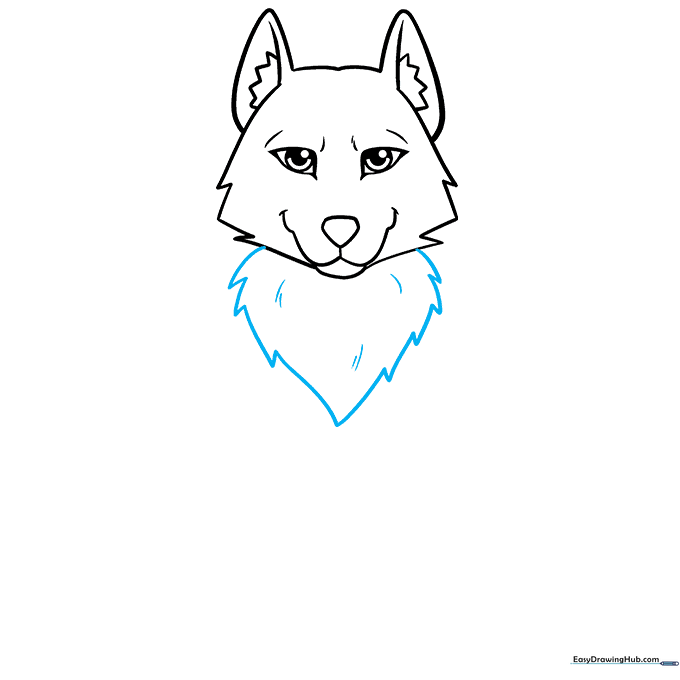
Draw an inverted triangle shape on the chest using jagged, rhythmic lines. Teacher's Tip: Add a few extra 'V' shapes inside the chest area to create depth and make the fur look thick.
Step 6: Drawing the First Foreleg
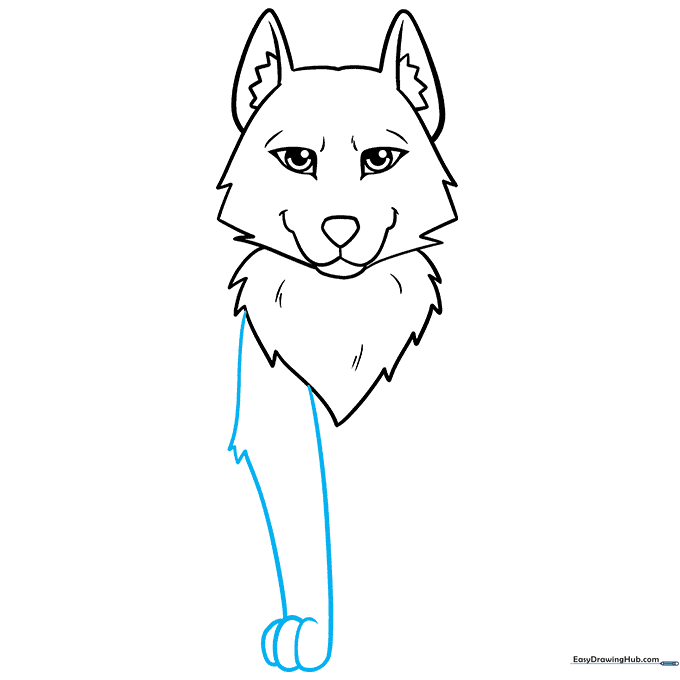
Extend two curved lines downward for the leg, adding a jagged elbow and rounded paws at the bottom. Teacher's Tip: Keep the leg slightly tapered to make it look natural.
Step 7: Adding the Second Foreleg

Mirror the first leg on the other side. Teacher's Tip: Ensure the paws are aligned at the same level so your wolf looks like it is standing firmly on the ground.
Step 8: Constructing the Rear Legs
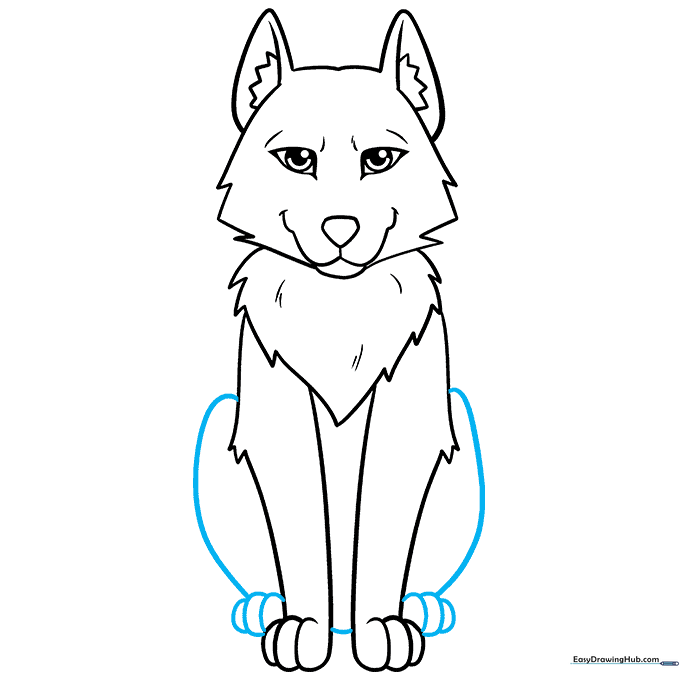
Draw the back legs using overlapping curves to suggest the haunches. Teacher's Tip: Think of these as 'bent' knees to give the wolf a ready-to-pounce posture.
Step 9: The Fluffy Tail

Finish your wolf with a large, bushy tail using long, jagged lines. Teacher's Tip: Make the tail nice and big—it’s a signature feature of a happy wolf!
Step 10: Bringing Your Wolf to Life with Color
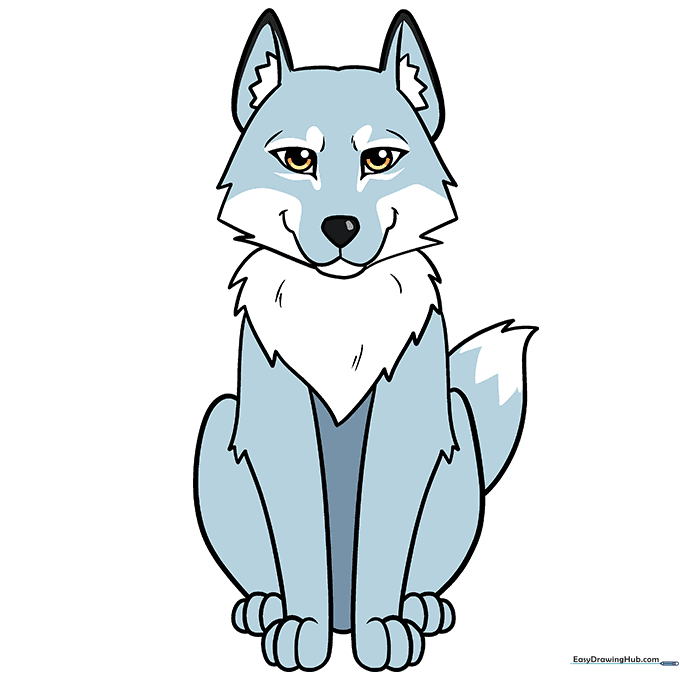
Time to color! Use shades of gray, white, or even brown. Teacher's Tip: Use a darker gray for the shadowed areas under the neck and tail to give your drawing a 3D look.
More Tutorials


