How to Draw a Cartoon Rose: Easy 9-Step Guide for Kids
Bring a touch of magic to your sketchbook with this friendly cartoon rose! Designed for ages 5 and up, this project uses basic shapes to build confidence in young artists. Grab your pencil, eraser, and paper, and let’s create a smiling flower together.
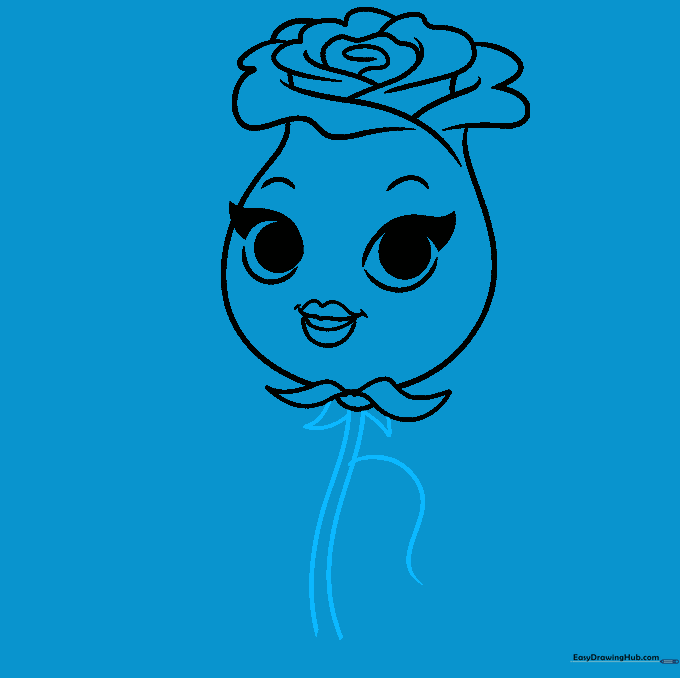
🎯 Final Result

Step-by-Step Instructions
Step 1: Sketching the Expressive Eyes

Start by drawing two circles for the eyes. Shade the inner pupils to give your rose personality. Add a small triangle at the corner of each eye and shade it in to create a cute 'cat-eye' lash effect. Teacher's Tip: Keep your pencil pressure light so you can easily adjust the shape if needed.
Step 2: Adding Brows and a Smile

Complete the eye shapes with curved lines. Draw a soft arch above each eye for the eyebrows, then sketch the upper lip of a wide, happy smile. Tip: A gentle curve for the mouth makes the character look much friendlier!
Step 3: Defining the Face and Petals

Draw the lower lip, then wrap a large 'U' shape around the face. Inside the top of the 'U', draw a 'Y' shape to start the overlapping petals. Tip: Think of this 'Y' as the center of the flower bloom.
Step 4: Building the Bloom

Add a smaller 'Y' shape connected to the first one. Use smooth, curved lines to outline the edges of the petals around the center. Tip: Don't worry about perfect symmetry; flowers in nature are beautifully irregular!
Step 5: Finishing the Rosebud

Continue adding wavy, curved lines at the top to close the rosebud shape. These lines should flow naturally from the center outward.
Step 6: Adding the Sepals

Draw a small spiral in the center for detail. At the base of the flower, draw small, pointed leaves called sepals. Erase any overlapping lines inside the sepals to keep the drawing clean. Tip: Sepals are the little green leaves that hug the bottom of a rose.
Step 7: Drawing the Stem
Extend two parallel curved lines downward to create the stem. Add a small curved line branching off the side—this will be the anchor for your leaf. Tip: Keep the stem lines smooth to make the flower look elegant.
Step 8: Adding the Leaves

Draw a leaf on the stem using curved lines that meet at a point. Make it look like it's waving by curving the edges slightly. Tip: Leaves have veins, so you can add a small line down the middle for extra detail.
Step 9: Final Touches

Draw one more leaf to balance the design. Finally, add a little patch of grass at the bottom using jagged, short lines. This grounds your drawing and makes it look like it's growing in a garden!
Step 10: Bring It to Life with Color

Time to color! While roses are traditionally red, feel free to use bright pink, yellow, or even purple. Use a darker shade for the leaves to make the flower pop. Tip: Use colored pencils and try layering light and dark shades for a professional look.
More Tutorials


