How to Draw a Cartoon Man: Easy 10-Step Guide
Ready to bring a character to life? This tutorial is perfect for young artists and beginners looking to master basic facial proportions and clothing details. You will only need a pencil, an eraser, and a piece of paper to build your cartoon man from the ground up.
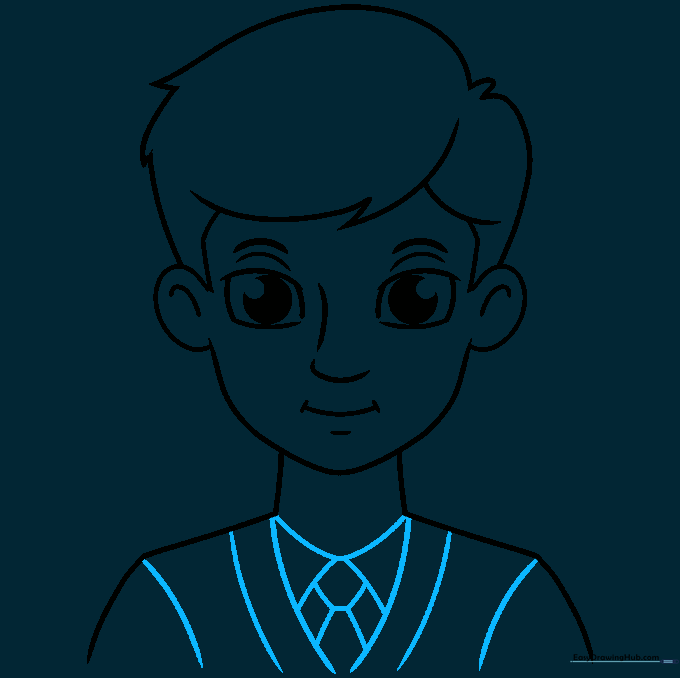
🎯 Final Result

Step-by-Step Instructions
Step 1: Establishing the Shoulders

Start by drawing two gentle, curved lines to form the shoulders and the base of the neck. Teacher's Tip: Keep these lines soft and rounded to give your character a friendly, approachable look.
Step 2: Defining the Neck

Mirror the lines from the first step to complete the neck and shoulder structure. Teacher's Tip: Try to keep the spacing even on both sides to ensure your character looks symmetrical.
Step 3: Sketching the Face Shape

Use a long, fluid curved line to connect the neck and create the jawline, cheeks, and chin. Teacher's Tip: Imagine you are drawing a rounded 'U' shape to get that classic cartoon look.
Step 4: Adding the First Ear

Draw a 'C' shaped curve on the side of the head for the ear, adding a small inner line for detail. Teacher's Tip: Ears are usually aligned with the eyes and nose, so keep this placement in mind for later.
Step 5: Adding the Second Ear

Repeat the process on the opposite side to draw the second ear. Teacher's Tip: Try to match the height of the first ear so your character looks balanced.
Step 6: Drawing Expressive Eyes

Sketch rectangular shapes for the eyes, adding curved lines above for eyelids and eyebrows. Draw small circles inside for pupils and shade them in. Teacher's Tip: Leave a tiny white dot unshaded in the pupil to create a 'glint' that makes the eyes look alive!
Step 7: Adding the Nose and Mouth
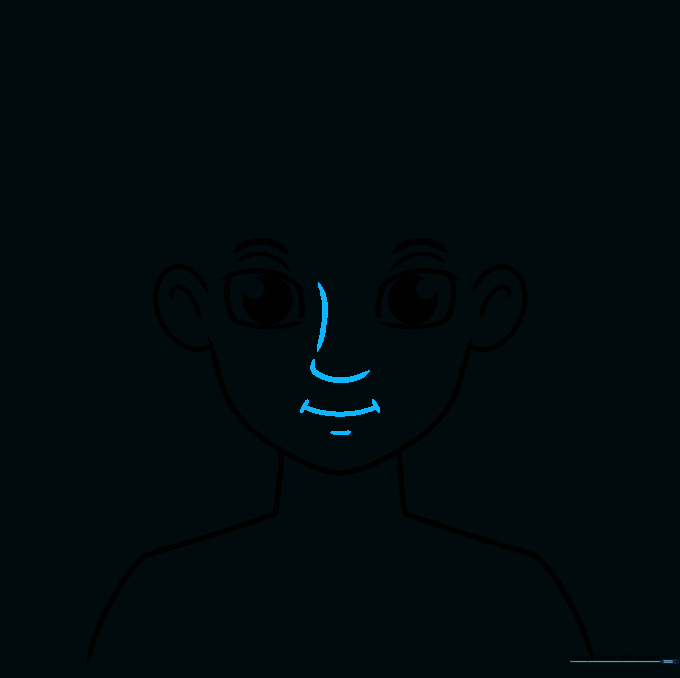
Use simple curved lines to define the bridge of the nose, the tip, and a friendly, smiling mouth. Teacher's Tip: A slight curve at the corners of the mouth makes your character look genuinely happy.
Step 8: Styling the Hair

Use jagged, overlapping lines to create tufts of hair across the forehead and top of the head. Teacher's Tip: Don't worry about making the lines perfect; hair is naturally messy and clumped!
Step 9: Drawing the Suit and Tie
Add a collar, a necktie, and suit lapels using 'V' shapes and straight lines. Teacher's Tip: Use a ruler if you find it hard to keep the tie lines straight, or embrace the hand-drawn look for more character.
Step 10: Bringing Him to Life with Color

Now for the fun part! Add color to your character. Choose your favorite hair and eye colors, and pick a professional color for the suit. Teacher's Tip: Use light pressure with your colored pencils to layer colors for a more professional finish.
More Tutorials


