How to Draw a Cartoon House: Easy 10-Step Guide
Ready to design your own dream home? This tutorial is perfect for young artists ages 5 and up, using basic geometric shapes to build a structured cartoon house. All you need is a pencil, an eraser, and some paper to get started on this fun, screen-free creative project.
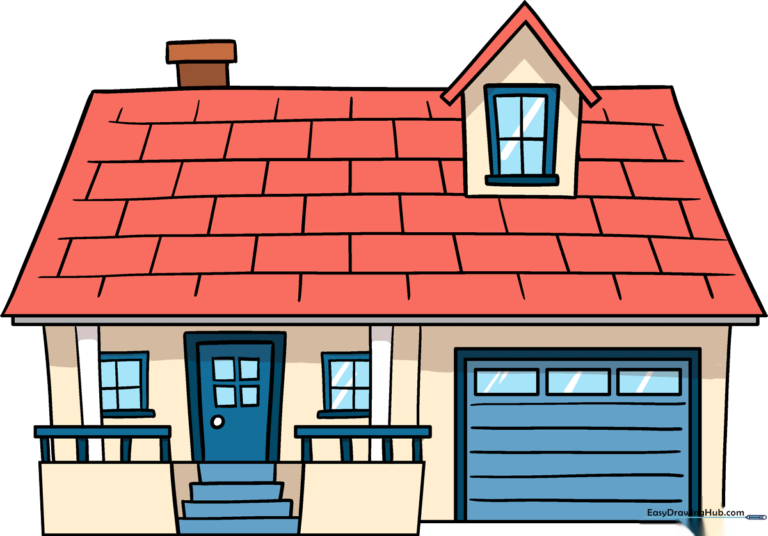
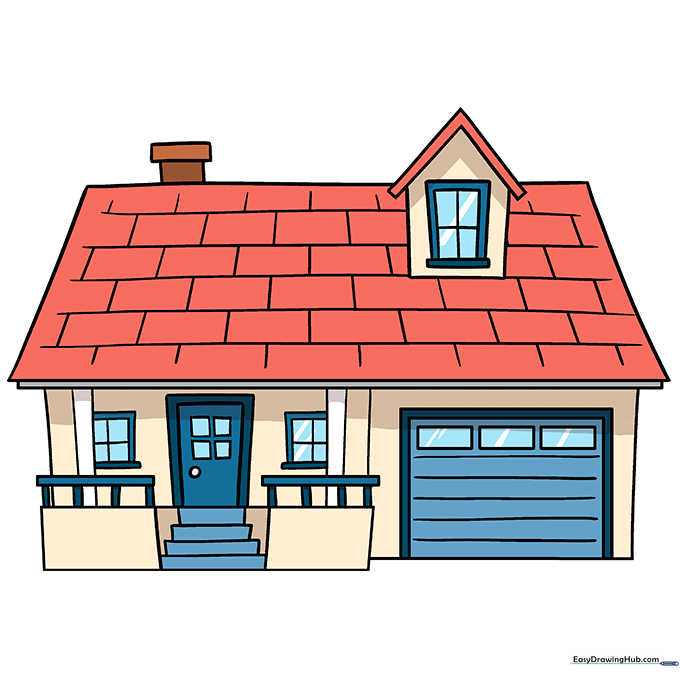
🎯 Final Result
Step-by-Step Instructions
Step 1: Establishing the Foundation
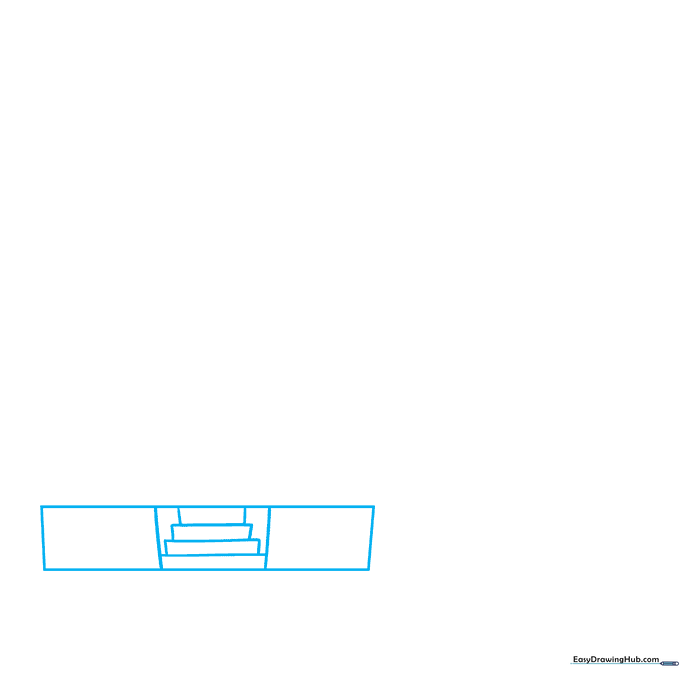
Start by drawing a large rectangle for the main house body. Divide it into three vertical sections using straight lines. Inside the middle section, stack four small horizontal rectangles to create the front steps. Teacher's Tip: Use a light touch; these are just your guidelines!
Step 2: Adding the Porch and Door
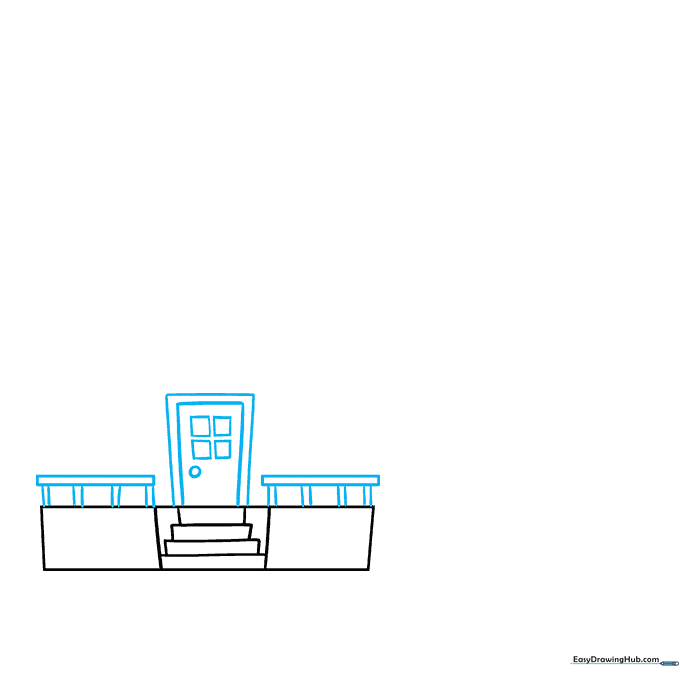
Draw narrow vertical rectangles on the sides to act as porch railings. In the center, draw a rectangle for the door, adding a smaller rectangle inside for the frame. Don't forget a small circle for the doorknob and four squares for a window on the door. Tip: Keep your circles small to make the house look larger.
Step 3: Sketching the Garage
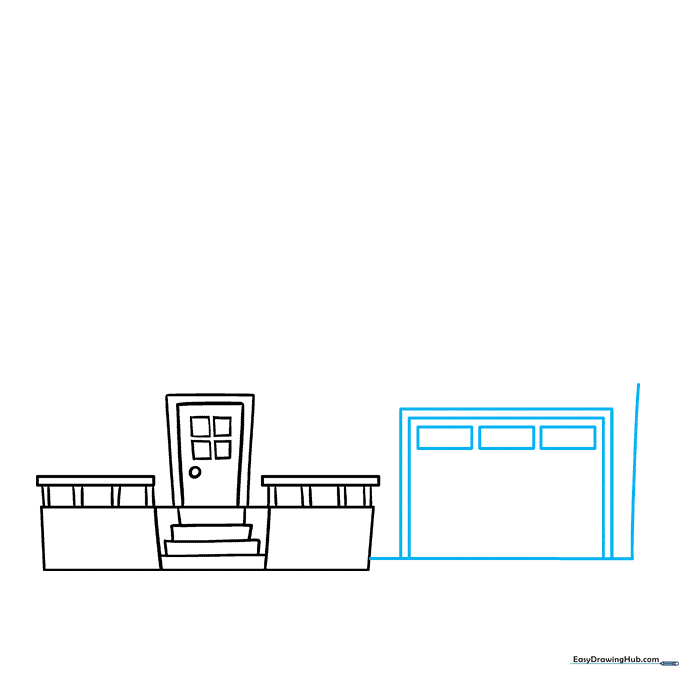
Extend an 'L' shaped line from the side to create the garage wall. Add a large rectangle for the garage door and three smaller rectangles at the top for windows. Tip: Ensure your garage door is slightly wider than the house door for realistic proportions.
Step 4: Adding Garage Texture

Add horizontal lines across the garage door to represent panels. Draw a straight vertical line on the opposite side of the house to define the outer wall. Tip: Use a ruler if you struggle with straight lines, but freehand is great for building confidence!
Step 5: Defining the Structure
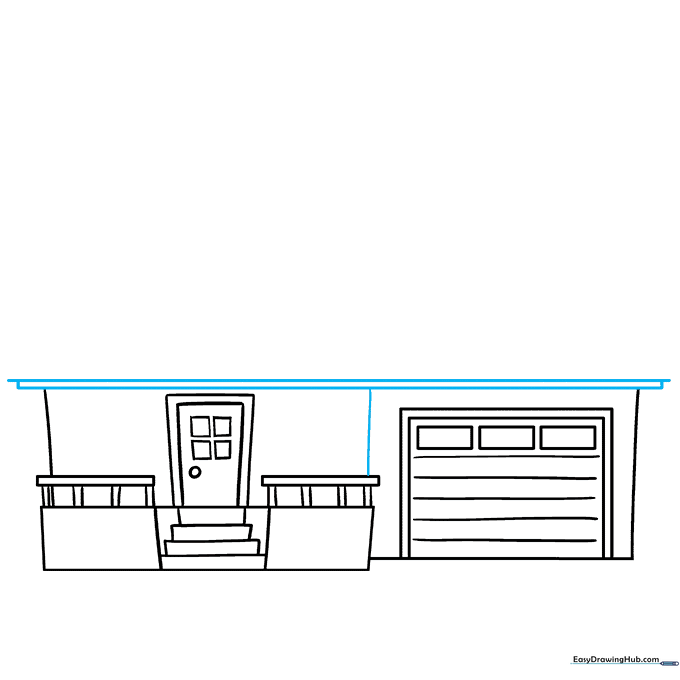
Draw a vertical line between the house door and garage to separate the sections. Add a narrow horizontal rectangle across the front to create a trim or ledge. Tip: This adds depth to your drawing, making it look more 3D.
Step 6: Porch Columns and Windows
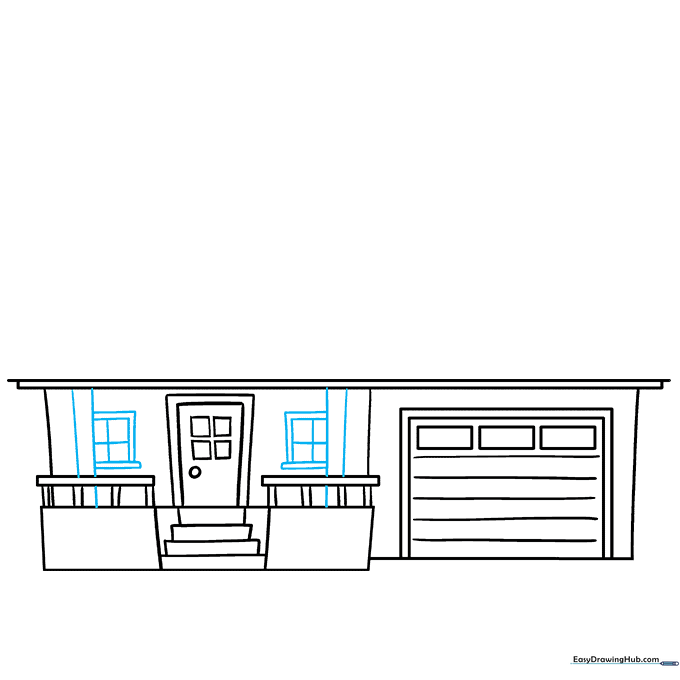
Draw two pairs of parallel lines on the porch for columns. Add windows with frames and a 't' shape inside to create the panes. Tip: Make sure your columns are the same height to keep the house looking balanced.
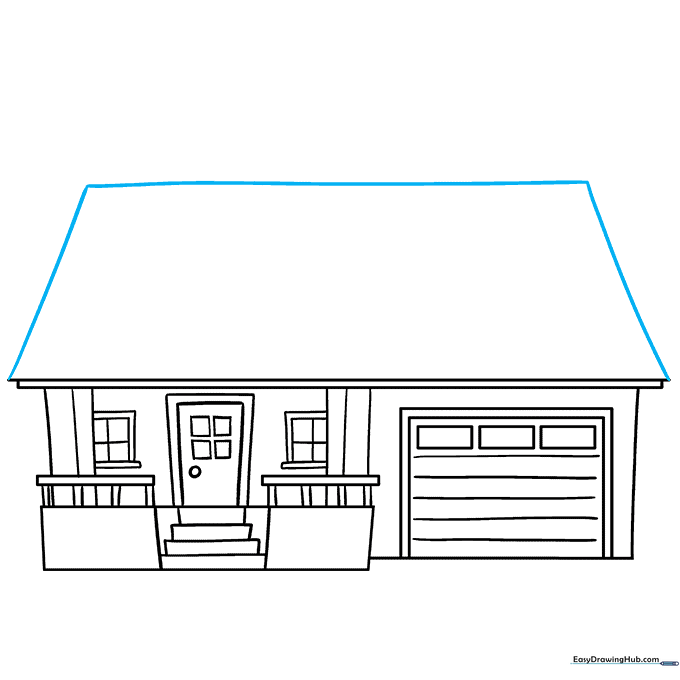
Step 7: The Roofline

Use straight lines to enclose a trapezoid shape on top of the house for the roof. Tip: Start from the center peak and work your way down to the edges to ensure symmetry.
Step 8: Dormer and Chimney
Draw a pentagon-shaped dormer window on the roof with a small 'V' shaped roof of its own. Add a chimney using two rectangles on the side. Tip: Erase any overlapping lines inside the chimney to make it look like it's attached to the roof.
Step 9: Adding Shingles
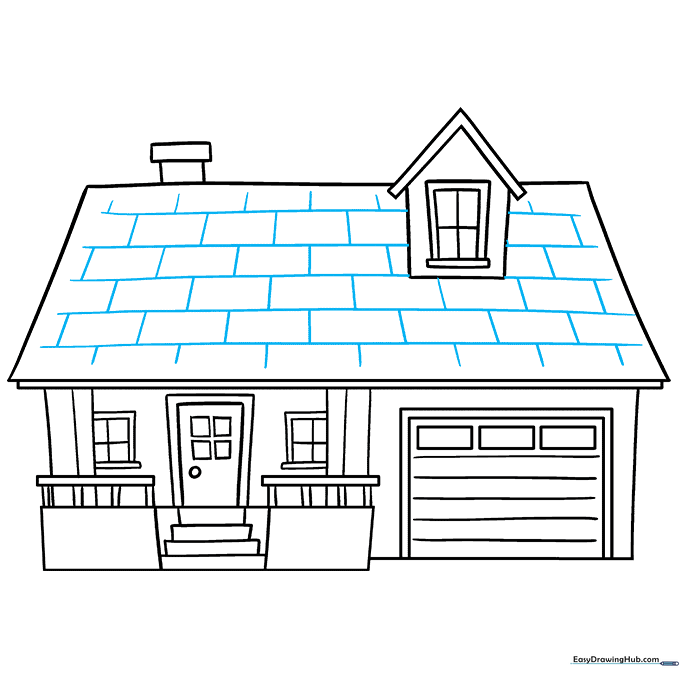
Texture the roof by drawing many small rectangles across it to represent shingles. Tip: Don't worry about making them perfect; a little variation makes the house look more charming and hand-drawn.
Step 10: Bring It to Life with Color
Your outline is complete! Now, add your favorite colors. We used beige for the walls, red for the roof, and blue for the trim. Tip: Use light pressure with your colored pencils to layer colors for a more professional look.
More Tutorials


