How to Draw a Cartoon Grandma: Easy 10-Step Guide
Bring a sweet, classic character to life with this simple drawing tutorial designed for young artists. You only need a pencil, an eraser, and a piece of paper to get started. Follow these steps to practice character proportions and expressive line work while creating a fun, lovable grandma illustration.
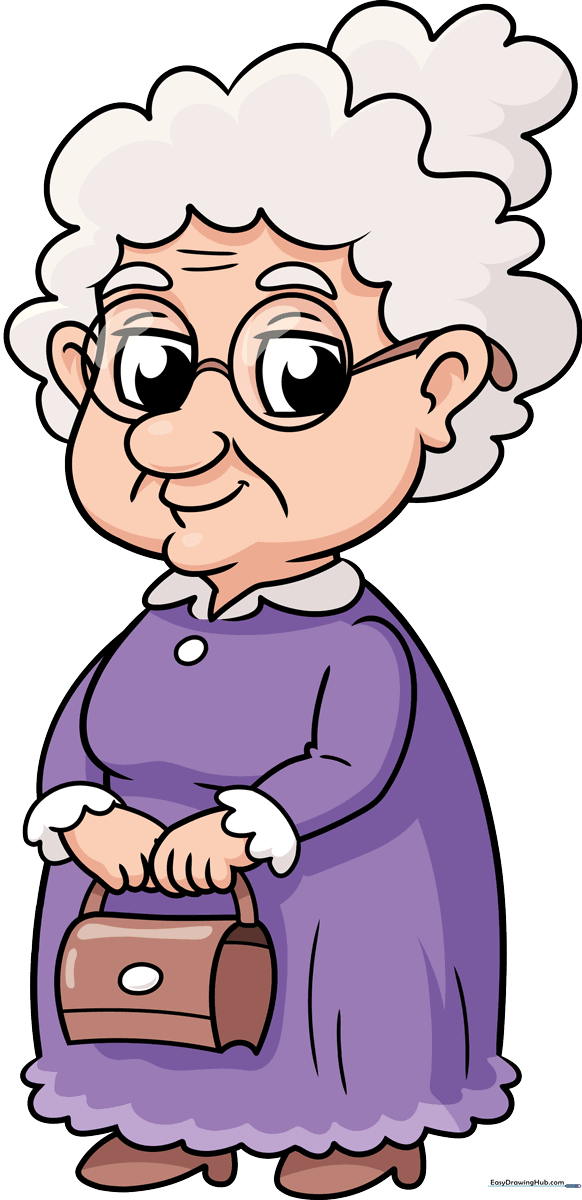
🎯 Final Result
Step-by-Step Instructions
Step 1: Sketching the Expressive Eyes

Start by drawing two rectangular shapes for the glasses frames. Inside each, add a circle for the pupil and shade it in. Tip: Keep your pencil pressure light so you can easily adjust the shape if the eyes look a bit uneven.
Step 2: Defining the Facial Structure
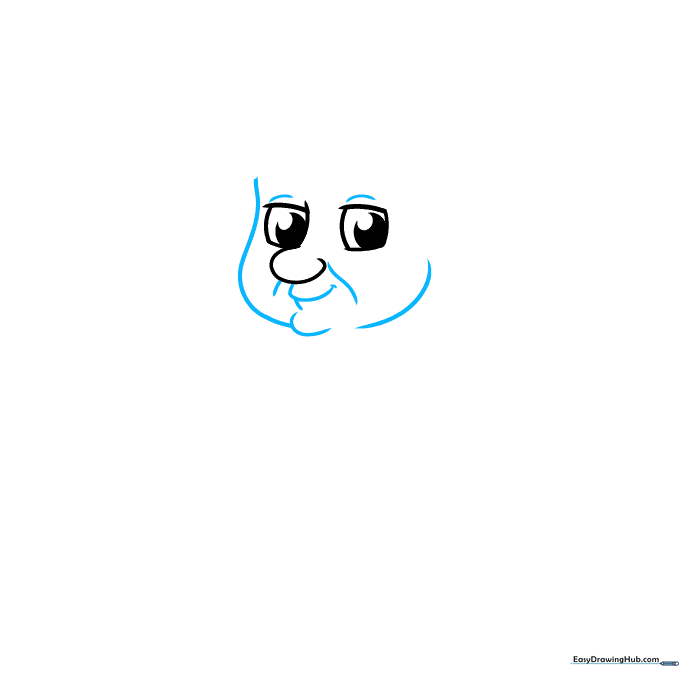
Use soft, curved lines to shape the chin and cheeks. Add a gentle, smiling mouth and small lines near the eyes to give her a warm, happy expression. Tip: A slightly rounded chin makes the character look much friendlier.
Step 3: Adding Ears and Hair
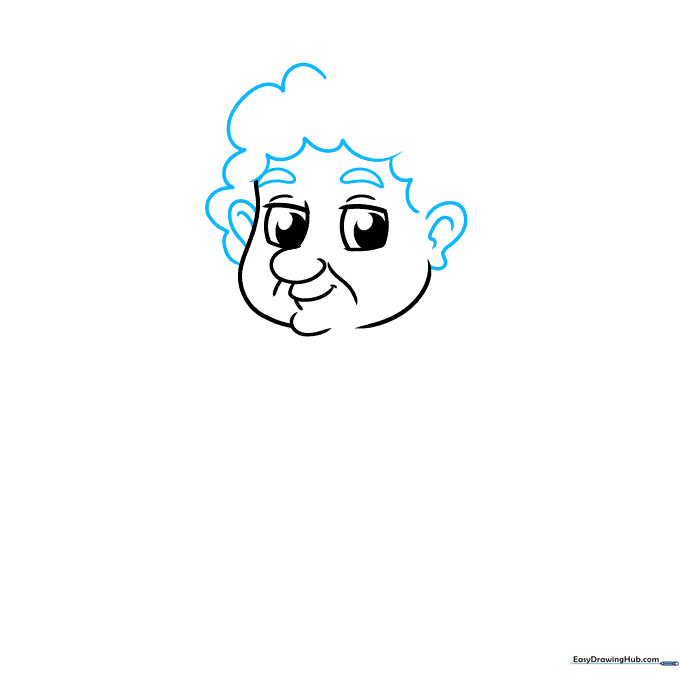
Draw two small half-circles on the sides for ears, then sketch a wavy, cloud-like line across the top for her hair. Add two curved strokes above the eyes for eyebrows. Tip: Vary the size of your hair curves to make it look fluffy and natural.
Step 4: Completing the Glasses
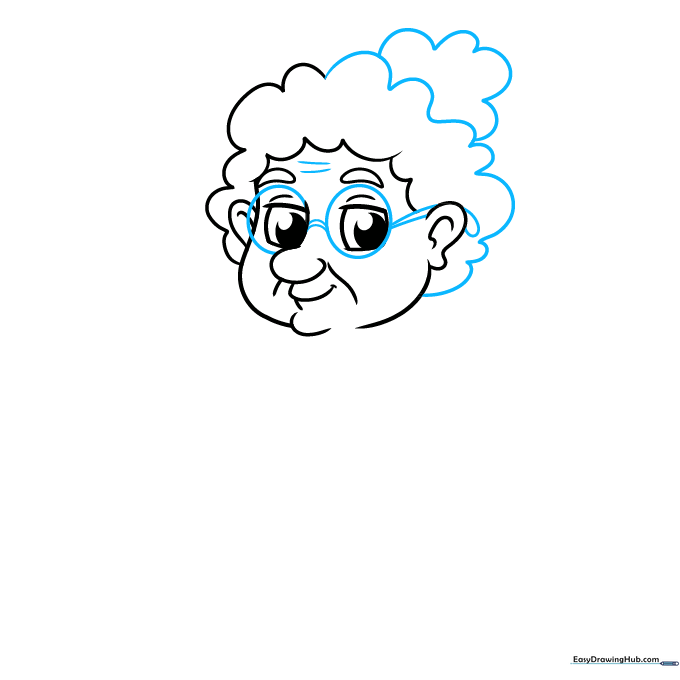
Connect the glasses frames to the ears with thin lines to create the temple pieces. Add a few small wrinkles on the forehead to give her character. Tip: Keep the glasses lines thin so they don't overpower the face.
Step 5: Sketching the Neck and Collar
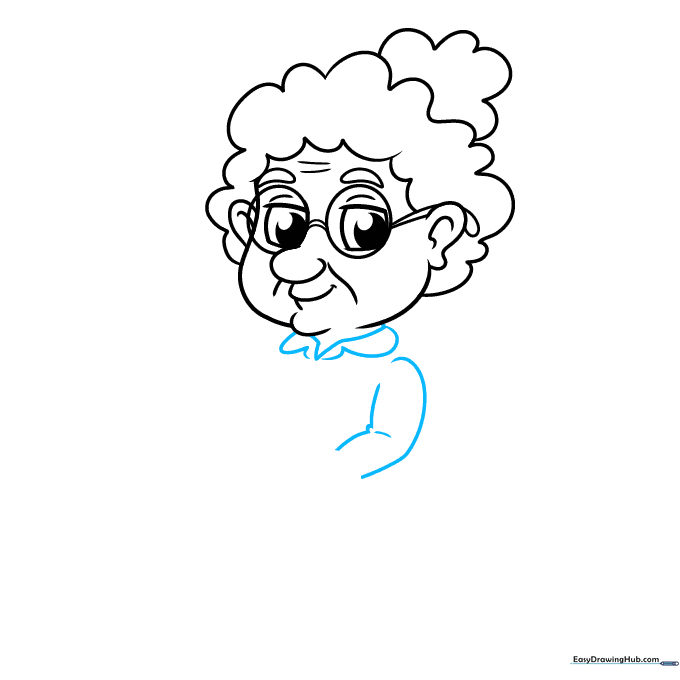
Draw a small 'V' shape for the neck and add a rounded collar around it. This helps define the start of her outfit. Tip: Use smooth, continuous lines to make the clothing look soft.
Step 6: Adding Sleeves and Hands
Draw the sleeves with a scalloped edge to look like lace. Add simple shapes for the hands resting near the torso. Tip: Don't worry about drawing perfect fingers; simple overlapping curves work best for cartoons.
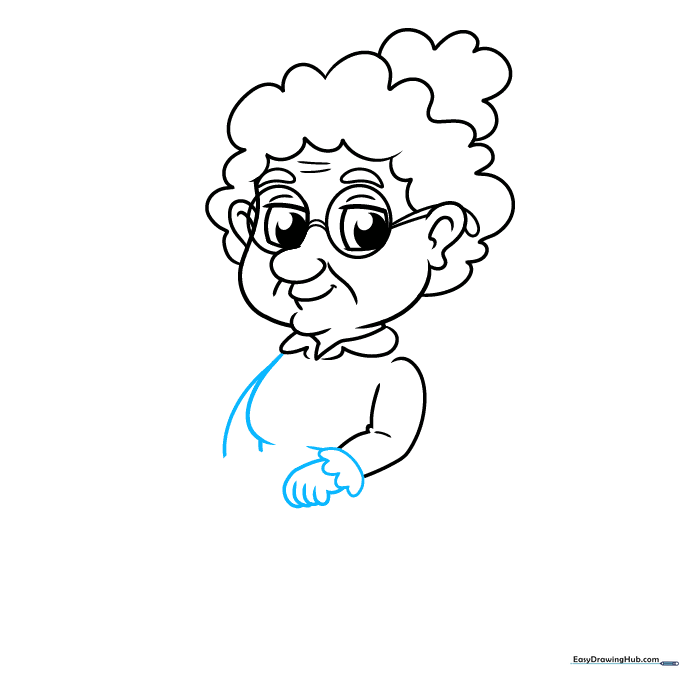
Step 7: Drawing the Purse
Draw a rounded 'L' shape under the hands to form the base of her purse. Tip: Imagine the purse is hanging from her arm to help you place the lines correctly.
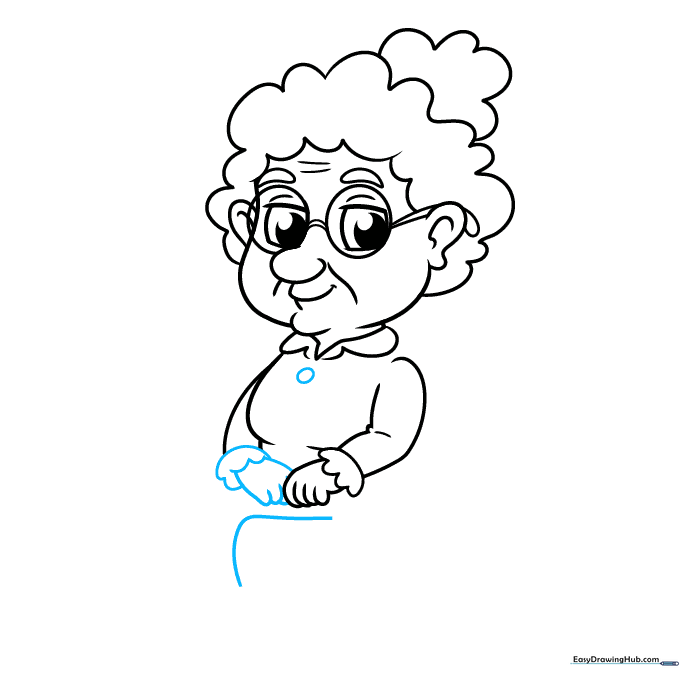
Step 8: Refining the Purse and Body
Add a handle to the purse and some small details like a clasp. Extend the lines of the dress down to show the rest of her body. Tip: Use a slightly darker line for the purse to make it stand out from the dress.
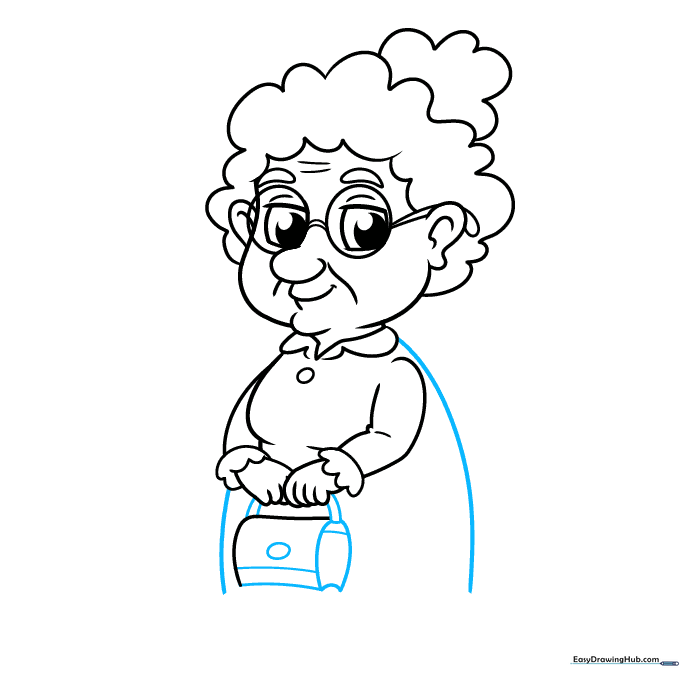
Step 9: Finalizing the Outline
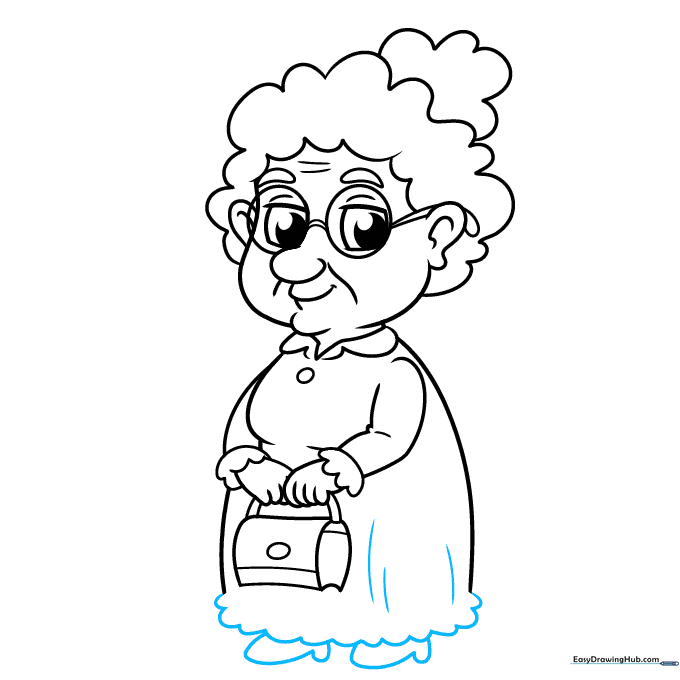
Finish the dress with a scalloped hem and draw two simple shapes for her shoes. Tip: Make sure the hem lines are consistent with the lace on her sleeves for a cohesive look.
Step 10: Adding Color
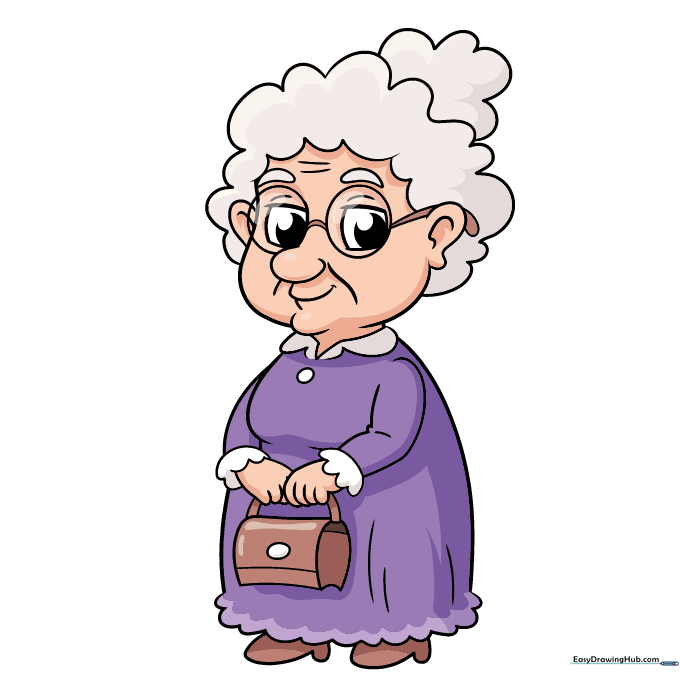
Now for the fun part! Color your grandma with bright, cheerful colors. You can keep her hair white or light gray, and choose a fun pattern for her dress. Tip: Use colored pencils to add soft shading to the folds of her dress to give it depth.
More Tutorials


