How to Draw a Goat: Easy 9-Step Guide for Kids
Bring a friendly farm animal to life with this easy-to-follow guide, perfect for young artists ages 5 and up. You will only need a pencil, an eraser, and some paper to build your goat from basic shapes. Follow these steps to develop your confidence and artistic precision.
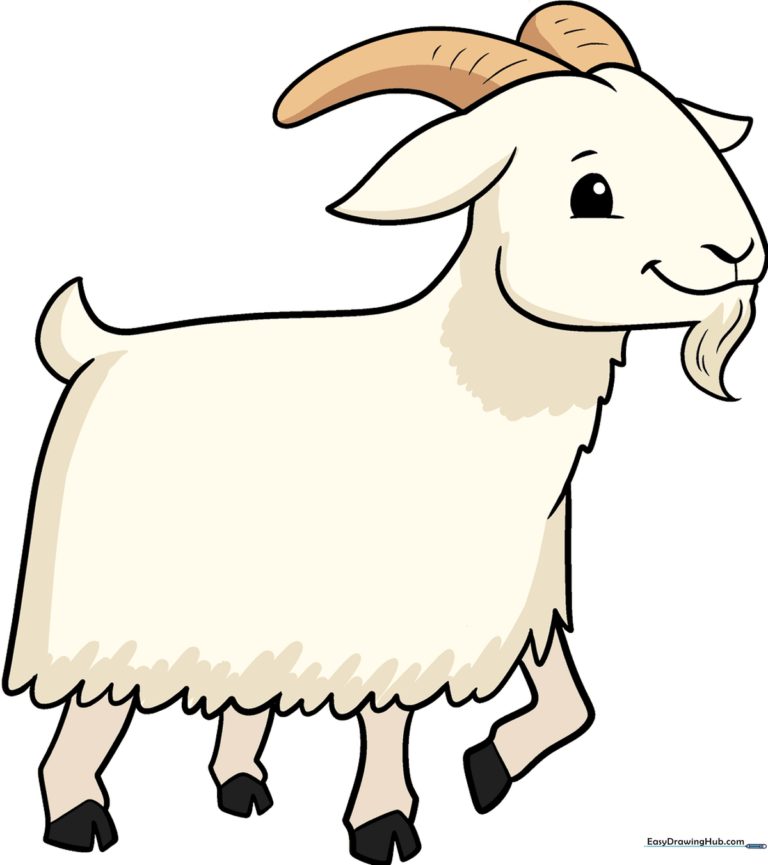
🎯 Final Result
Step-by-Step Instructions
Step 1: Sketching the Face and Features

Start by drawing a soft, curved line for the cheek and a partial oval for the eye. Place a small circle inside for the pupil and shade it in. Add a 'U' shape for the nose and simple curves for the mouth. Teacher's Tip: Keep your pencil lines very light here so you can easily erase any overlapping marks later.
Step 2: Adding the Chin and Beard
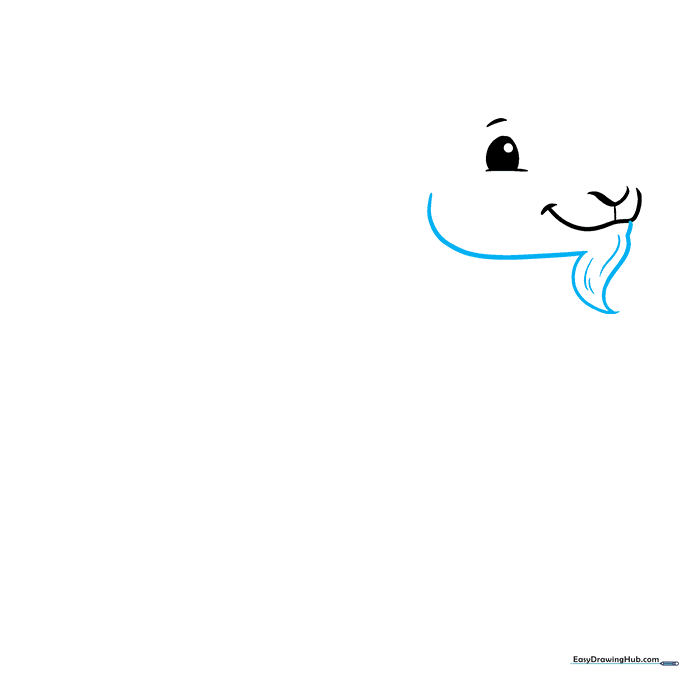
Draw the jawline extending from the mouth, ending in a pointed shape for the beard. Use short, flicking strokes to give the beard a textured, hairy look. Teacher's Tip: Think of the beard as a triangular tuft of grass to get the shape just right.
Step 3: Defining the Head and Ears
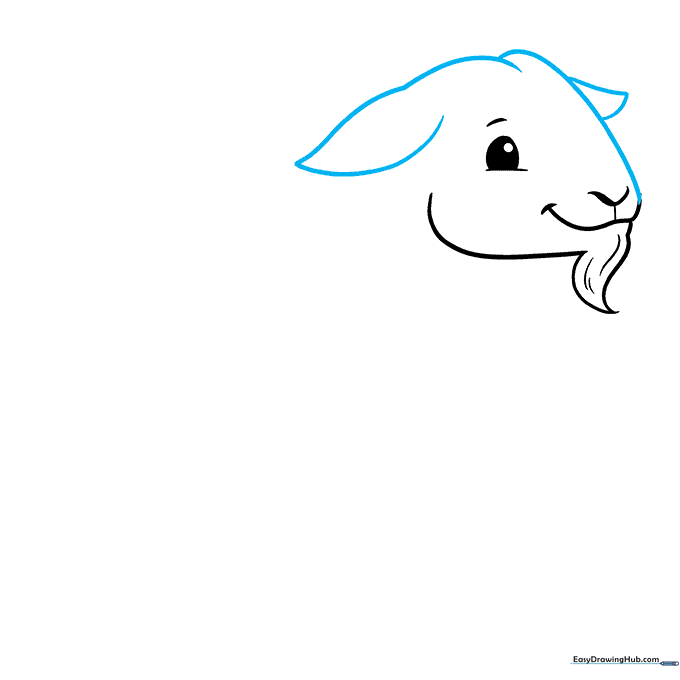
Use overlapping curved lines to define the top of the head and the ears. The ears should look like soft, drooping teardrops. Teacher's Tip: Don't worry if the lines aren't perfect; goats have floppy ears that look great with a little bit of a wobble.
Step 4: Sketching the Horns

Extend a curved line from the head and double it back to create a rounded triangle for the first horn. Add a smaller partial oval for the second horn behind it. Teacher's Tip: Add a few small curved lines across the horns to give them a natural, ridged texture.
Step 5: Forming the Back and Tail
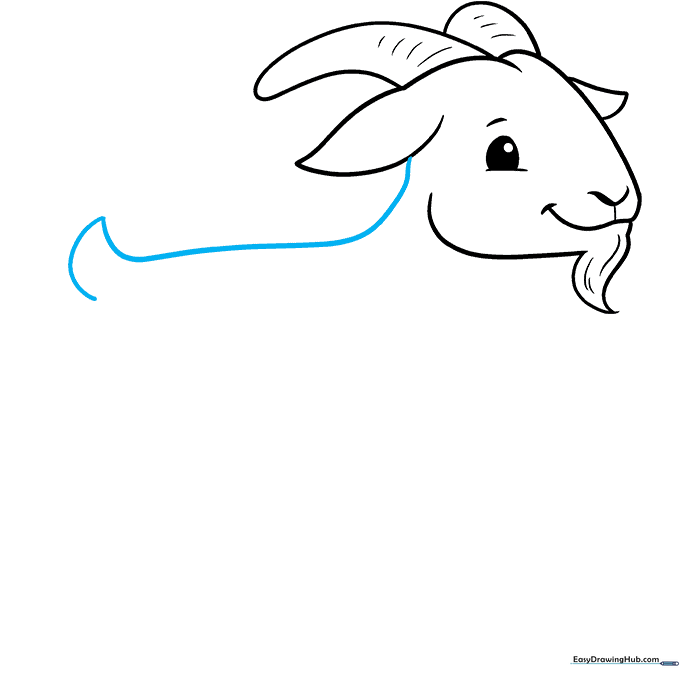
Draw a long, smooth curve from the ear to create the goat's back, ending with a small tail. Teacher's Tip: Keep this line fluid—a smooth back makes the goat look friendly and approachable.
Step 6: Creating the Furry Neck
Use a series of jagged, connected lines to draw the neck and chest. This creates the appearance of fluffy fur. Teacher's Tip: Use quick, zig-zag motions with your pencil to make the fur look natural and soft.
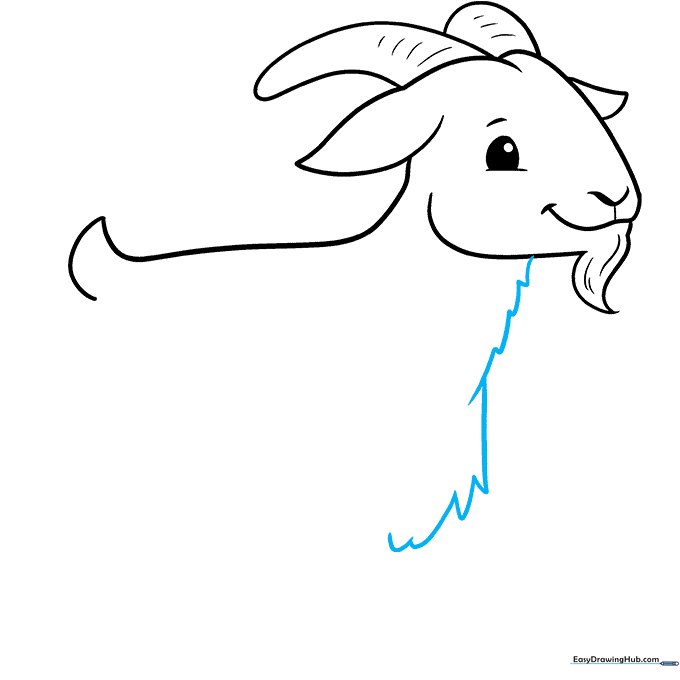
Step 7: Connecting the Body

Draw a long line overlapping the tail base, then use a series of 'U' shaped lines to connect the back to the chest area. Teacher's Tip: These 'U' shapes help define the goat's belly and give the drawing a rounded, cartoonish charm.
Step 8: Drawing the Front Legs
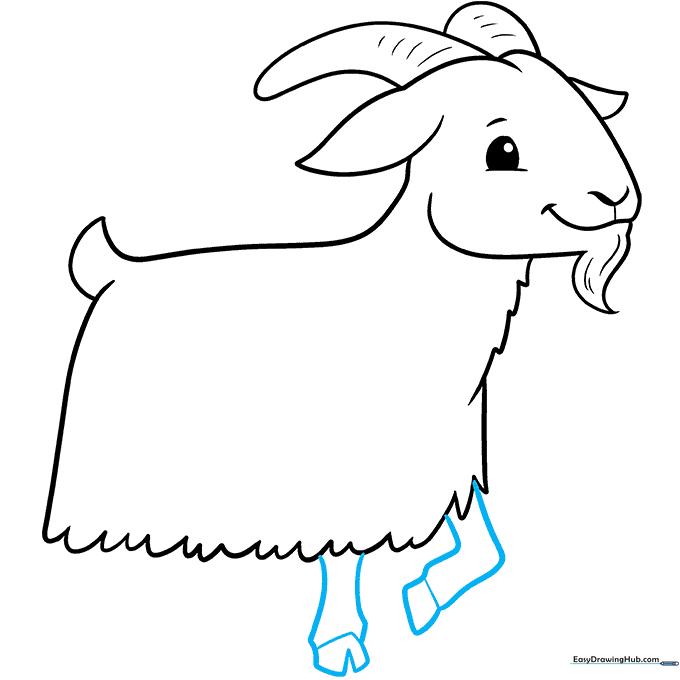
Outline the front legs with curved lines. At the bottom, add a 'V' shape to create the split hoof. Teacher's Tip: Add a horizontal line across the bottom of each leg to clearly separate the hoof from the leg.
Step 9: Adding the Rear Legs
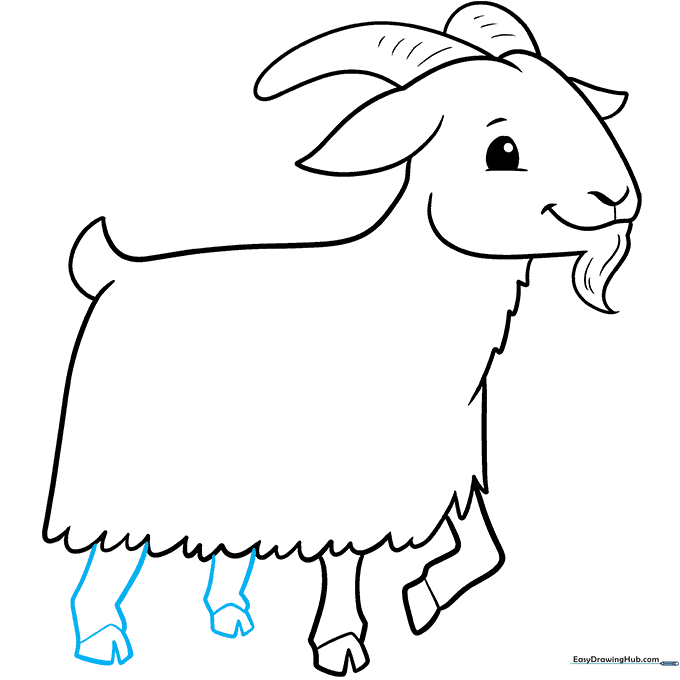
Finish by drawing the rear legs using the same curved technique as the front legs. Ensure the hooves match the style of the front ones. Teacher's Tip: Check that your goat is standing level by aligning the bottom of the hooves.
Step 10: Coloring Your Goat

Your outline is complete! Now, bring your goat to life with color. We chose a classic white with brown horns, but feel free to experiment with spots, patches, or different shades of brown and cream to make your goat unique.
More Tutorials


