How to Draw a Cartoon Flamingo: Easy 10-Step Guide
Ready to bring a tropical friend to life? This tutorial is perfect for young artists ages 5 and up. All you need is a pencil, an eraser, and some paper to start building your flamingo's iconic shape and feathery details.
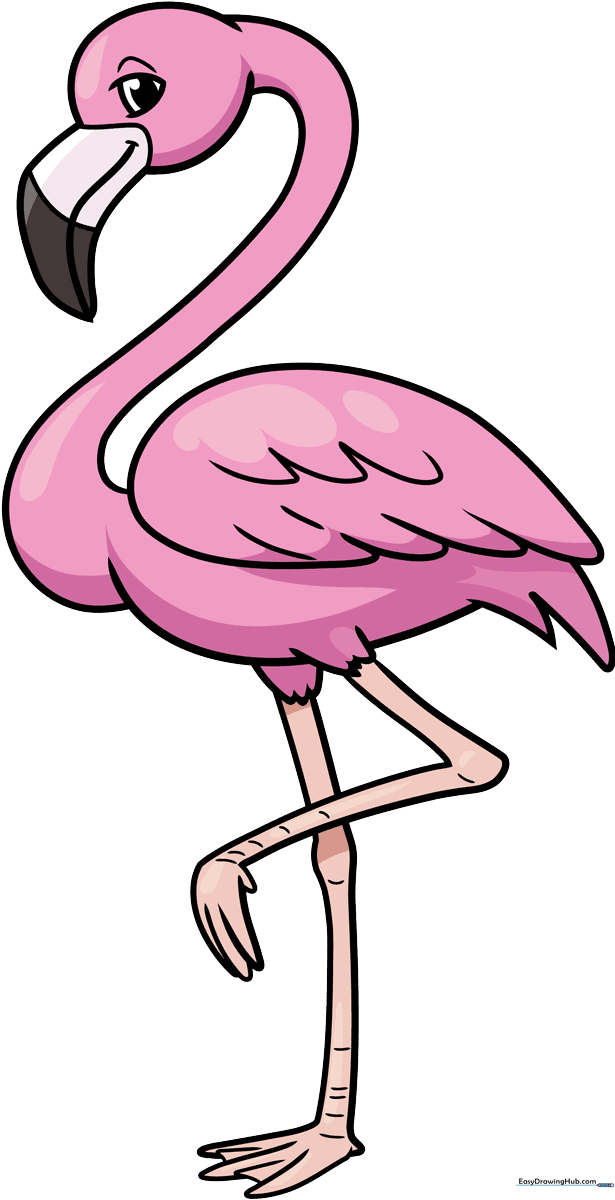
🎯 Final Result
Step-by-Step Instructions
Step 1: Sketching the Head

Draw a small semi-circle near the top of your page for the crown of the head. Add a rounded triangle for the eye, placing a small oval inside for the pupil. Teacher's Tip: Keep your pencil pressure light so you can easily erase any guidelines later.
Step 2: Shaping the Beak
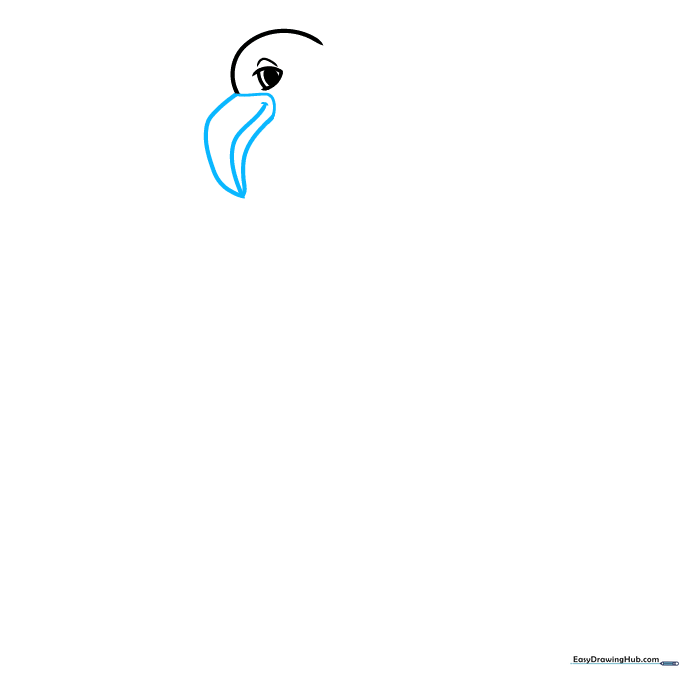
Outline the iconic curved beak using two lines that meet at a point. Add a wavy line inside to give it that classic flamingo look. Teacher's Tip: Think of the beak shape like a banana—it should have a gentle, downward curve.
Step 3: Creating the Long Neck
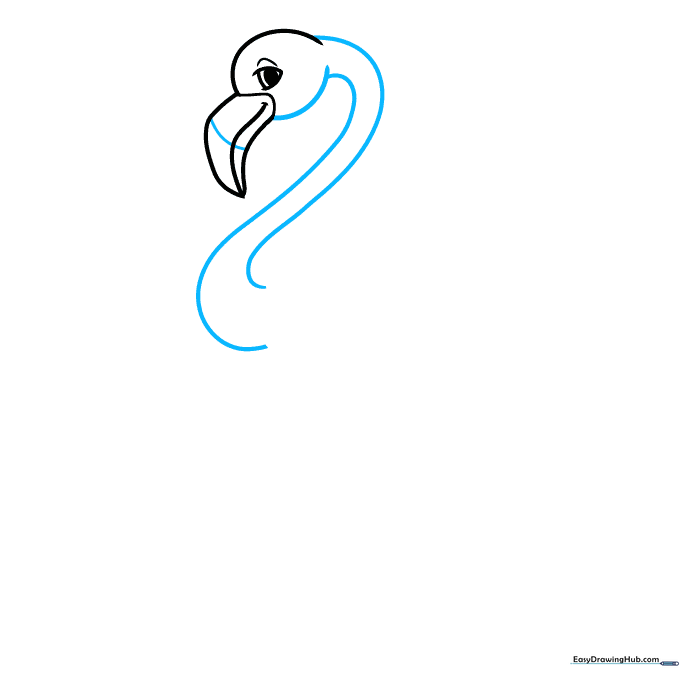
Draw two long, parallel backward S-curves to form the elegant, slender neck. Connect these to the head. Teacher's Tip: Don't worry if the lines aren't perfectly straight; flamingos have very wiggly, flexible necks!
Step 4: Starting the Wing
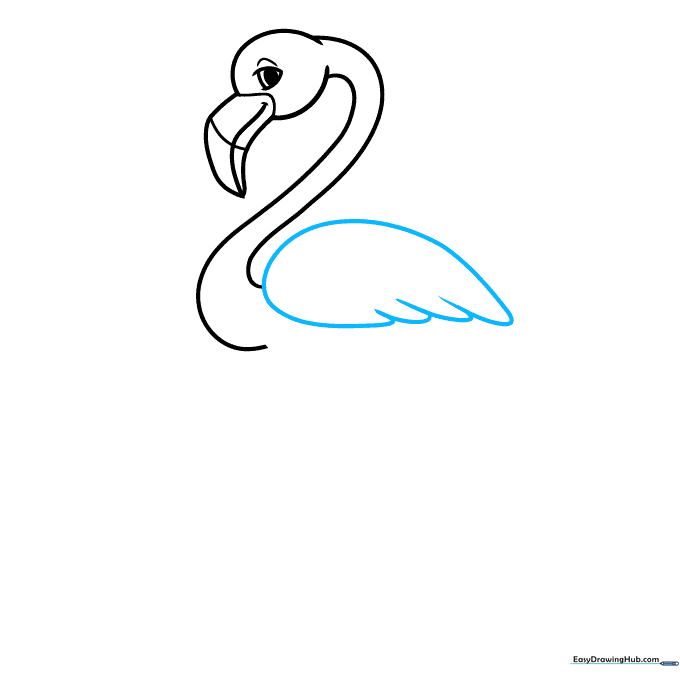
Sketch a rounded hill shape for the top of the wing, then add three overlapping loops underneath to suggest feathers. Teacher's Tip: Use smooth, rounded motions to make the feathers look soft and fluffy.
Step 5: Defining the Body
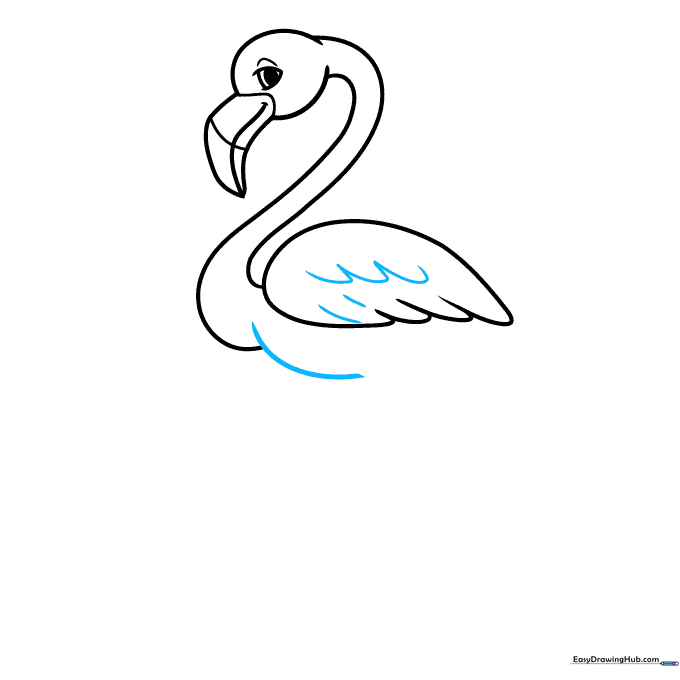
Add more loops to the wing for texture and draw a large, sweeping curve underneath to form the belly. Teacher's Tip: Keep the body shape round and plump to make your cartoon character look extra cute.
Step 6: Adding the Tail
Use small, sharp triangles at the back of the body to create the tail feathers. Teacher's Tip: Vary the size of your triangles to make the tail look natural and playful.
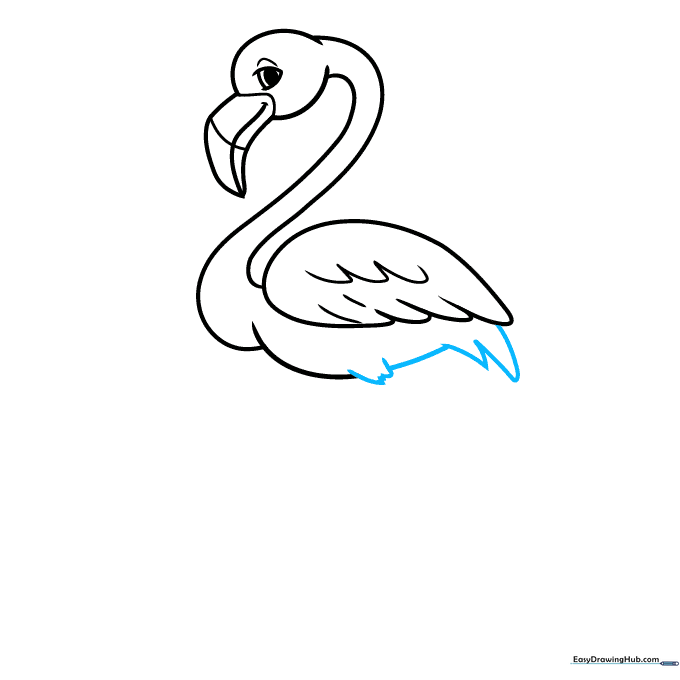
Step 7: Drawing the First Leg
Draw two long, thin lines for the leg and add three loops at the bottom for the webbed toes. Teacher's Tip: Flamingos have very thin legs, so keep your lines close together.
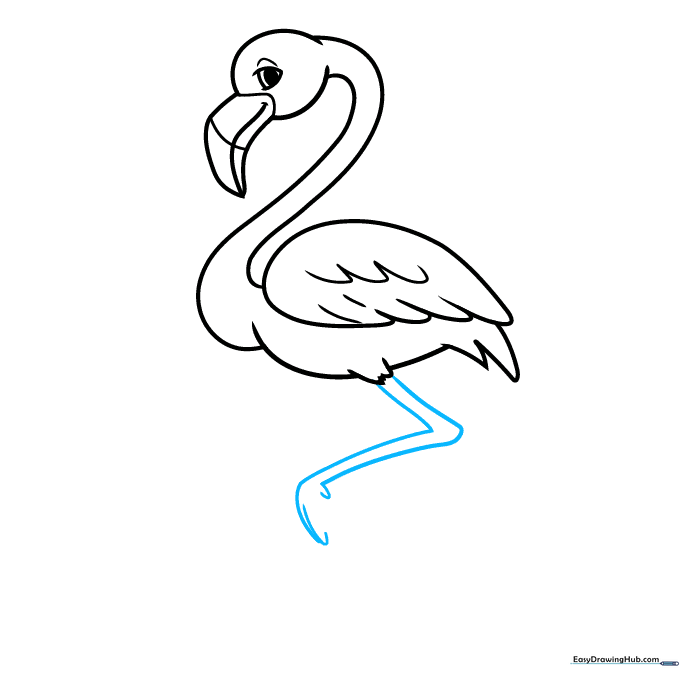
Step 8: Adding the Second Leg
Draw the second leg slightly bent, with an oval for the knee joint. Add a triangle for the foot. Teacher's Tip: Drawing the leg bent adds a sense of movement to your drawing.
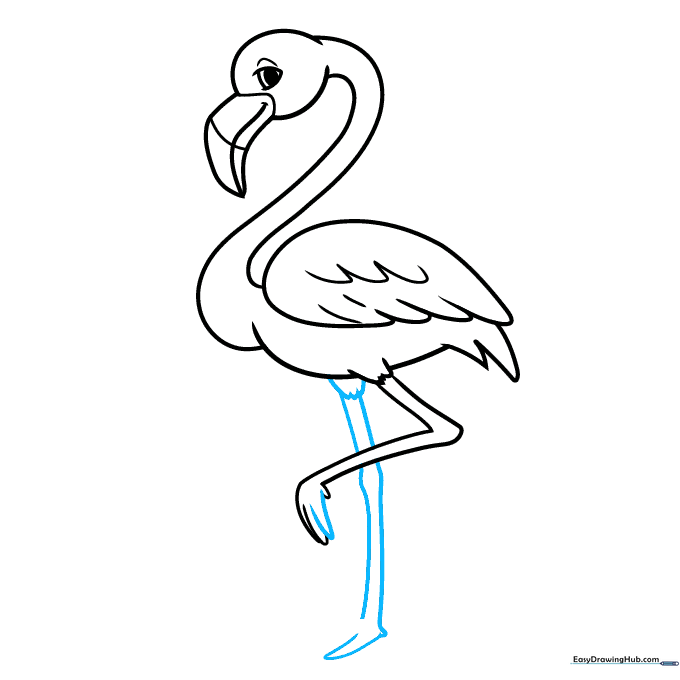
Step 9: Refining the Feet
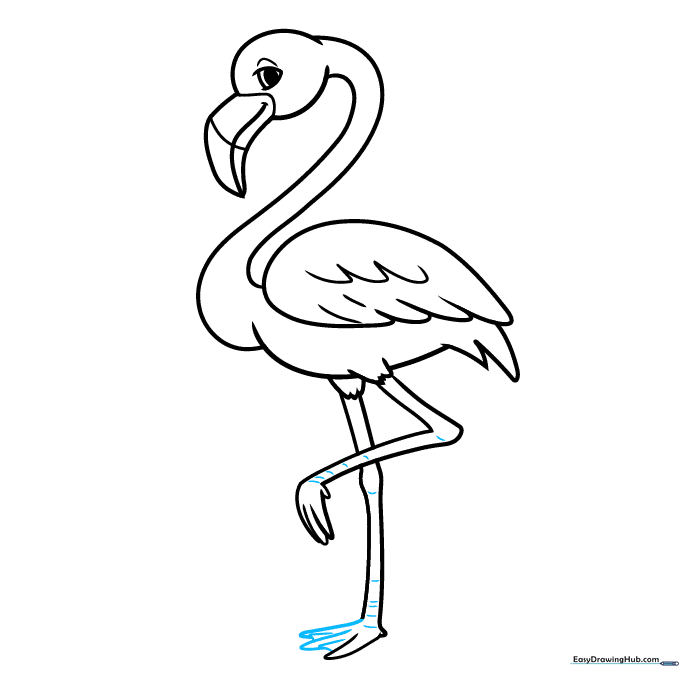
Add more triangles to the toes to complete the webbed look. Add a few narrow lines inside the legs for detail. Teacher's Tip: Small details like these make your drawing look more professional.
Step 10: Bringing it to Life with Color
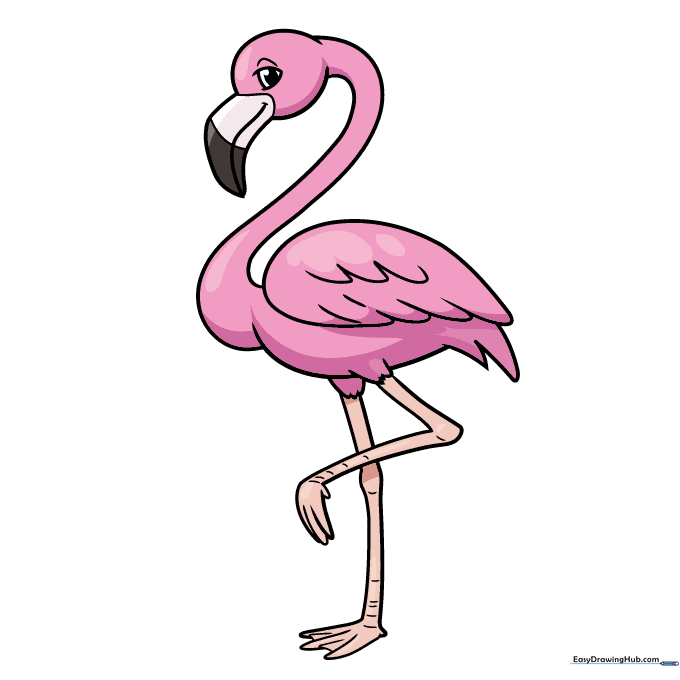
Outline your drawing with a dark marker, then fill it in with vibrant pinks. Use gray for the beak tip. Teacher's Tip: Try using different shades of pink to give your flamingo depth and personality!
More Tutorials


