How to Draw a Cartoon Fish: Easy 9-Step Guide for Kids
This step-by-step tutorial is perfect for young artists ages 5 and up. All you need is a pencil, an eraser, and a piece of paper to bring your underwater friend to life. Follow along to build confidence in your drawing skills while creating a vibrant, happy fish.
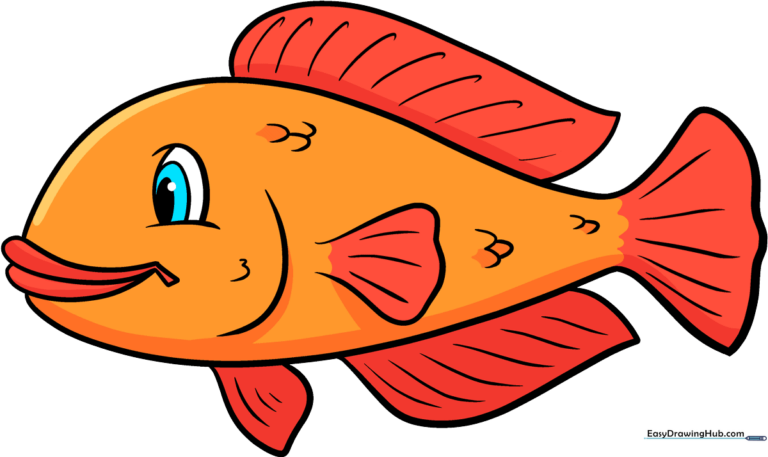
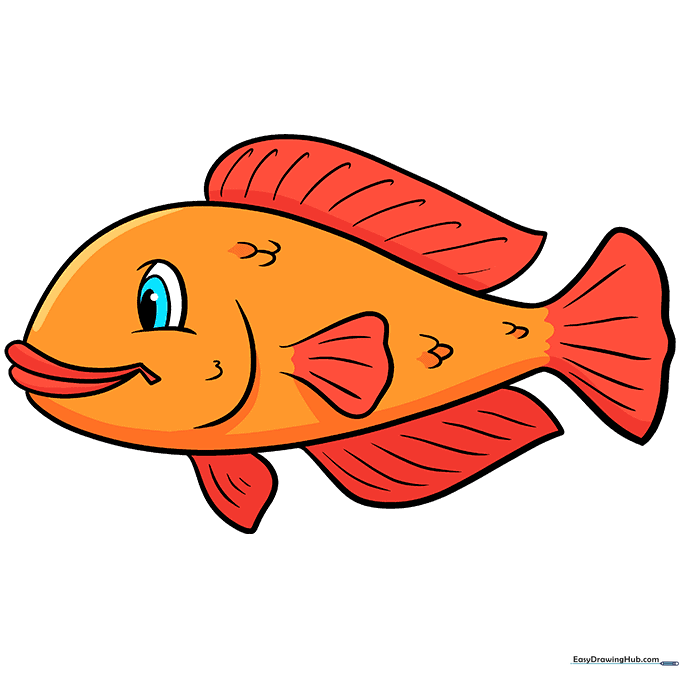
🎯 Final Result
Step-by-Step Instructions
Step 1: Drawing the Eye

Start by drawing the eye using three overlapping curved lines. Inside, add three smaller ovals, shading the center one to create a pupil. Teacher's Tip: Keep the eye near the front of the head to give your fish a friendly, curious expression.
Step 2: Sketching the Mouth
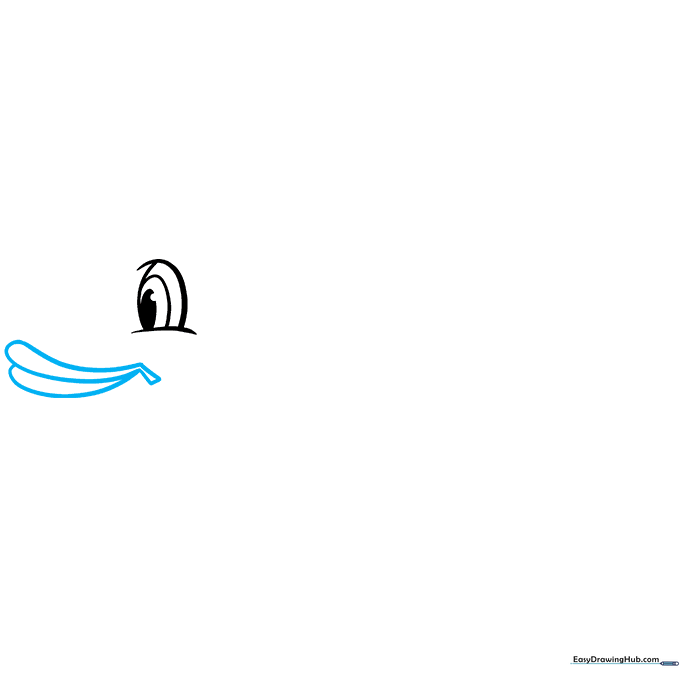
Use curved lines to form the teardrop-shaped lips. Add a small rectangle at the corner of the mouth to show a smile. Teacher's Tip: Use short, soft strokes to make the lips look rounded and natural.
Step 3: Defining the Belly

Extend a long, smooth curved line from the bottom of the mouth to create the fish's belly. Teacher's Tip: Try to draw this in one continuous motion to keep the line looking fluid and graceful.
Step 4: Shaping the Back and Gills
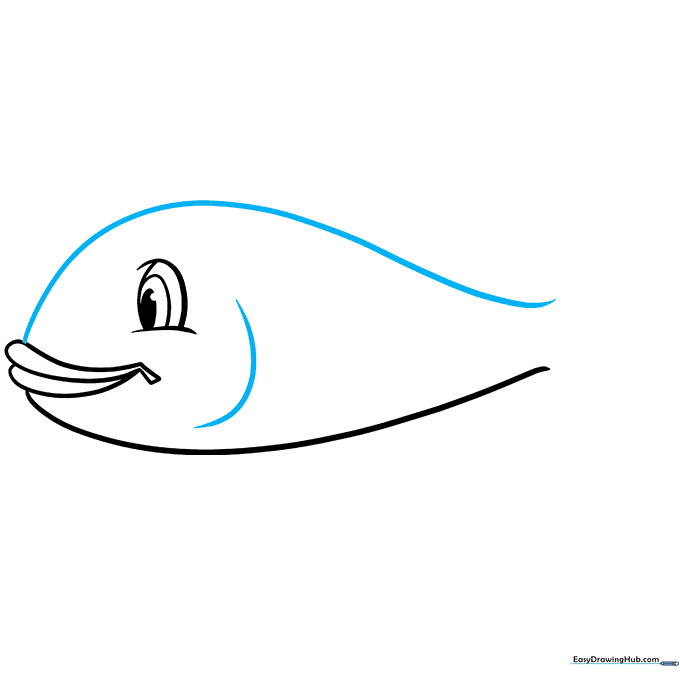
Draw a curved line from the top of the mouth to form the back, then add a small curved line behind the eye for the gills. Teacher's Tip: The gill line should be slightly shorter than the eye to keep the proportions balanced.
Step 5: Adding Fins
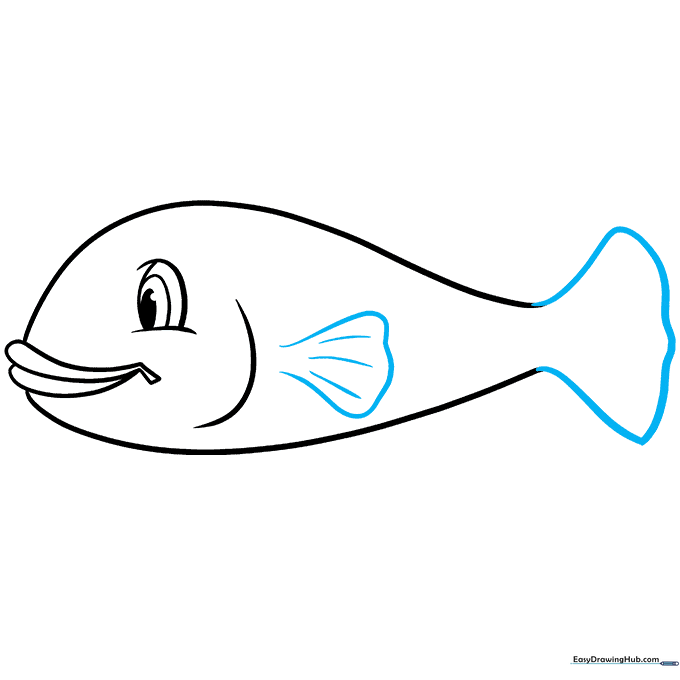
Draw the fan-shaped tail and a pectoral fin on the side using curved lines. Add small lines inside the fins for texture. Teacher's Tip: Fan shapes are easier to draw if you imagine you are drawing a slice of pie.
Step 6: Adding Bottom Fins
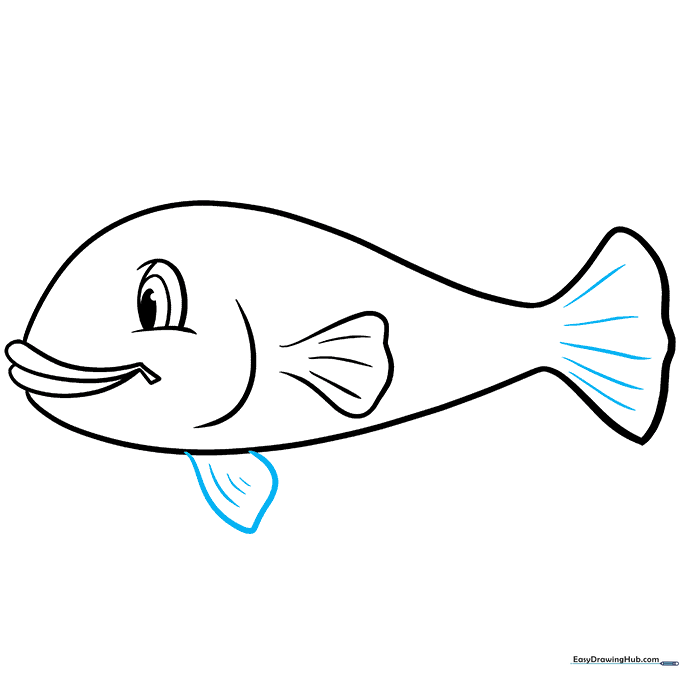
Enclose another fin along the bottom of the body. Add curved texture lines to match the tail. Teacher's Tip: Keep these lines light so they don't overpower the main body shape.
Step 7: The Caudal Fin
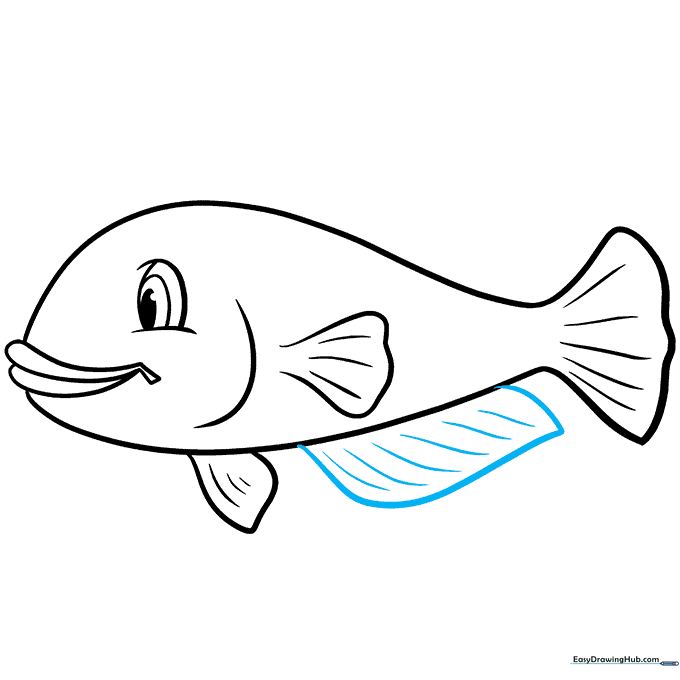
Add the caudal fin to the bottom section and texture it with curved lines. Teacher's Tip: Ensure the fin connects smoothly to the belly line you drew in Step 3.
Step 8: The Dorsal Fin
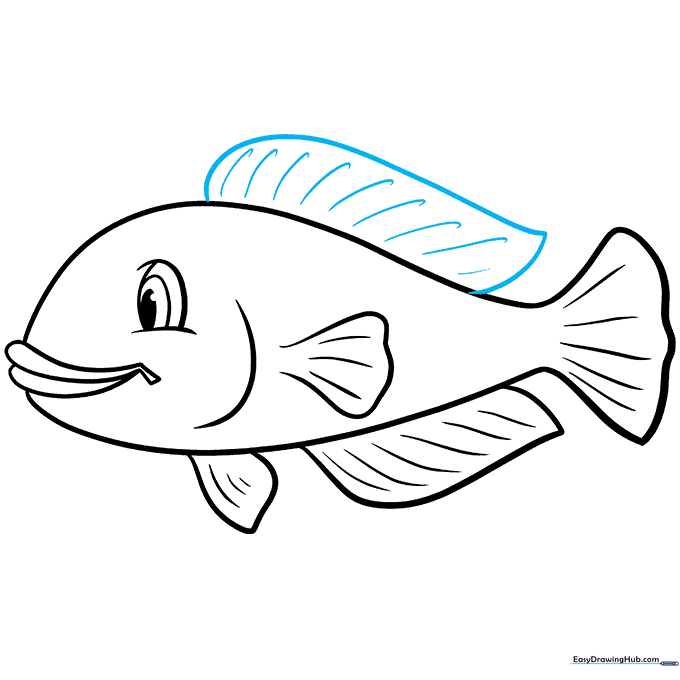
Draw the dorsal fin on the top of the fish's back. Add texture lines to keep it consistent with the other fins. Teacher's Tip: A larger dorsal fin makes the fish look more active and energetic!
Step 9: Final Details and Color
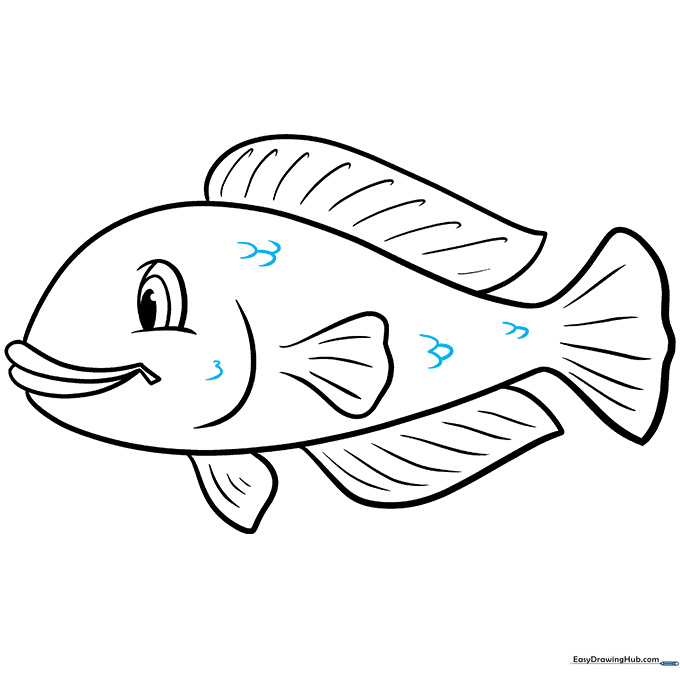
Add 'U' shaped scales across the body. Once finished, color your fish! We used orange and red, but feel free to use any colors you like. Teacher's Tip: Use a darker shade of your main color to add depth to the scales.
Coloring Your Masterpiece
Now that your outline is complete, bring your fish to life with vibrant colors. Want to try more? Check out our guides on drawing a goldfish or a rainbow trout.
More Tutorials


