How to Draw a Cow: Easy 10-Step Guide for Kids
Ready to bring a friendly farm animal to life? This tutorial is perfect for young artists ages 5 and up. You only need a pencil, an eraser, and a piece of paper to start building your own cartoon cow character.
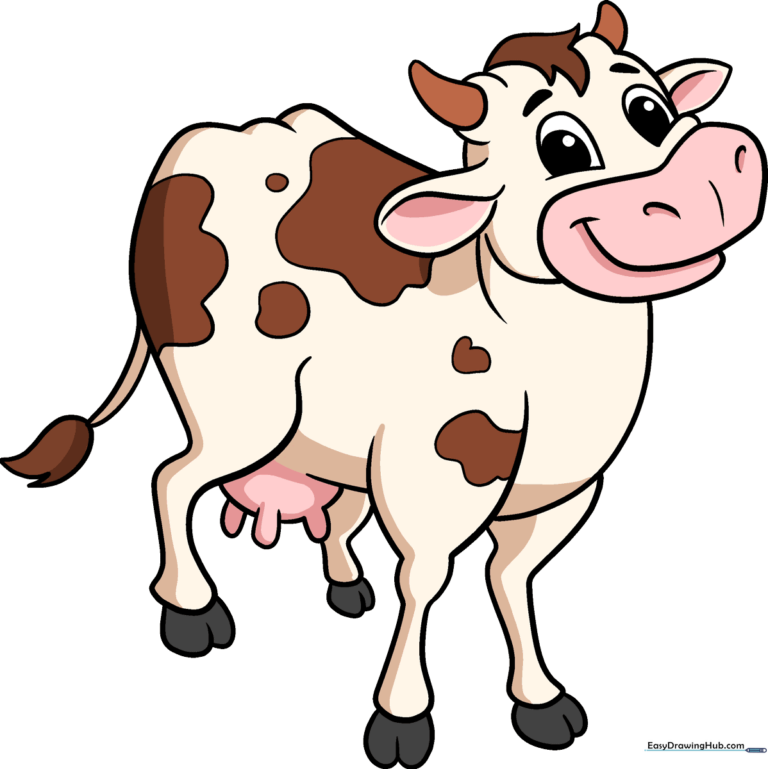
🎯 Final Result
Step-by-Step Instructions
Step 1: Sketching the Expressive Eyes

Start by drawing two curved lines for the upper cheeks. Add three ovals inside each, shading the smallest one to create a pupil. Teacher's Tip: Keep the eyes close together to give your cow a friendly, curious expression.
Step 2: Defining the Muzzle

Draw a long, gentle spiral-like curve to form the mouth area. Add small, comma-shaped lines for the nostrils. Teacher's Tip: A slightly larger muzzle makes the cow look more youthful and cute.
Step 3: Adding Ears and Horns
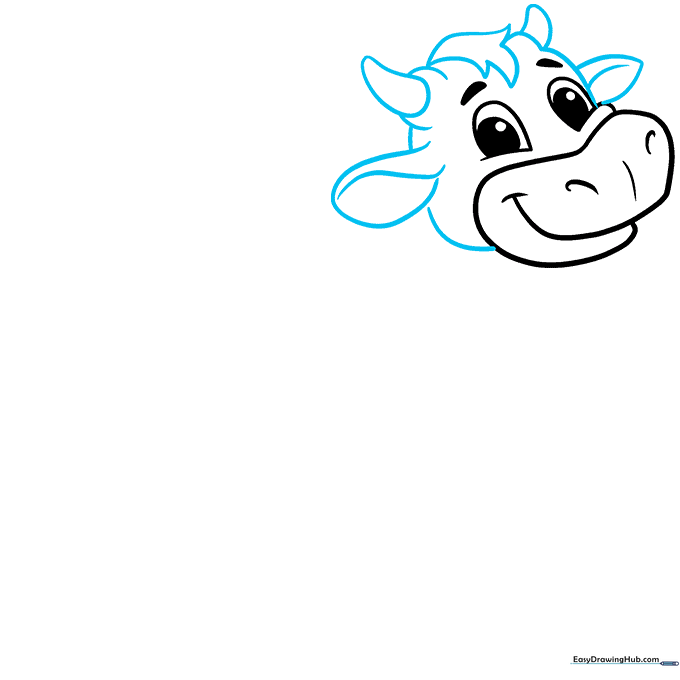
Sketch the ears using pointed curves and add rounded triangles for the horns. Finish with a small tuft of hair on top. Teacher's Tip: Don't worry about perfect symmetry; real cows have unique, slightly messy hair!
Step 4: Sketching the Front Leg
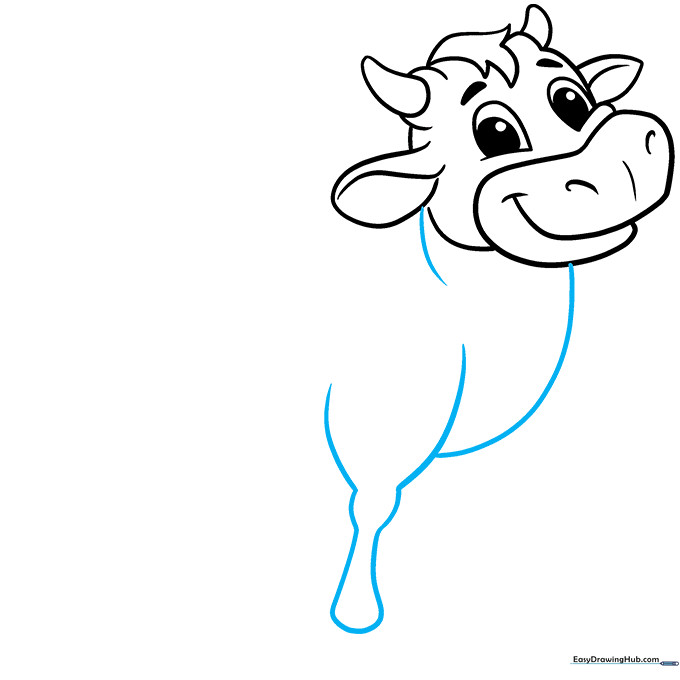
Draw a wavy line that doubles back to create the front leg, emphasizing the knee and hoof. Connect it to the muzzle to form the chest. Teacher's Tip: Use a fluid motion for the leg to make the cow look like it's walking.
Step 5: Completing the Front Legs
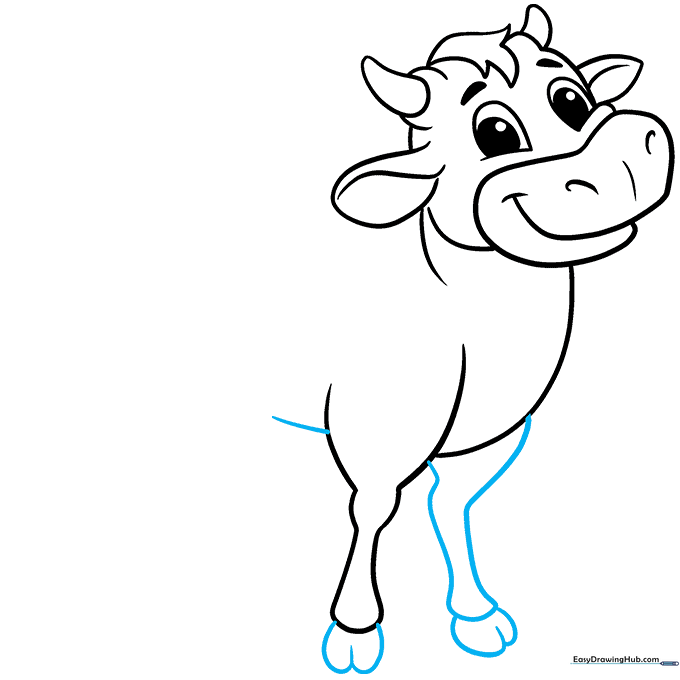
Draw the second front leg and add heart-shaped hooves. Extend a line for the belly. Teacher's Tip: The heart shape for the hooves is a great way to add character to your cartoon animal.
Step 6: Shaping the Back and Hips

Use overlapping curved lines to define the cow's back and the curve of the hip. Teacher's Tip: Keep these lines soft and rounded to give the cow a friendly, plump appearance.
Step 7: Adding the Tail and Rear Leg
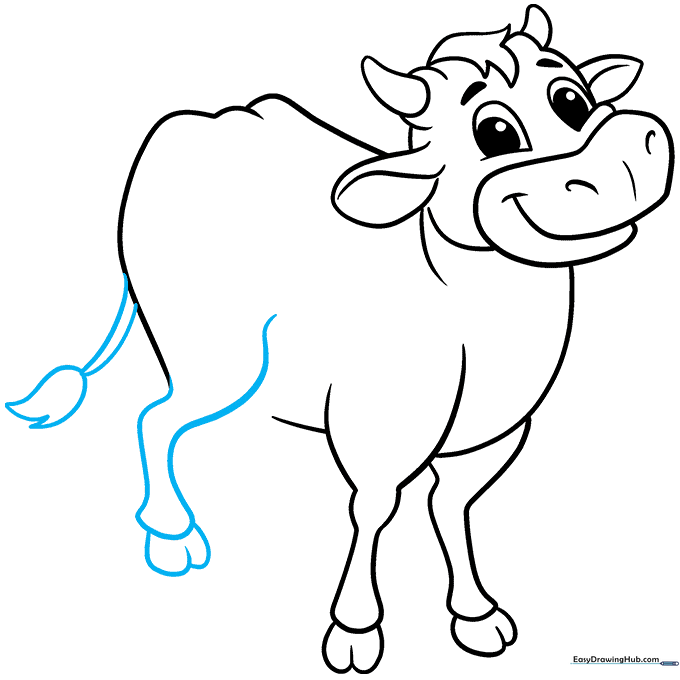
Draw the rear leg and a tail with a tuft of hair at the end. Teacher's Tip: Make the tail look like it's swishing by drawing it in a slight 'S' curve.
Step 8: Finalizing the Body
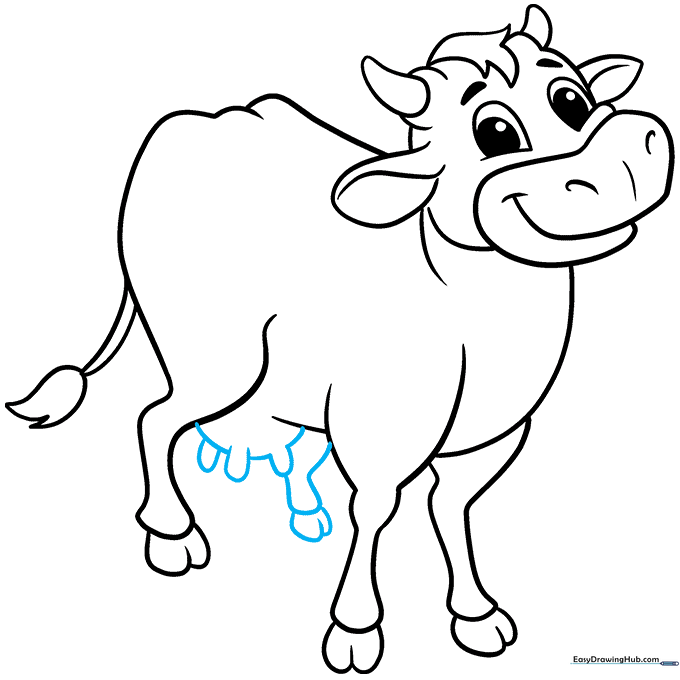
Add the final leg and the udder details using simple, overlapping curves. Teacher's Tip: Ensure these lines connect smoothly to the belly for a clean look.
Step 9: Adding Characteristic Spots
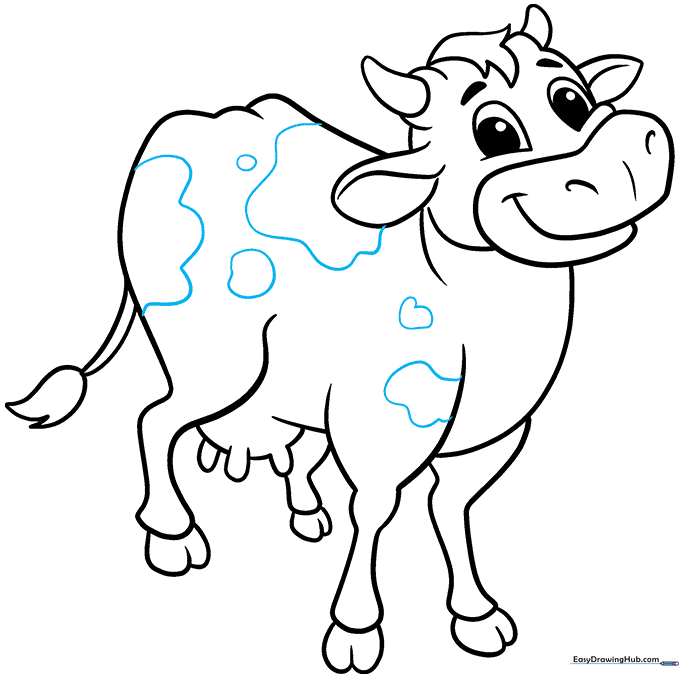
Draw irregular shapes across the back to create spots. Teacher's Tip: Vary the size of the spots to make your cow look more natural and interesting.
Step 10: Bringing Your Cow to Life with Color
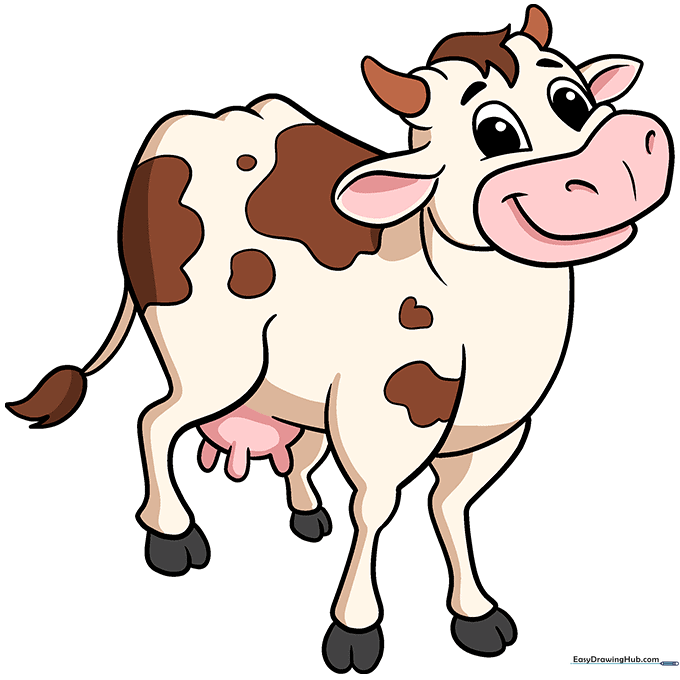
Time to color! Use black or brown for the spots and white or cream for the body. Teacher's Tip: Use light, circular strokes when coloring to keep the texture smooth and professional.
More Tutorials


