How to Draw a Human Body Outline: Easy 10-Step Guide
Ready to bring your characters to life? This guide is designed for young artists and beginners to learn the fundamental proportions of the human body. You only need a pencil, an eraser, and a sheet of paper to start building your own unique figures.
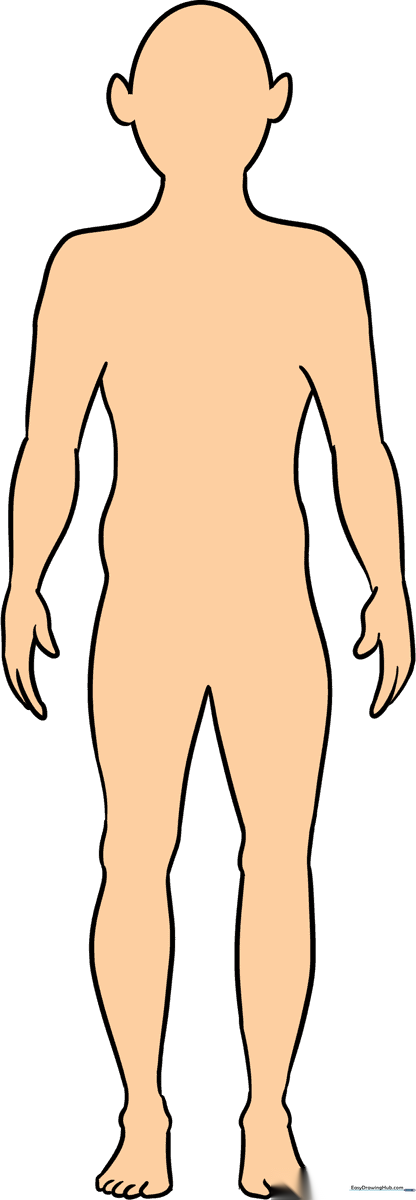
🎯 Final Result
Step-by-Step Instructions
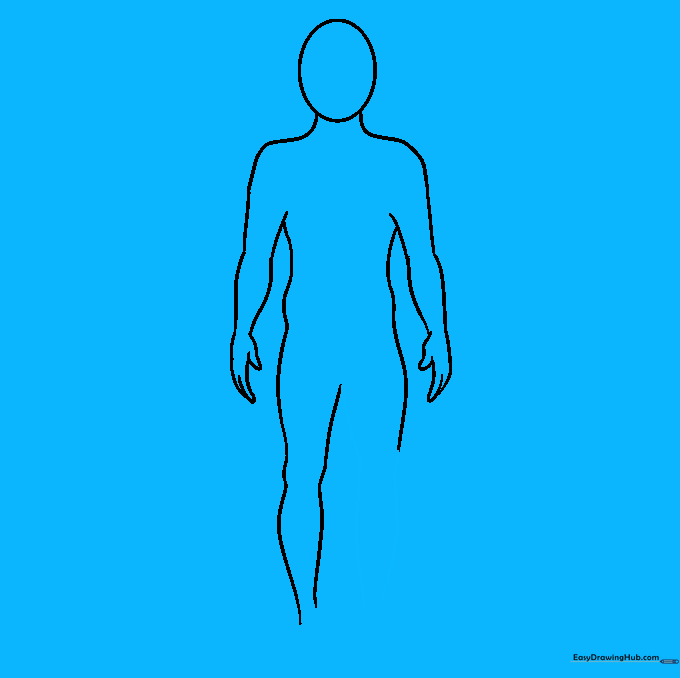
Step 1: Sketching the Head

Draw a light oval to represent the head. Teacher's Tip: Keep your pencil pressure very light here; this is just a guide that we will refine later!
Step 2: Defining the Neck and Shoulders

Extend two curved lines downward from the head to create the neck, then flare them outward to form the shoulders. Tip: Think of the neck as a small bridge connecting the head to the body.
Step 3: Sketching the First Arm
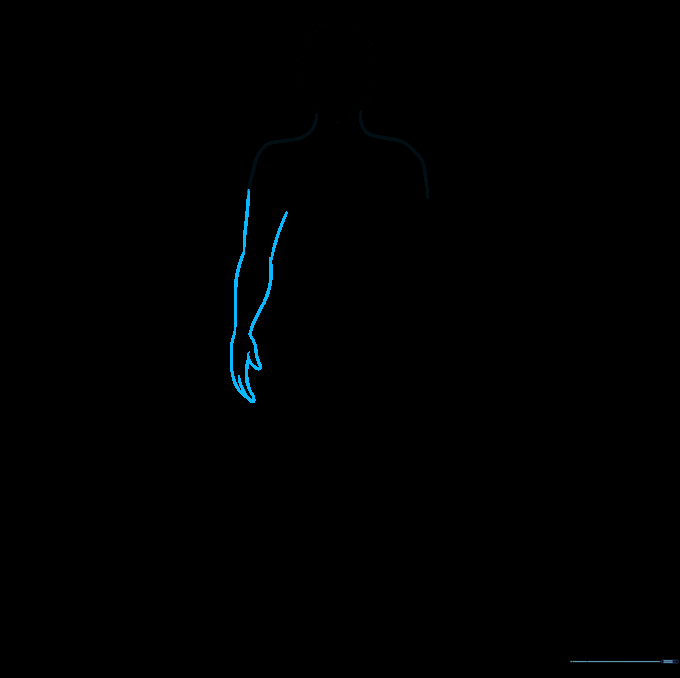
Use pairs of curved lines to outline the upper and lower arm, tapering them at the elbow and wrist. Finish the hand with small 'U' shapes for fingers. Tip: Keep your lines fluid to make the arm look natural rather than stiff.
Step 4: Adding the Second Arm
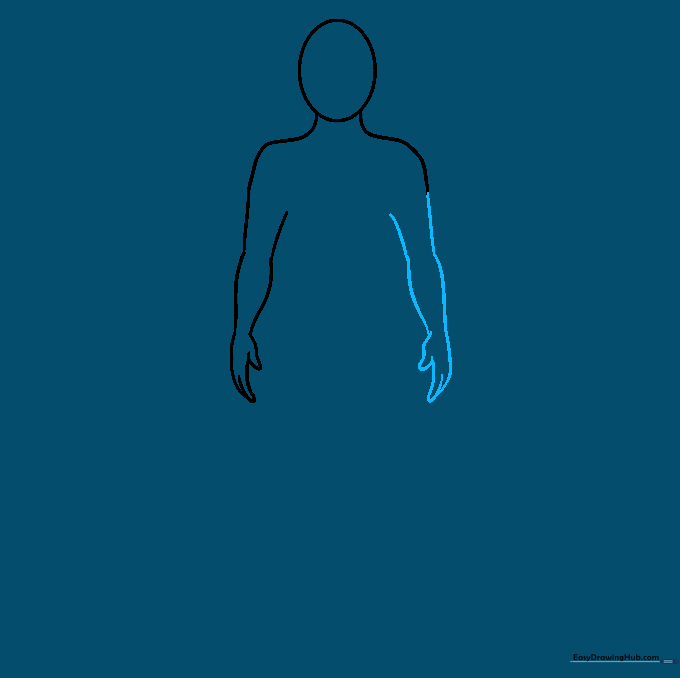
Repeat the process from Step 3 to draw the second arm. Tip: Try to match the length of the first arm to keep your character balanced.
Step 5: Drawing the Torso

Draw two long, curved lines for the torso, narrowing slightly at the waist and widening at the hips. Tip: A slight curve makes the body look more dynamic and less like a box.
Step 6: Outlining the First Leg
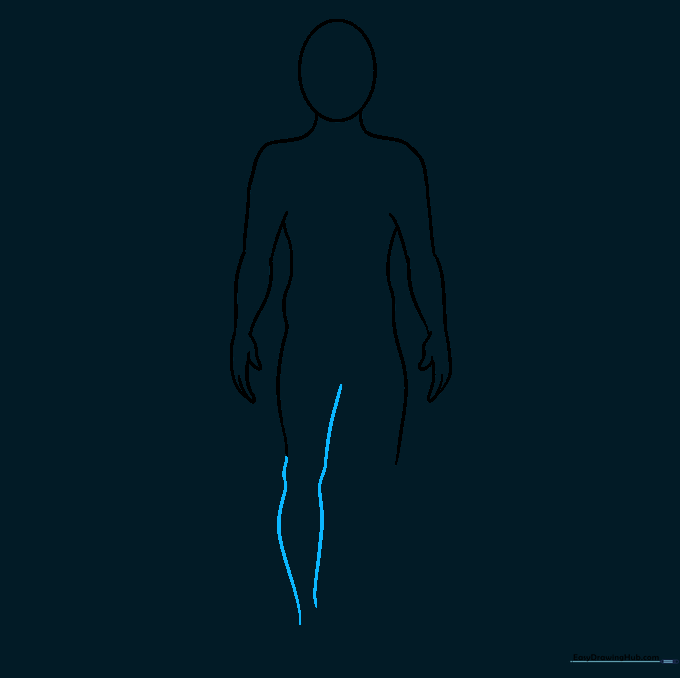
Outline the leg with curved lines, emphasizing the knee and the calf muscle. Tip: Legs are usually the longest part of the body—don't be afraid to make them nice and tall!
Step 7: Outlining the Second Leg
Mirror the first leg on the other side to complete the lower body. Tip: Check that both legs are touching the same 'ground' line so your character isn't floating.
Step 8: Adding Feet and Toes

Sketch the feet with curved lines, adding small 'U' shapes for the toes. Tip: Keep the feet relatively small to maintain the proportions of the body.
Step 9: Final Details and Cleanup

Add ears using 'C' shapes and erase any overlapping guide lines from the head and neck. Tip: A clean drawing makes it much easier to add clothes or hair later!
Step 10: Personalize Your Character
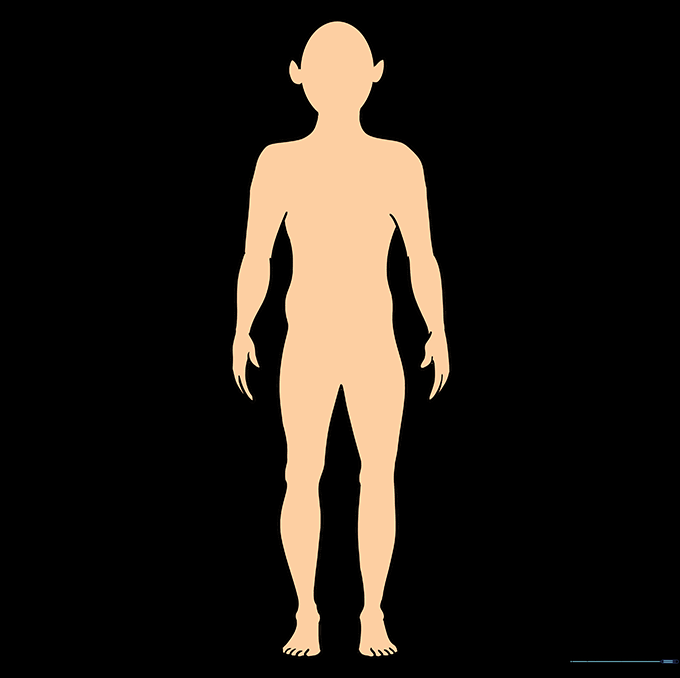
Your base outline is ready! Now you can add facial features, hair, or clothing to turn this into any character you imagine. Tip: Use our other tutorials to learn how to draw specific hairstyles or outfits to complete your look.
More Tutorials


