How to Draw a Blank Face: Easy 9-Step Guide for Beginners
Ready to bring your own characters to life? This tutorial is perfect for artists ages 5 and up who want to master the basic head shape and hairline before adding expressions. All you need is a pencil, an eraser, and a sheet of paper to begin building your portrait skills.
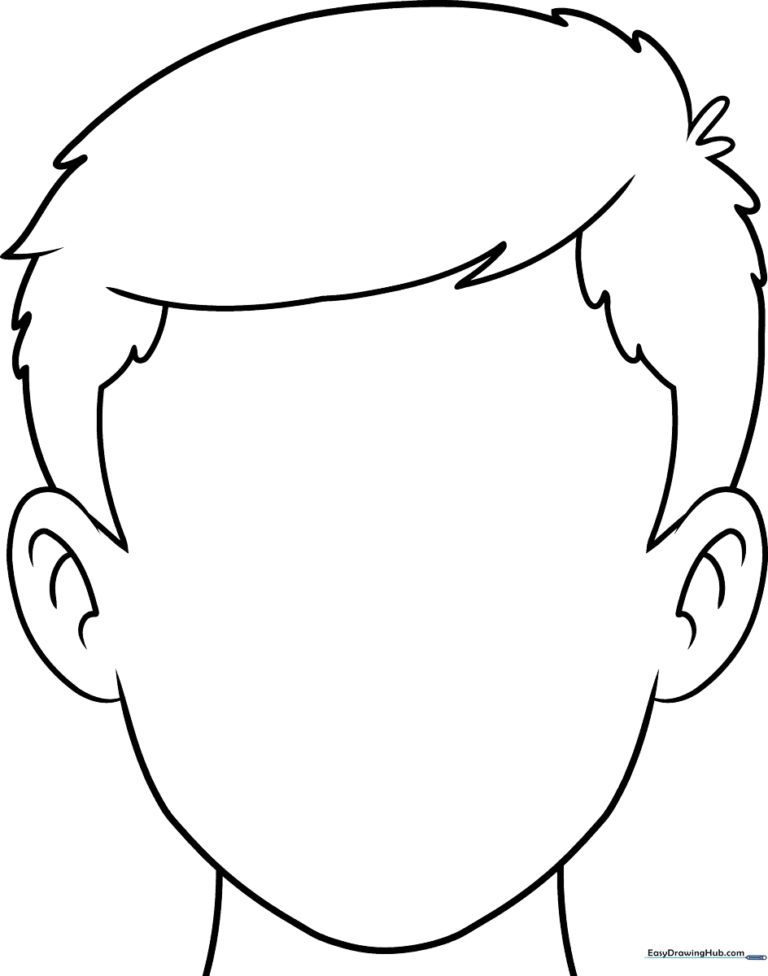
🎯 Final Result
Step-by-Step Instructions
Step 1: Sketching the Jawline

Draw a large, rounded “U” shape to form the chin and jaw. Teacher's Tip: Keep your pencil pressure light so you can easily adjust the shape if it looks a bit lopsided.
Step 2: Adding the Ears
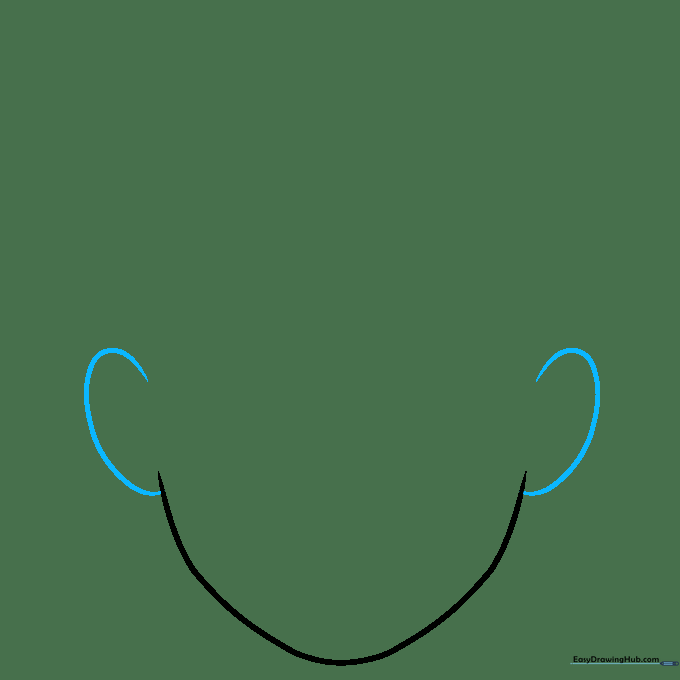
Place a “C” shaped curve on each side of the jawline. Teacher's Tip: Try to align the tops of the ears with where the eyes will eventually go—usually about halfway down the head.
Step 3: Defining Ear Detail

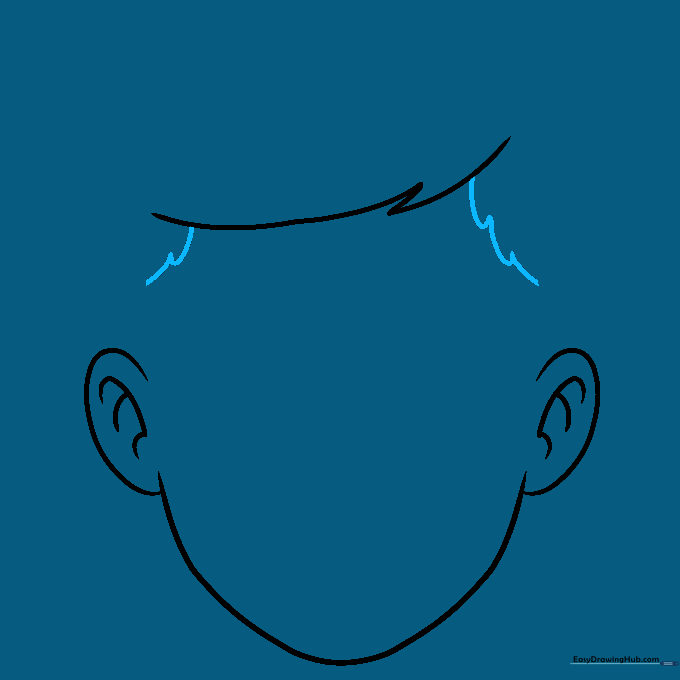
Add smaller curved lines inside each ear to give them depth. Teacher's Tip: Don't worry about perfect anatomy here; simple, fluid curves are best for a clean cartoon style.
Step 4: Starting the Hairline

Sketch the hair across the forehead using jagged, pointed lines. Teacher's Tip: Vary the length of your points to make the hair look more natural and less like a straight line.
Step 5: Framing the Face
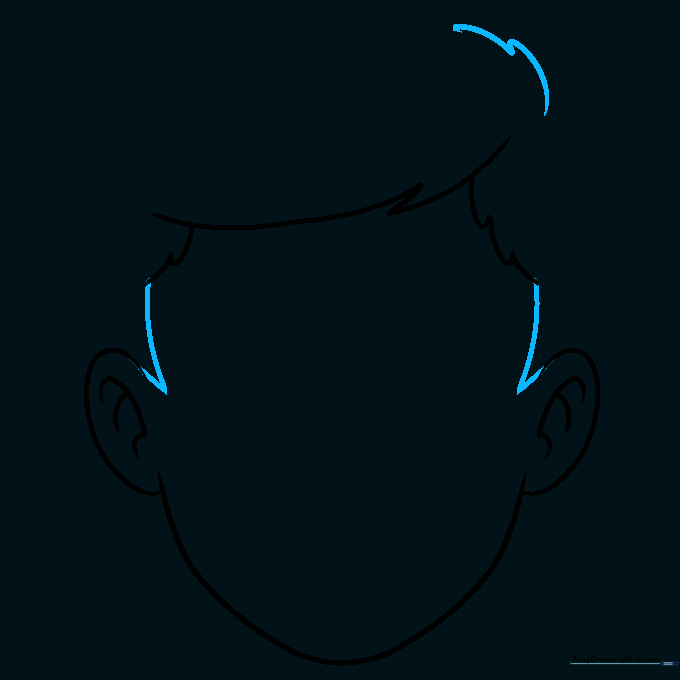
Extend the hair down the sides of the face using connected curved lines. Teacher's Tip: Imagine the hair has weight—let it curve slightly outward away from the face.
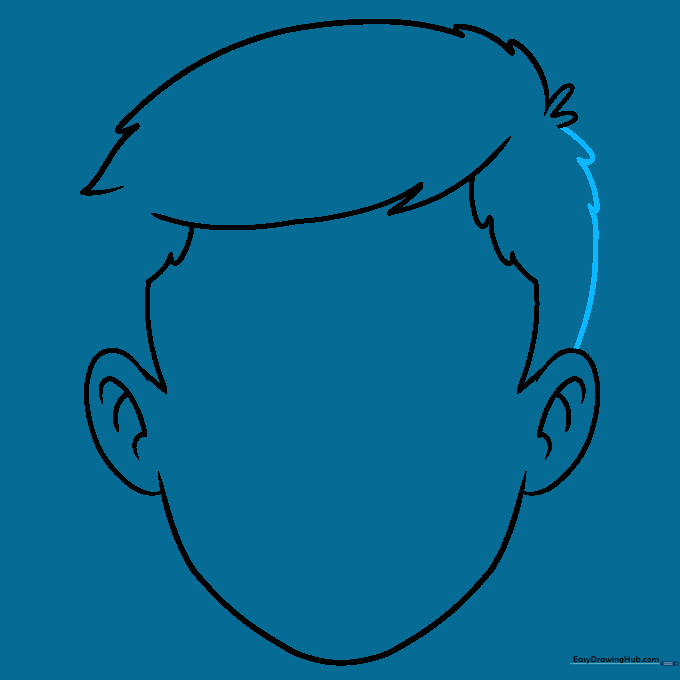
Step 6: Connecting the Hair
Connect the hair to the ears with sideburns and build up the top of the head. Teacher's Tip: Use smooth, sweeping motions to keep the hair looking soft.
Step 7: Adding Volume
Continue building the hair on top, adding a few 'U' shaped spikes for texture. Teacher's Tip: Spikes at the crown add personality—don't make them all the same size!
Step 8: Filling the Gaps
Close the hair shape between the crown and the ears. Teacher's Tip: Check that your lines meet up cleanly; this makes the final outline look professional.
Step 9: Adding the Neck
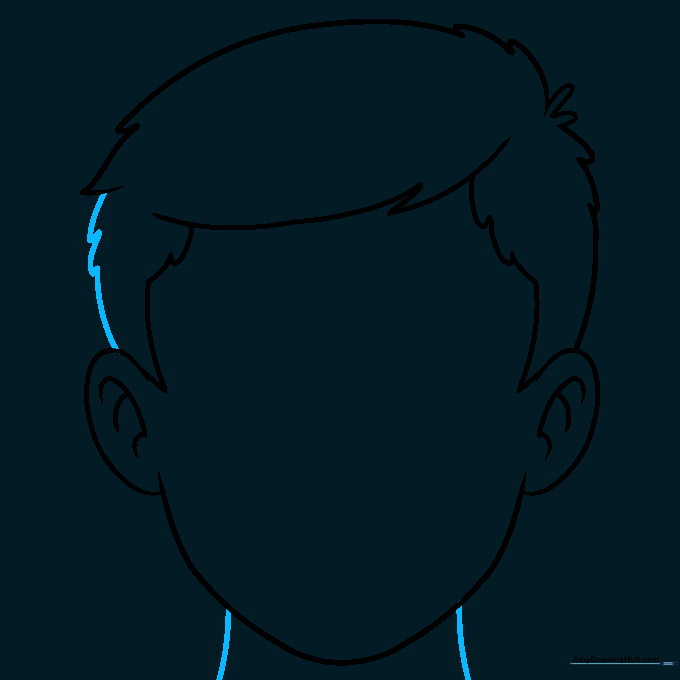
Finish the head by drawing two simple lines for the neck. Teacher's Tip: Keep the neck lines slightly curved to suggest the natural shape of the collarbone area.
Step 10: Ready for Expressions

Your blank face is complete! Now you have a perfect canvas to practice drawing eyes, noses, and mouths. Teacher's Tip: Try drawing this same face multiple times and experiment with different hairstyles.
More Tutorials


