How to Draw a Black Girl: Easy 10-Step Portrait Guide
Perfect for young artists ages 8+, this portrait tutorial focuses on facial structure and expressive features. You will need a pencil, an eraser, and your favorite coloring markers or pencils. Follow along to develop your shading skills and create a character with personality.
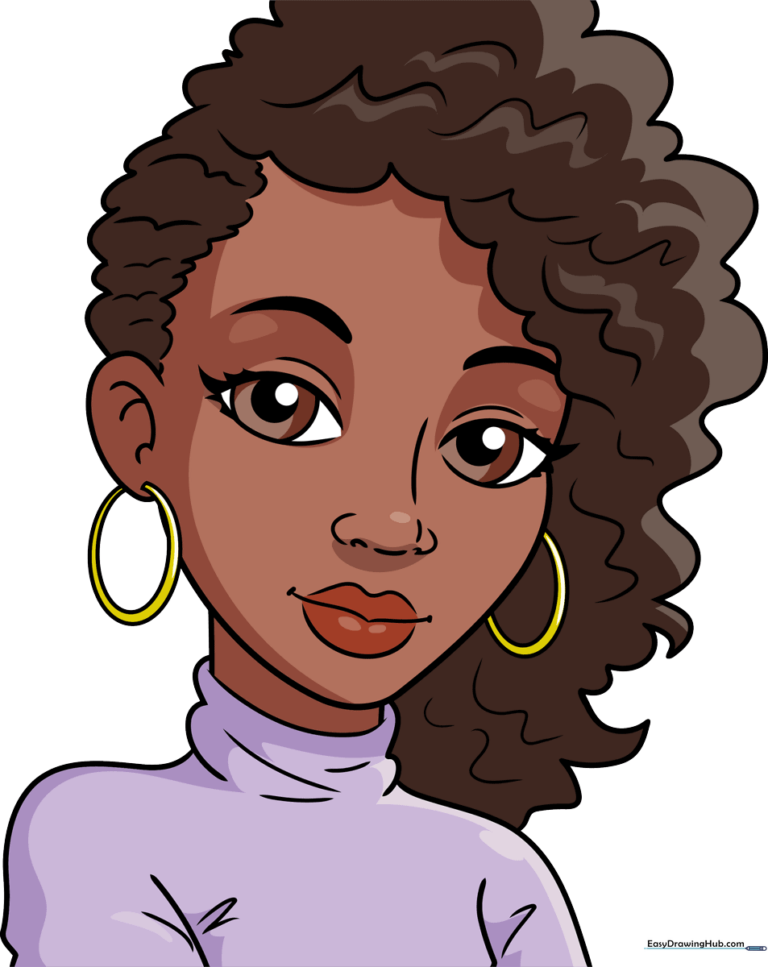
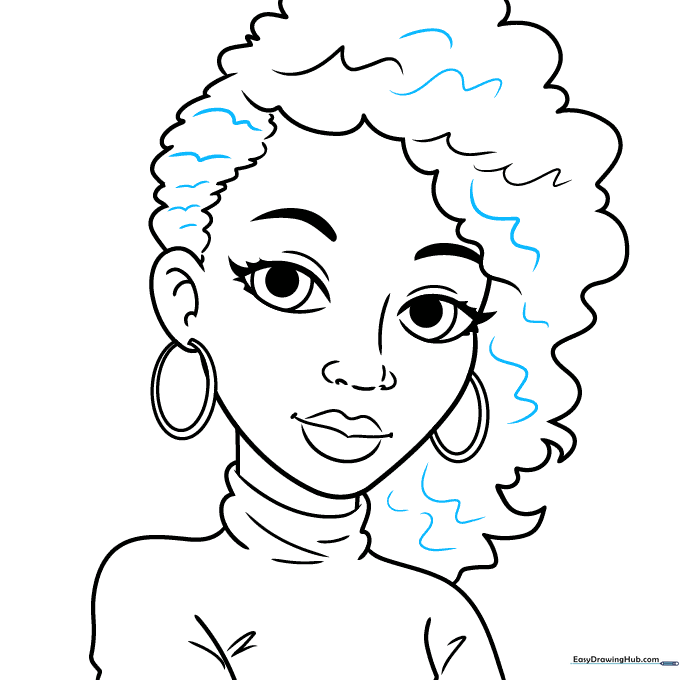
🎯 Final Result
Step-by-Step Instructions
Step 1: Sketching the Expressive Eyes
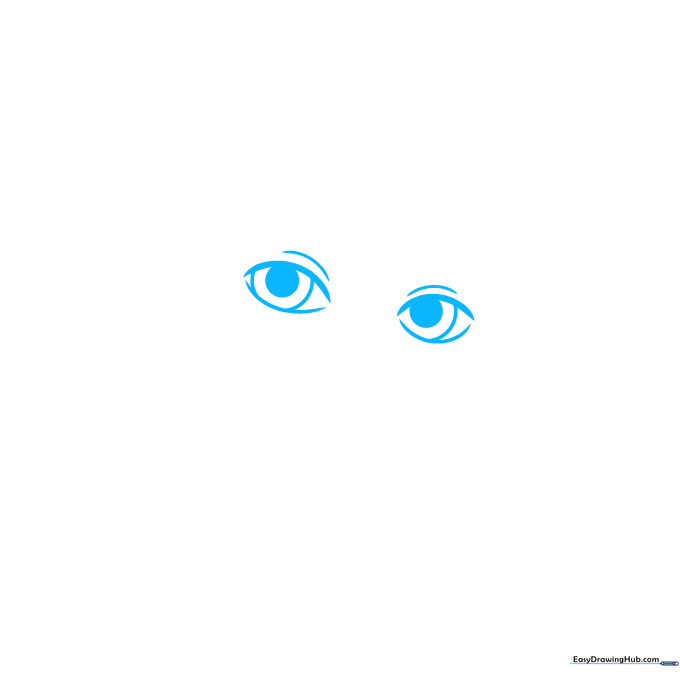
Draw two almond-shaped eyes using curved lines that don't quite touch at the corners. Add a soft arch above each for the eyelid. Teacher's Tip: Keep your pencil pressure light here so you can easily adjust the symmetry if one eye looks a bit different than the other.
Step 2: Defining Brows and Lashes
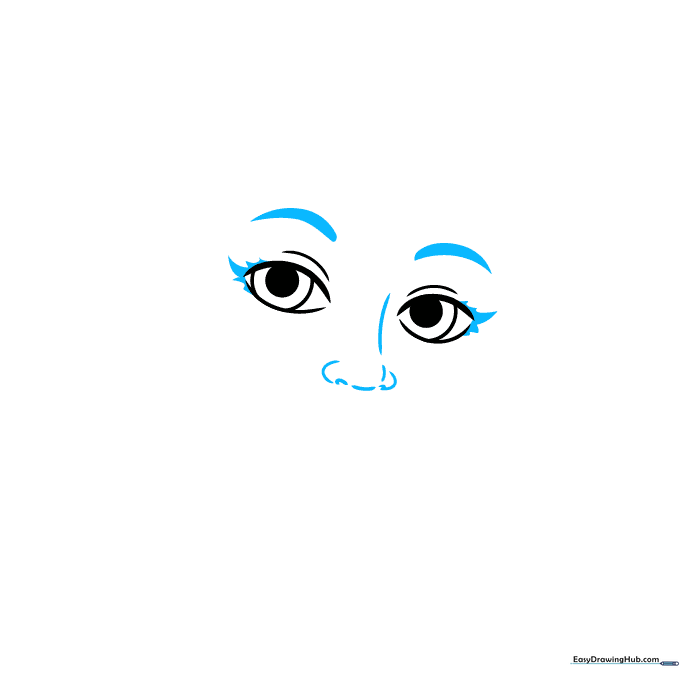
Add thick, expressive eyebrows above the lids and small triangles at the corners of the eyes for lashes. Sketch the nose bridge and nostrils with gentle curves. Teacher's Tip: Use short, flicking motions with your pencil to make the lashes look natural rather than stiff.
Step 3: Shaping the Face and Lips
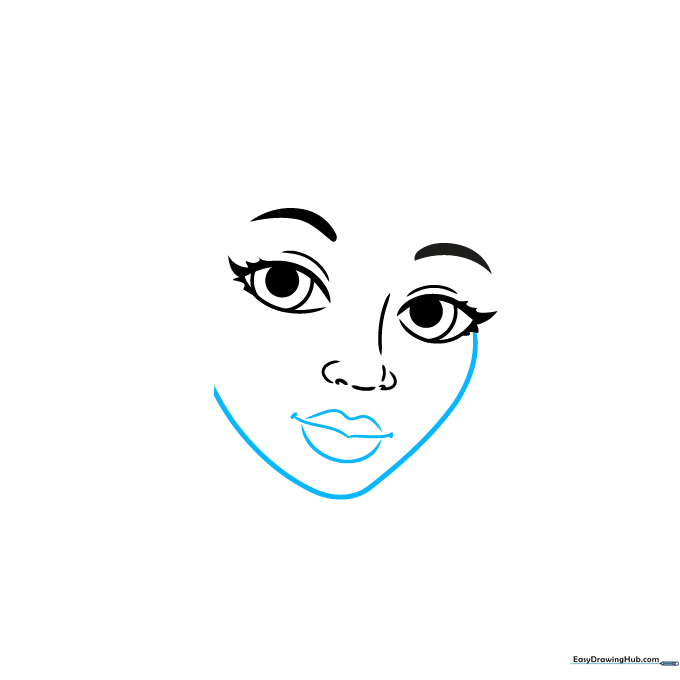
Outline the chin and cheek with a long, smooth curve. Draw the lips using two lines that meet at a soft point. Teacher's Tip: To get the lips right, think of them as a soft 'M' shape on top and a gentle 'U' on the bottom.
Step 4: Adding Ears and Jewelry
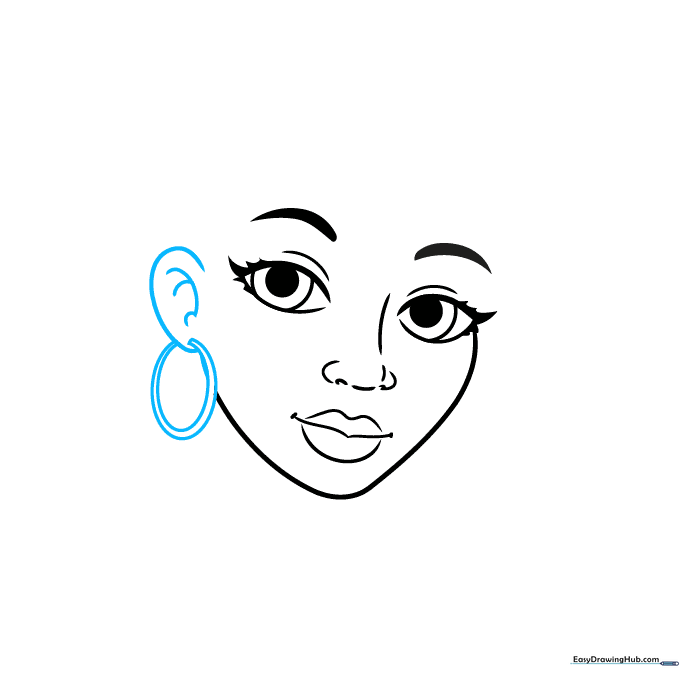
Draw a 'C' shape for the ear and add two circles to create a hoop earring. Add a few inner lines to the ear to show its natural folds. Teacher's Tip: Ears usually align with the top of the eyes and the bottom of the nose—use this as a guide for placement!
Step 5: Sketching the Hairline
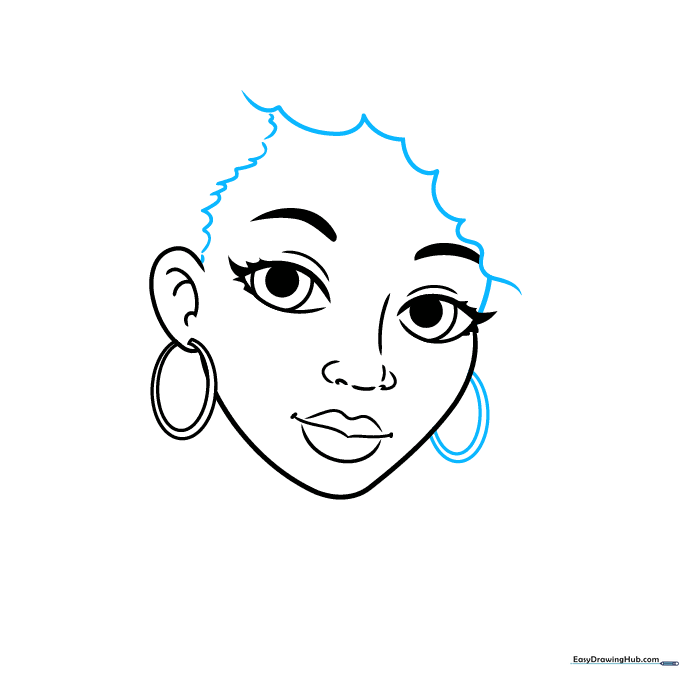
Use connected curved lines to create the hairline, overlapping them slightly for a natural look. Add the second earring on the other side. Teacher's Tip: Hair isn't a solid block; draw the lines in the direction you want the hair to flow.
Step 6: Styling the Hair
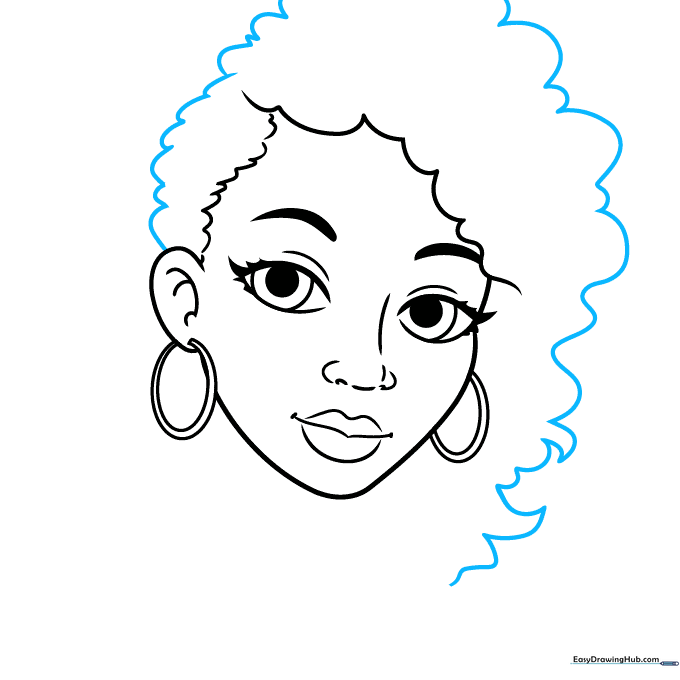
Use a series of curved lines that meet at points to build the volume of the hair. Teacher's Tip: Don't worry about making every line perfect. Hair is organic and looks best with a bit of variation in the curves.
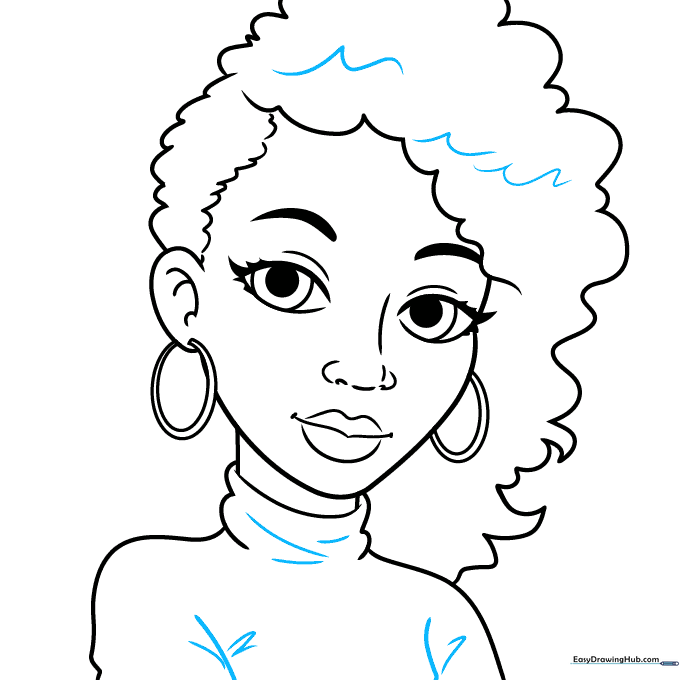
Step 7: Drawing the Neck and Shoulders

Extend two lines down from the chin to form the neck, then sketch the collar of a turtleneck sweater. Teacher's Tip: Keep the neck lines parallel to ensure the head looks centered on the shoulders.
Step 8: Adding Texture and Detail
Add texture lines to the hair and the sweater sleeves to give your drawing depth. Teacher's Tip: Use light, rhythmic strokes to create the illusion of fabric folds on the sweater.
Step 9: Finalizing the Outline
Add final touches to the hair texture to complete the silhouette. Teacher's Tip: Now is the time to go over your pencil lines with a darker pen or pencil to make your drawing pop!
Step 10: Bringing It to Life with Color

Use your favorite markers or colored pencils to fill in your portrait. Teacher's Tip: Try using two shades of the same color for the skin to create a subtle shadow effect near the jawline.
More Tutorials


