How to Draw a Black Anime Girl: Easy 10-Step Guide
Ready to bring a new character to life? This tutorial is perfect for artists ages 8+ who want to master anime-style proportions and expressive features. Grab your favorite graphite pencil and a clean eraser, and let’s start sketching this stylish character step-by-step.
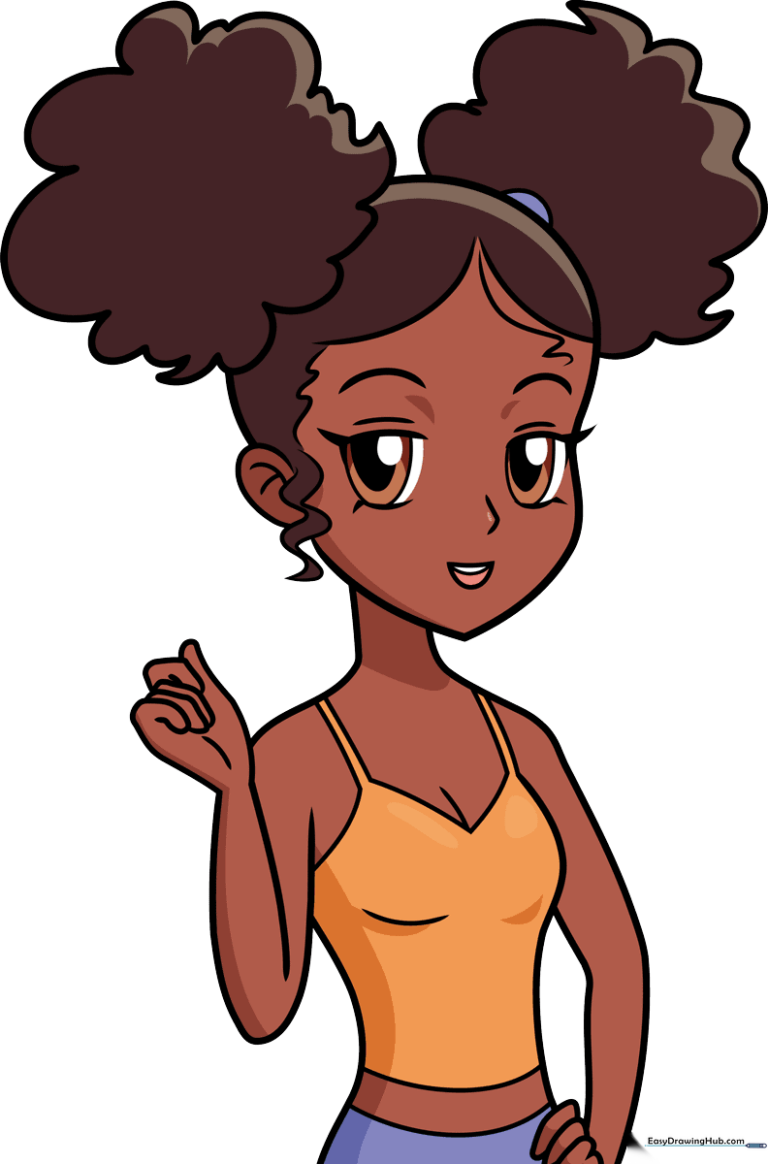
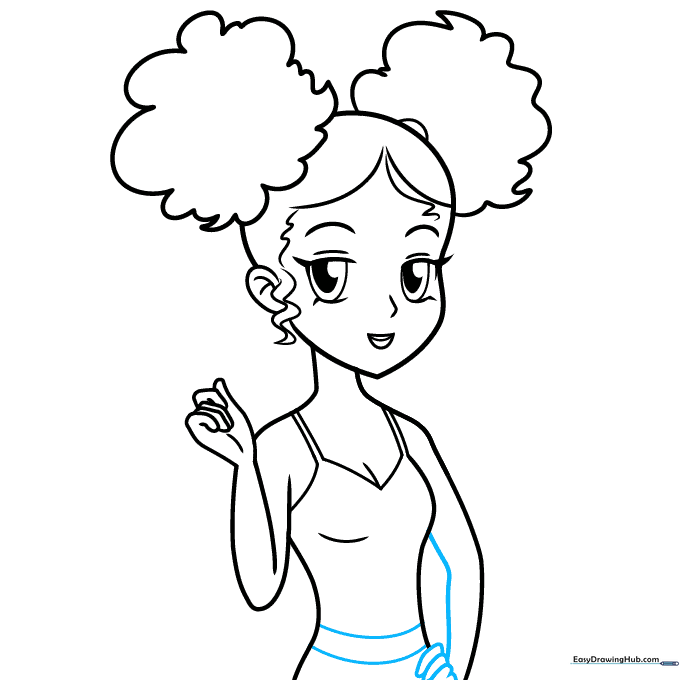
🎯 Final Result
Step-by-Step Instructions
Step 1: Sketching the Expressive Eyes
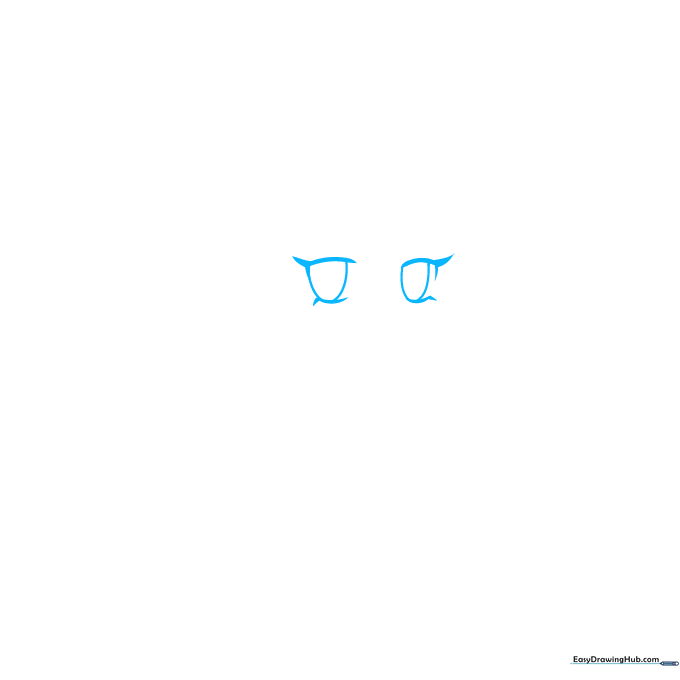
Start by sketching the anime-style eyes. Use thick, bold lines for the top and bottom lids, adding sharp, pointed lashes at the outer corners. Tip: Keep your pencil pressure light so you can easily adjust the shape if the eyes look uneven.
Step 2: Defining Facial Features
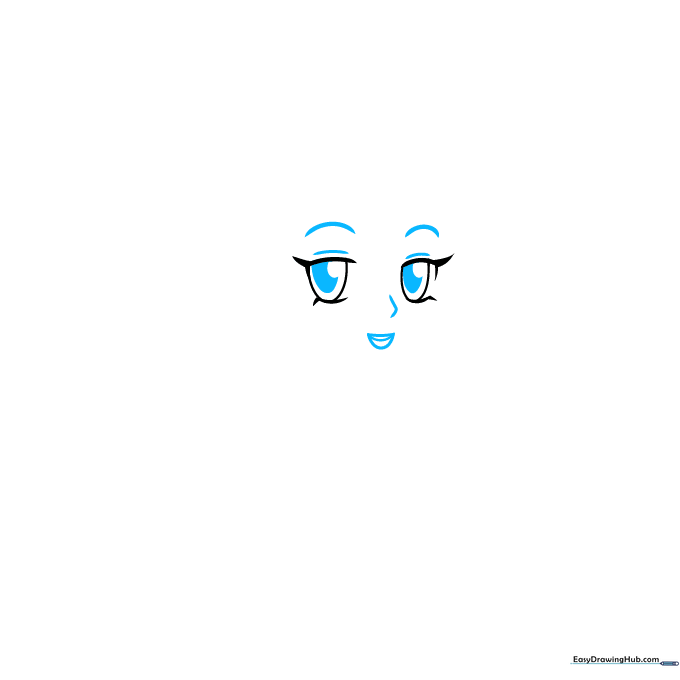
Add curved lines for the eyebrows, lids, and a small, simple nose. Draw a small mouth using a half-oval shape with a horizontal line across it. Tip: Add two ovals inside each eye for pupils and shade the space between them to give your character a lively, focused gaze.
Step 3: Shaping the Face and Hairline
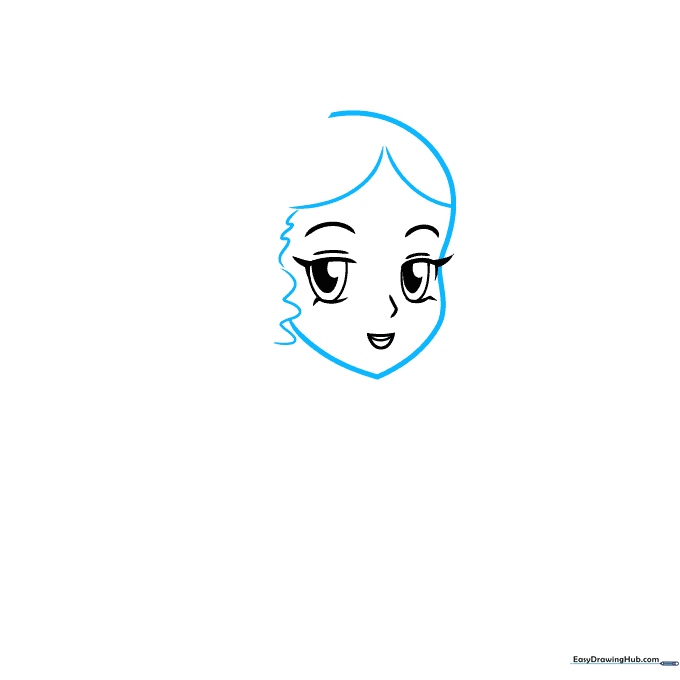
Outline the forehead, cheek, and chin with a smooth, continuous curved line. Create the hairline using an inverted 'V' shape on the forehead, then add wavy lines at the sides to suggest cascading hair. Tip: Use long, flowing strokes to make the hair look natural and soft.
Step 4: Adding the First Ponytail
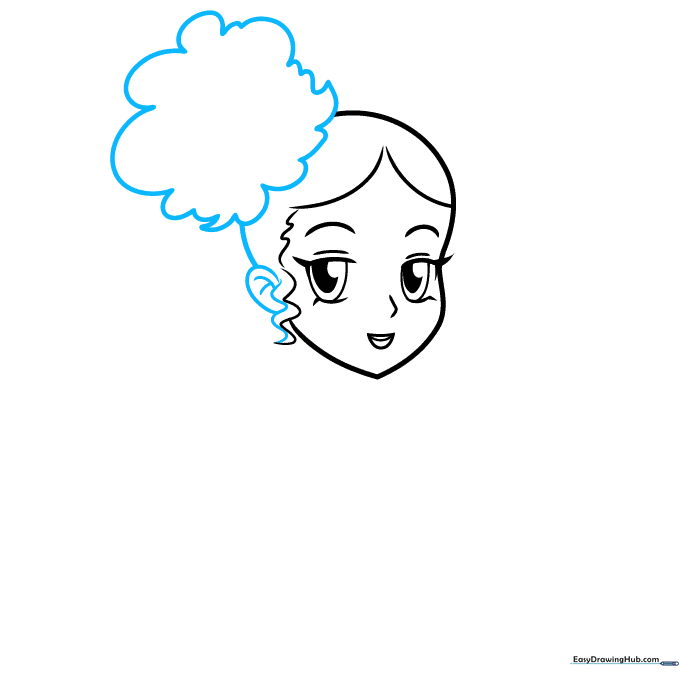
Use curved lines that meet at points to draw the round shape of a poofy ponytail. Complete the side of the head, the ear, and a small curl near the face. Tip: Don't worry about perfect symmetry; hair has volume and moves naturally!
Step 5: Balancing the Hairstyle
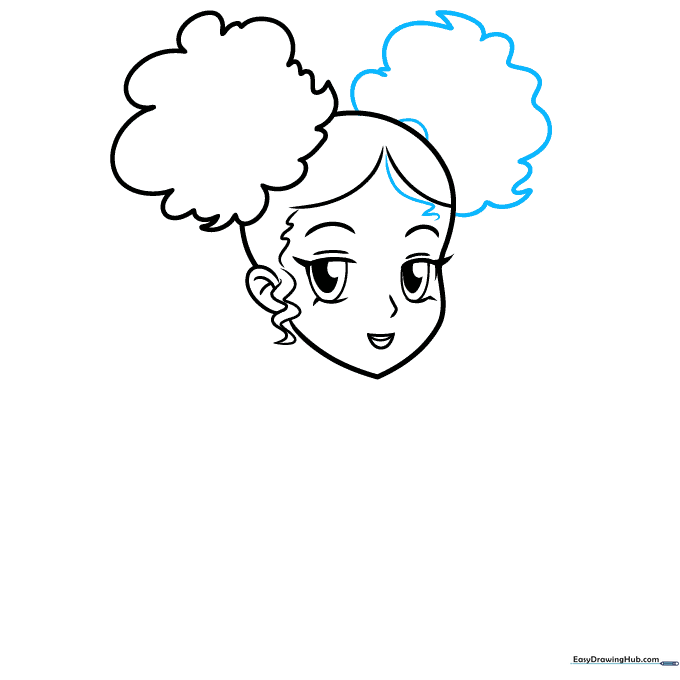
Draw a second poofy ponytail on the opposite side of the head to match the first. Add a single spiraling line on the forehead to create a cute, wispy curl. Tip: Vary the size of your curved lines to give the hair a more realistic, textured look.
Step 6: Sketching the Neck and Arm
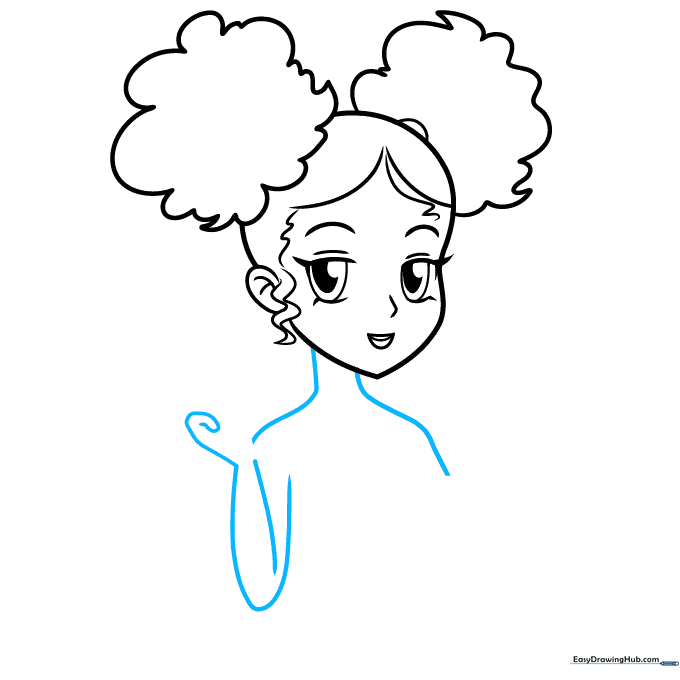
Extend curved lines from the head to form the neck and shoulders. Draw the arm, the side of the hand, and the pinky finger using long, sweeping curves. Tip: Keep your lines fluid to capture the graceful posture typical of anime characters.
Step 7: Defining the Hand and Outfit
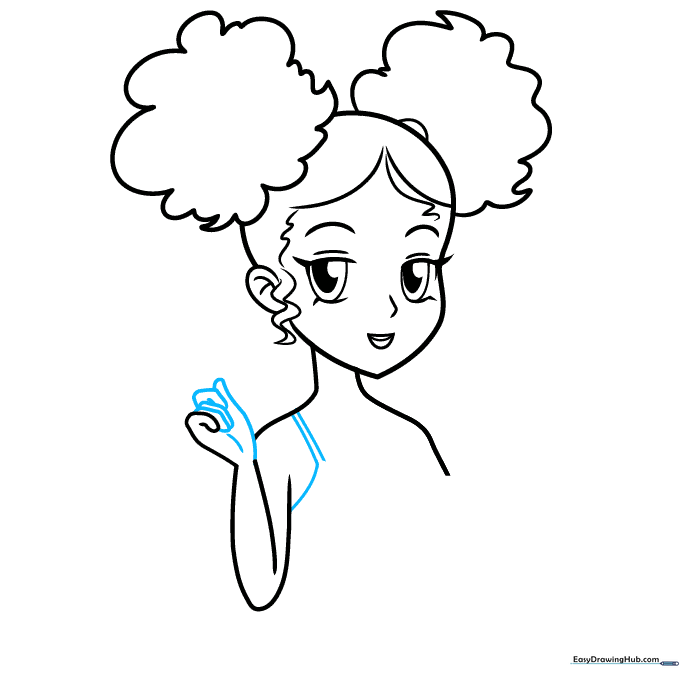
Complete the hand using overlapping curved lines to show the fingers. Add the spaghetti strap and the side of the shirt. Tip: Use a light touch when drawing fingers; they are often the trickiest part, so take your time!
Step 8: Adding Torso Details
Use curved lines to draw the remaining arm, the torso, and the neckline of the shirt. Tip: Ensure the lines for the shirt follow the curve of the body to make the clothing look like it’s actually being worn.
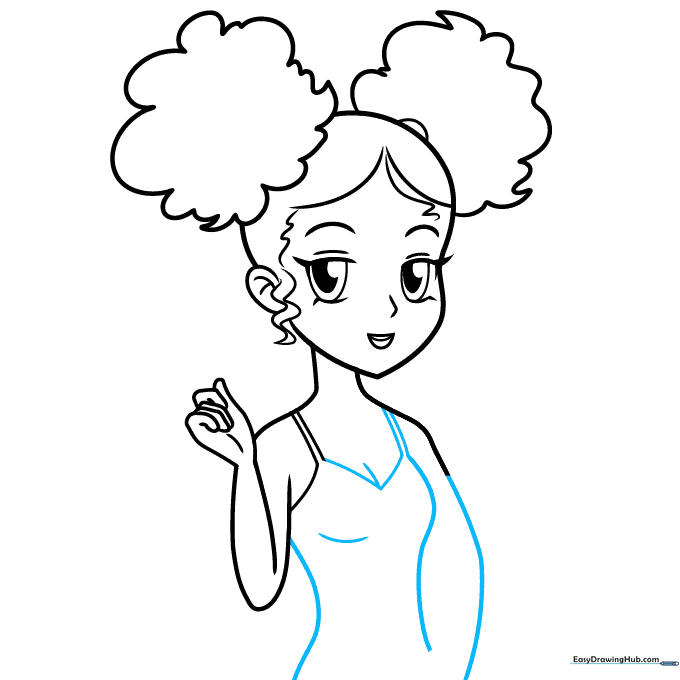
Step 9: Finalizing the Outline
Finish the arm and the hand resting on the hip. Draw two curved lines across the torso to define the belt or the gap between the top and pants. Tip: Double-check your lines and erase any overlapping construction marks for a clean, professional finish.
Step 10: Adding Color and Style
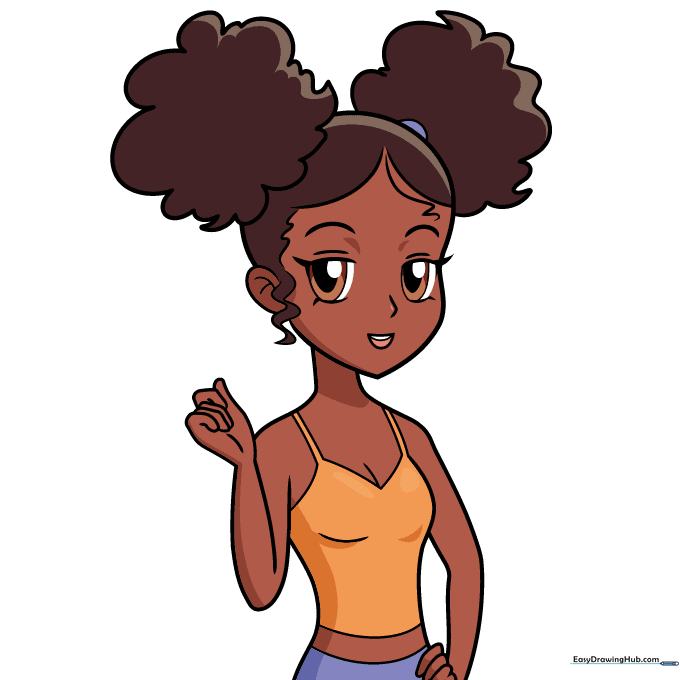
Your outline is complete! Now, bring your character to life with colored pencils or markers. Tip: Use darker shades for the folds in the clothing to add depth and dimension to your final drawing.
More Tutorials


