How to Draw a Bird of Paradise Flower: Easy 10-Step Guide
Bring the tropics to your sketchbook with this vibrant Bird of Paradise drawing guide. Designed for budding artists ages 6 and up, this project requires only a pencil, eraser, and paper to create a stunning botanical masterpiece. Follow these simple steps to build confidence in your line work and floral anatomy.
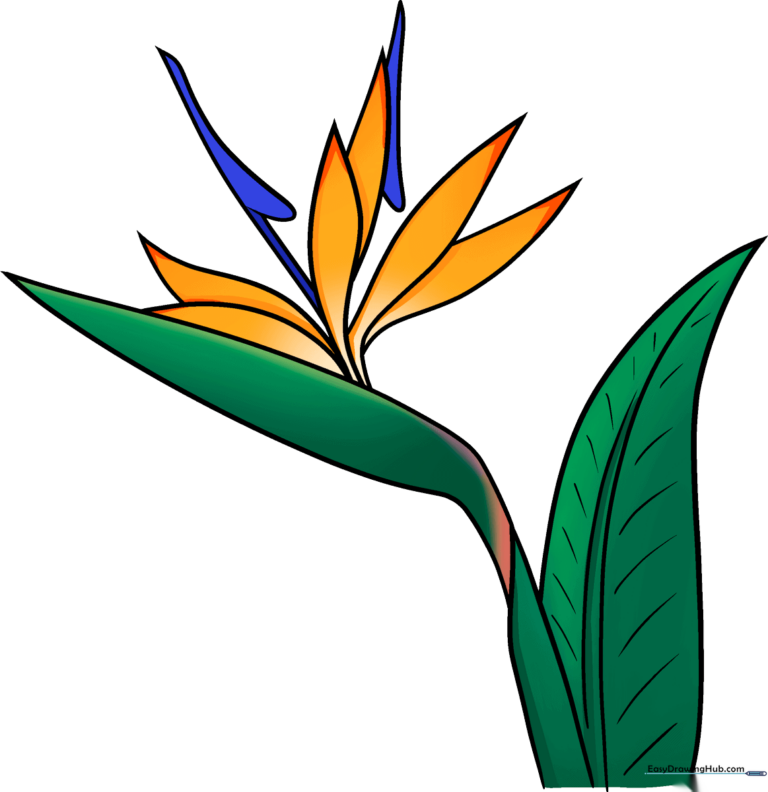
🎯 Final Result
Step-by-Step Instructions
Step 1: Sketching the Base Bract

Start by drawing the primary bract—the protective leaf at the base of the flower. Use two curved lines that meet at a sharp, narrow point. Teacher's Tip: Keep your pencil pressure light so you can easily adjust the shape if it looks a bit too wide.
Step 2: Adding the Secondary Leaf

Draw a second, slightly larger leaf shape overlapping the first. Use two sweeping curved lines that meet at a point. Teacher's Tip: Think of this as a 'boat' shape; it provides the sturdy foundation for the colorful blooms to come.
Step 3: Defining the Leaf Vein

Add detail to the leaf by drawing two curved lines down the center to form the vein. They should converge but not touch. Add small, short curved lines branching out from the vein. Teacher's Tip: Use short, quick strokes to mimic the natural texture of a leaf.
Step 4: Extending the Bract Base
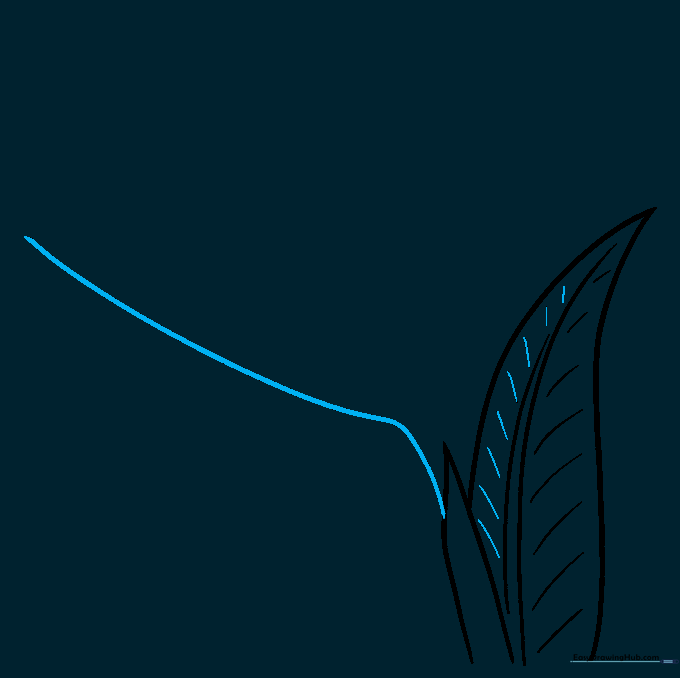
Extend a long, graceful curved line from the base of your bract. This will act as the stem or the base of the flower head. Teacher's Tip: A smooth, continuous motion creates a more natural, organic look than jerky, short lines.
Step 5: Drawing the First Sepal
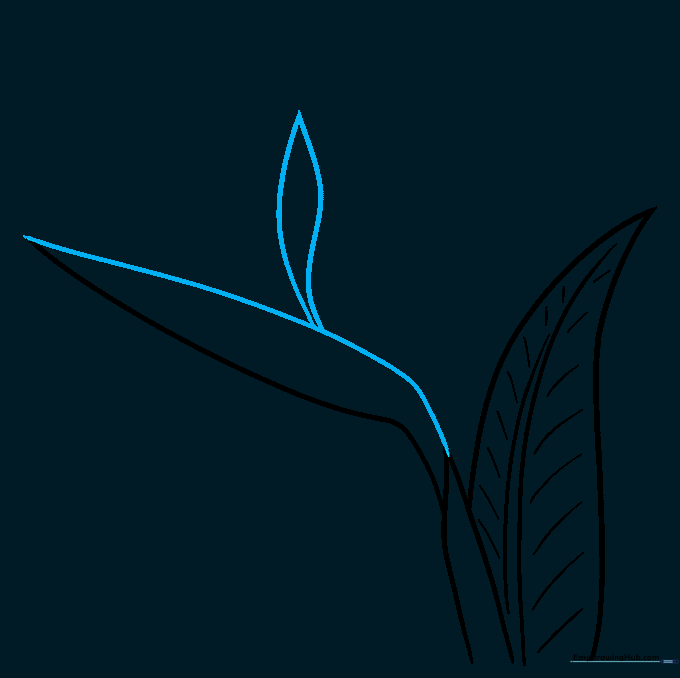
Draw the top of the bract, then extend two curved lines that meet at a sharp point to create the first sepal. These bright structures are often mistaken for petals! Teacher's Tip: Make this sepal stand tall and proud to give your flower its signature 'bird' silhouette.
Step 6: Adding the Second Sepal

Repeat the process to draw a second sepal next to the first. Keep the lines sharp and pointed. Teacher's Tip: Vary the height of your sepals slightly to make the flower look more realistic and less like a mirror image.
Step 7: Layering the Sepals

Extend another pair of curved lines from the existing sepals to add depth. Draw a curved line from the base of the sepals toward the bract. Teacher's Tip: Imagine the flower is unfolding; overlapping these shapes creates a 3D effect.
Step 8: Finalizing the Sepal Cluster
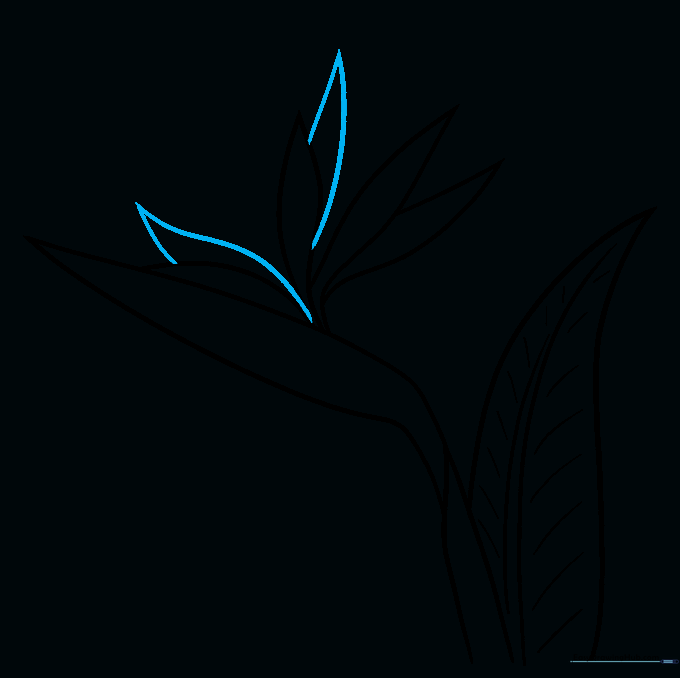
Draw a few more sepals to complete the cluster. Keep the lines clean and meeting at sharp points. Teacher's Tip: Don't worry about perfect symmetry—nature is wonderfully irregular!
Step 9: Drawing the Central Petals
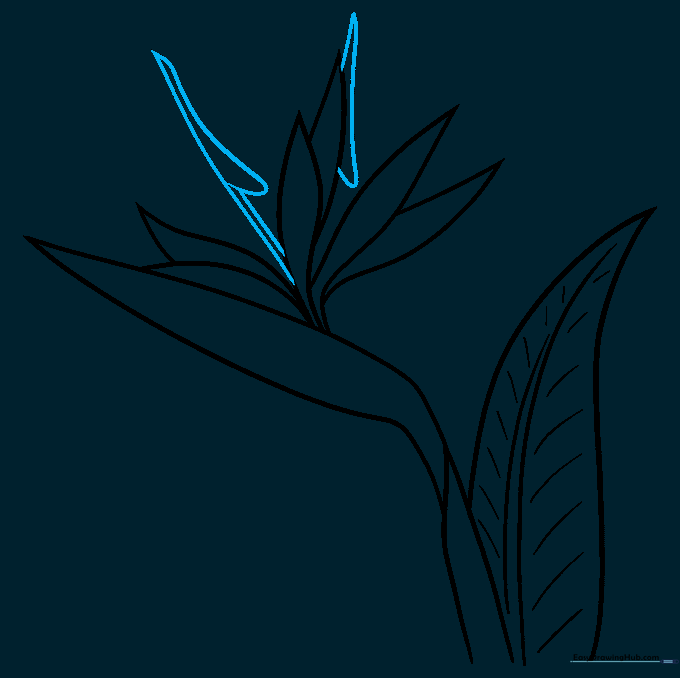
Complete the outline by drawing the fused central petals. Extend two curved lines of different lengths and connect them with a final curve. Teacher's Tip: This is the 'beak' of your bird flower, so make it distinct and bold.
Step 10: Adding Color
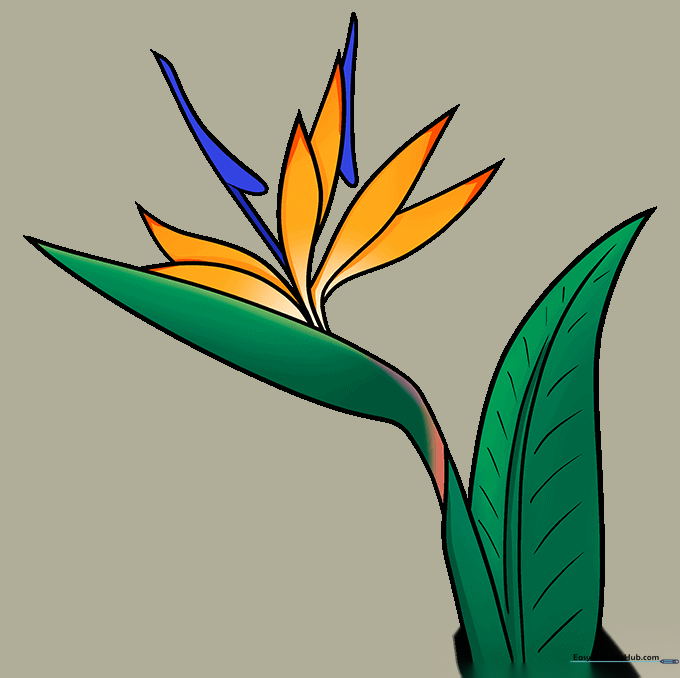
Bring your drawing to life with color! Use vibrant oranges for the sepals with red tips, and deep blues for the central petals. Teacher's Tip: Use light pressure with your colored pencils to blend the orange into the red for a realistic, sun-kissed look.
More Tutorials


