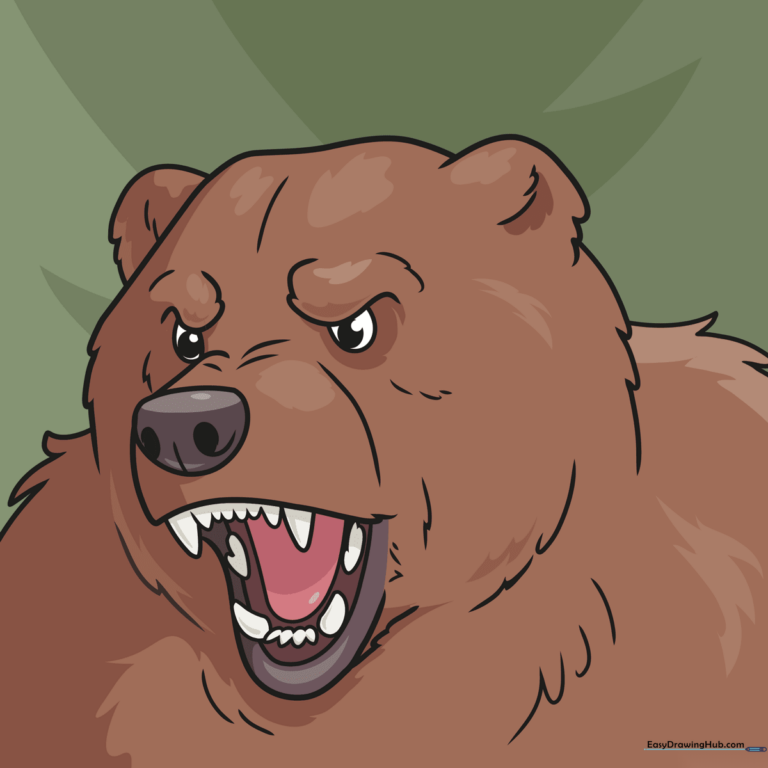
How to Draw a Bear Face: Easy 10-Step Guide for Kids
Ready to bring a grizzly bear to life? This tutorial is perfect for artists ages 7+ looking to master facial expressions and fur texture. Grab a pencil, an eraser, and a piece of paper to start building your bear's character, from his fierce brow to his textured coat.
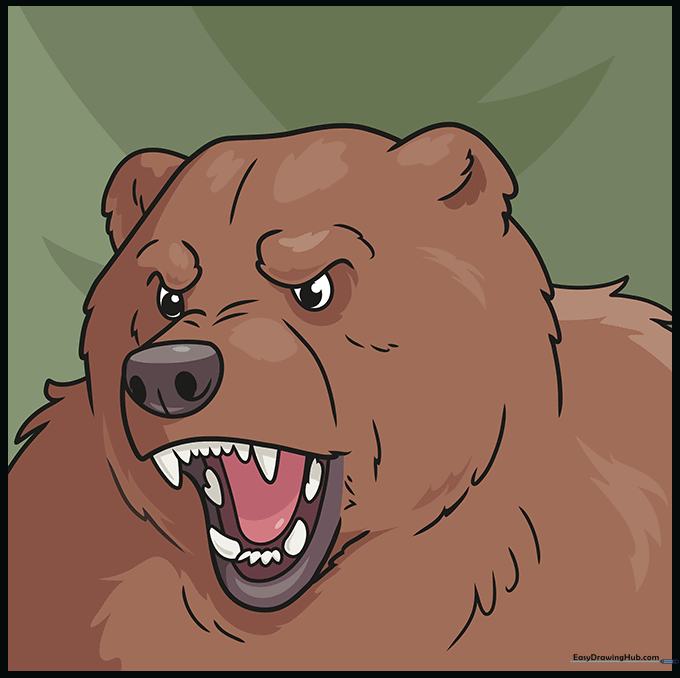
🎯 Final Result
Step-by-Step Instructions
Step 1: Sketching the Brow and Eyes

Start by sketching the bear's furrowed brow using two curved lines. Beneath these, draw two half-circles for the eyes and add a small, dark pupil in each. Teacher's Tip: Keep your pencil lines light and loose here so you can easily adjust the expression if the bear looks too grumpy or too sleepy!
Step 2: Defining the Snout and Nose

Draw a large, rounded shape below the eyes to form the snout. Add a dark, irregular shape at the tip for the nose, and use small spiral lines to define the nostrils. Teacher's Tip: Think of the nose as a rounded triangle; keeping it centered helps the bear look symmetrical.
Step 3: Shaping the Jaw and Cheeks
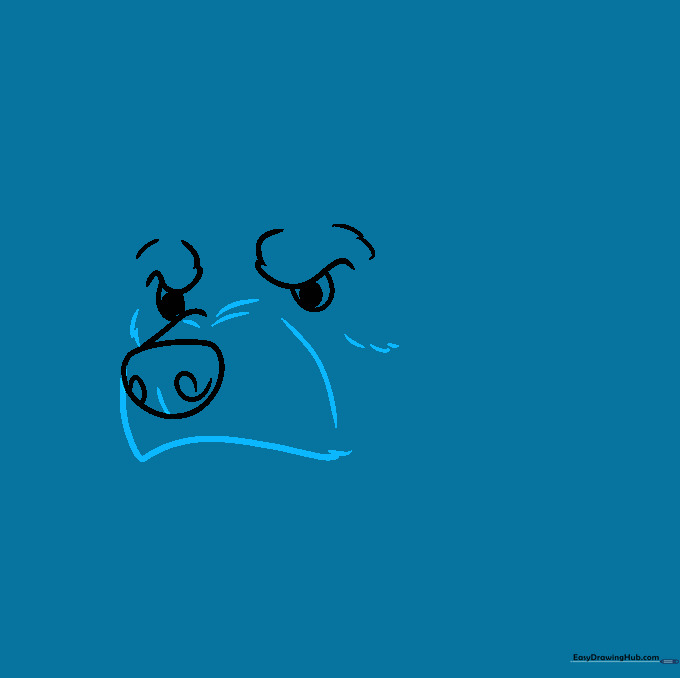
Outline the upper jaw with curved lines and add small, jagged strokes around the cheeks to suggest thick fur. Teacher's Tip: Use short, quick pencil strokes for the fur to give it that 'scruffy' grizzly texture.
Step 4: Drawing the Open Mouth
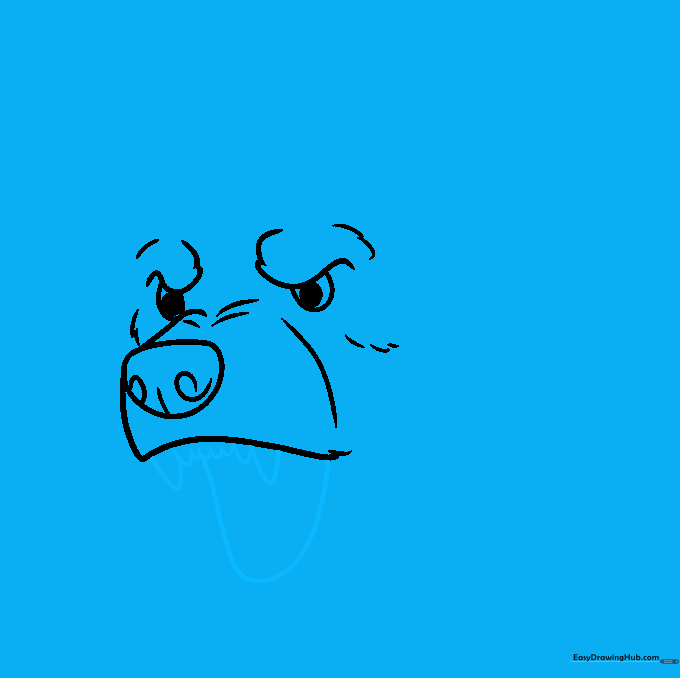
Use 'U' shaped lines to create the teeth, making the corner fangs slightly larger and sharper. Connect these with a wide, curved line to form the open mouth. Teacher's Tip: Don't worry about making the teeth perfect—bears have jagged, natural-looking teeth!
Step 5: Adding the Lower Jaw
Draw the lower teeth using similar 'U' shapes and add a curved line inside the mouth to show depth. Teacher's Tip: Erase any overlapping lines from the previous steps to keep your drawing clean and professional.
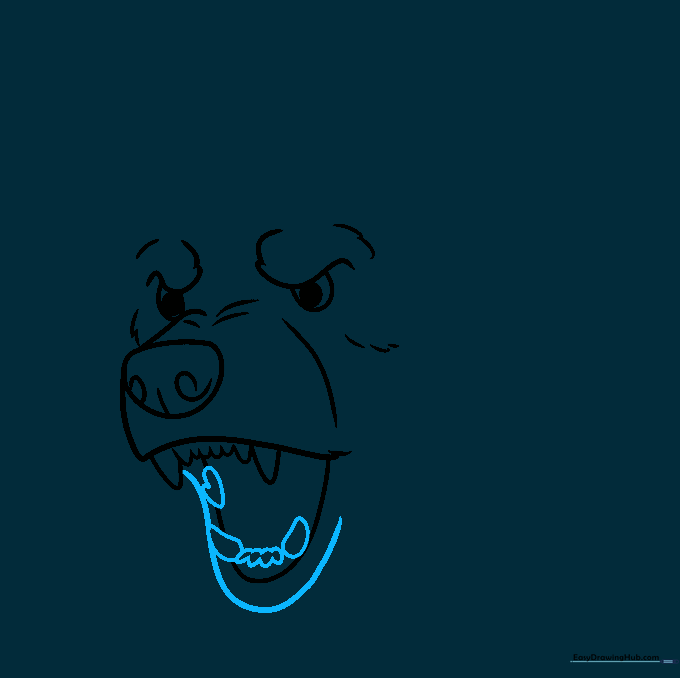
Step 6: Adding the Tongue and Fur
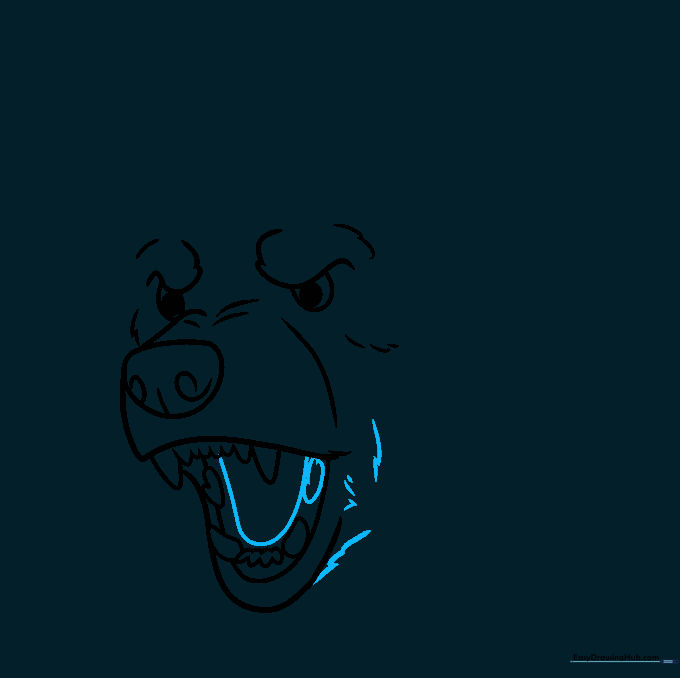
Sketch a 'U' shape for the tongue inside the mouth and add more jagged lines around the jaw to emphasize the fur. Teacher's Tip: Vary the length of your fur strokes to make the bear look more realistic.
Step 7: Outlining the Head and Ears
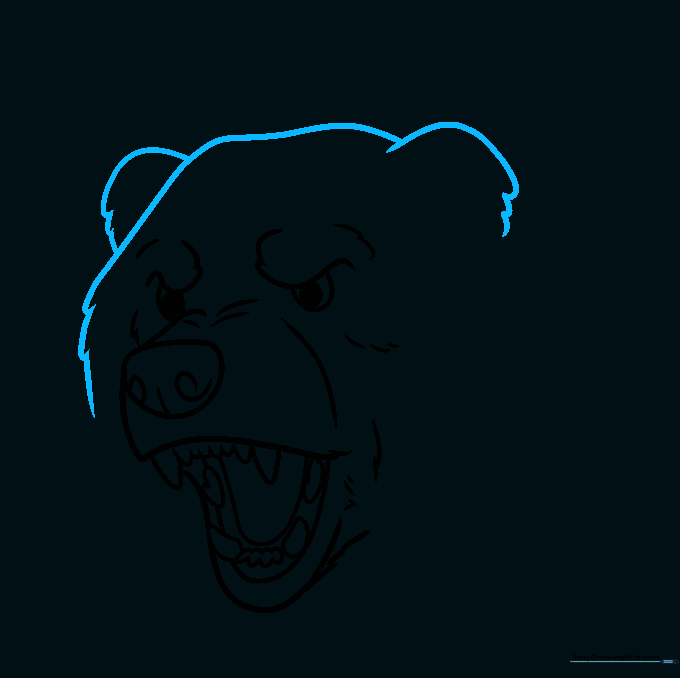
Use long, sweeping curved lines that meet at rounded points to frame the head and ears. Teacher's Tip: The 'points' are key—they mimic the way fur clumps together on a real bear.
Step 8: Adding Shoulder Fur
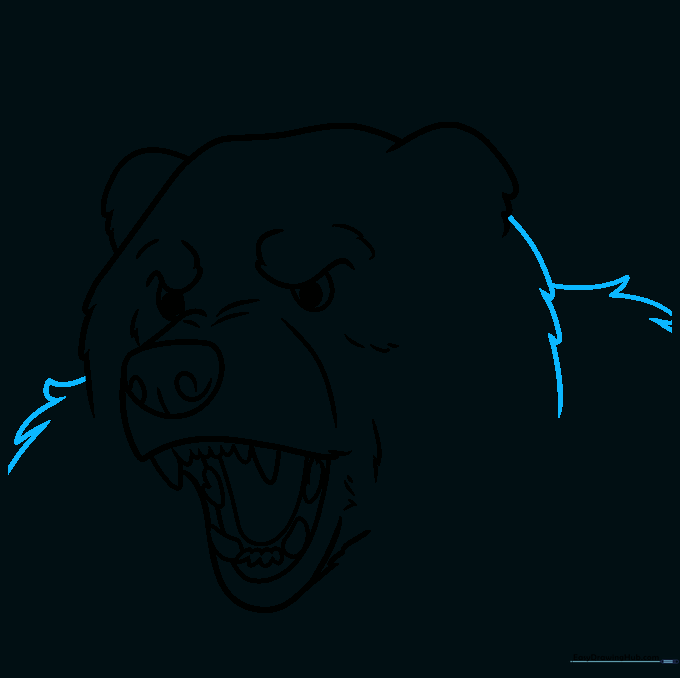
Continue adding jagged fur lines down the sides of the face and onto the shoulders. Teacher's Tip: Imagine the fur flowing downward from the top of the head to give it a natural look.
Step 9: Finalizing Details
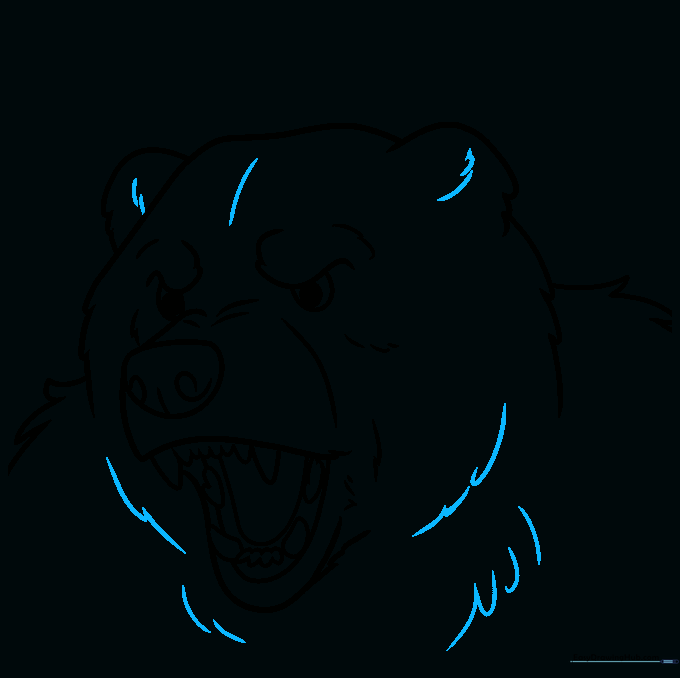
Add final touches to the ears, forehead, and chest area with small, curved lines to create depth. Teacher's Tip: Step back and look at your drawing from a distance to see if you need to darken any lines for better contrast.
Step 10: Bringing Your Bear to Life with Color
Time to color! Use browns for a grizzly, white for a polar bear, or even black. Teacher's Tip: Try using light and dark shades of the same color to create shadows, which makes your bear look 3D and more realistic.
More Tutorials


