How to Draw a Bat Face: Easy 9-Step Guide for Kids
Looking for a fun, spooky art project? This bat face tutorial is perfect for artists ages 5 and up. You only need a pencil, an eraser, and a piece of paper to bring this nocturnal creature to life while practicing symmetry and line control.
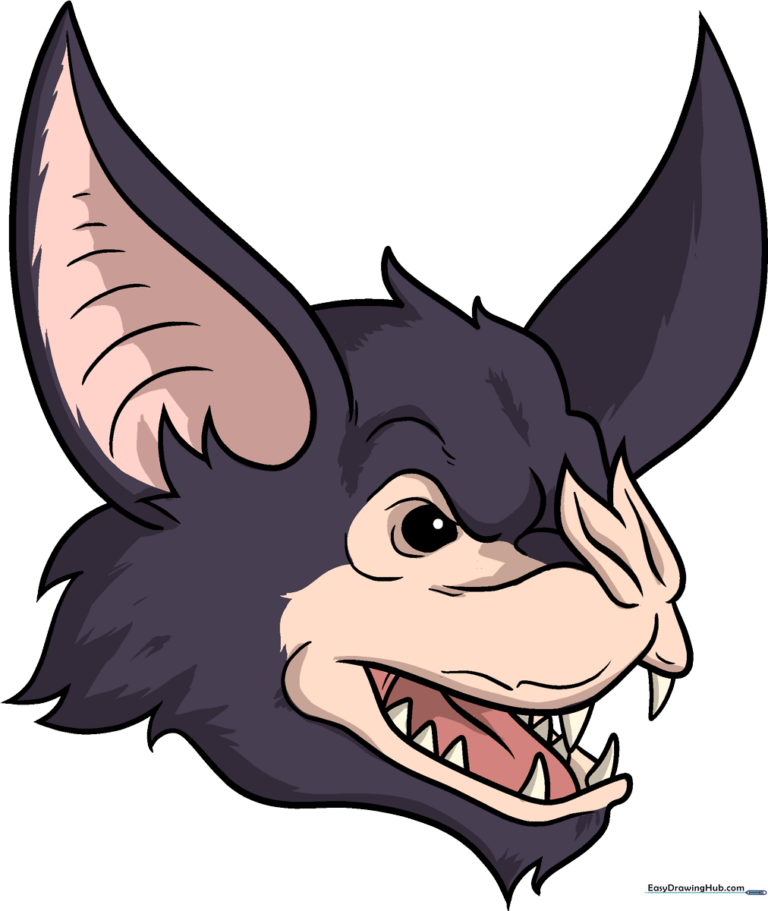
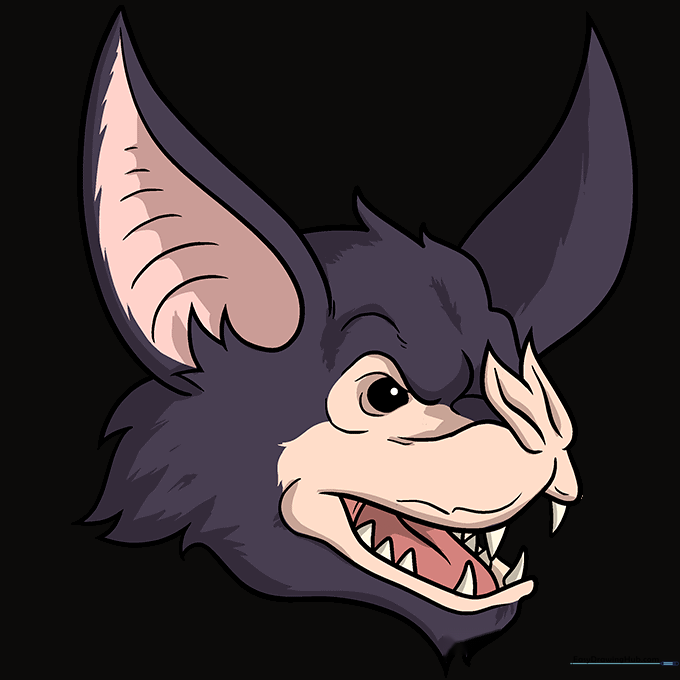
🎯 Final Result
Step-by-Step Instructions
Sketching the Snout and Nose

Start by drawing the snout and nose area. Use overlapping curved lines for the lips, and above them, sketch two connected teardrop shapes for the nose. Teacher's Tip: Keep these shapes small and centered to give your bat a cute, proportionate look.
Defining the Jaw and Teeth
Use a curved line to form the lower jaw, adding short, jagged lines to suggest skin texture. Sketch small triangles for the teeth. Teacher's Tip: Make the teeth slightly rounded at the tips so they look friendly rather than sharp.
Adding Mouth Details
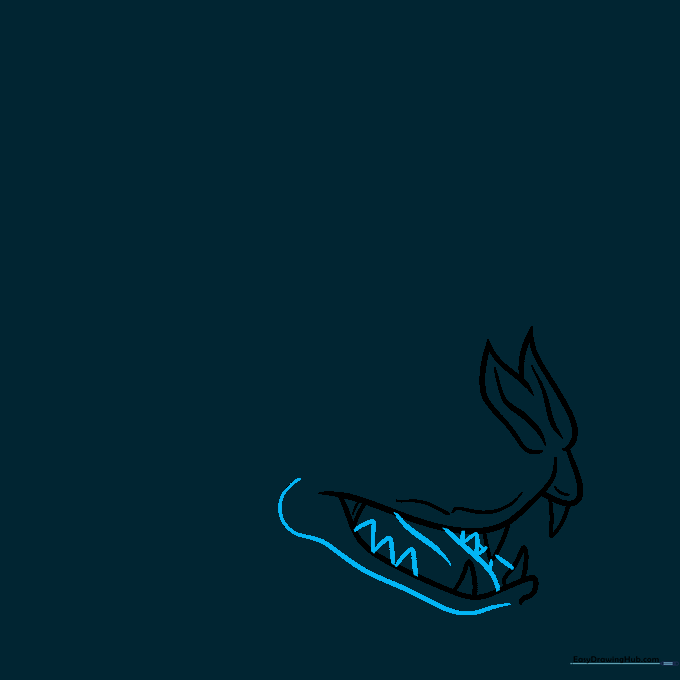
Outline the outer edge of the lower jaw. Add a tongue and the inner lip detail inside the mouth. Teacher's Tip: Use a darker pencil stroke here to make the inside of the mouth stand out from the face.
Drawing the Expressive Eye

Draw an irregular round shape for the eye with a small circle inside for the pupil. Shade the area around the pupil. Add curved lines for the brow and snout. Teacher's Tip: A bright 'glint' or white spot in the pupil makes the eye look alive!
Adding Fur Texture
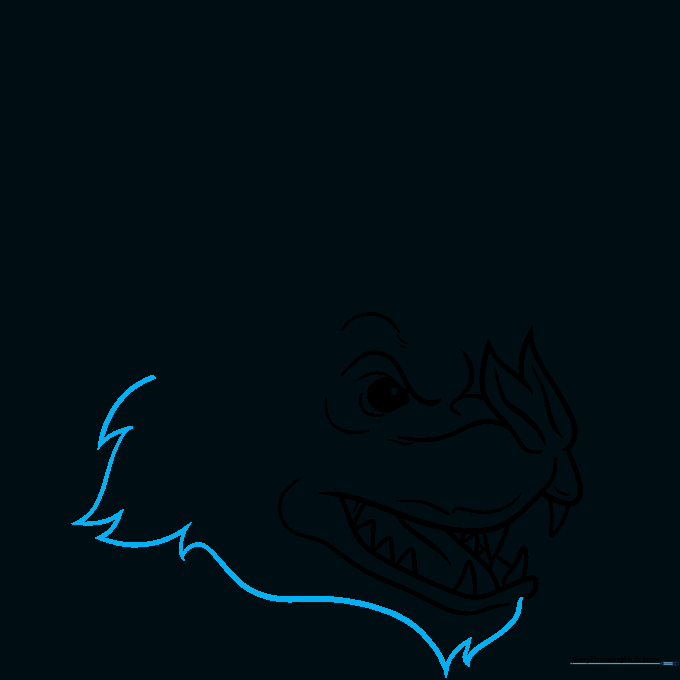
Trace the base of the head using short, jagged lines to represent fur. Teacher's Tip: Vary the length of your lines to make the fur look natural and fluffy rather than perfectly smooth.
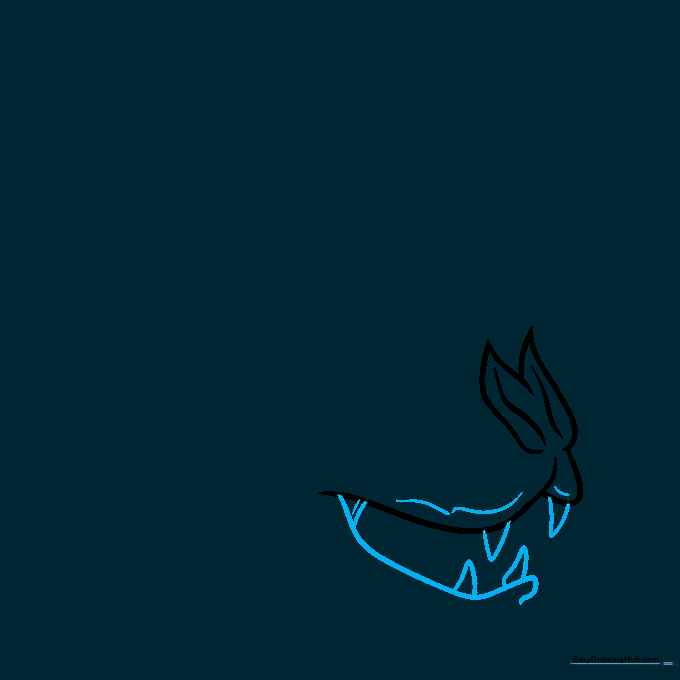
Sketching the First Ear
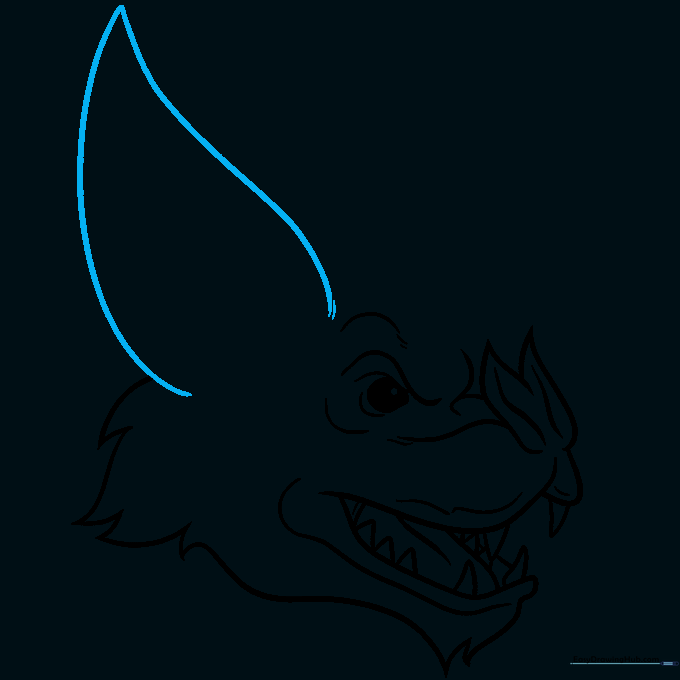
Draw the large ear using two long, graceful curved lines that meet at a point. Teacher's Tip: Bats have huge ears to help them navigate; don't be afraid to make it nice and tall!
Adding Ear Detail
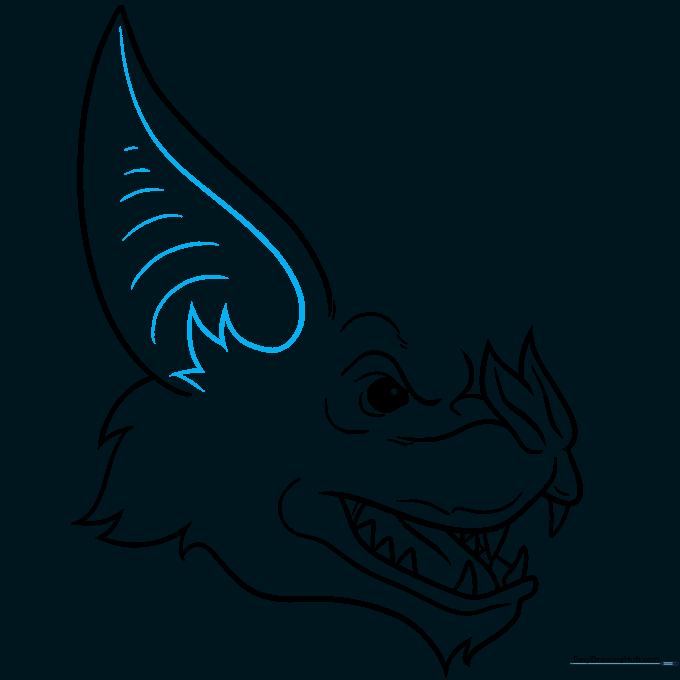
Add texture inside the ear with small horizontal curved lines and fur at the base. Teacher's Tip: These small lines represent the cartilage and skin folds inside the ear.
Defining the Top of the Head
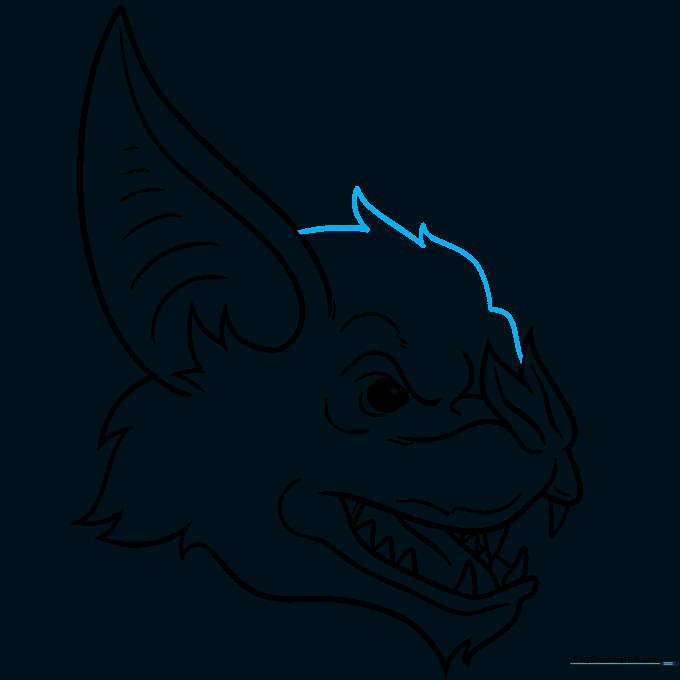
Connect the ear to the head using a series of jagged, furry lines. Teacher's Tip: Imagine you are drawing a fuzzy caterpillar to get the right 'bumpy' look for the fur.
Completing the Outline
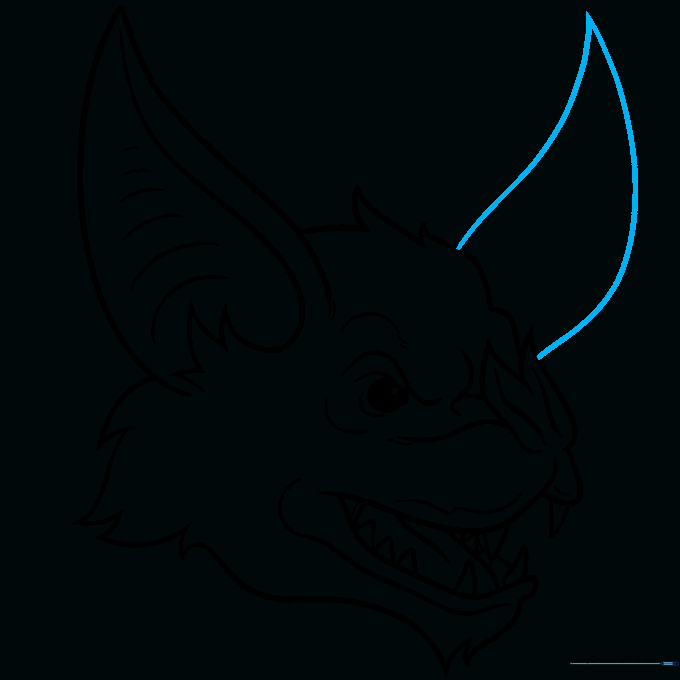
Draw the second ear on the opposite side to finish the head shape. Teacher's Tip: Check that both ears are roughly the same size to keep your bat looking balanced.
Adding Color
Bring your bat to life with color! Use shades of black, gray, or brown. Teacher's Tip: Leave a tiny white space in the eyes to make them look shiny and bright.
More Tutorials


