How to Draw a Basketball: Easy 10-Step Guide for Kids
Ready to hit the court? This tutorial is perfect for young athletes and artists ages 5+. You only need a pencil, an eraser, and your favorite markers to bring this basketball to life while practicing symmetry and circular shapes.
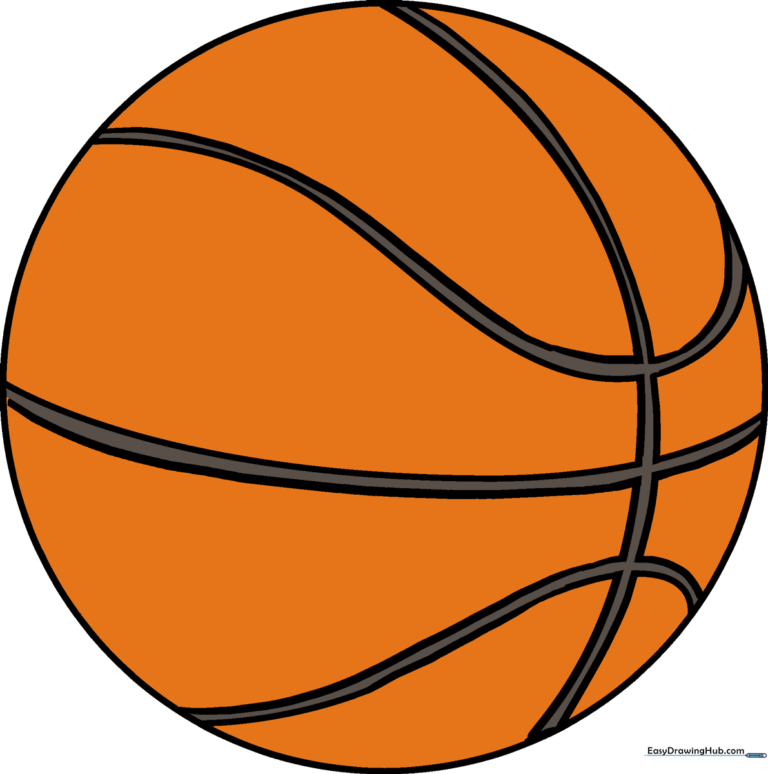
🎯 Final Result
Step-by-Step Instructions
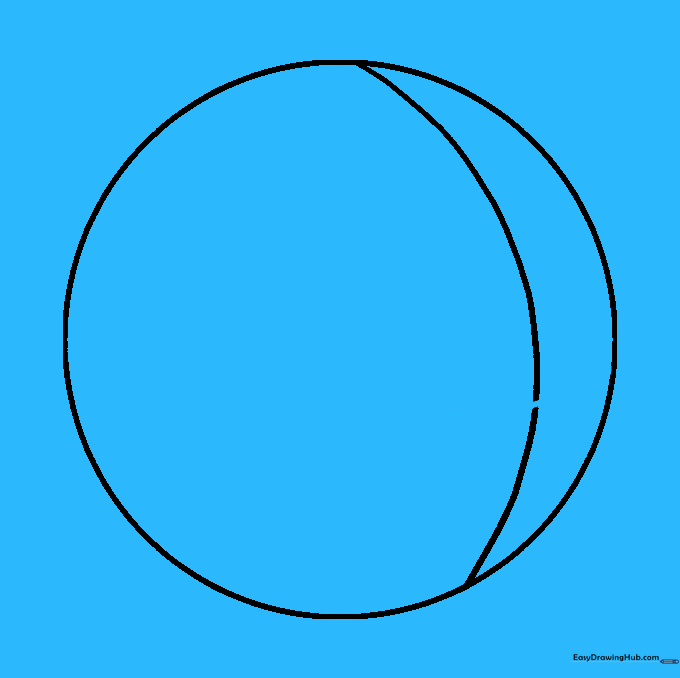
Step 1: Sketching the Base Circle

Draw a light circle to serve as your basketball. Teacher's Tip: Use a light touch with your pencil so you can easily erase any overlapping lines later!
Step 2: Adding the First Vertical Rib

Draw a curved line across the circle, positioned slightly off-center. This represents the first recessed seam of the ball.
Step 3: Creating the Horizontal Seam
Draw a second curved line crossing the first at a perpendicular angle. Tip: Keep the curve gentle to maintain the roundness of the ball.
Step 4: Drawing the Side Rib

Add a curved line connecting the side of the circle to your vertical line. This creates the signature pattern of a basketball.
Step 5: Completing the Side Rib

Mirror the previous step on the opposite side of the vertical line, attaching it to the edge of the circle.
Step 6: Adding the Lower Rib

Draw a curved rib line below the horizontal center, connecting the side of the ball to the vertical line.
Step 7: Balancing the Lower Rib

Extend the line on the other side of the vertical rib to the edge of the ball, keeping the spacing consistent.
Step 8: Adding Depth to the Seams
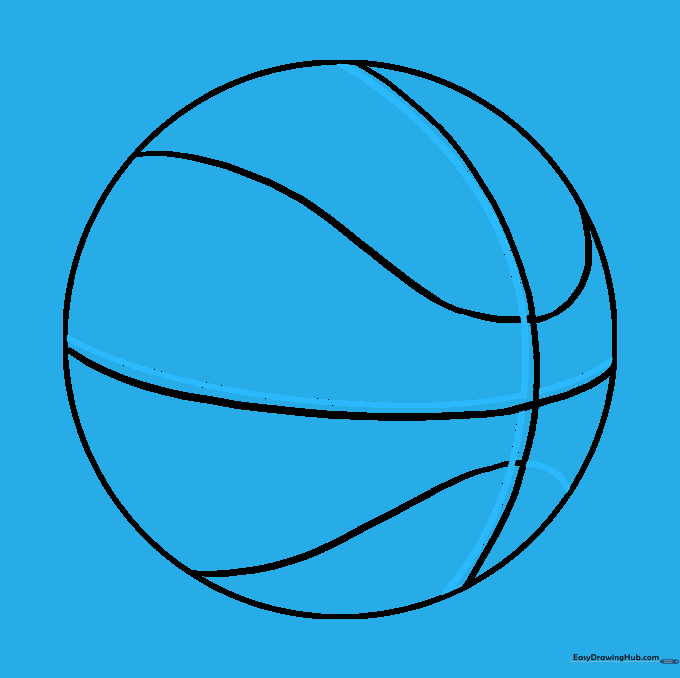
Draw a second curved line parallel to your existing rib lines. This gives the seams a 3D, recessed look.
Step 9: Refining the Outline

Add parallel lines to the upper and lower ribs, then carefully erase the overlapping guide lines where they cross. This makes the seams look clean and professional.
Step 10: Adding Color

Time to color! Use bright orange for the panels and black for the seams. Feel free to experiment with other colors like red, white, and blue for a custom team ball.
More Tutorials


