How to Draw a Baseball: Easy 10-Step Guide for Kids
Ready to hit a home run with your art? This tutorial is perfect for young athletes and budding artists ages 5 and up. All you need is a pencil, an eraser, and a piece of paper to bring this classic sports ball to life.
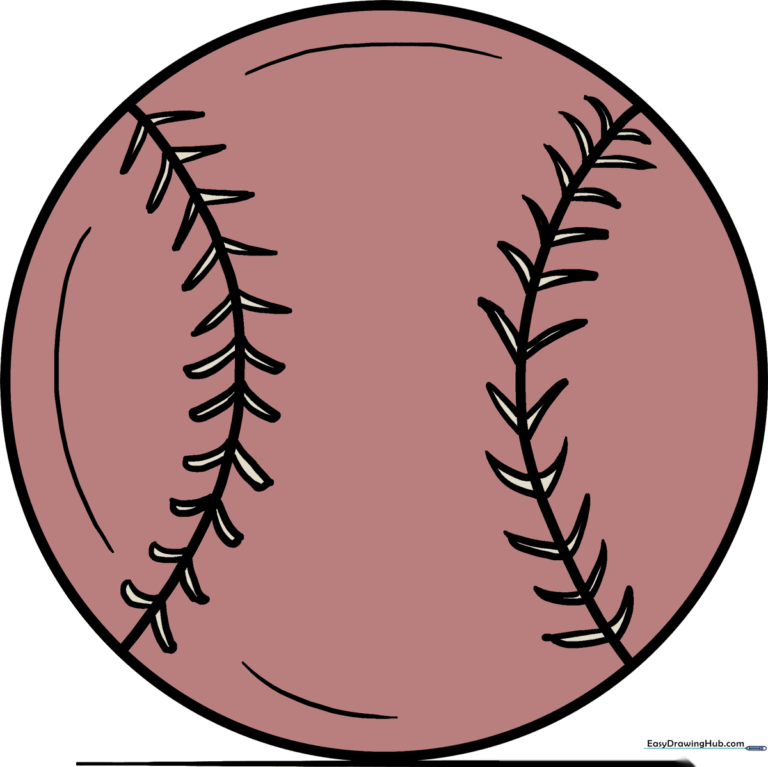
🎯 Final Result
Step-by-Step Instructions
Step 1: Sketching the Base Circle

Draw a clean, round circle to serve as the base of your baseball. Teacher's Tip: Use a circular object like a small lid to trace if you're having trouble getting a perfect shape!
Step 2: Mapping the First Seam

Draw a gentle curved line inside the circle, touching the edges. This defines the path for your first set of stitches. Tip: Keep the curve soft to maintain the ball's rounded look.
Step 3: Creating the Second Seam
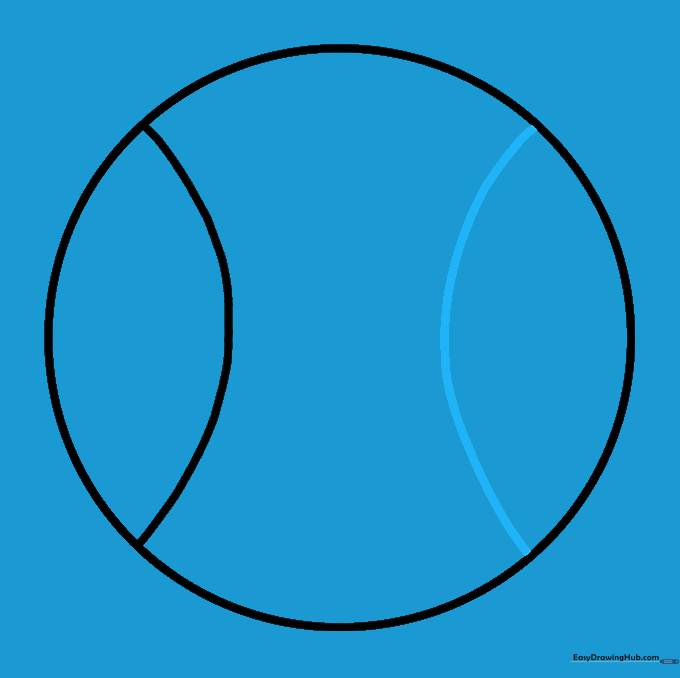
Draw a matching curved line on the opposite side of the circle. These two lines will frame your stitching area. Tip: Try to keep the distance from the edge consistent on both sides.
Step 4: Starting the Stitches

Draw small, parallel lines along the seam that meet at a point, creating a 'V' or arrowhead shape. Tip: Think of these as tiny arrows pointing toward the center of the seam.
Step 5: Filling the First Seam
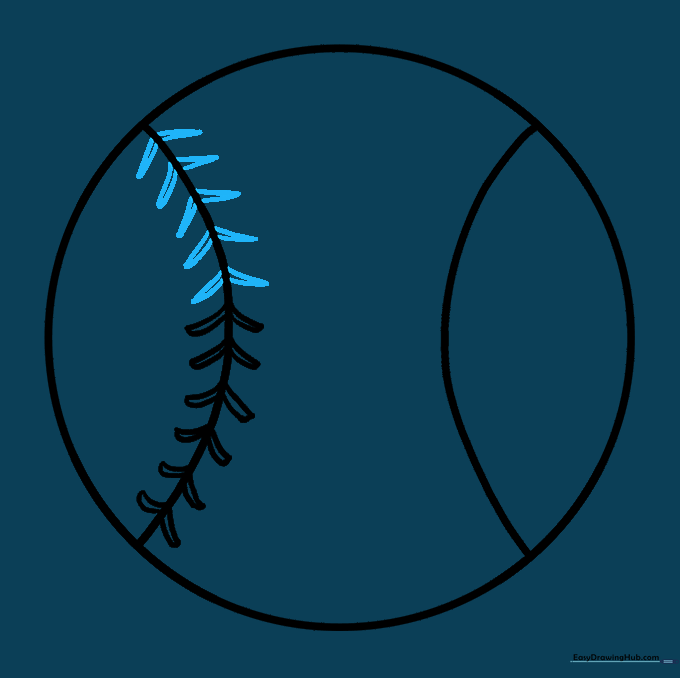
Continue the 'V' pattern all the way along the first curved line. Tip: Keep your spacing even so the stitches look neat and professional.
Step 6: Beginning the Second Seam

Repeat the stitch pattern on the second curved line. Tip: Take your time; it's okay if they aren't perfectly identical, as real baseballs have handmade character!
Step 7: Continuing the Pattern

Work your way down the second seam, adding stitches one by one. Tip: If your hand gets tired, take a quick break—drawing requires focus!
Step 8: Completing the Stitches

Finish off the second seam with your final stitches. Tip: Check that your stitches look like they are 'hugging' the seam line.
Step 9: Adding 3D Depth

Add a few curved lines near the edges of the circle to give the ball a sense of volume. Tip: These subtle lines make your drawing look like a real, round object rather than a flat circle.
Step 10: Bringing It to Life with Color
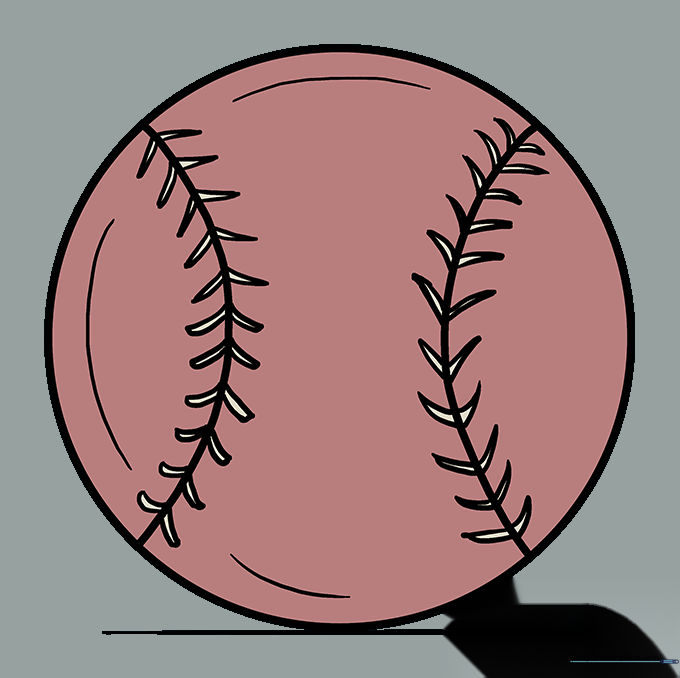
Time to color! Use red for the stitches and leave the rest white, or get creative with a worn-in brown leather look. Tip: Use light pressure with your pencil to create a soft, realistic texture.
More Tutorials


