How to Draw a Banana Tree: Easy 10-Step Guide for Kids
Bring a tropical vibe to your sketchbook with this fun, beginner-friendly banana tree tutorial. Designed for young artists, this guide uses basic shapes to build confidence and artistic ability. Grab your pencil and paper to start creating your own island paradise today!
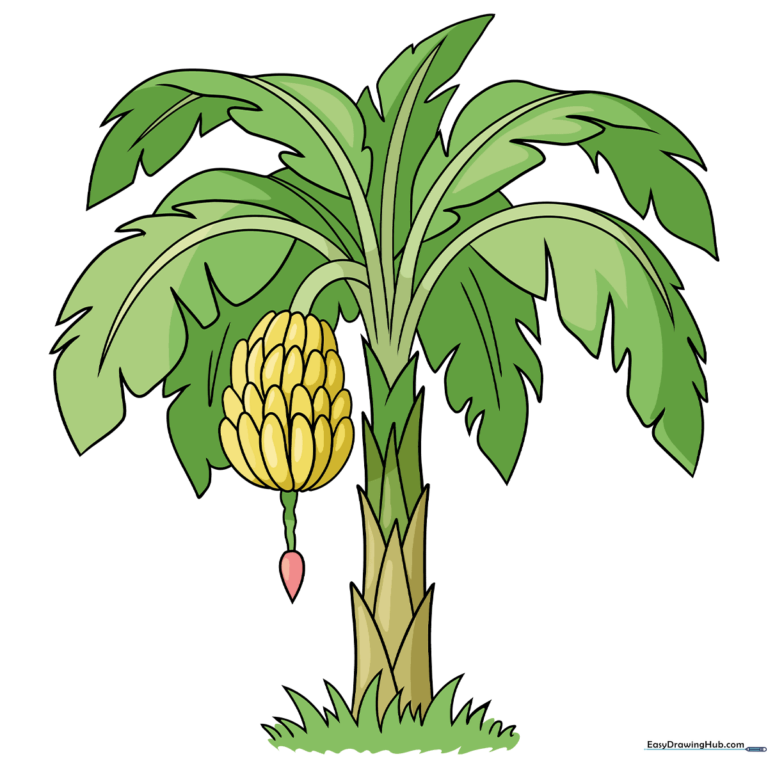
🎯 Final Result
Step-by-Step Instructions
Step 1: Sketching the Grassy Base
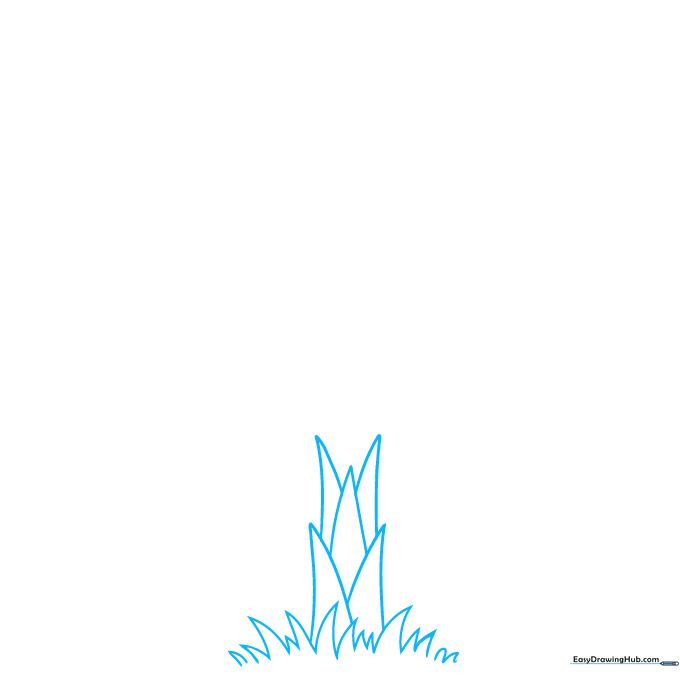
Start by drawing the grass at the base of your tree using short, jagged, curved lines. Then, begin the trunk by stacking two triangles followed by one. Teacher's Tip: Keep your pencil pressure light here so you can easily adjust the trunk shape if needed.
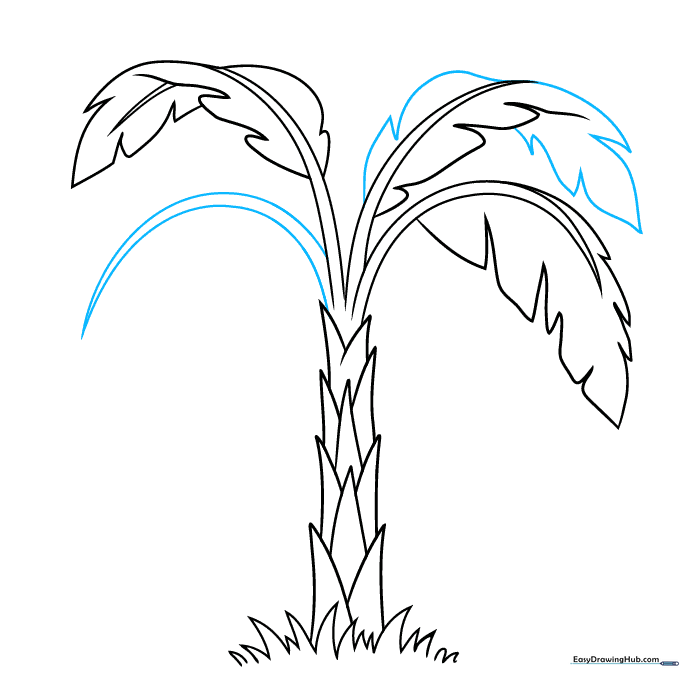
Step 2: Building the Trunk and First Leaf
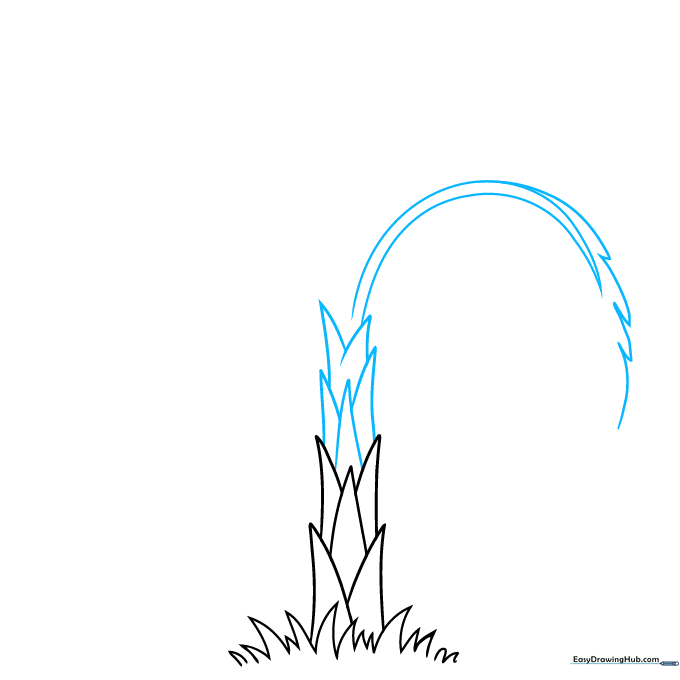
Continue the trunk with more curved triangles. From the top, extend two parallel curved lines that meet at a sharp point to form the base of your first large leaf. Teacher's Tip: Think of the leaf as a long, flowing ribbon—don't worry about making it perfectly straight!
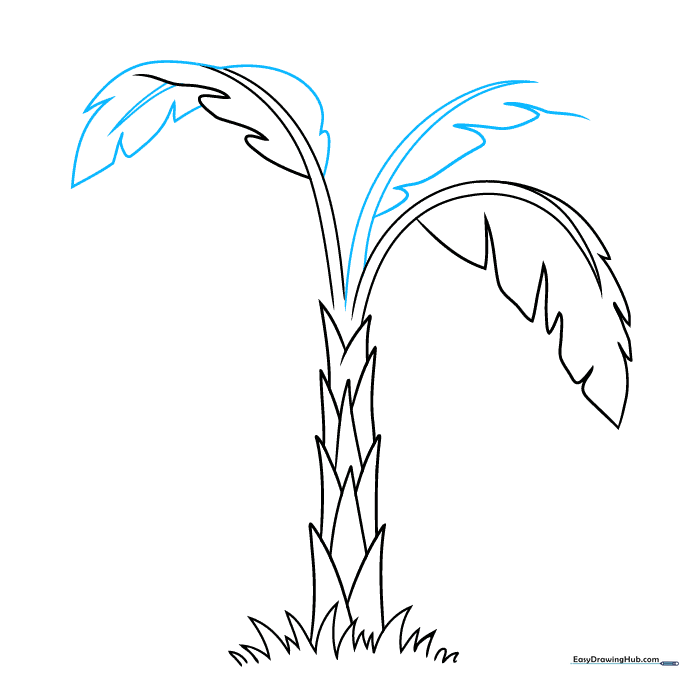
Step 3: Detailing the Leaf Edges

Use small, curved 'V' shapes to give the leaf an irregular, natural edge. Then, start a second leaf by extending two curved lines from the trunk. Teacher's Tip: Vary the size of your 'V' shapes to make the leaf look more realistic and less like a machine-made object.
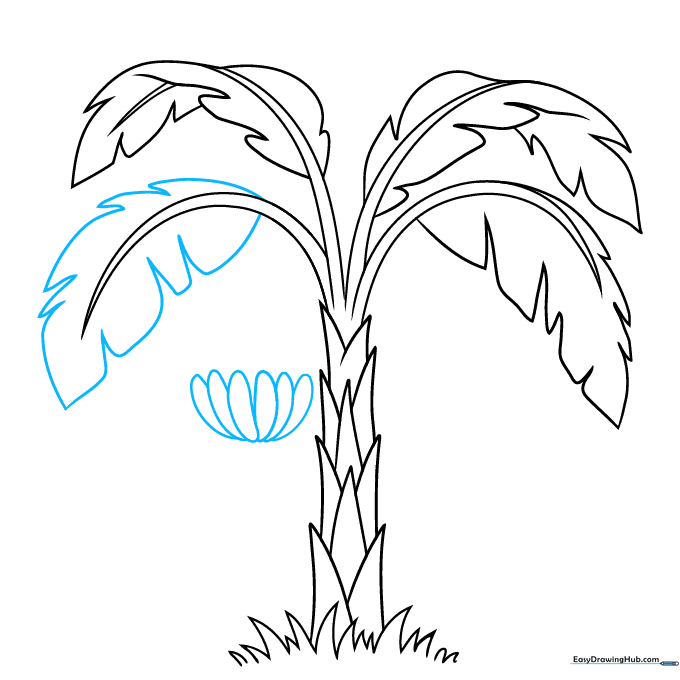
Step 4: Adding a Curled Leaf
Draw a leaf that looks like it is folding over itself by using curved lines that meet at a point for the central vein. Add another leaf nearby using the same wavy line technique. Teacher's Tip: A 'folded' leaf adds depth to your drawing—try to imagine the leaf curving toward the viewer.
Step 5: Expanding the Canopy
Finish the outline of the previous leaf with smooth, curved lines. Then, sketch a fourth leaf extending from the top of the trunk. Teacher's Tip: Don't worry if your leaves overlap; overlapping objects is a great way to show distance and space in a drawing.
Step 6: Drawing the Banana Bunch
Finish the fourth leaf with serrated edges. Now, draw the bananas! Create a cluster of overlapping, elongated shapes with rounded ends, arranged in a half-circle. Teacher's Tip: Draw the bananas slightly different sizes to make the bunch look natural.
Step 7: Adding More Bananas and the Flower
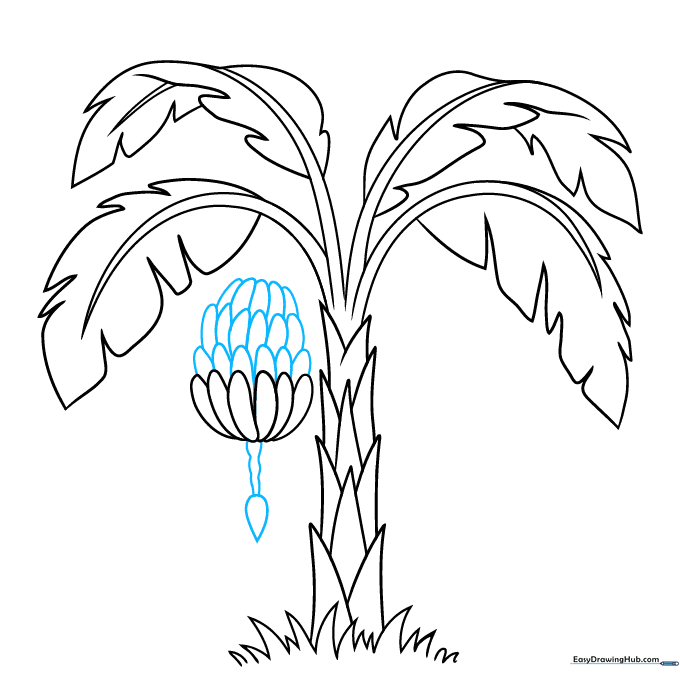
Add more rows of bananas using 'U' shaped lines. Below the fruit, draw the banana flower using two wavy lines connected by an upside-down teardrop shape. Teacher's Tip: The teardrop shape acts as the anchor for the flower, so make it nice and bold.
Step 8: Connecting the Fruit and Background Leaves
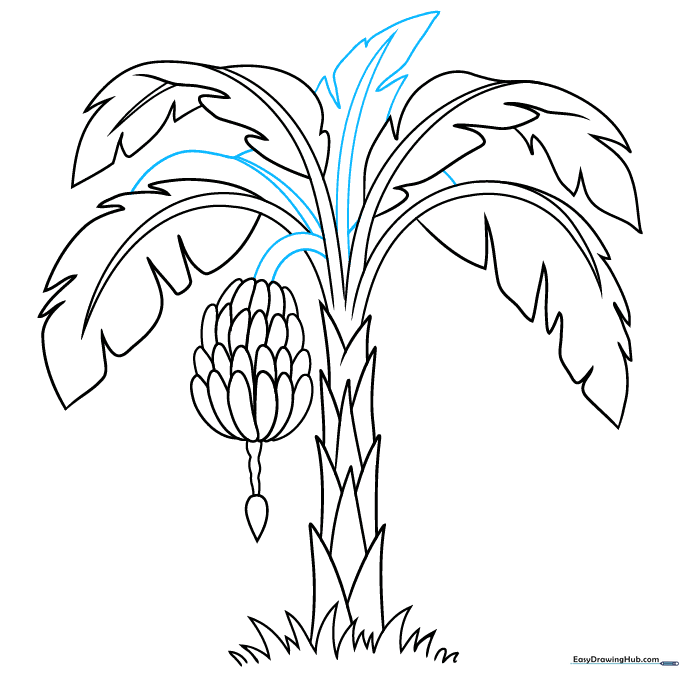
Connect the banana bunch to the trunk with two parallel curved lines. Add more leaves in the background to fill out the tree. Teacher's Tip: Use your eraser to clean up any lines where the bananas overlap the trunk for a professional look.
Step 9: Final Touches
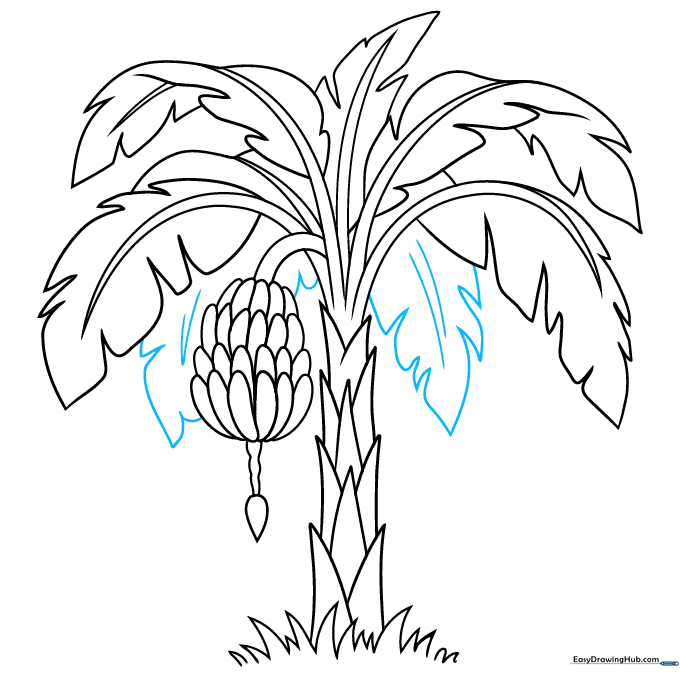
Complete your outline by adding the tips of two more leaves hanging down behind the tree. Teacher's Tip: Check your drawing for any gaps in the lines and close them up before you start coloring.
Step 10: Bring Your Tree to Life with Color
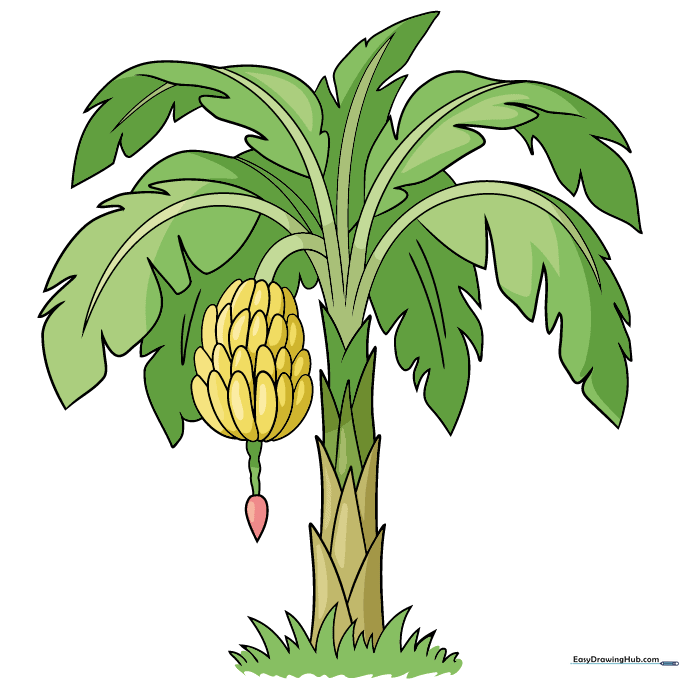
Time to color! Use light greens for the trunk and leaves. For the bananas, you can choose classic yellow, green for 'unripe,' or even a creative pink. Teacher's Tip: Try using two shades of green on the leaves to show where the sun hits them!
More Tutorials


