How to Draw a Backpack: Easy 10-Step Guide for Kids
Ready to draw the perfect school companion? This tutorial is designed for young artists ages 5+ to practice basic shapes and perspective. Grab a pencil, an eraser, and a piece of paper to follow along as we build your backpack step-by-step.
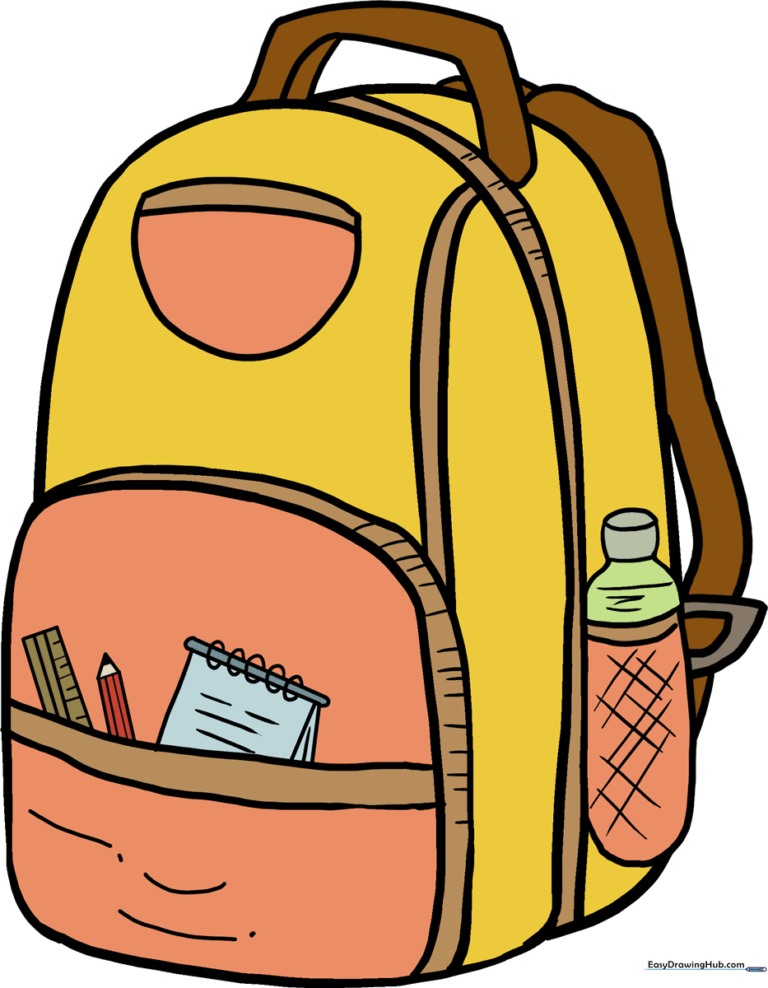
🎯 Final Result
Step-by-Step Instructions
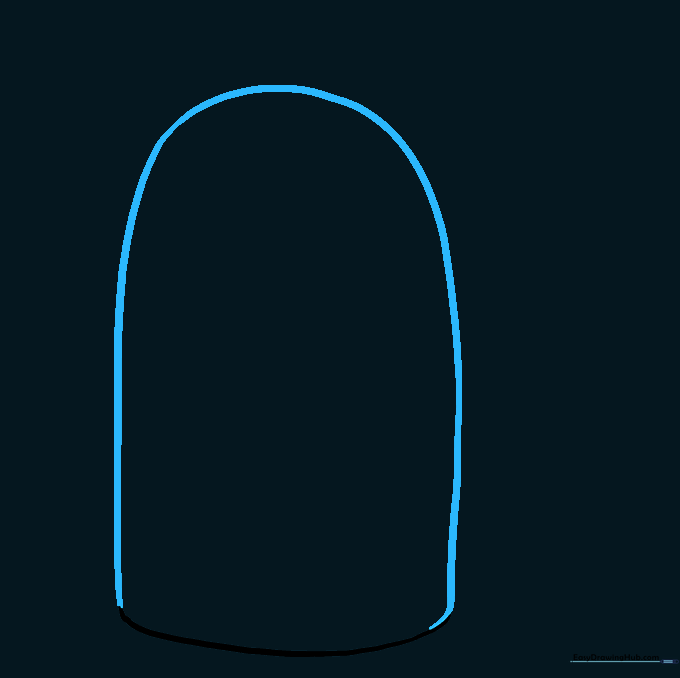
Step 1: Sketching the Base

Draw a gentle, wide curved line to form the bottom of your backpack. Teacher's Tip: Keep this line near the bottom of your page to leave plenty of room for the straps later.
Step 2: Outlining the Main Body
Draw a tall, arching curve above your first line, connecting the ends to create the main bag shape. Teacher's Tip: Think of this as drawing a large, rounded rectangle.
Step 3: Creating Depth
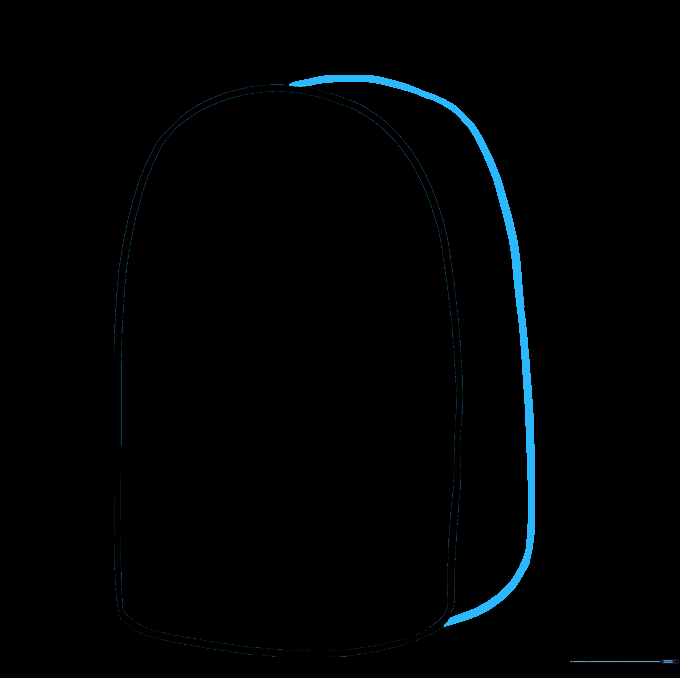
Add a curved line running from the top to the bottom on the side. This simple detail gives your drawing a 3D, realistic look.
Step 4: Adding the Front Pocket
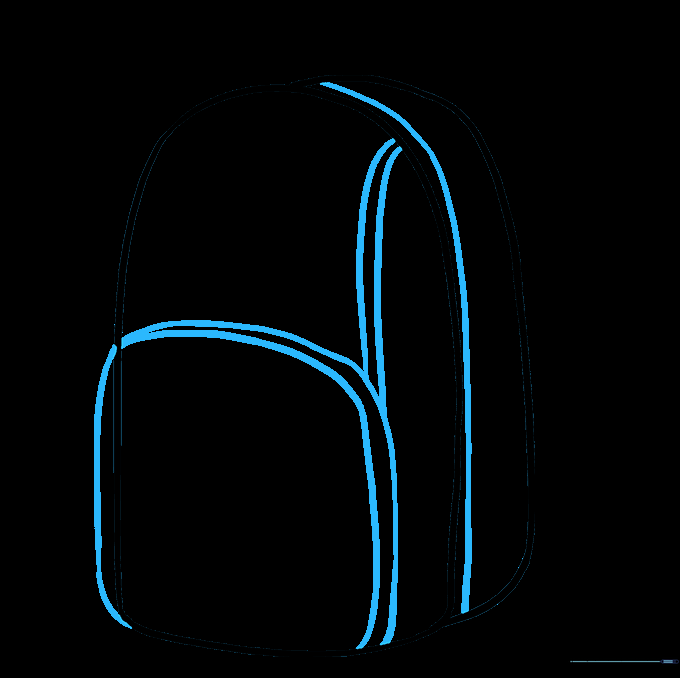
Draw a smaller, boxy shape on the front for the pocket. Add a parallel line inside it to show depth. Teacher's Tip: Make sure the corners are slightly rounded so it looks like soft fabric.
Step 5: Handles and Details
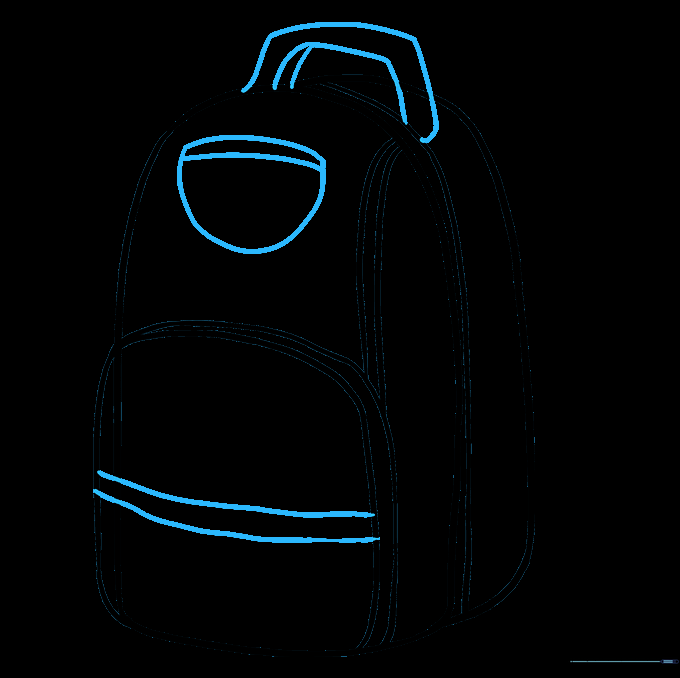
Draw a small loop at the top for the handle and horizontal lines on the pocket to represent zippers.
Step 6: Shoulder Straps
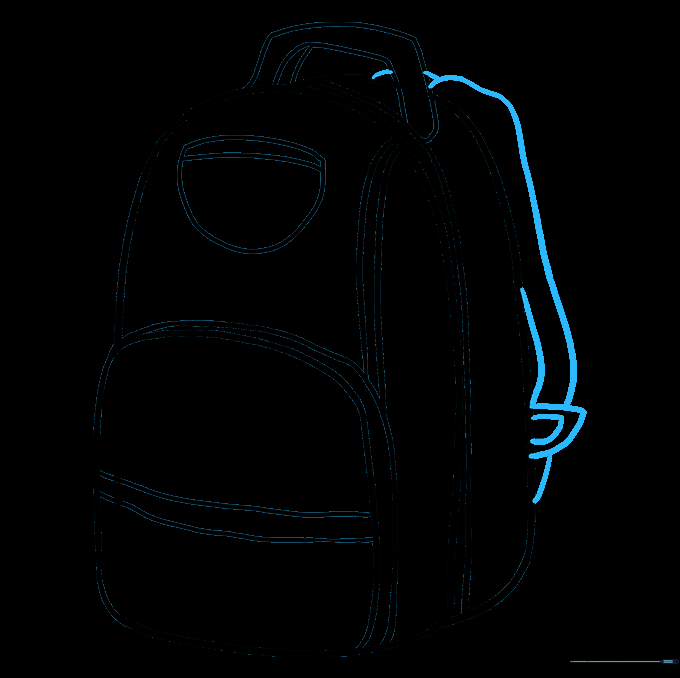
Sketch two thick straps coming from the top. Add small teardrop shapes for the adjustable buckles. Teacher's Tip: Buckles are just two shapes nested inside each other!
Step 7: Water Bottle Holder
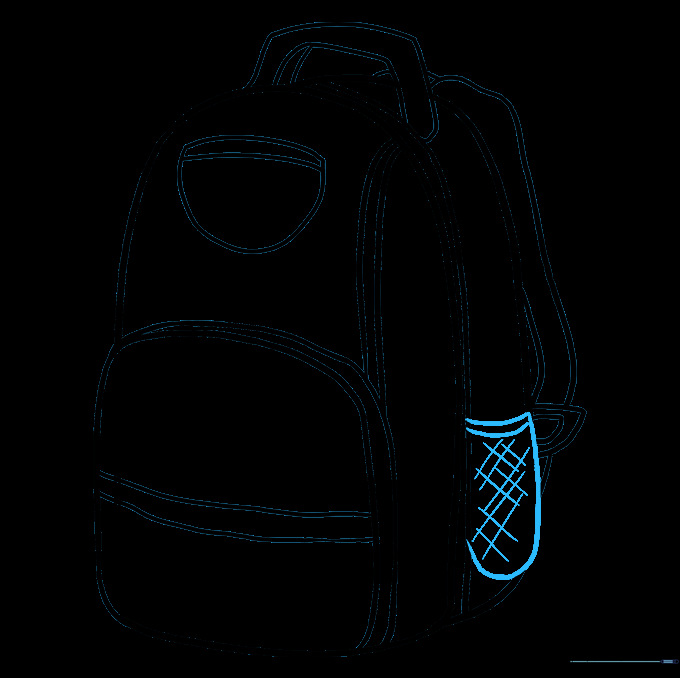
Draw a small 'U' shape on the side. Use a cross-hatch pattern (criss-crossing diagonal lines) to make it look like mesh fabric.
Step 8: School Supplies
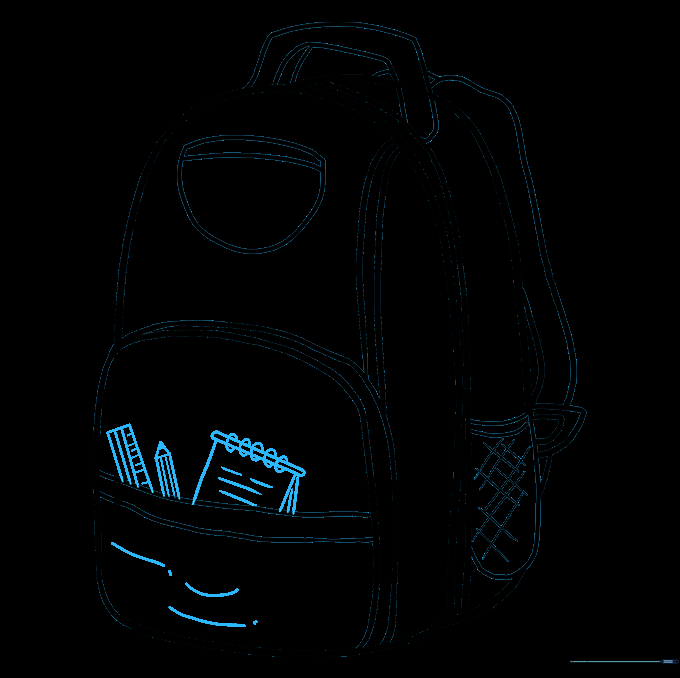
Draw a notebook and pencil peeking out of the pocket. Use small circles for the spiral binding and wavy lines for the paper.
Step 9: Final Touches

Add tiny 'teeth' to your zippers and draw a water bottle inside the mesh holder. This makes your drawing look complete and professional.
Step 10: Bring it to Life with Color

Time to color! Use your favorite shades. Maybe add some patterns or stickers to make it look like your real-life backpack.
More Tutorials


