How to Draw a Baby Fox: Easy 10-Step Guide for Kids
Ready to bring a woodland friend to life? This tutorial is perfect for young artists ages 5 and up. You’ll only need a pencil, an eraser, and your favorite markers to create this adorable baby fox while practicing basic geometric shapes.
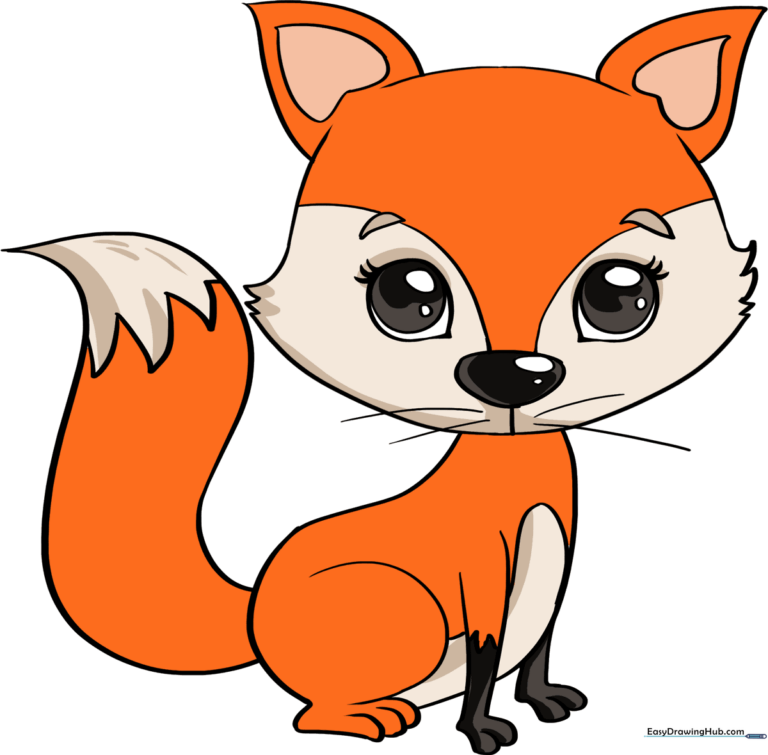
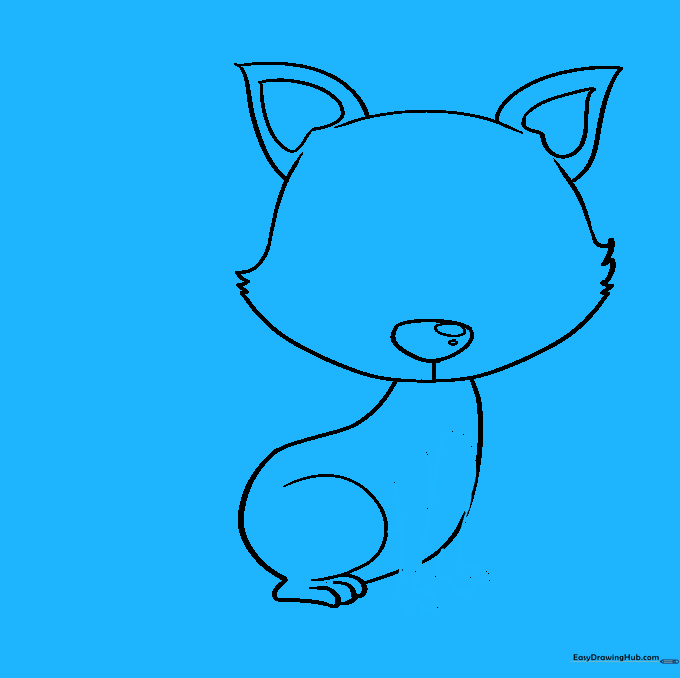
🎯 Final Result
Step-by-Step Instructions
Step 1: Sketching the Head Shape

Draw a soft, curved line for the top of the head. At each end, add short, zig-zag lines to create fluffy cheek fur. Connect these with a bottom curve. Teacher's Tip: Keep these lines light—we want the head to look soft and rounded, not sharp.
Step 2: Adding the Ears
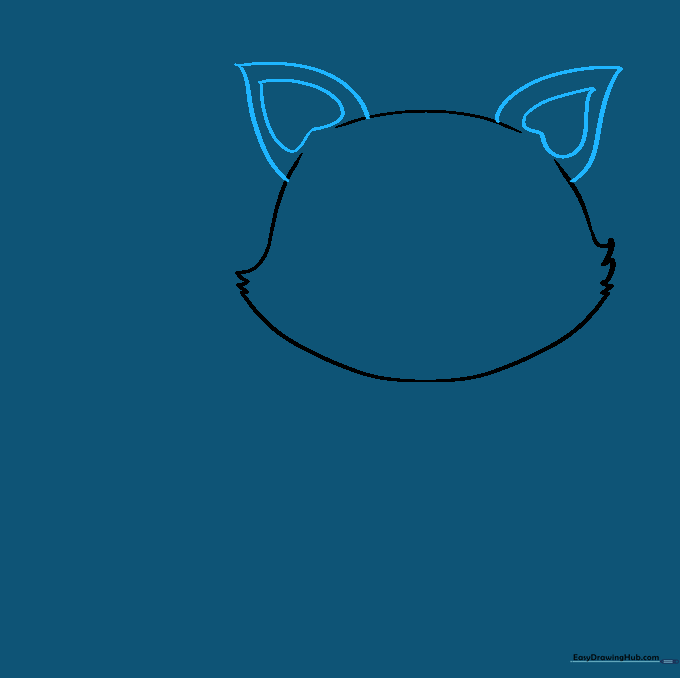
Draw two curved triangles on top of the head. Erase the lines inside the ears to open up the shape. Add a smaller upside-down heart inside each ear for detail. Tip: Make the ears slightly rounded at the tips to keep the fox looking like a baby.
Step 3: Drawing the Nose and Mouth

Place an irregular oval near the bottom of the face for the nose, leaving a tiny white spot for a 'shine' effect. Draw a small vertical line down from the nose for the mouth. Tip: A little highlight in the nose makes the fox look much more expressive!
Step 4: Outlining the Body
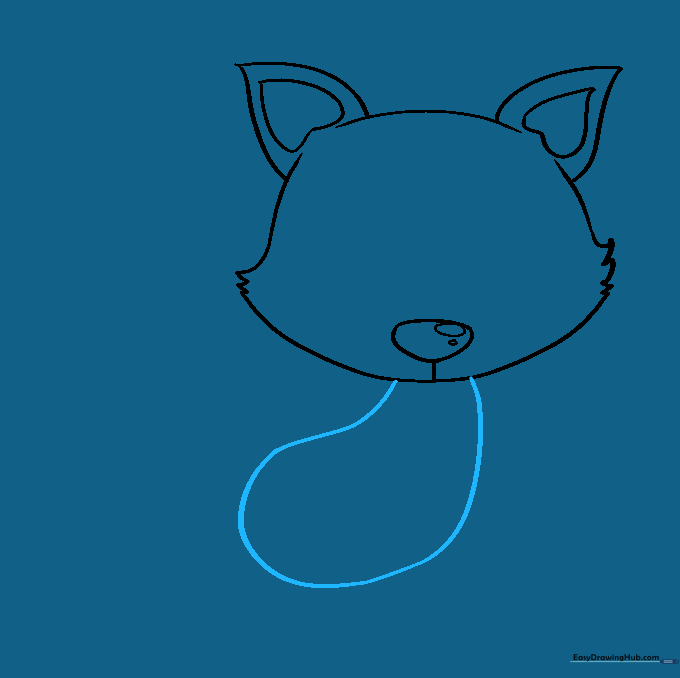
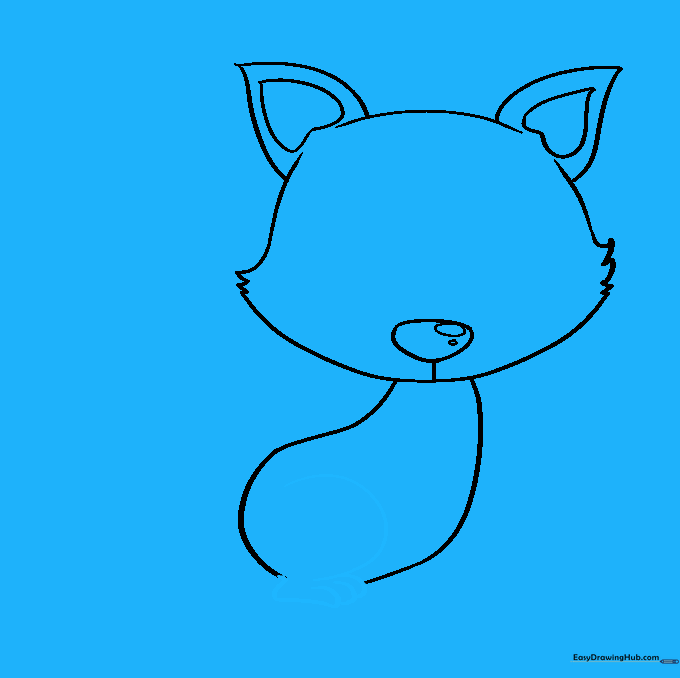
Use one long, continuous curved line to enclose the body shape. Keep it rounded and plump to emphasize the 'baby' look. Tip: Don't worry if it's not perfect; foxes come in all shapes and sizes!
Step 5: Sketching the Back Leg
Outline the crouching back leg using a 'C' shaped line. Add small curves at the bottom for the toes. Tip: Imagine the fox is sitting down to rest—this helps with the leg placement.
Step 6: Adding the Front Legs
Draw two lines for the front legs, ending in 'U' shapes for the paws. Connect them with a curved line for the underbelly. Tip: Keep the legs parallel to make the fox look balanced.
Step 7: Drawing the Bushy Tail
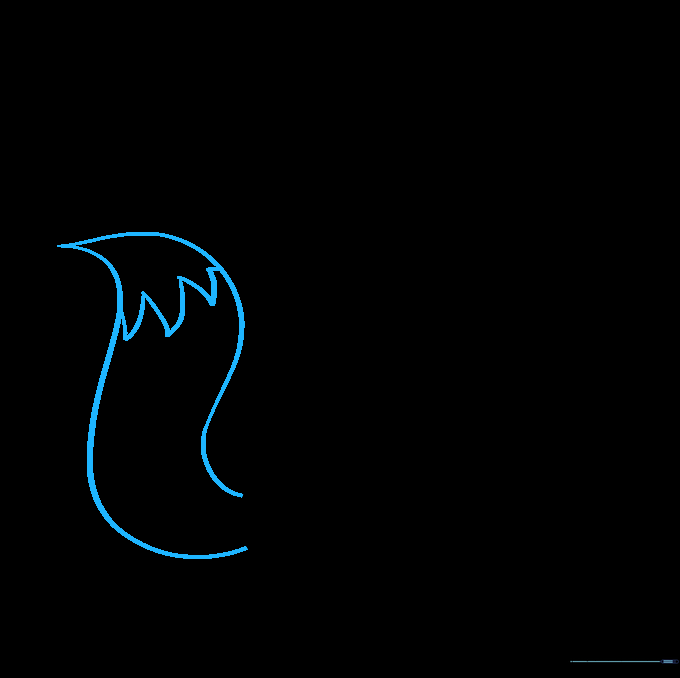
Draw two long, curved lines that meet at a sharp point for the tail. Add a zig-zag line near the tip to show the white fur patch. Tip: Make the tail nice and big—it's a fox's best feature!
Step 8: Adding Expressive Eyes
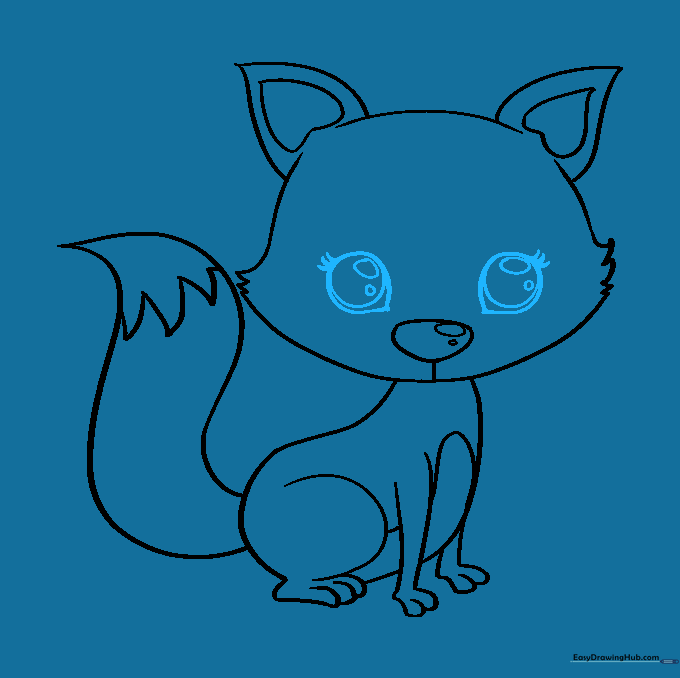
Draw two large circles for the eyes. Add smaller circles inside for pupils and tiny lines for eyelashes. Tip: Large eyes make the fox look extra cute and youthful.
Step 9: Final Details
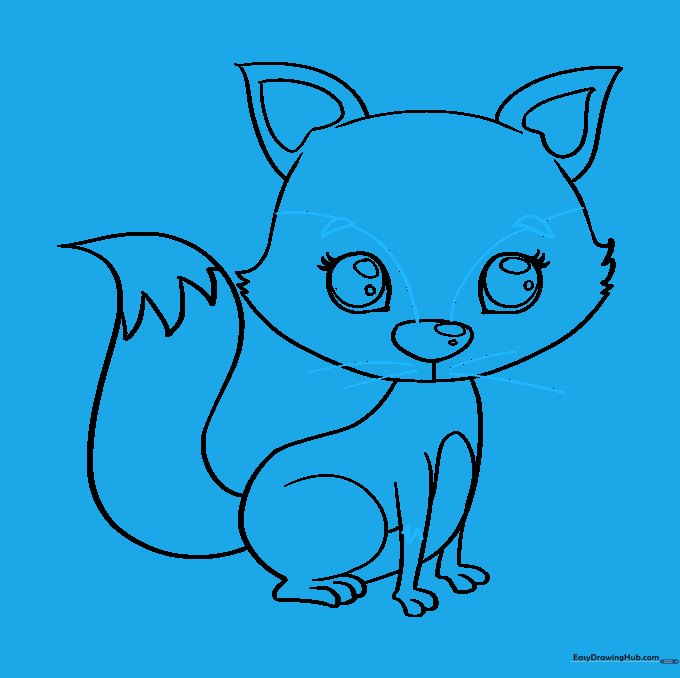
Add eyebrows, whiskers, and a zig-zag line on the leg to show fur patterns. These small details bring your drawing to life. Tip: Use a light touch for the whiskers so they look delicate.
Step 10: Bringing it to Life with Color

Time to color! Use vibrant oranges for the body, white for the belly and tail tip, and black for the paws. Tip: Try using light orange for the main body and a darker shade for the shadows to give your fox depth.
More Tutorials


